Time4sleep / New England White Wooden Ottoman Storage Bed Instructions by
time4sleep
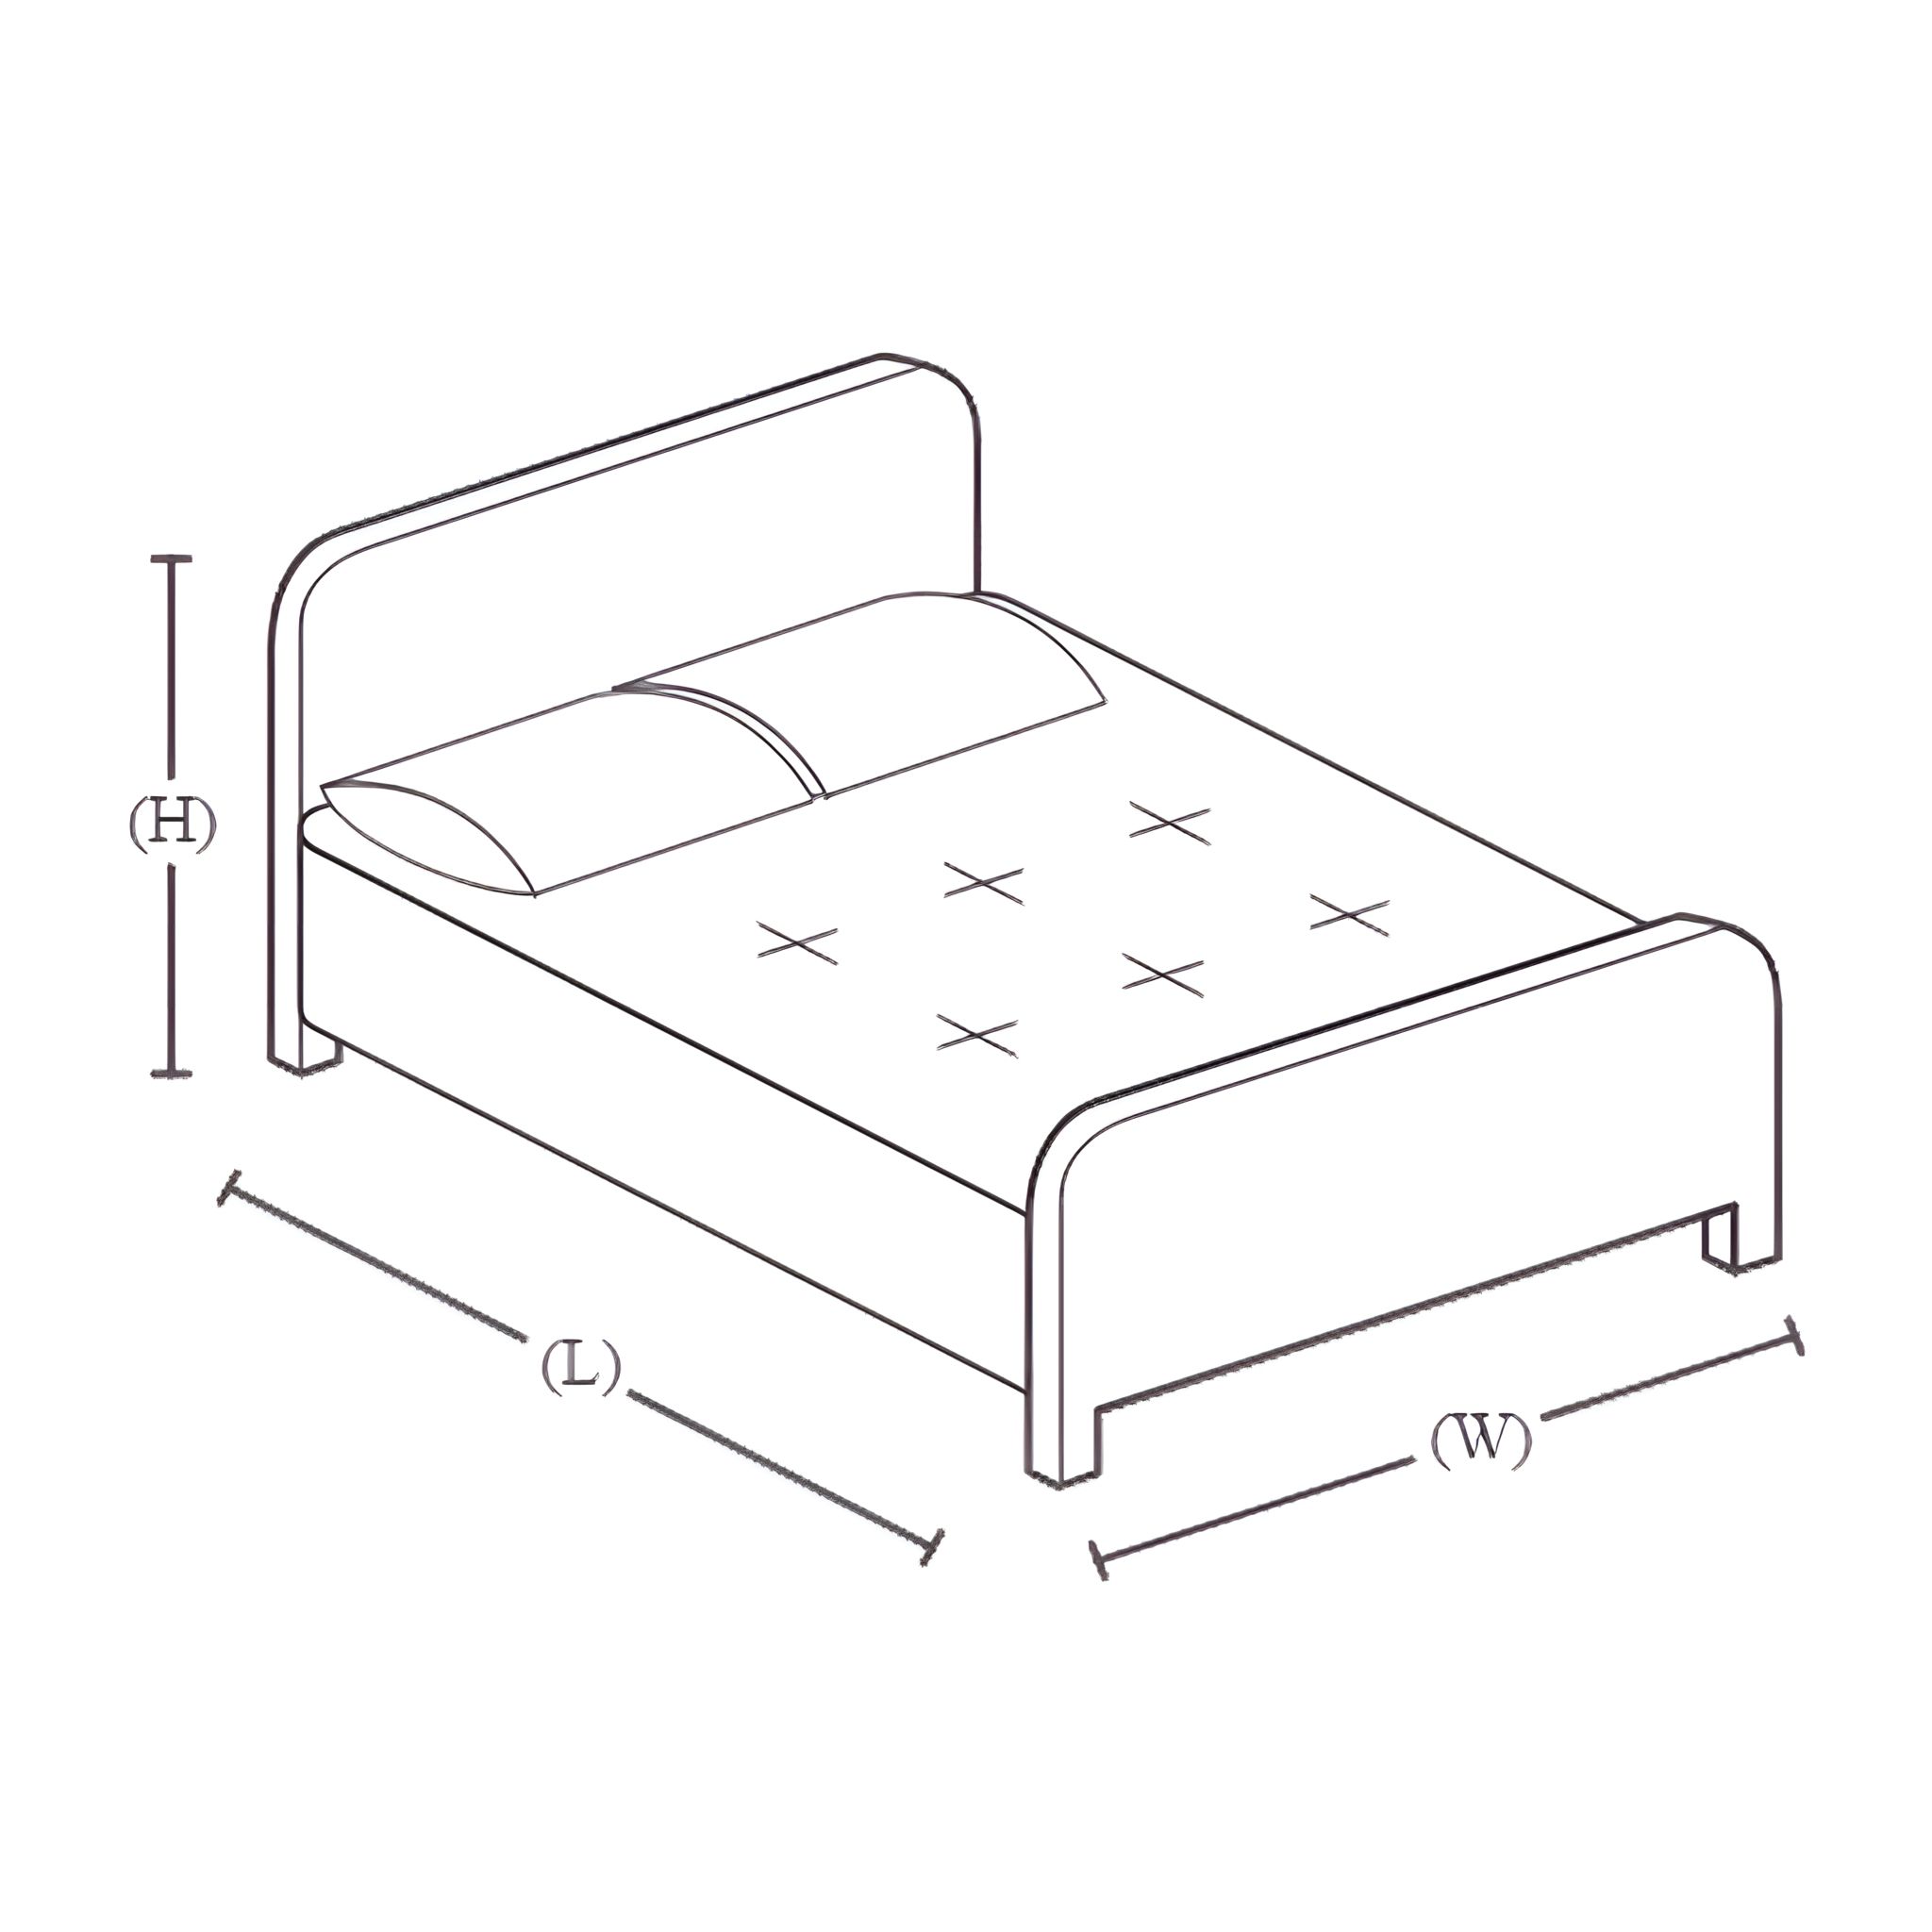
New England White Wooden Ottoman Storage Bed Assembly instructions for New England White Wooden Ottoman Storage Bed by Time4Sleep.
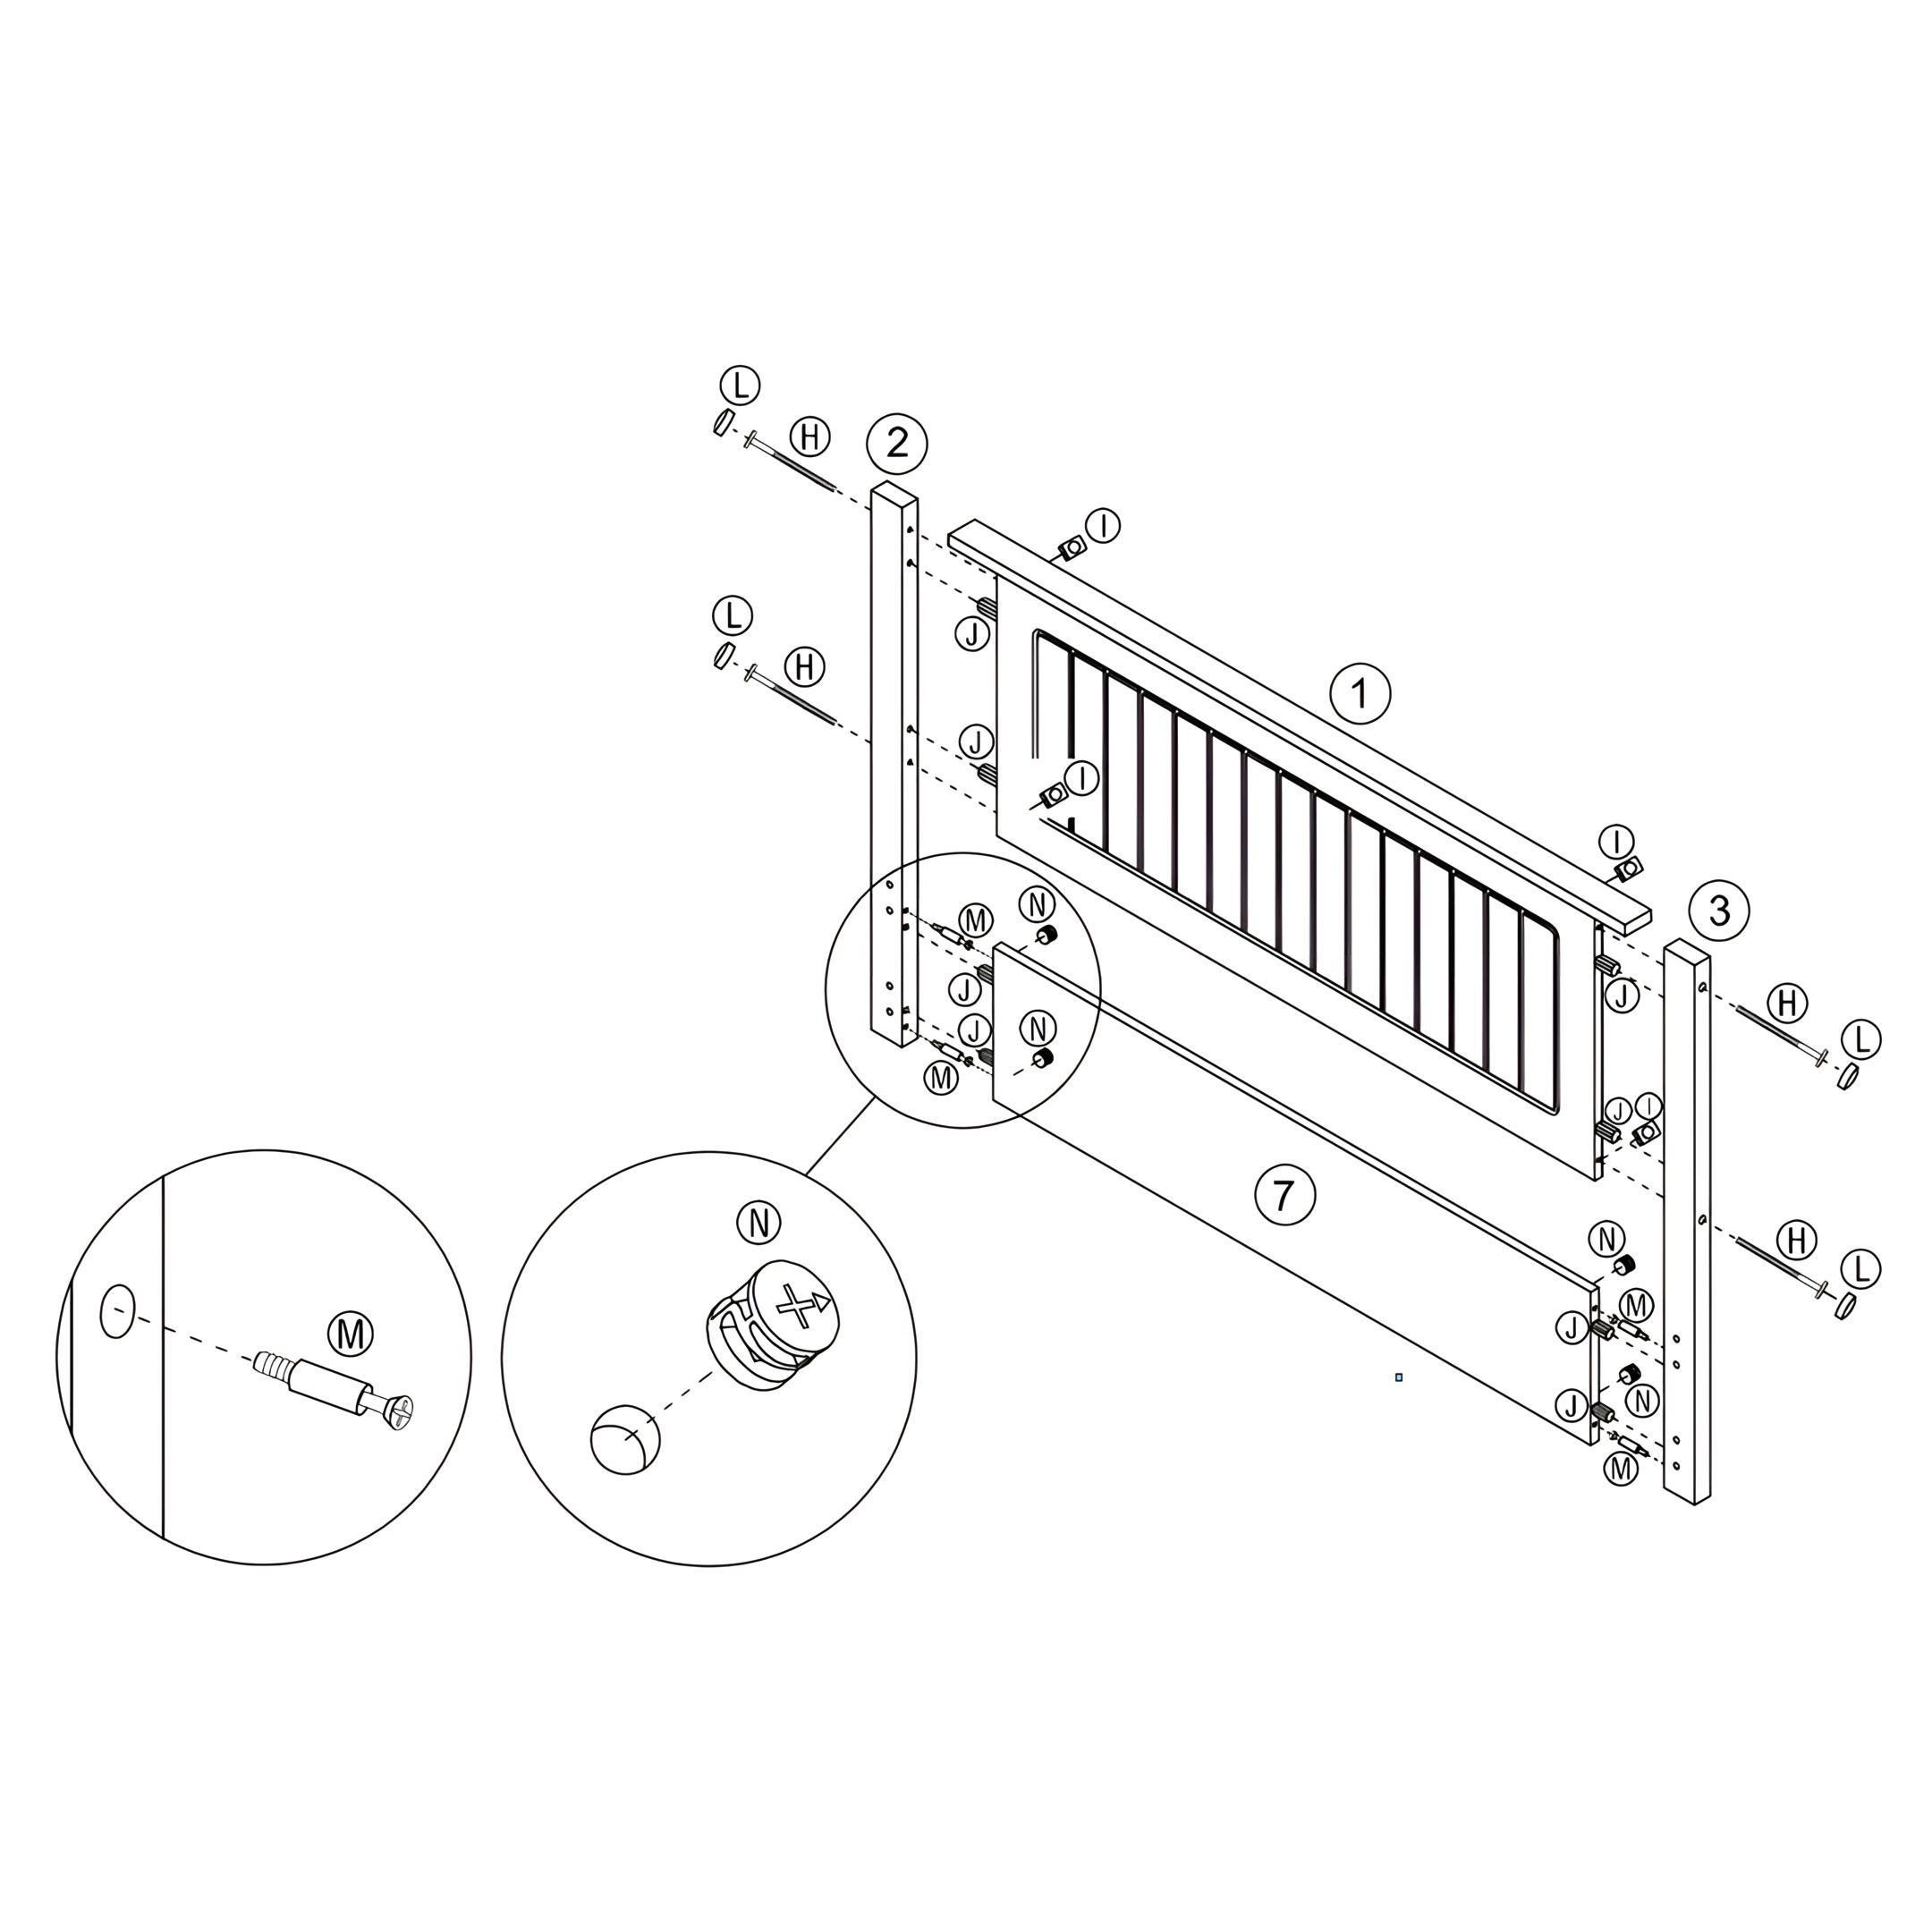
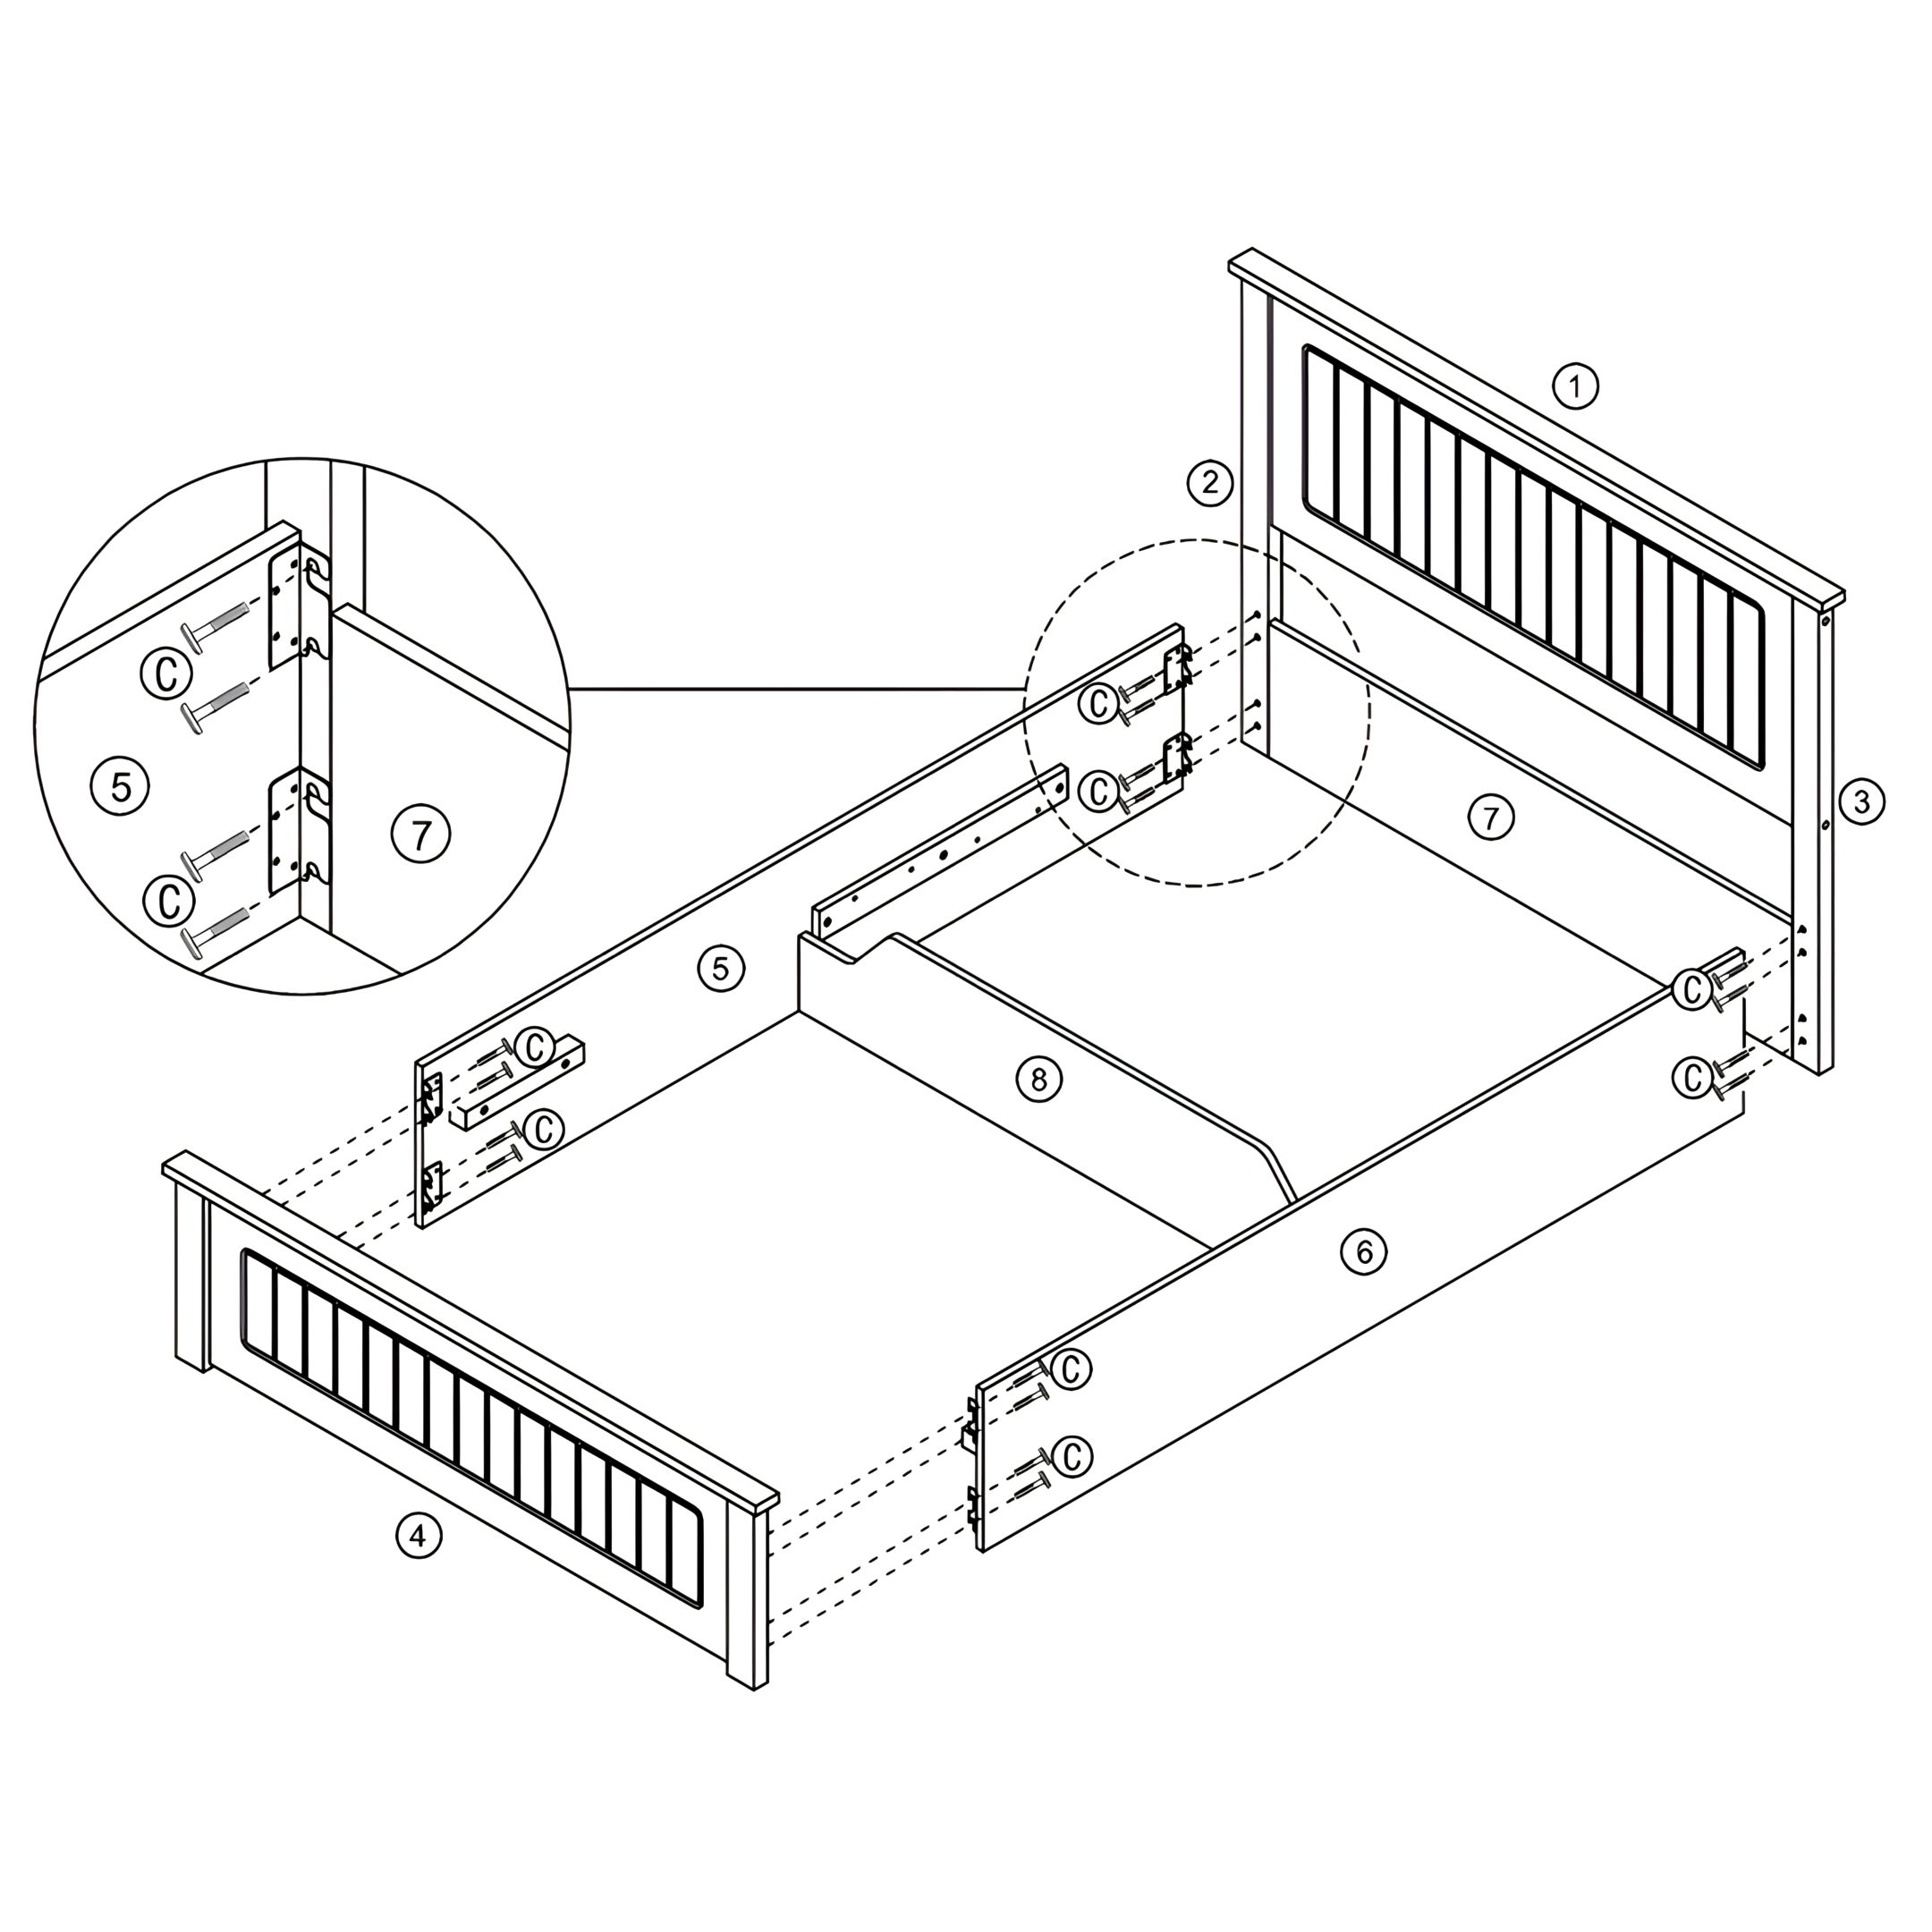
1. Assemble the Headboard
Insert Wood Dowels (J) into the pre-drilled holes on both HB. Posts (Left & Right) (2, 3).
Align the HB. Panel (1) between the HB. Posts (2, 3).
Secure HB. Panel (1) to HB. Posts (2, 3) using JCBC M6 × 90mm Bolts (H), tightening them with the Allen key.
Position the HB. Bottom Panel (7) below the HB. Panel (1).
Insert Connecting Bolts (M) through the pre-drilled holes on HB. Bottom Panel (7) and into HB. Posts (2, 3).
Insert Minifix Housings (N) into the designated slots on HB. Posts (2, 3) and rotate them to lock the Connecting Bolts (M) in place.
Cover the bolt holes with Wood Buttons (L) for a clean finish.
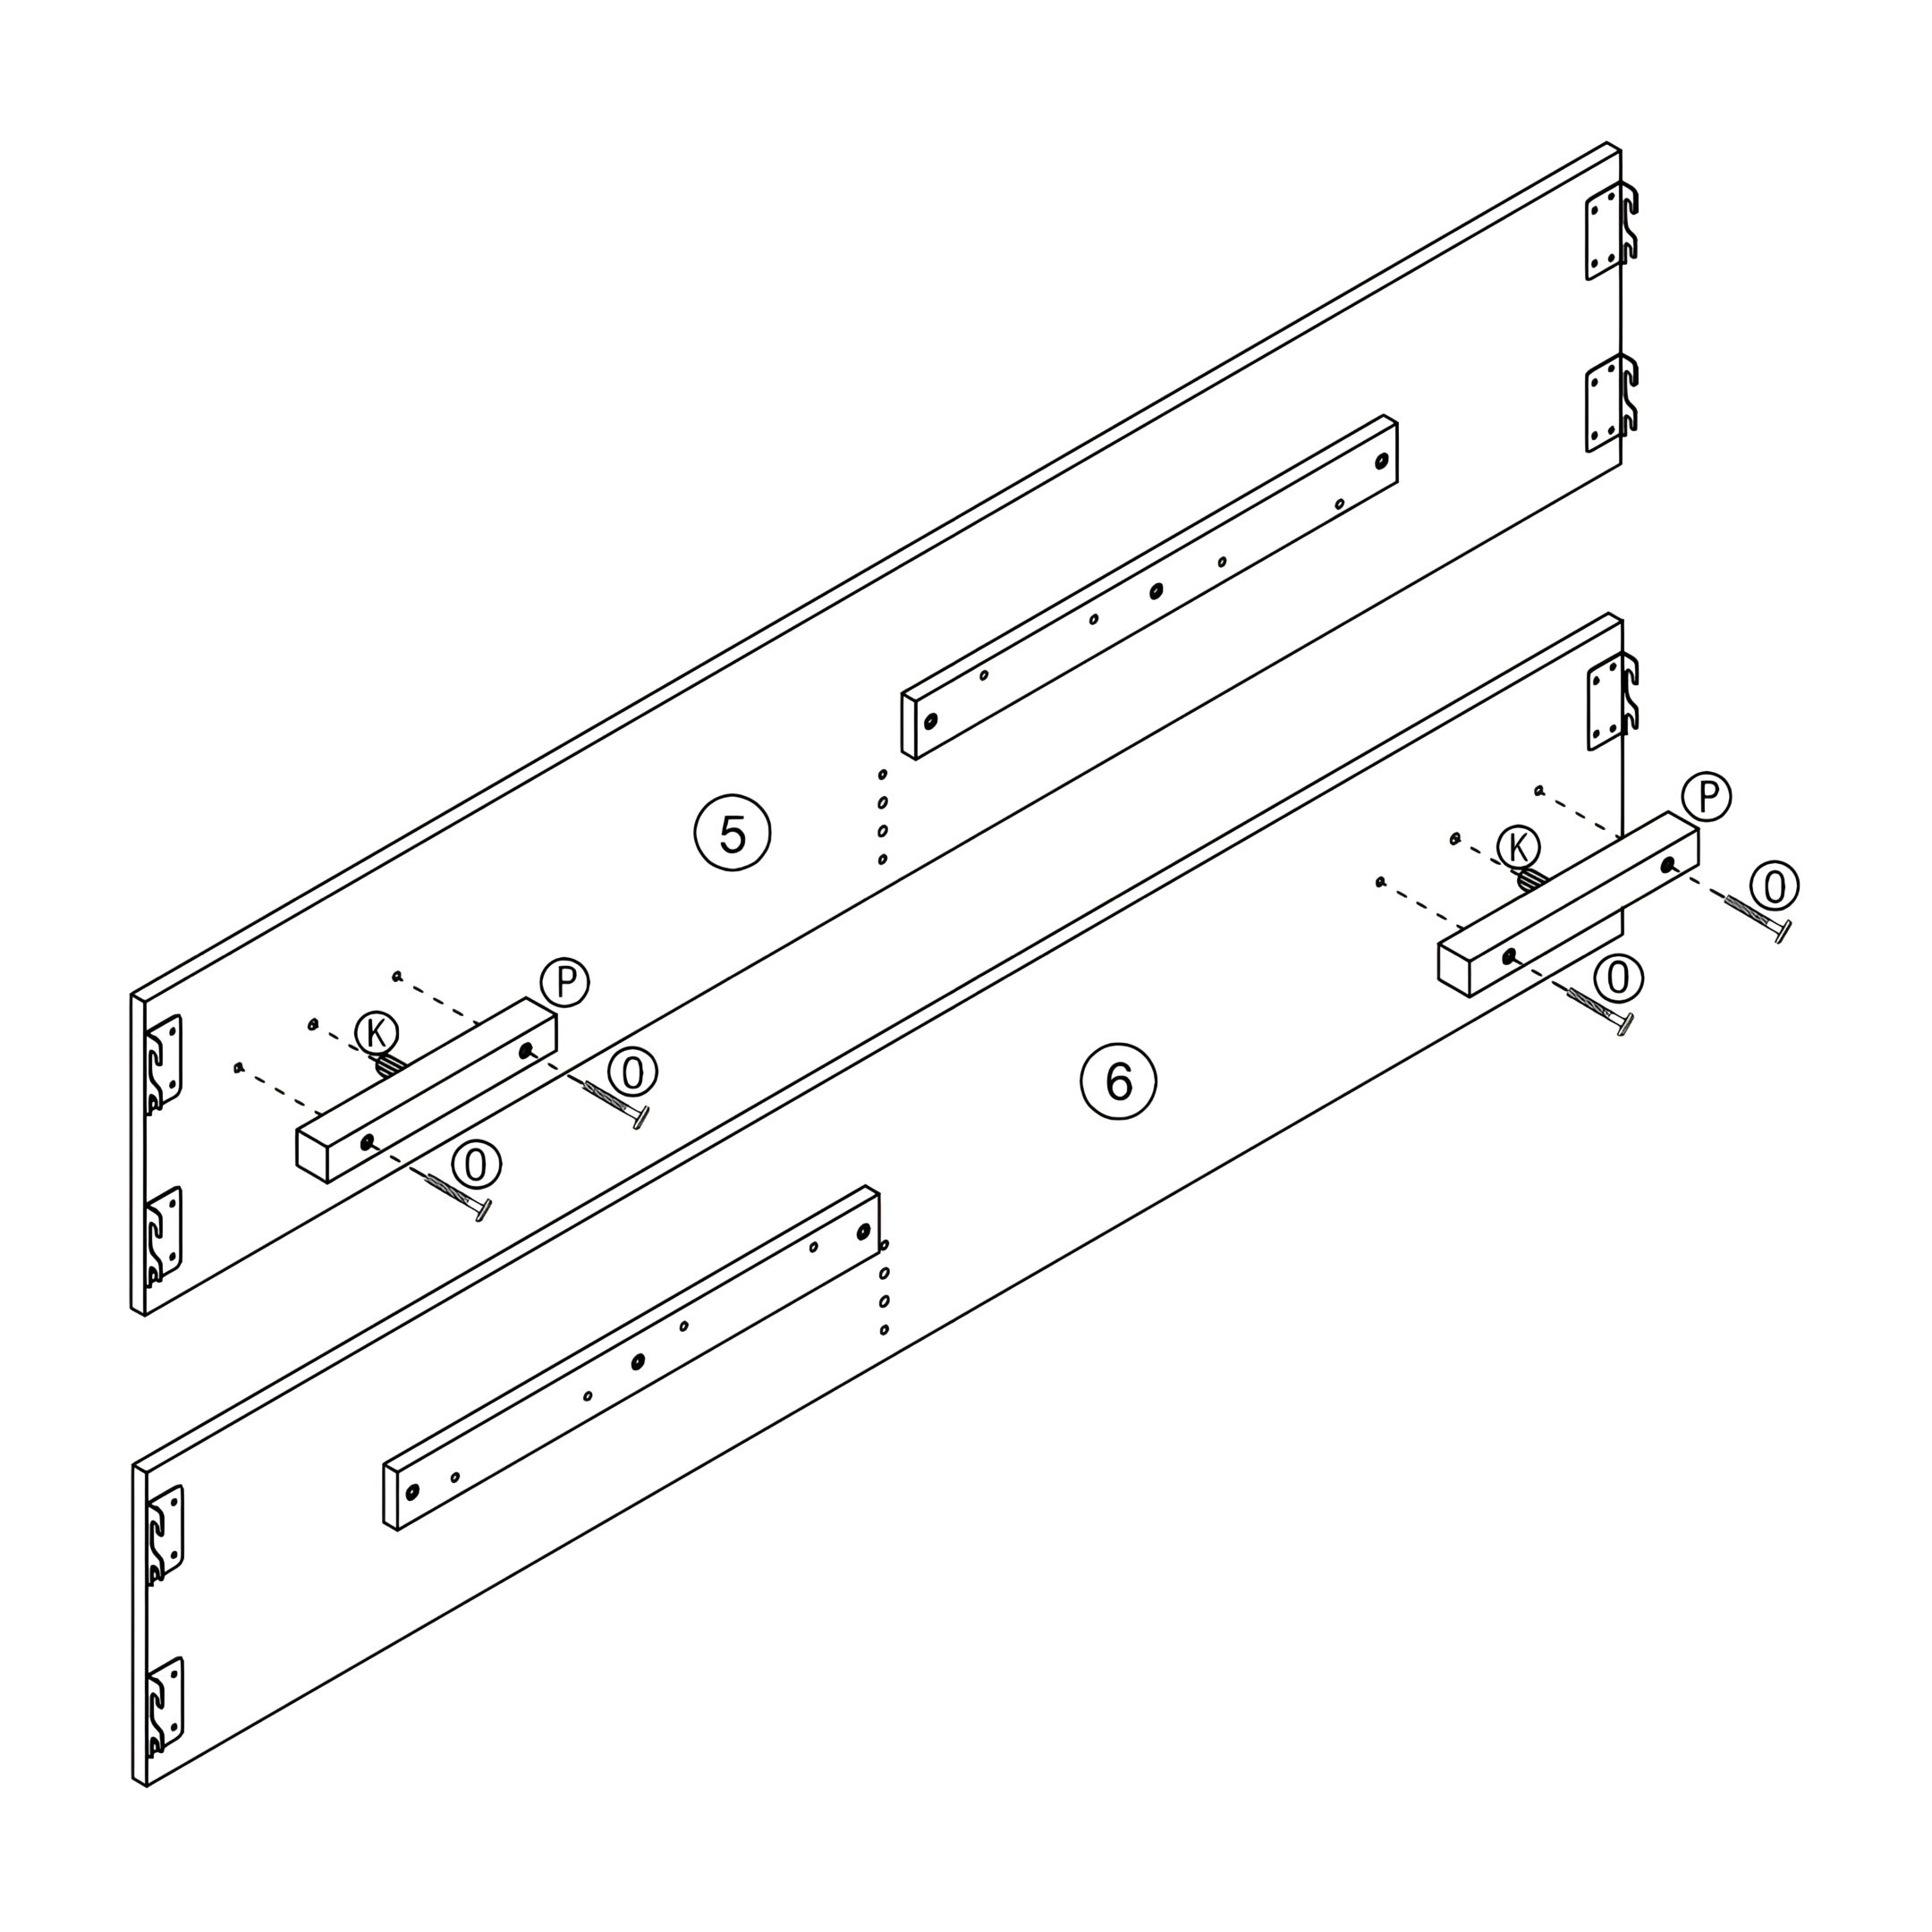
2. Attach the Stopper Blocks to the Side Rails
Insert Wood Dowels (K) into the designated holes on the Stopper Blocks (P).
Position the Stopper Blocks (P) onto the pre-drilled holes on the Side Rails (5, 6).
Secure each Stopper Block (P) using JCBC M6 × 45mm Bolts (O), tightening them with the Allen key.
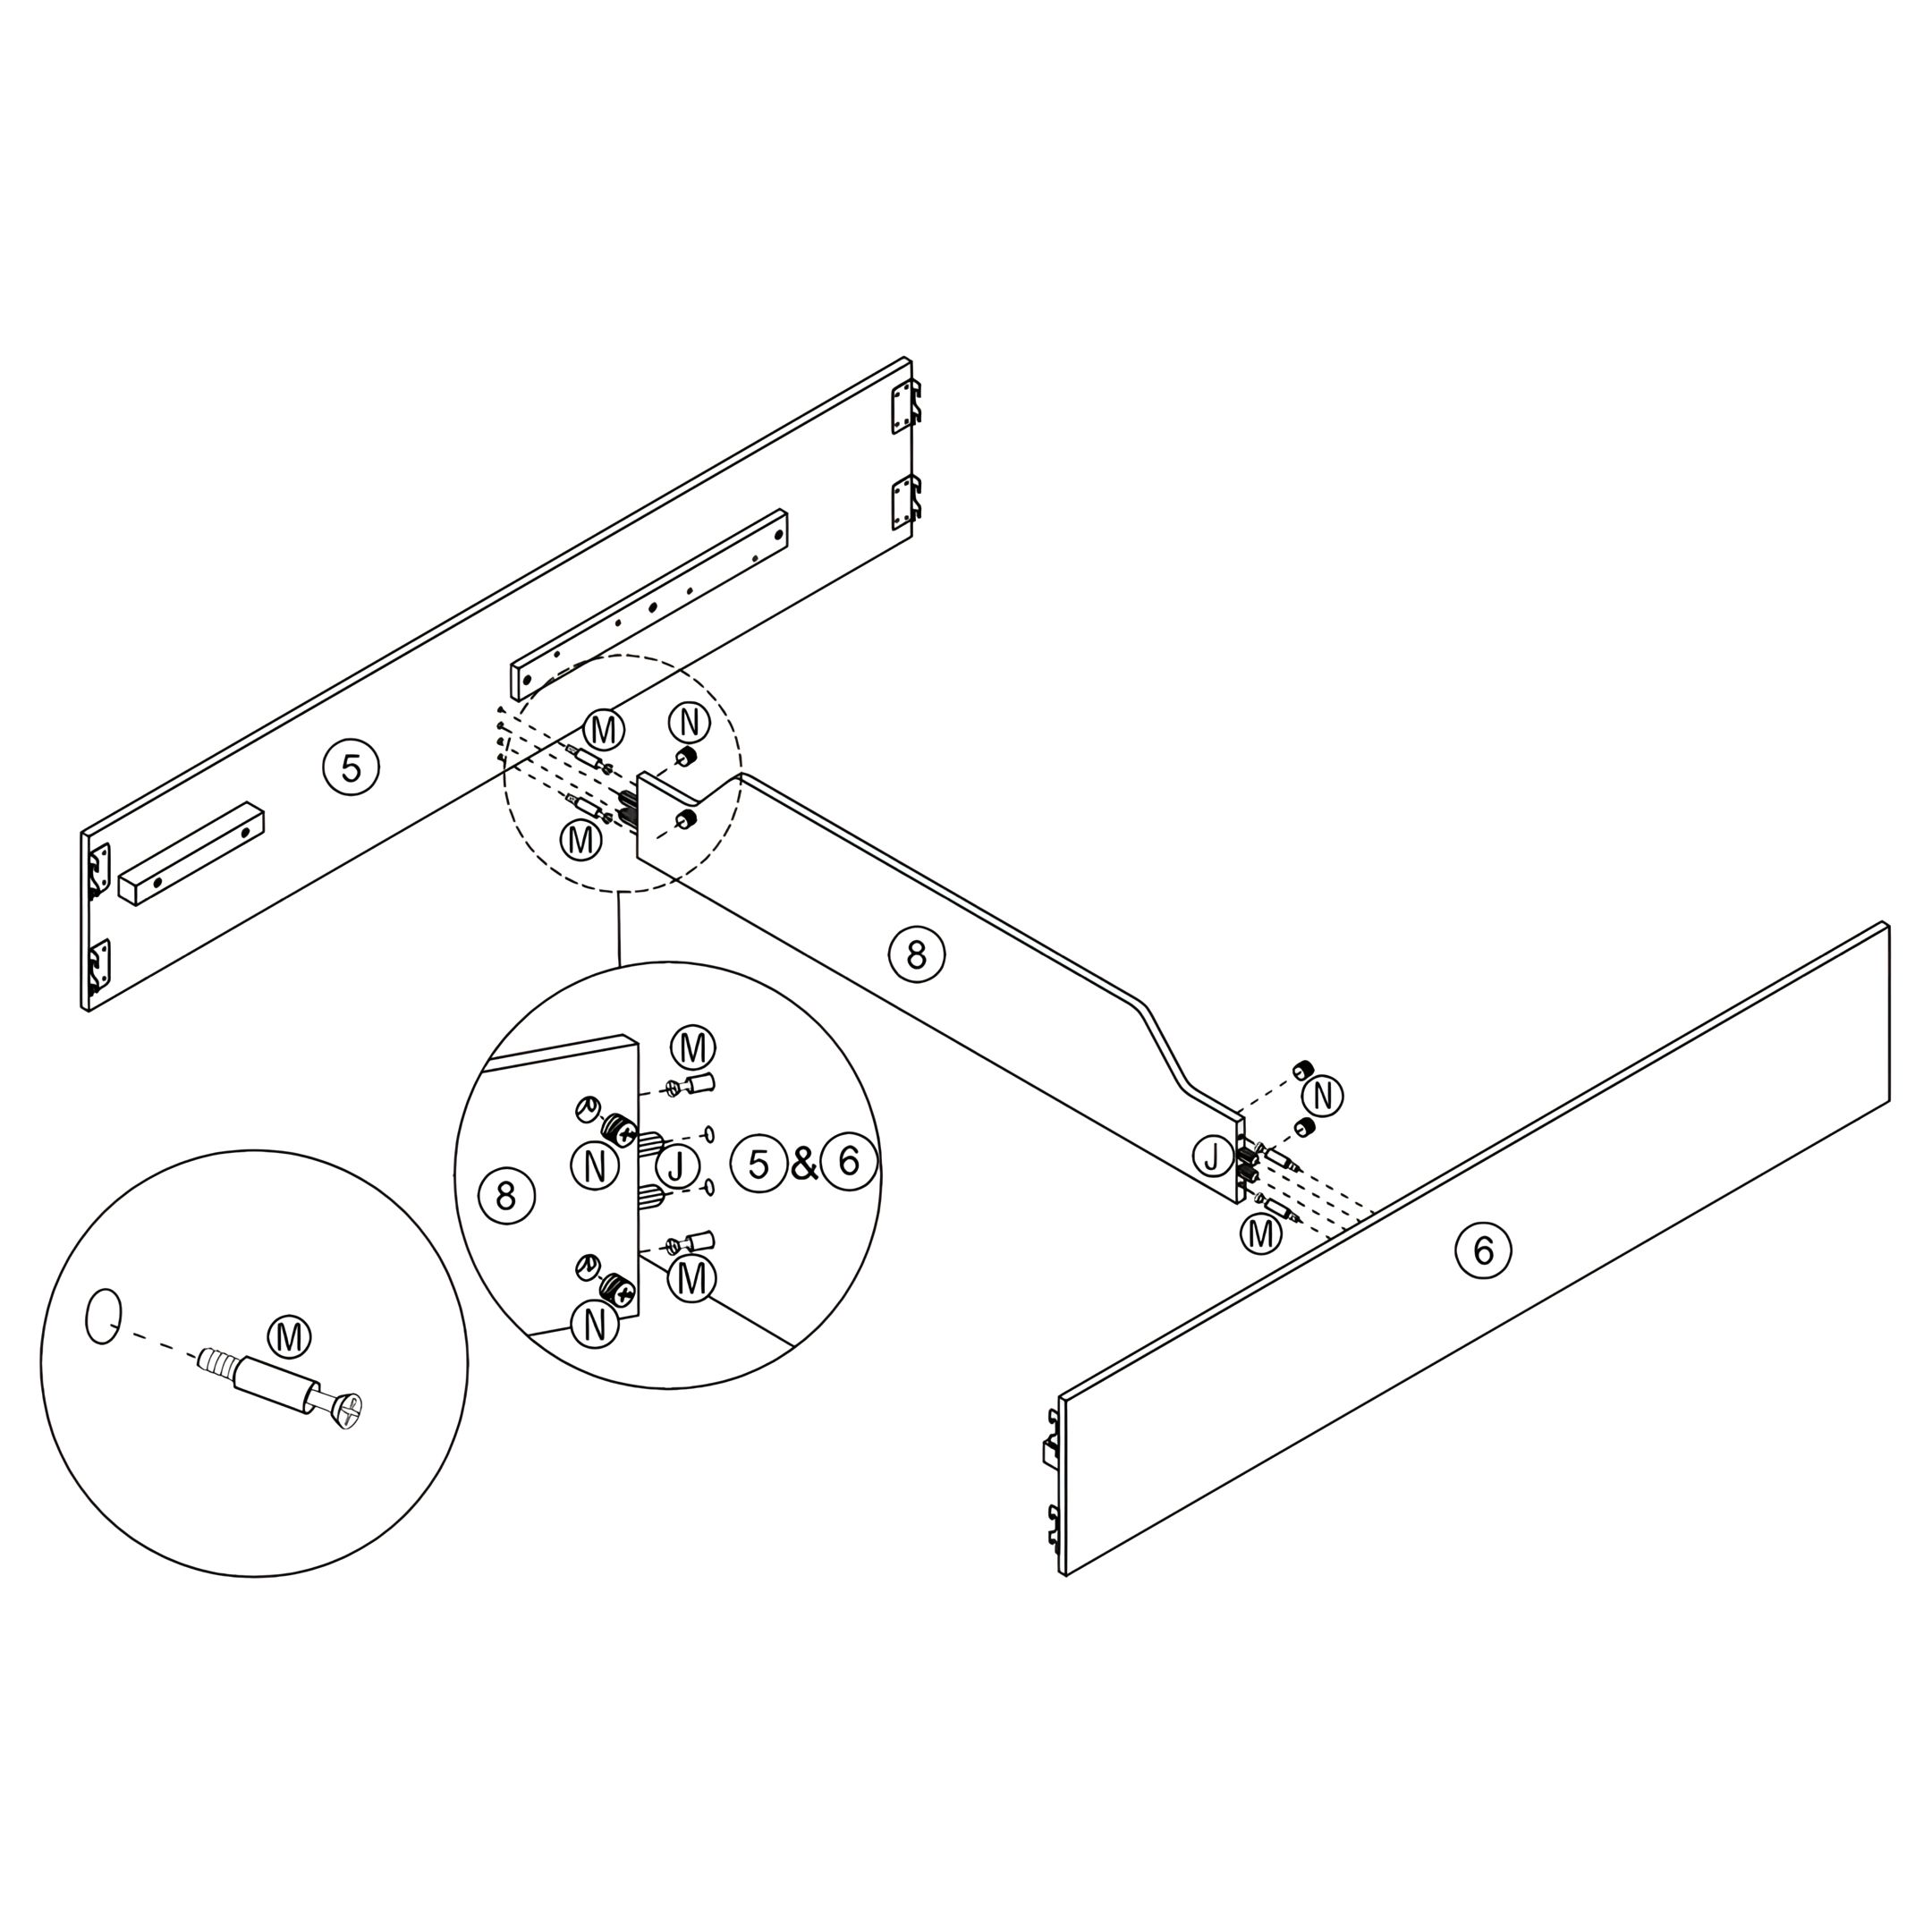
3. Attach the Center Panel to the Side Rails
Insert Wood Dowels (J) into the pre-drilled holes on both ends of the Center Panel (8).
Align the Center Panel (8) with the Side Rails (5, 6).
Insert Connecting Bolts (M) through the designated holes on the Side Rails (5, 6) and into the Center Panel (8).
Insert Minifix Housings (N) into the designated slots on the Side Rails (5, 6) and rotate them to lock the Connecting Bolts (M) in place.
Ensure all connections are tight and the Center Panel (8) is securely attached to both Side Rails (5, 6).
4. Attach the Side Rails, Footboard and Headboard
Align the Side Rails (5, 6) with the Headboard and Footboard.
Secure the Side Rails (5, 6) to the Headboard and Footboard using JCBB M8 × 20mm Bolts (C).
Ensure the brackets on the Side Rails (5, 6) fit properly into the designated slots.
Tighten all bolts to ensure the frame is stable.
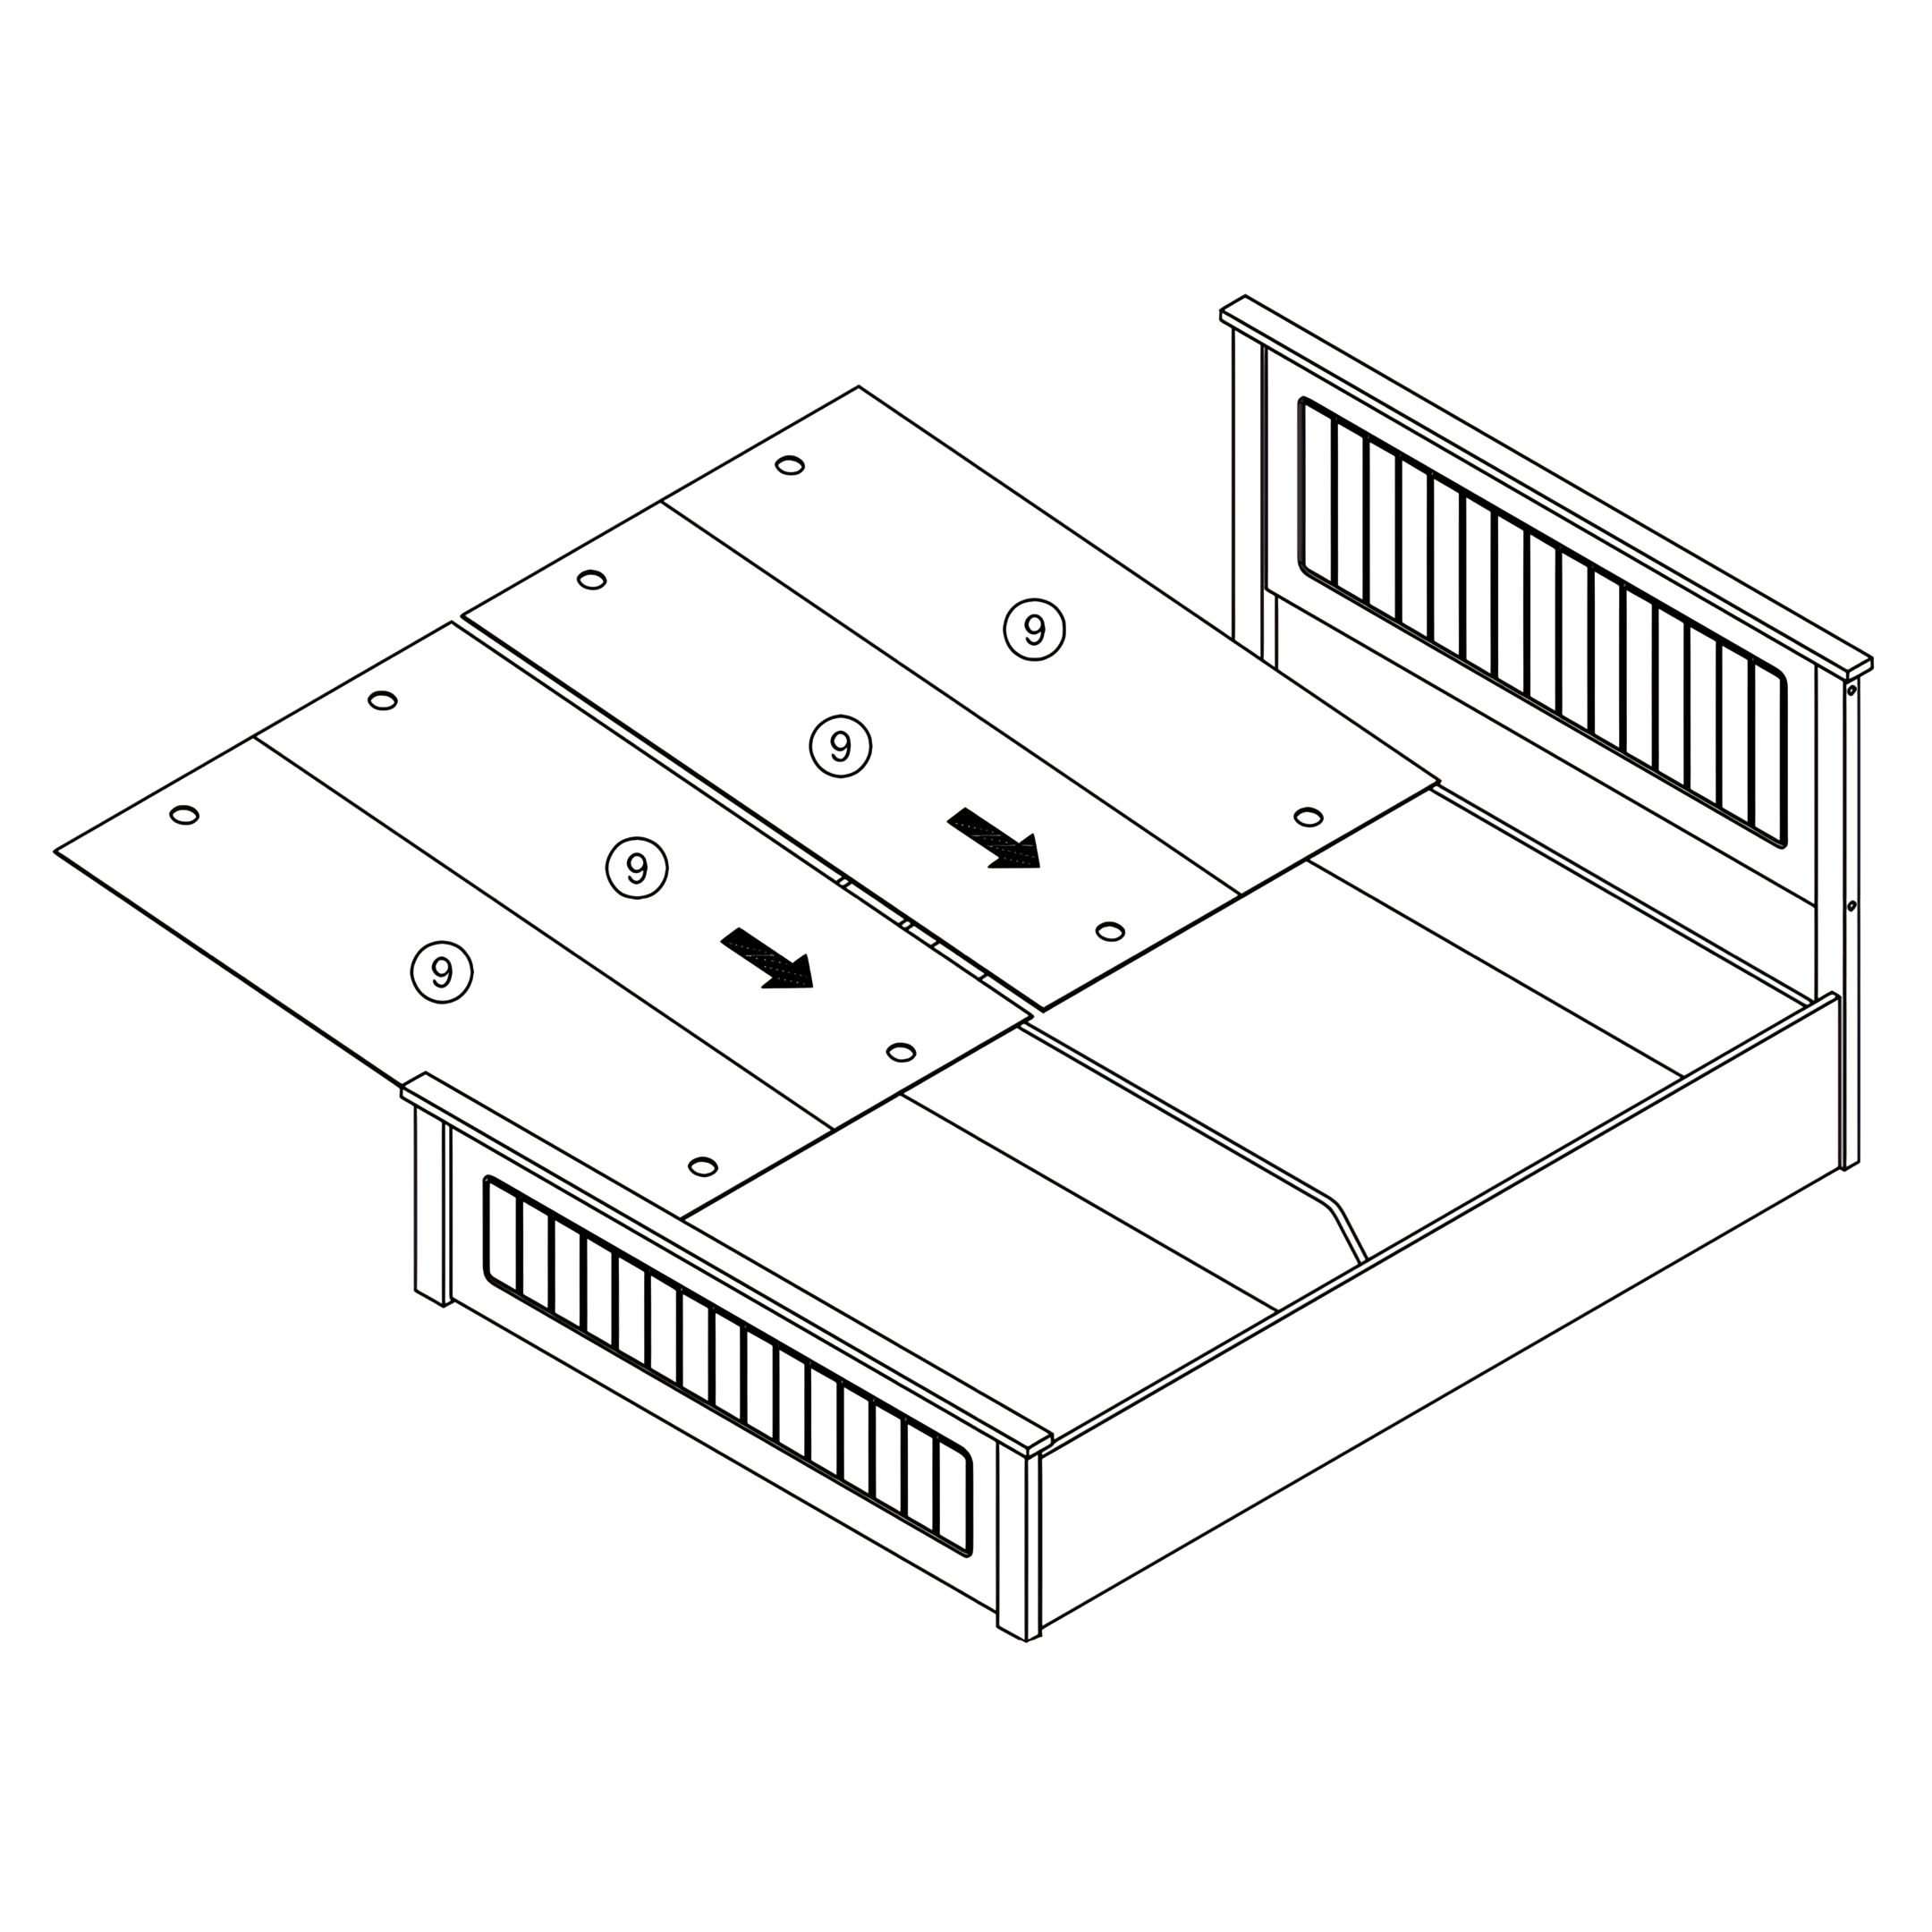
5. Install the Bottom Panels
Position the Bottom Panels (9) over the storage area, ensuring they align with the frame.
Slide the panels inward following the direction of the arrows until they fit securely.
Ensure the panels are evenly placed and flush with the surrounding frame.
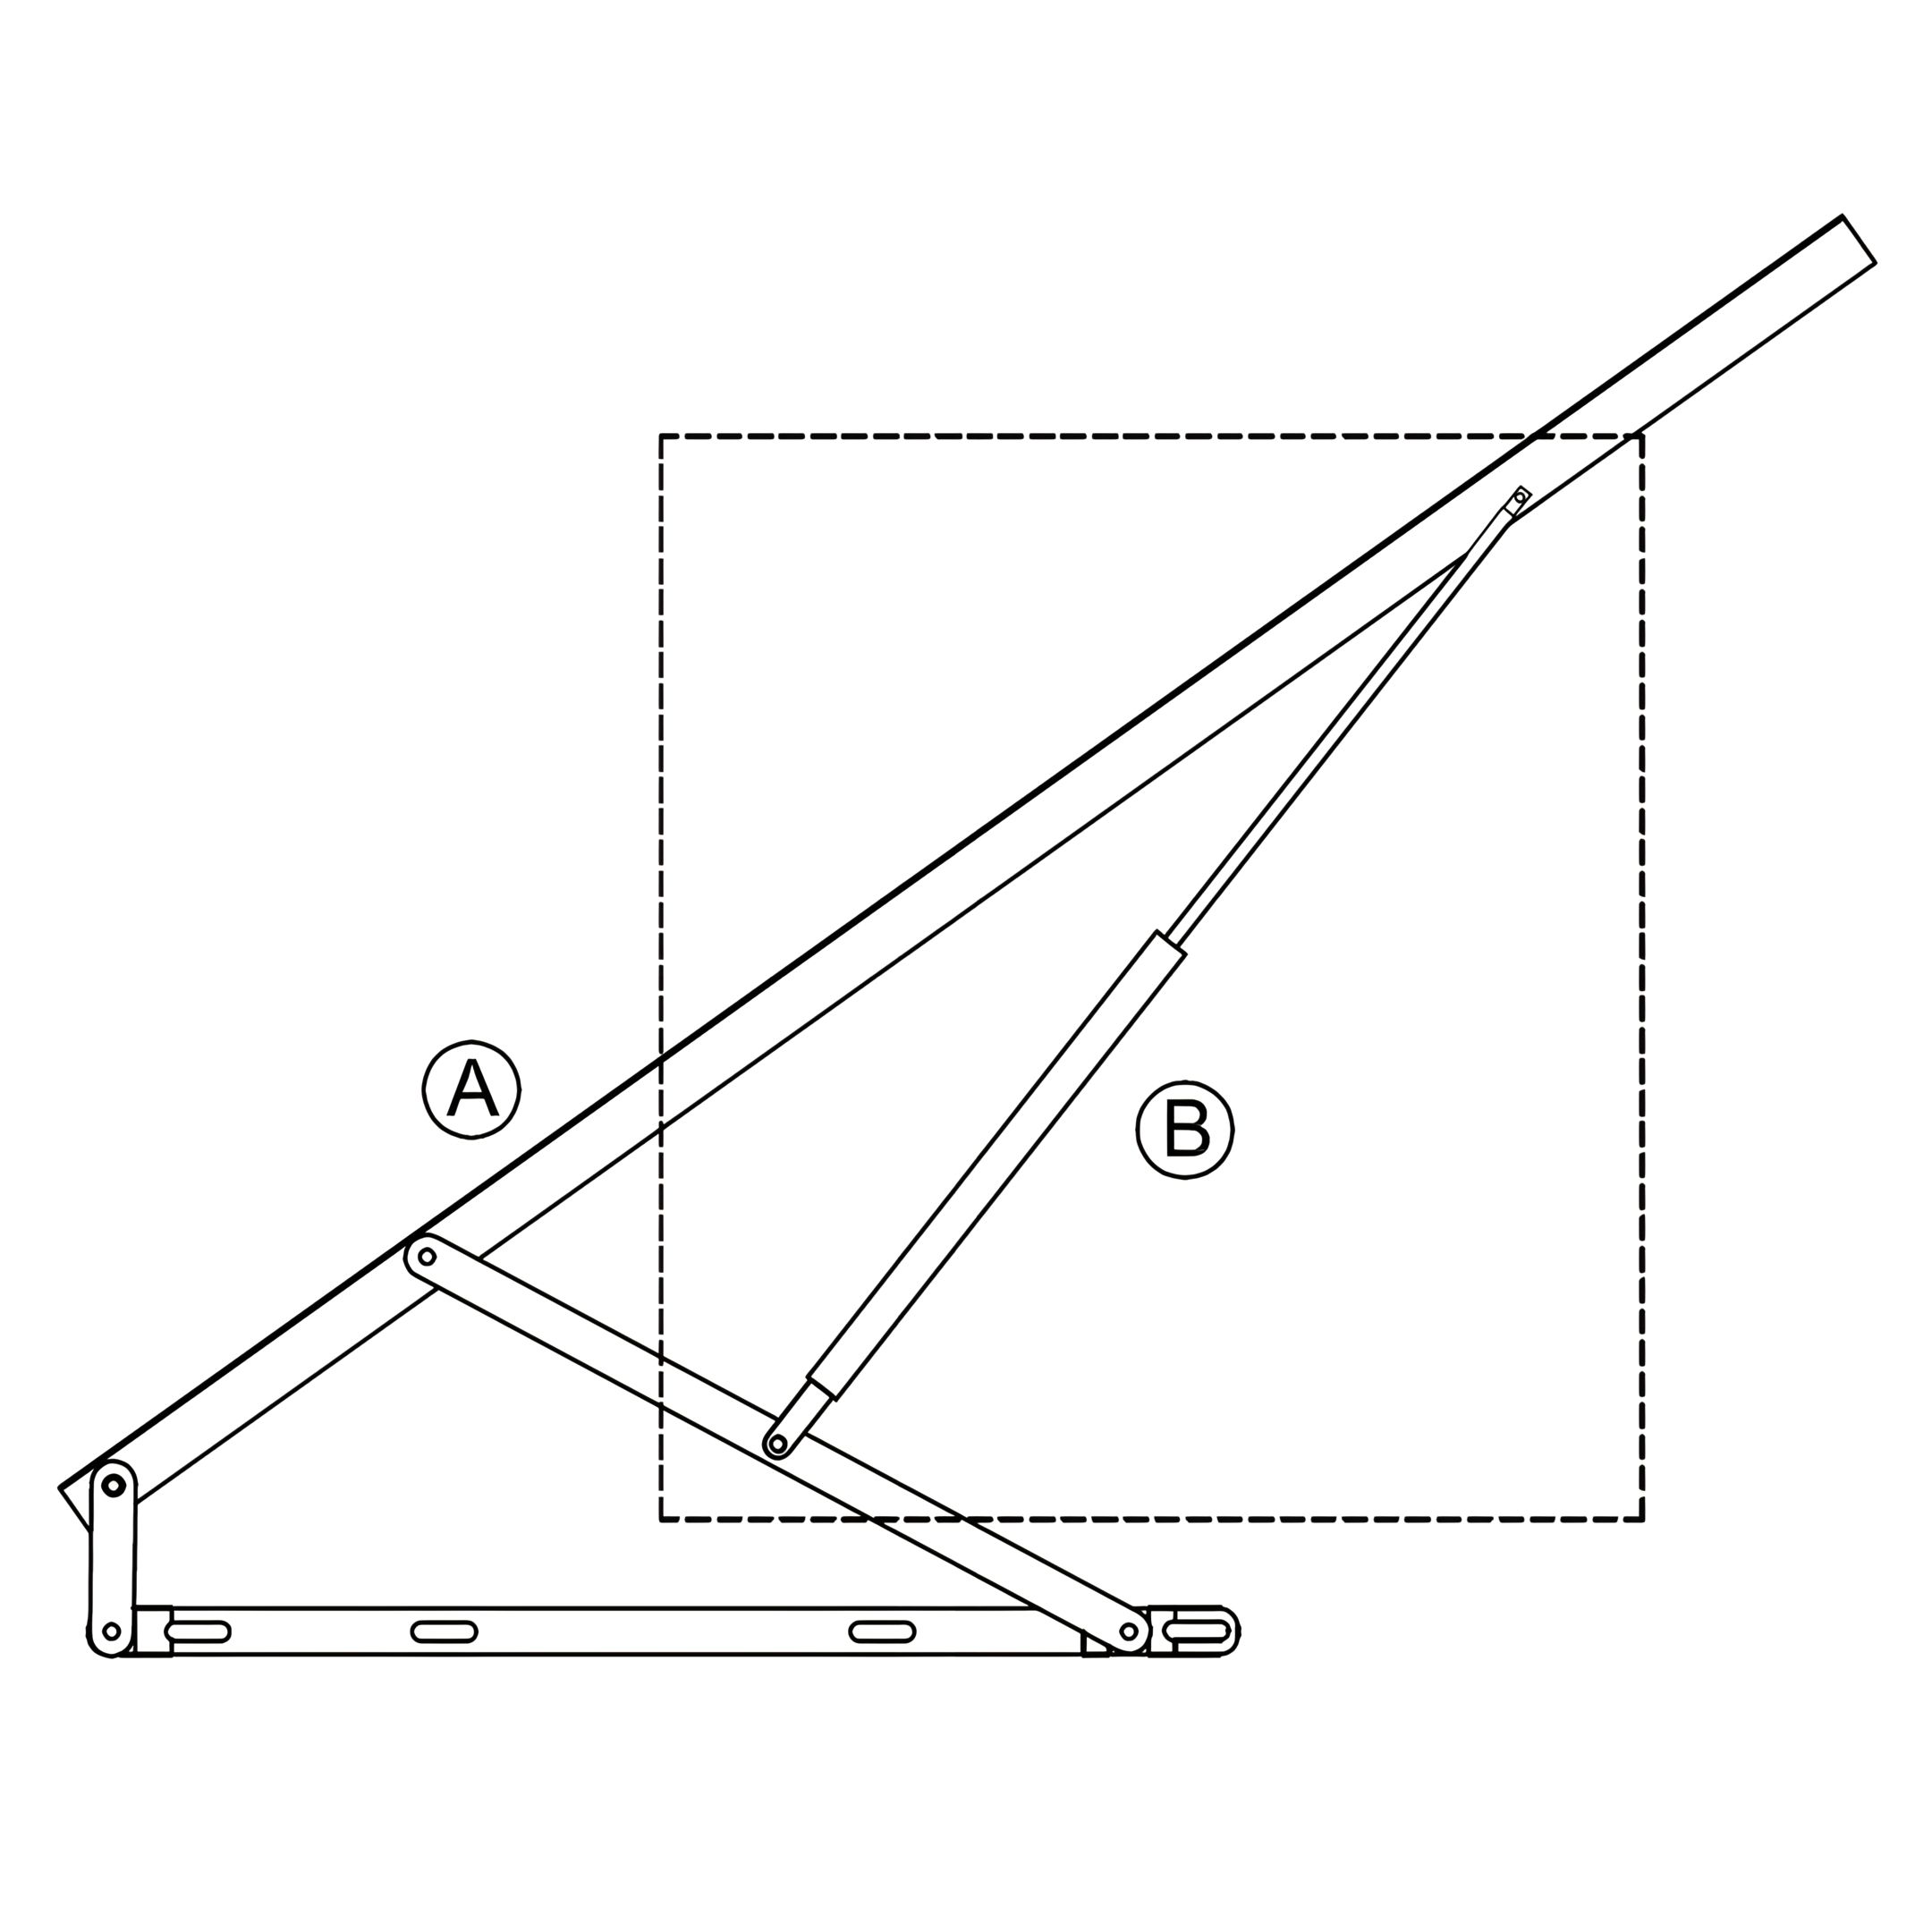
6. Install the Hydraulic Mechanism
Secure the Hydraulic Pump (B) to the Hydraulic Base Support (A) by aligning it properly.
Ensure the Hydraulic Pump (B) is installed in the correct orientation, as shown in the diagram.
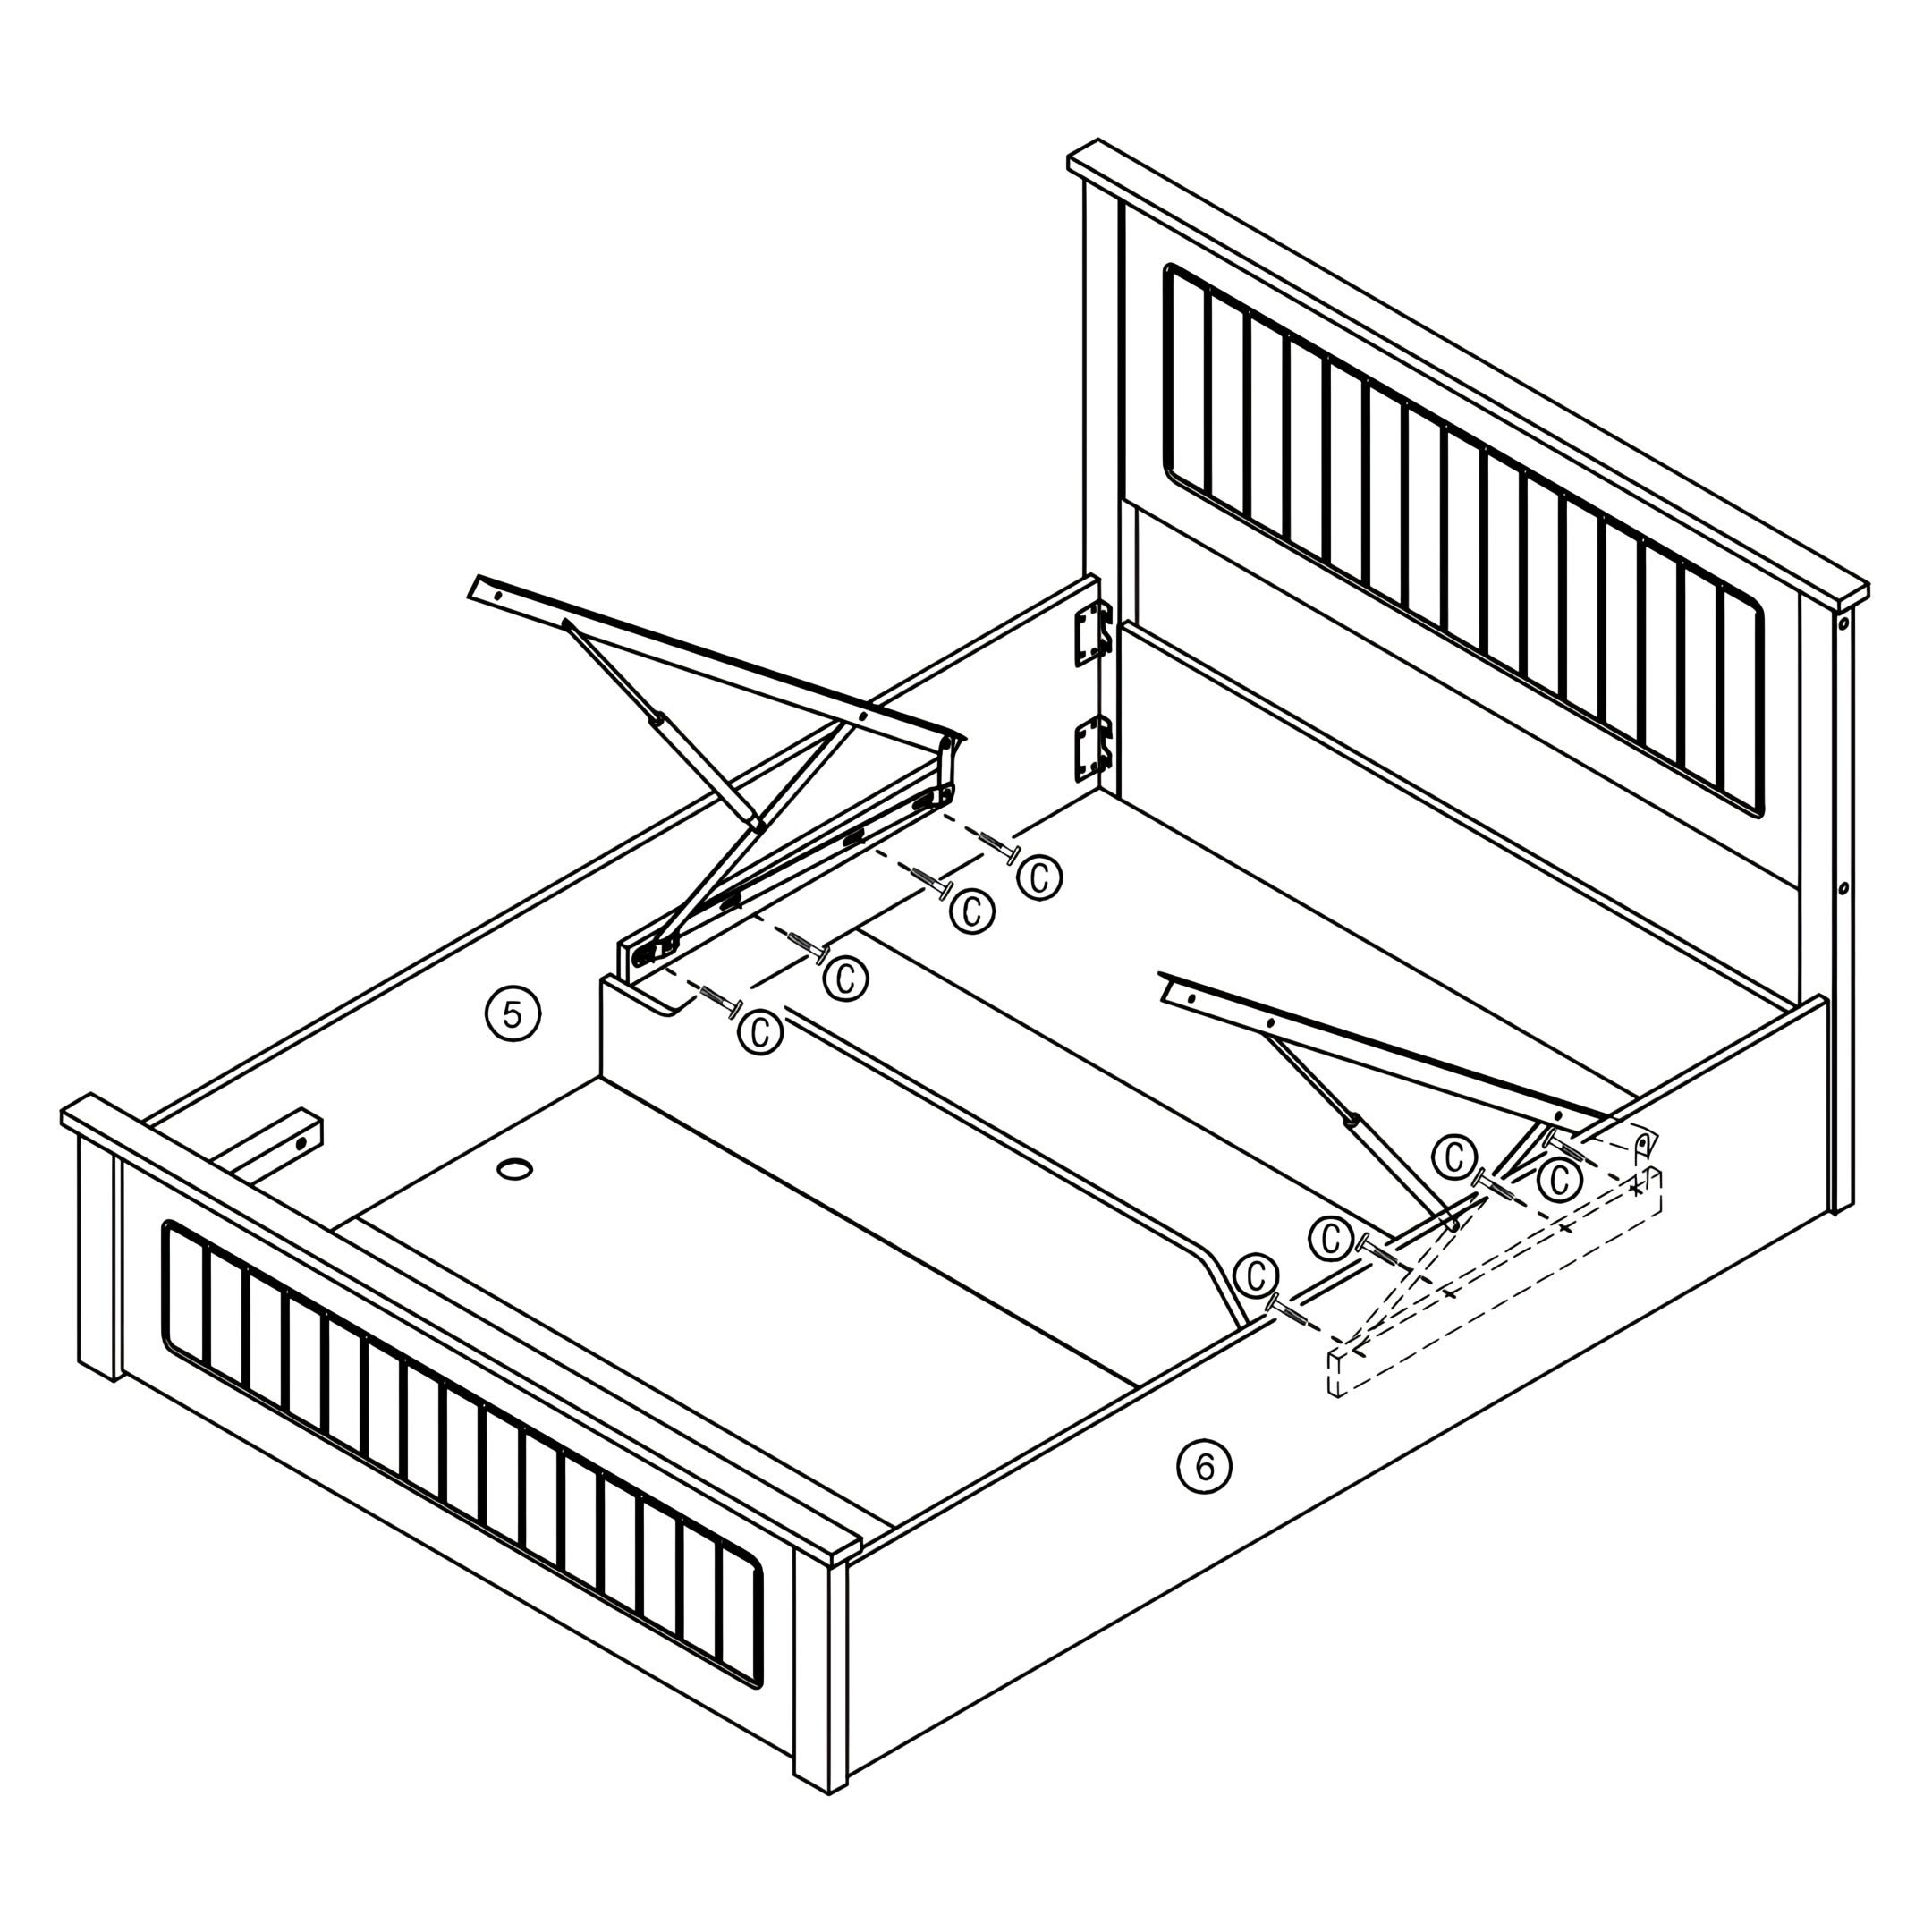
7. Secure the Hydraulic Mechanism to the Side Rails
Align the Hydraulic Base Supports (A) with the pre-drilled holes on the Side Rails (5, 6).
Secure the Hydraulic Base Supports (A) using JCBB M8 × 20mm Bolts (C).
Ensure the Hydraulic Mechanism is correctly positioned and securely fastened to the side rails.
Double-check that all bolts are tightened properly before proceeding.
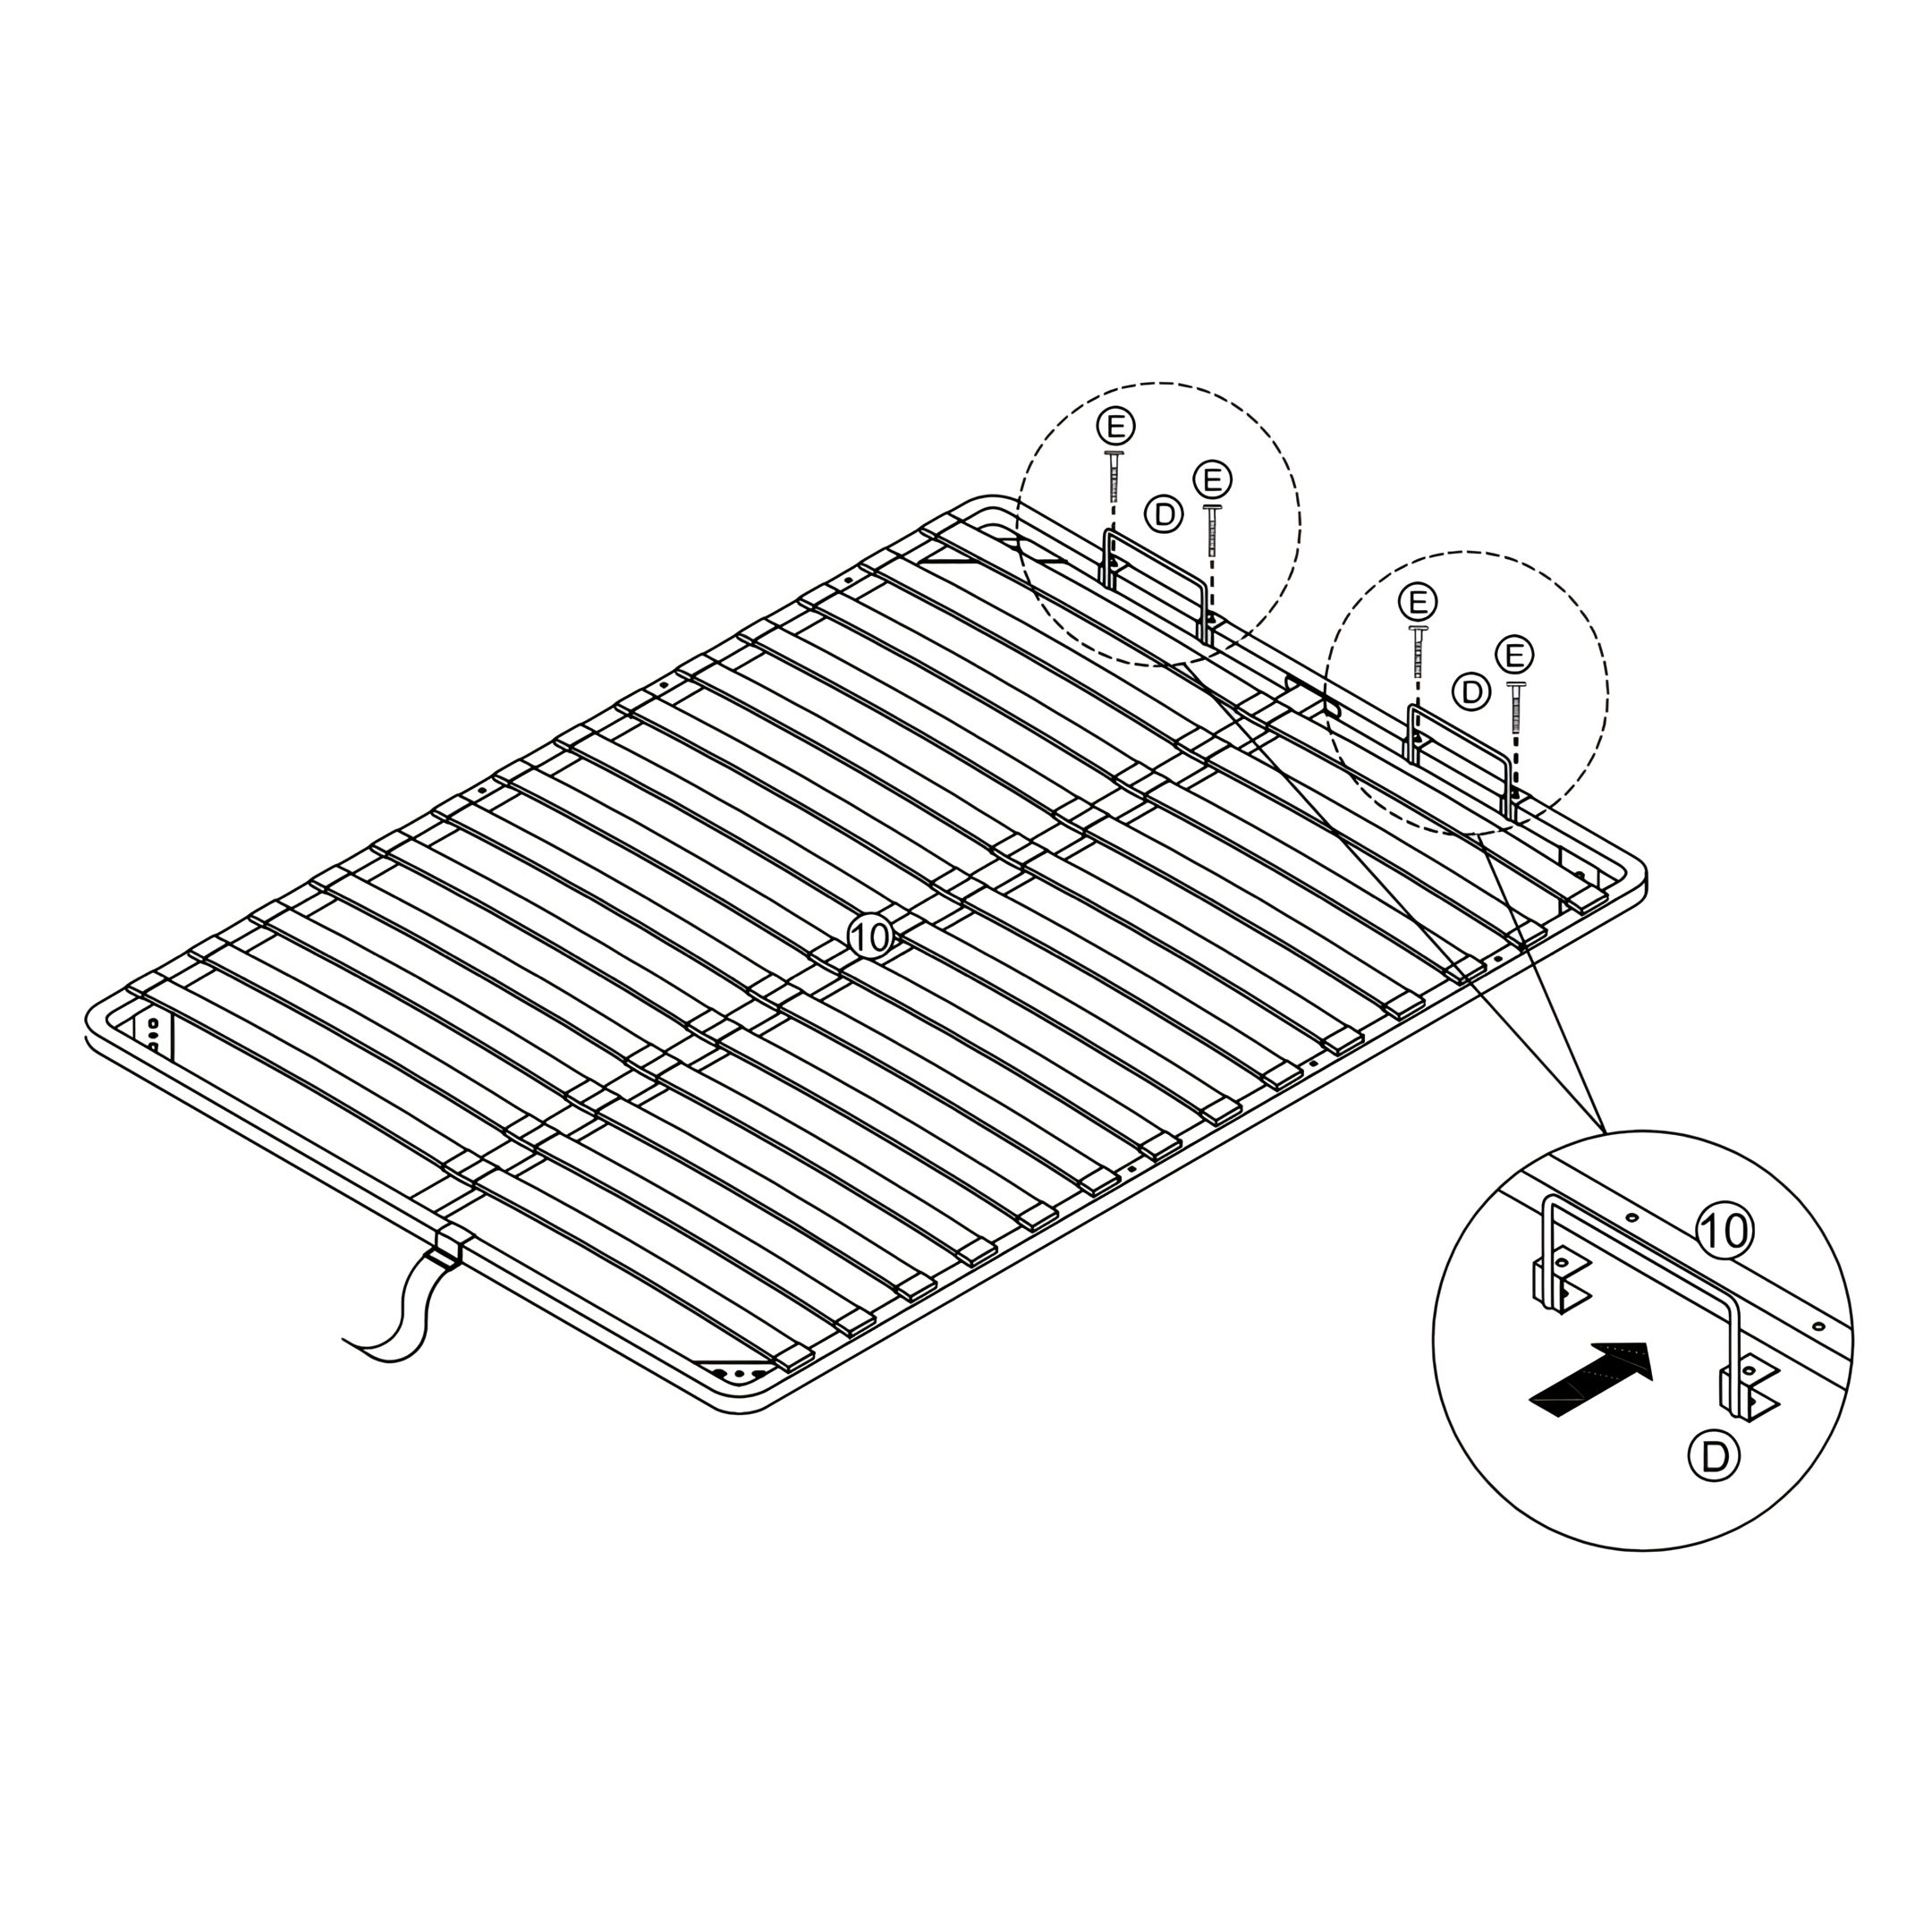
8. Attach the Base Handles
Position the Base Handles (D) on the frame of the Slatted Base (10).
Secure each Base Handle (D) using JCBC M6 × 40mm Bolts (E), ensuring they pass through the handle and into the frame.
Tighten all bolts securely to ensure the handles are firmly attached
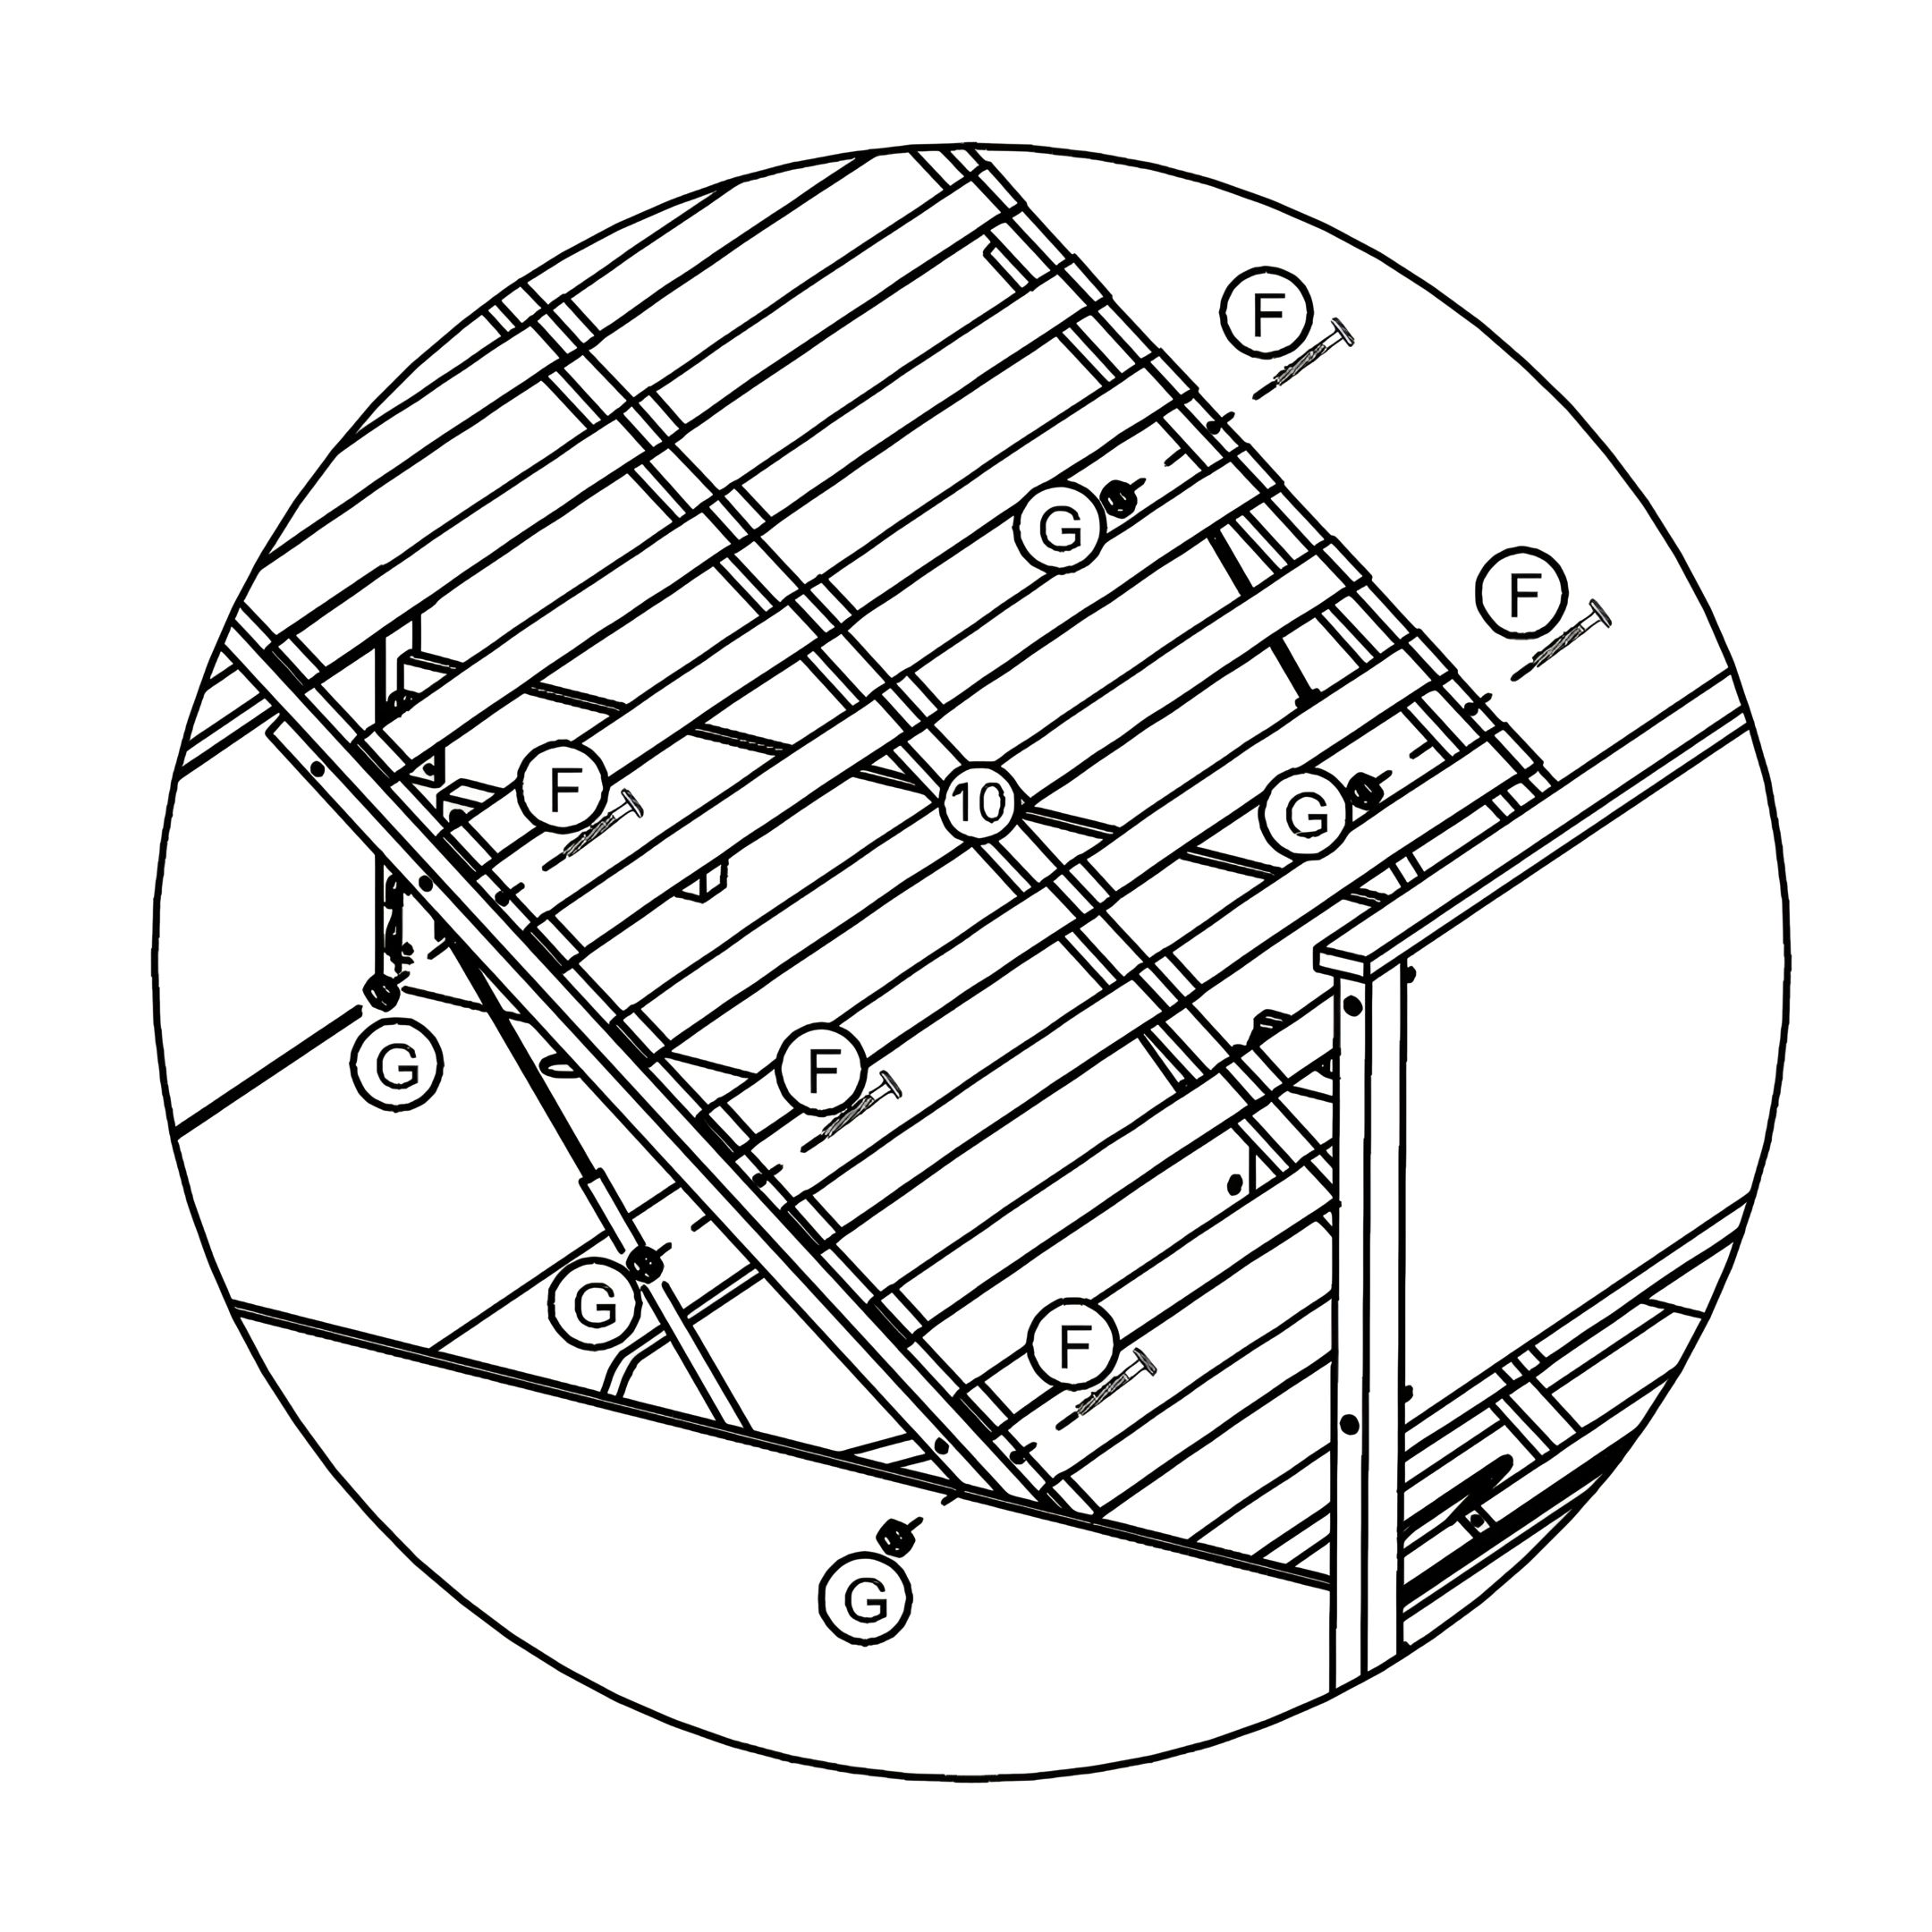
9. Secure the Slatted Base to the Hydraulic Mechanism
Lift the Slatted Base (10) and align it with the Hydraulic Base Supports (A).
Secure the Slatted Base (10) to the frame using JCBB M8 × 45mm Bolts (F).
Attach the M8 Hex Nuts (G) to the corresponding bolts and tighten them securely.
Ensure all fastenings are properly secured before testing the lifting mechanism.
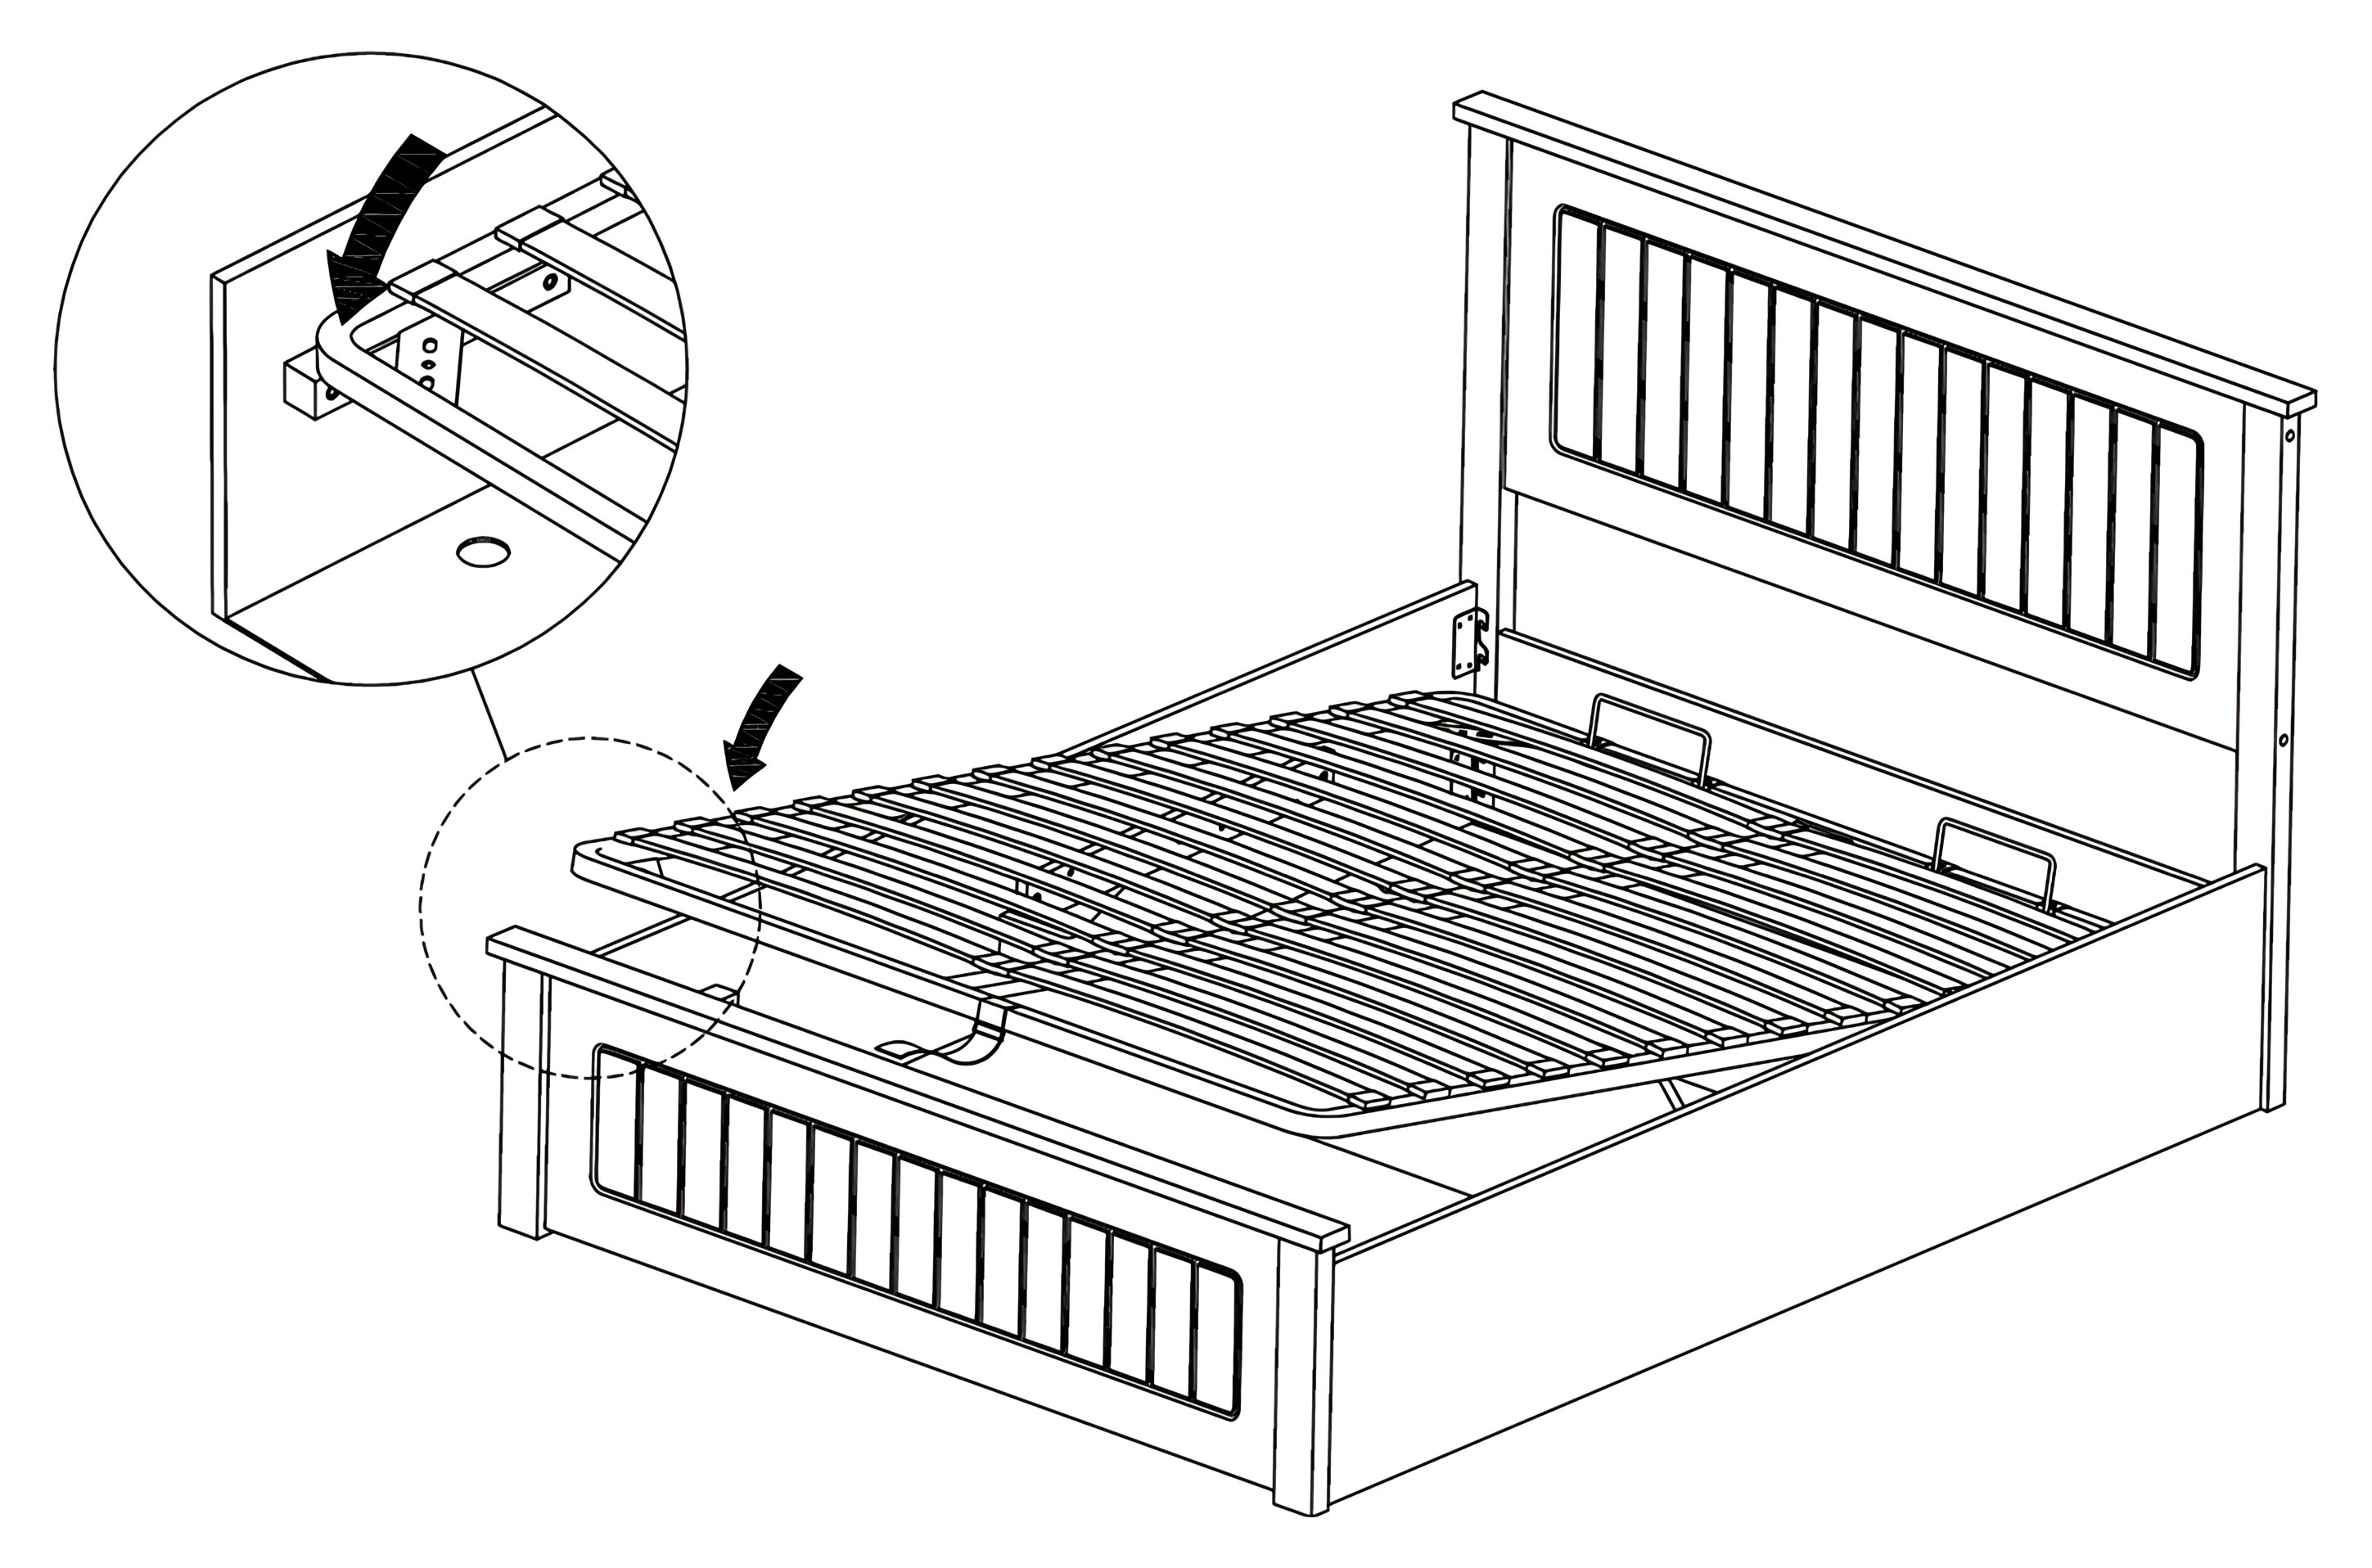
10. Lower the Slatted Base into Position
Carefully lower the Slatted Base (10) onto the Stopper Blocks (P) attached to the Side Rails (5, 6) .
Ensure the frame aligns properly and rests securely on the supports.
Confirm that the slatted base is properly seated before use.