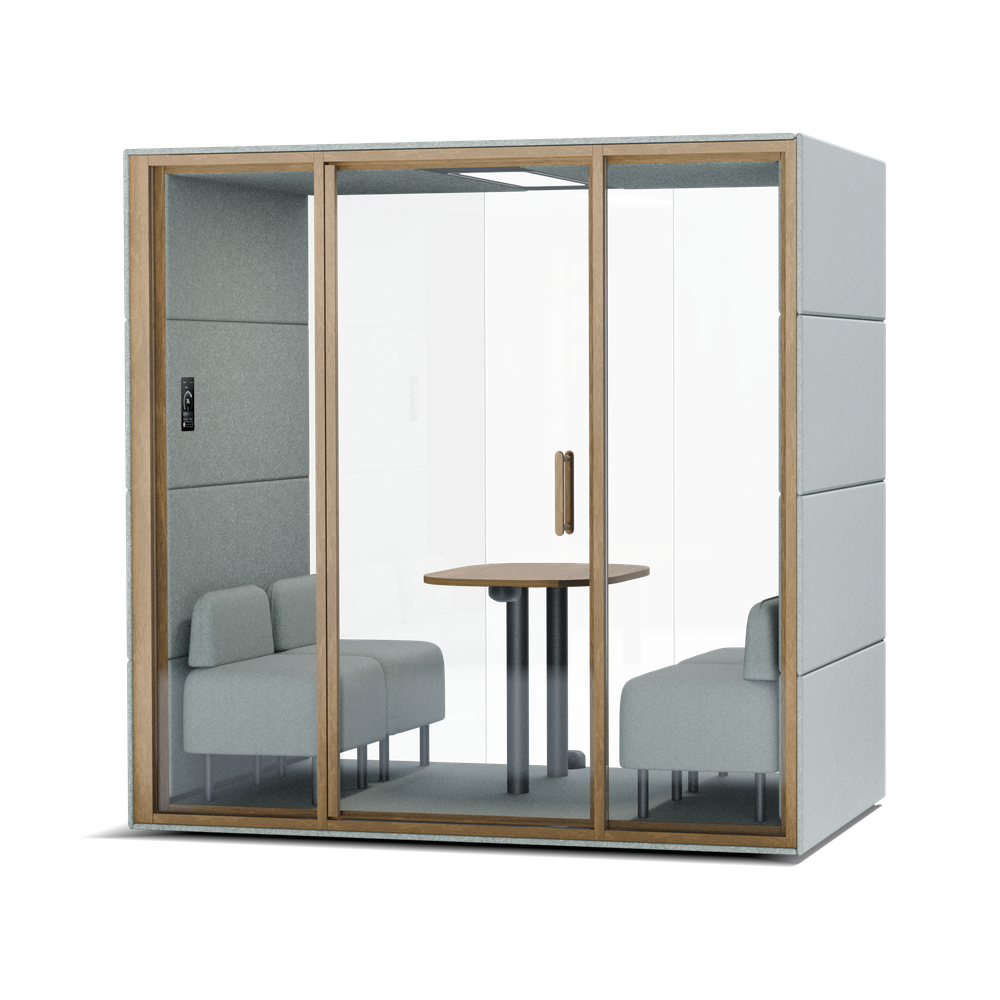
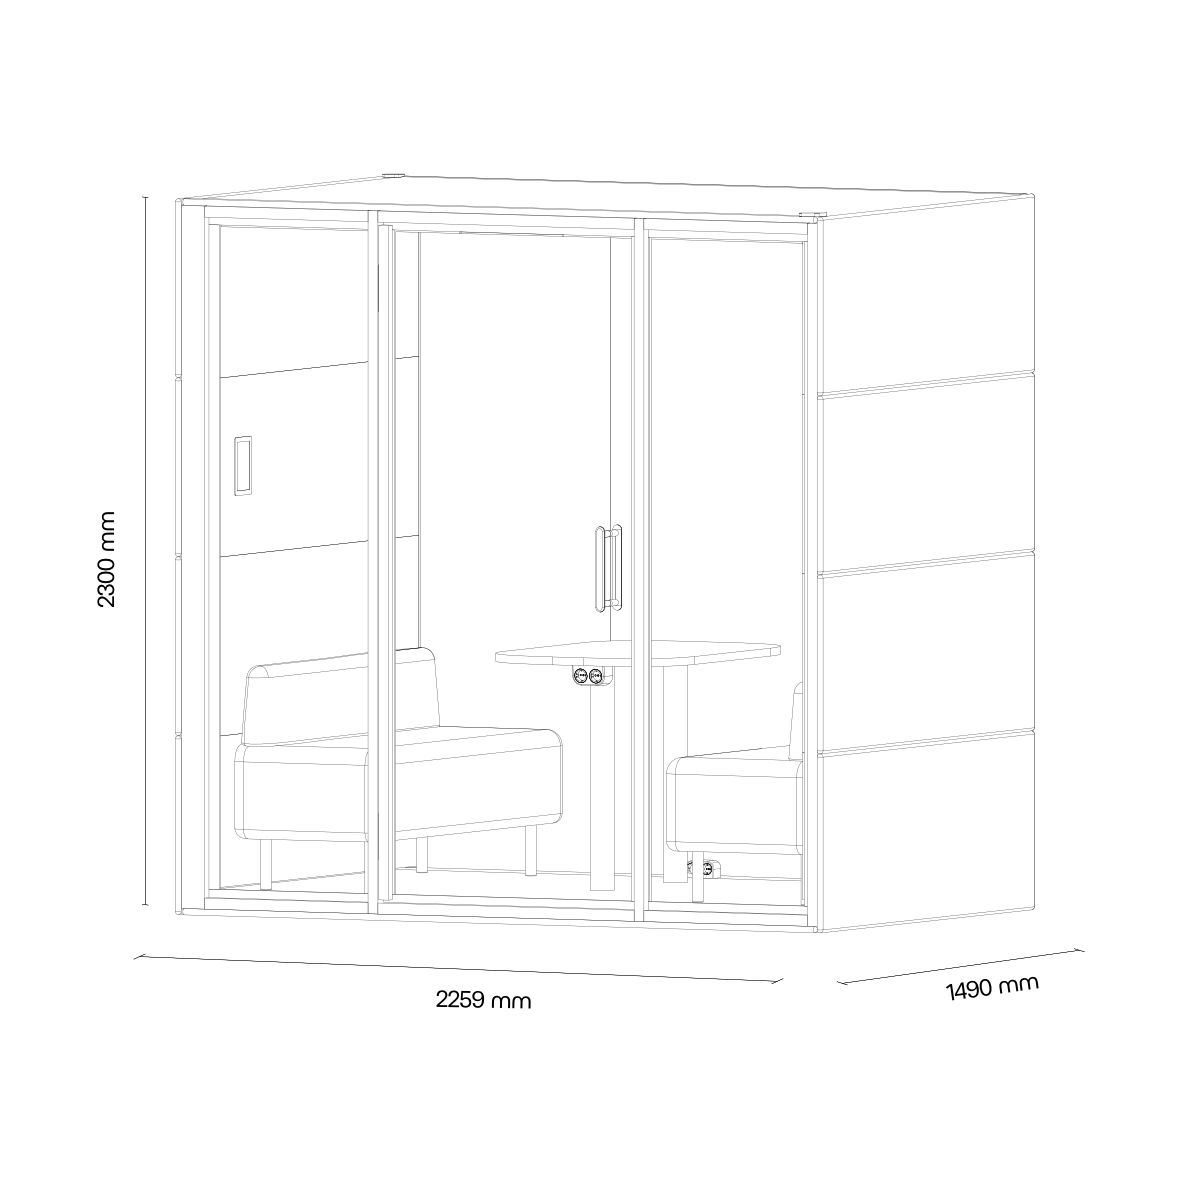
CHAT⁴ is crafted for team meetings and brainstorming sessions where privacy and comfort are key. Designed for four, this acoustic pod features an exceptional ventilation system, ensuring a steady flow of fresh air even during lengthy discussions.
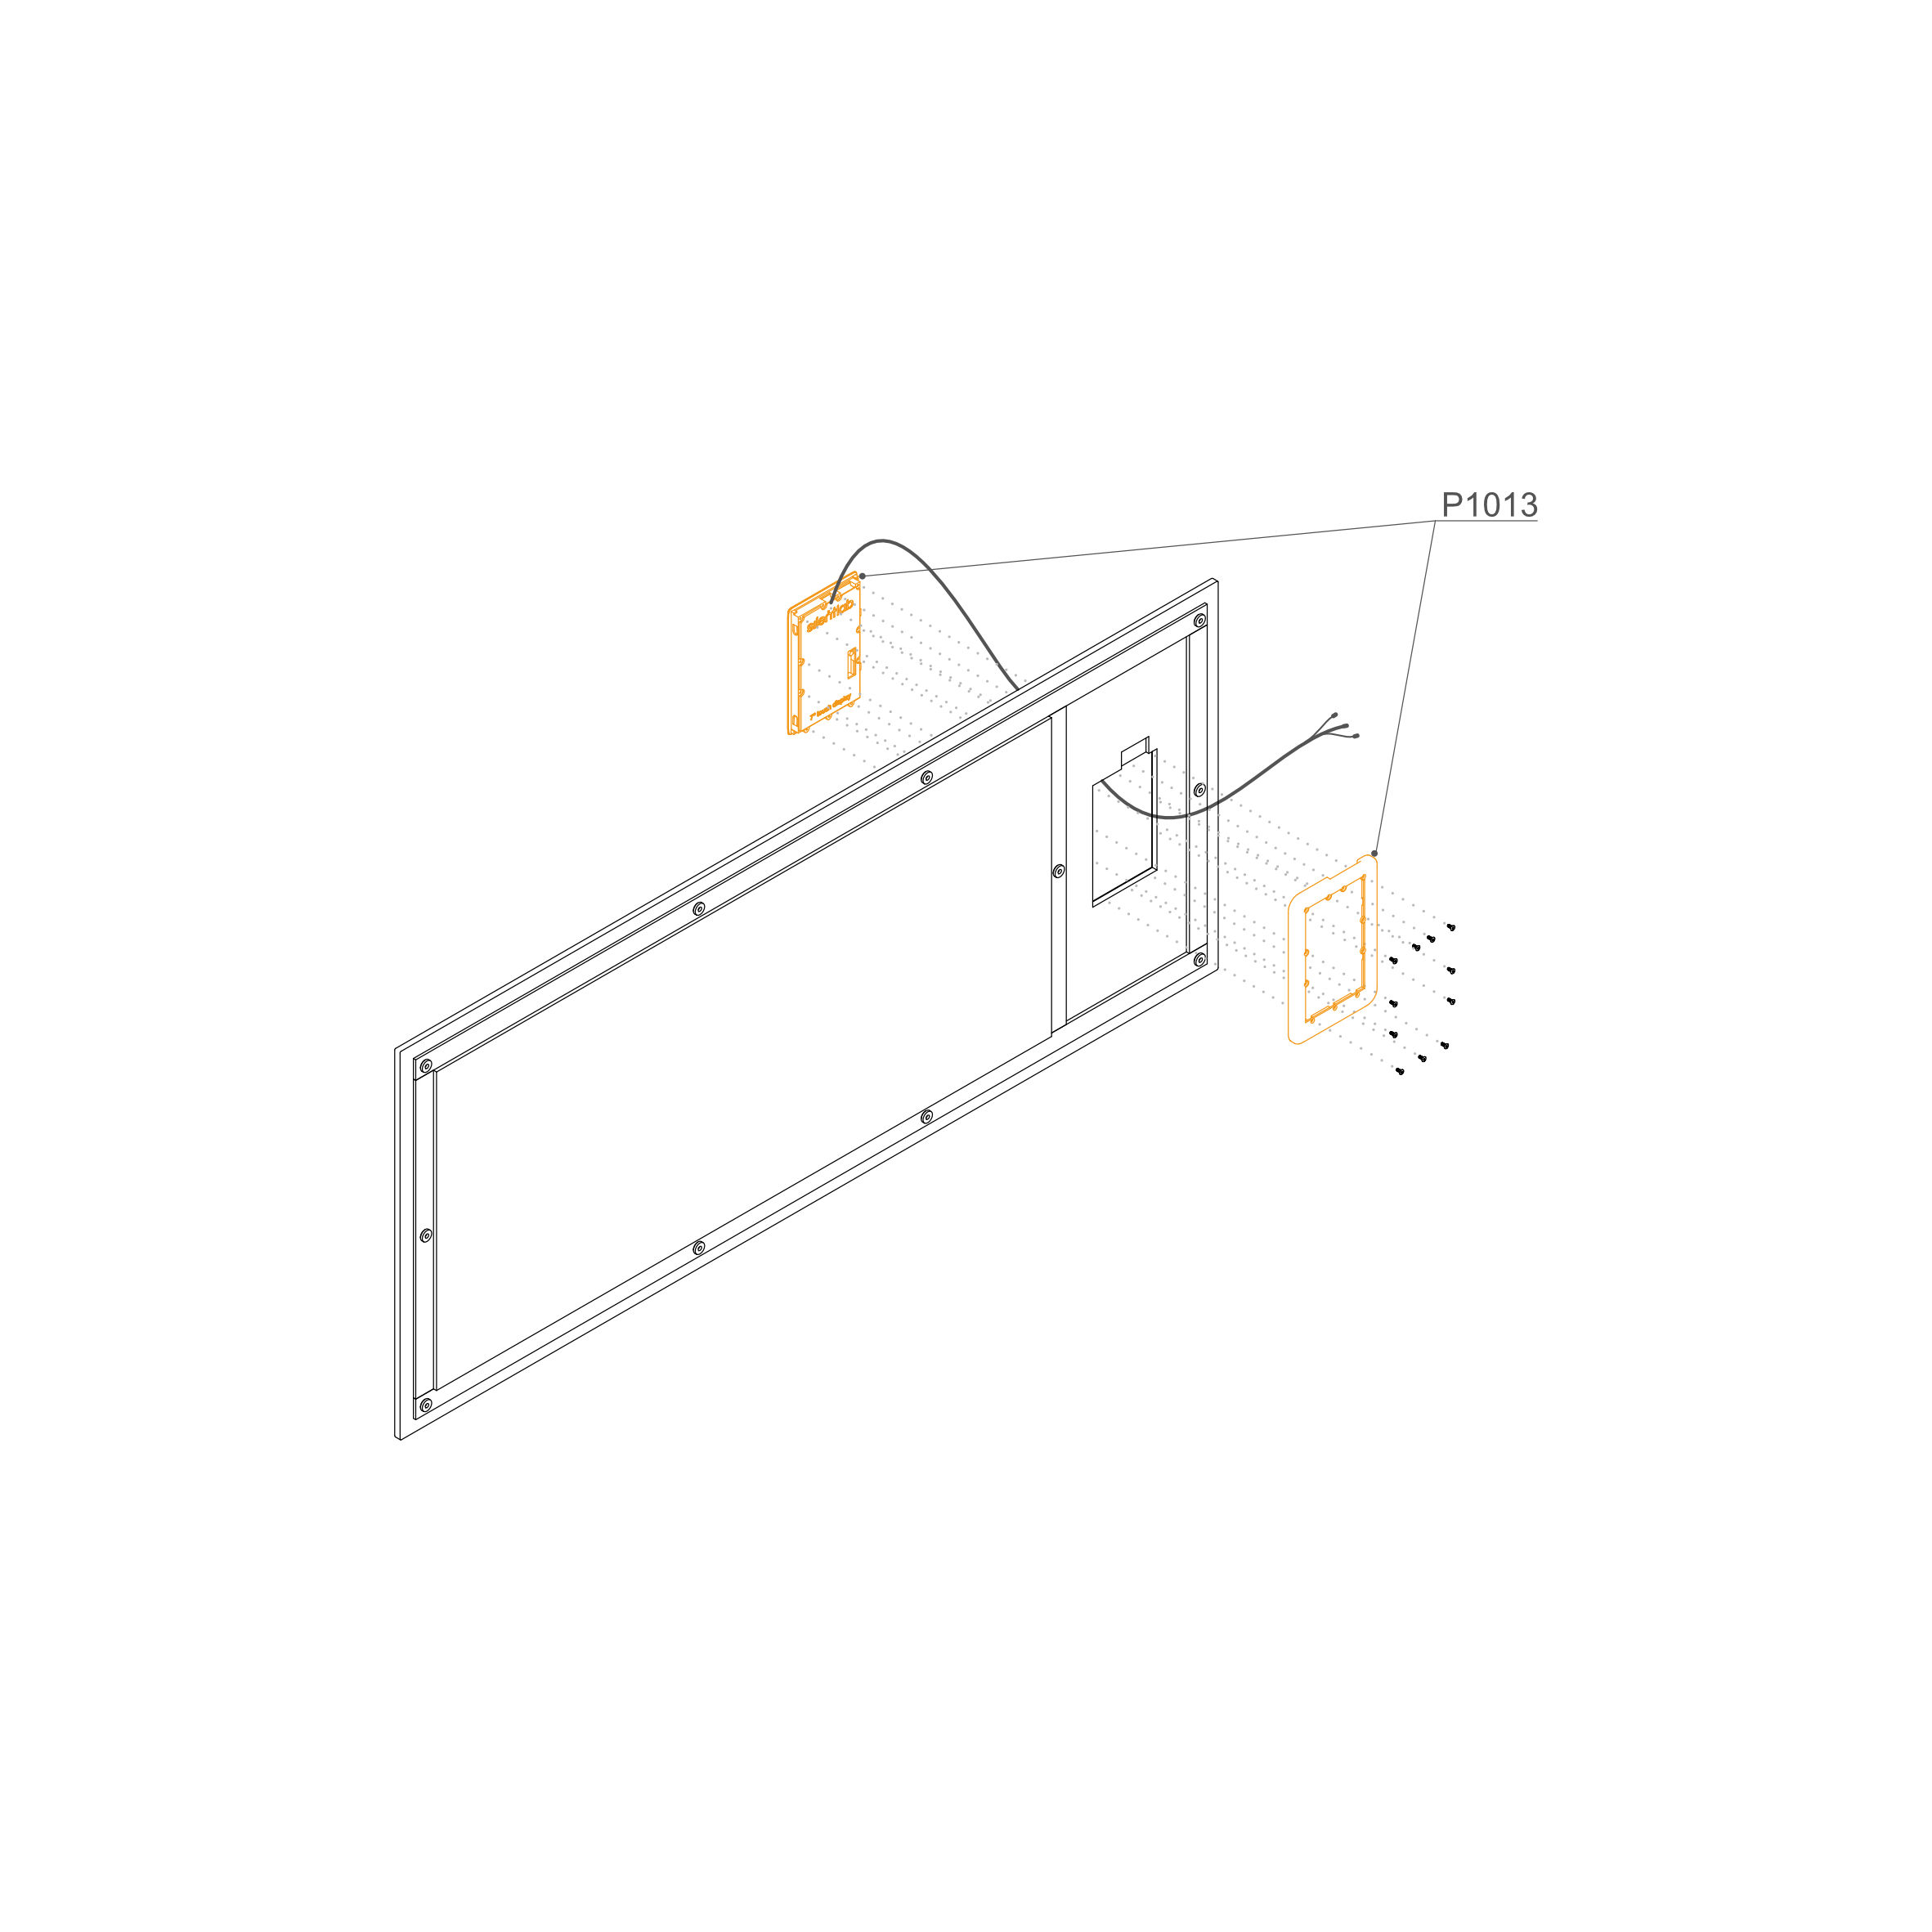
Unpack the Components: Carefully open the packaging and identify the display unit (P1013)
Disassemble the Housing: Using a screwdriver with a Torx bit, remove the rear frame from the display unit to prepare it for mounting.
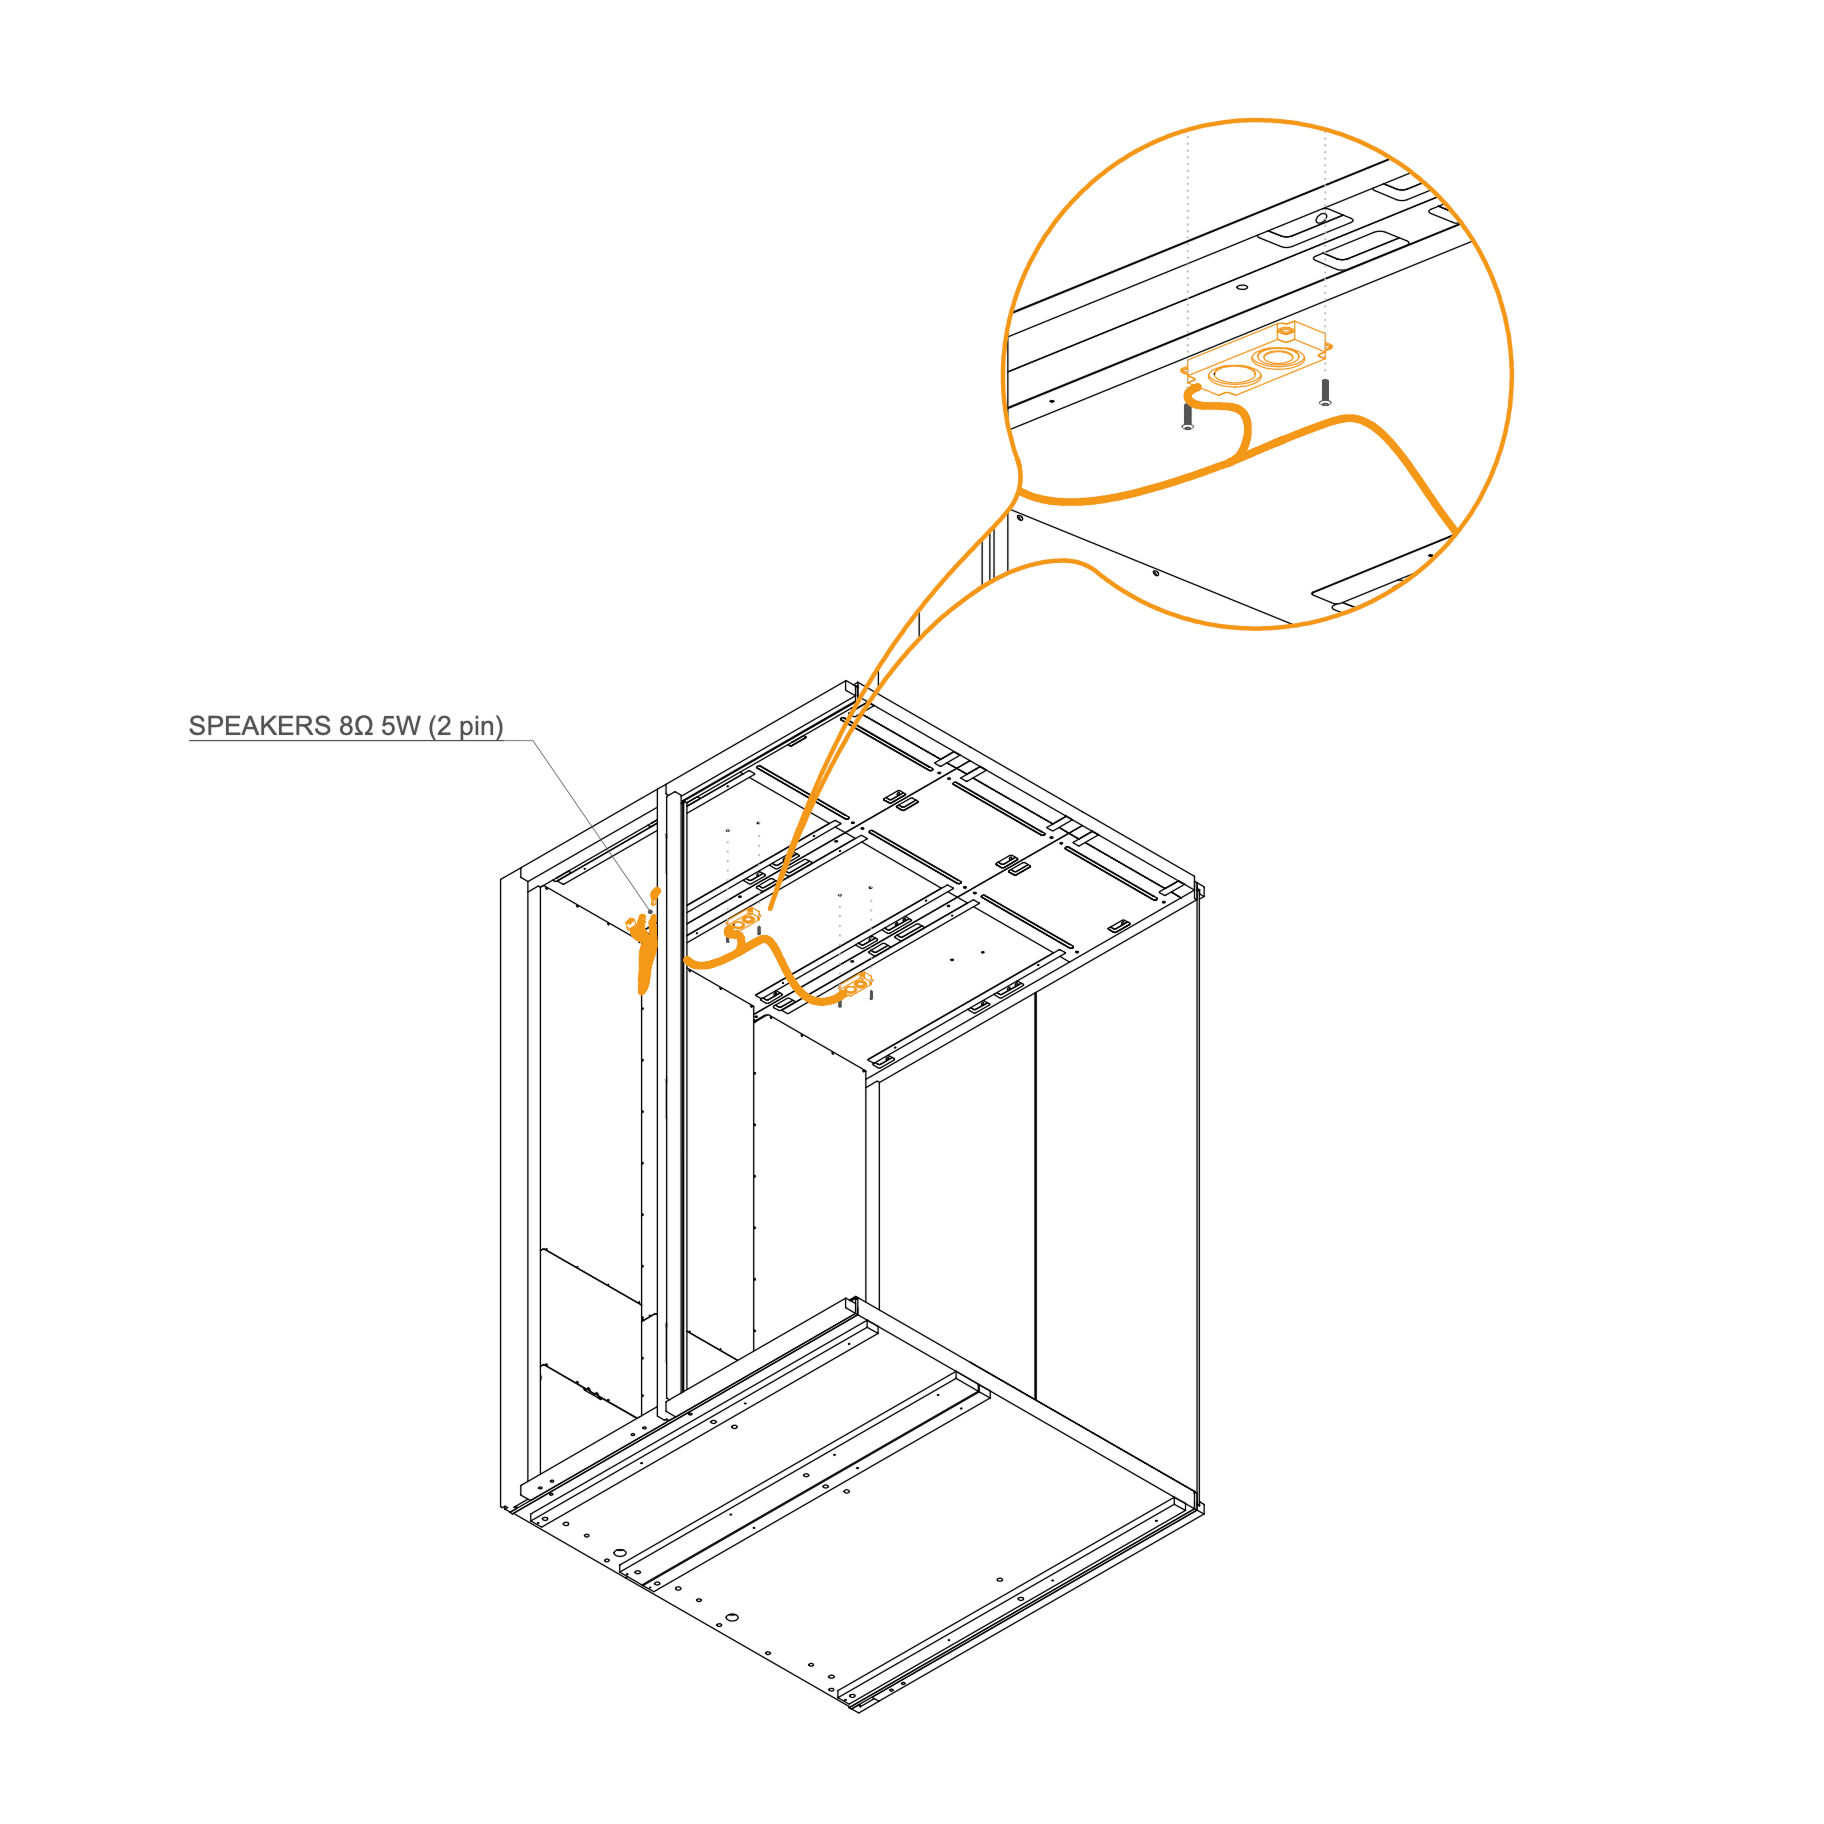
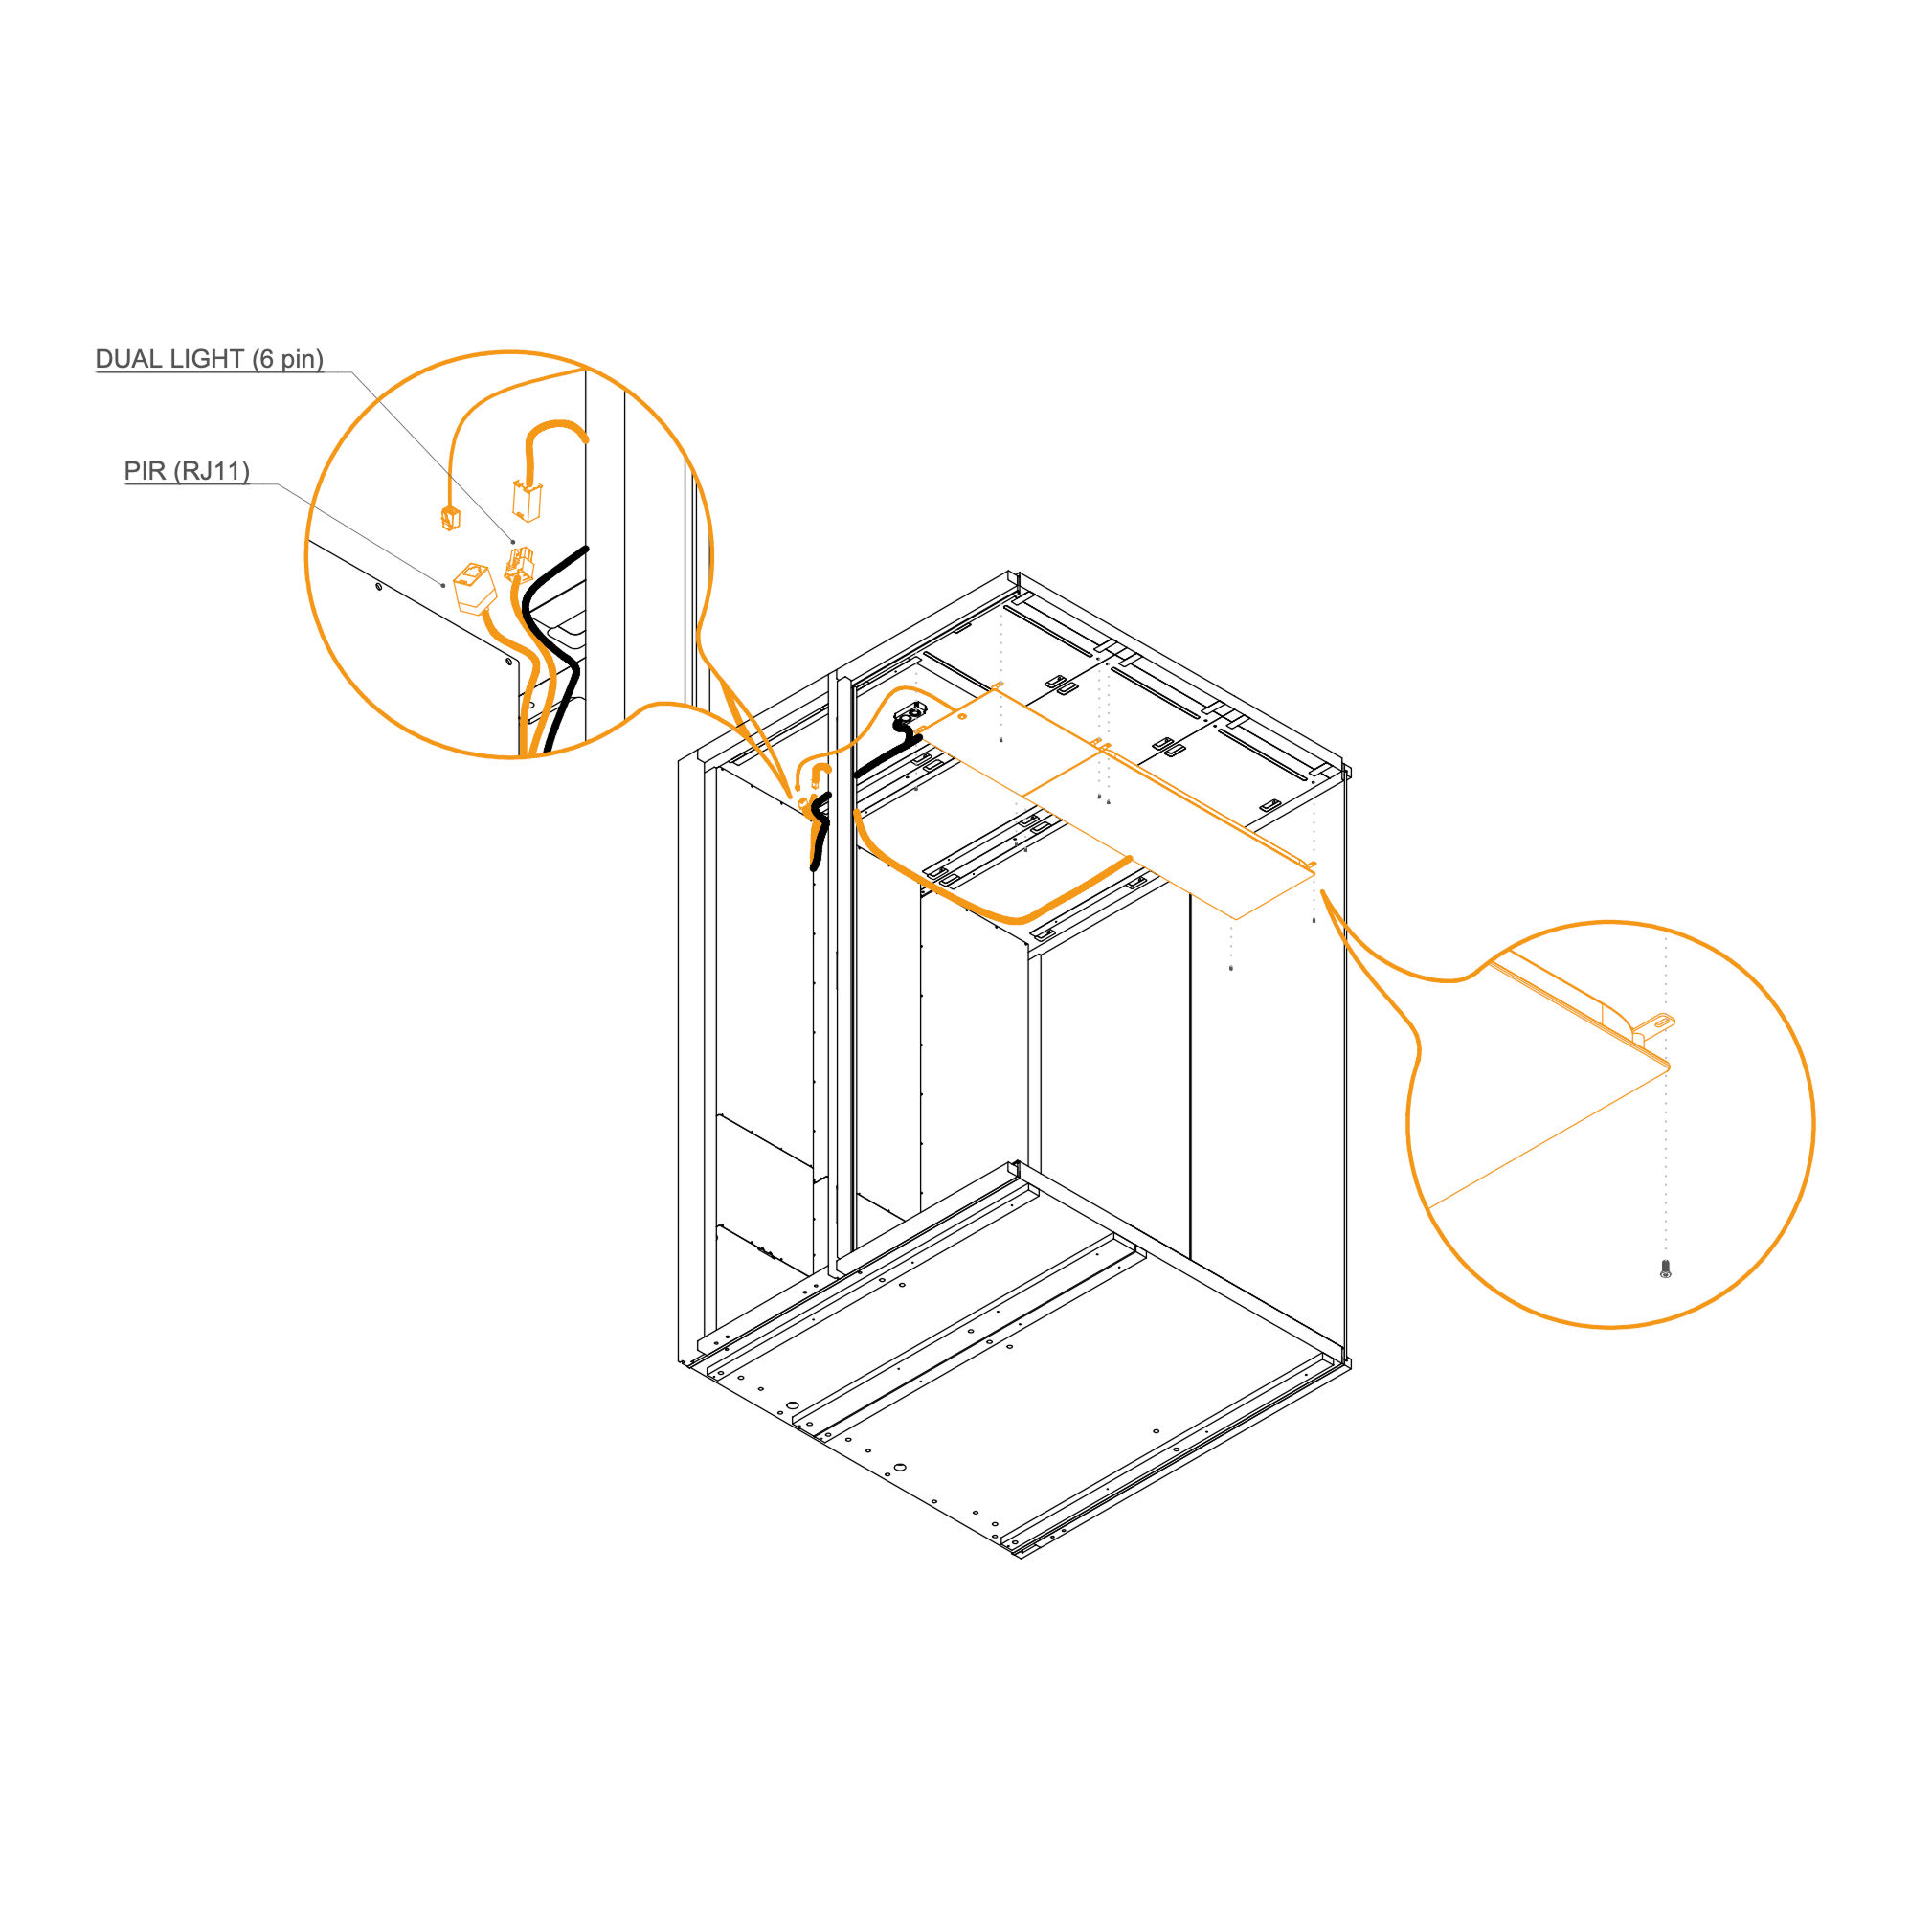
Feed the Cables: Locate the cutout in the upholstered internal panel. Gently pull all display cables through the hole from the front (upholstered side) to the back.
Note: Ensure the cables are oriented upwards as shown in the diagram.
Seat the Display: Insert the display unit into the cutout on the upholstered side of the panel until it sits flush against the surface.
Mount the Rear Frame: From the back of the panel, align the rear frame (P1013) with the back of the display unit.
Fasten the Bolts: Insert the provided bolts through the frame and into the display housing. Tighten them securely to sandwich the upholstered panel between the display and the rear frame.
Note: The upholstered panel shown is for illustration only. Additional holes may be present to accommodate potential socket installations.
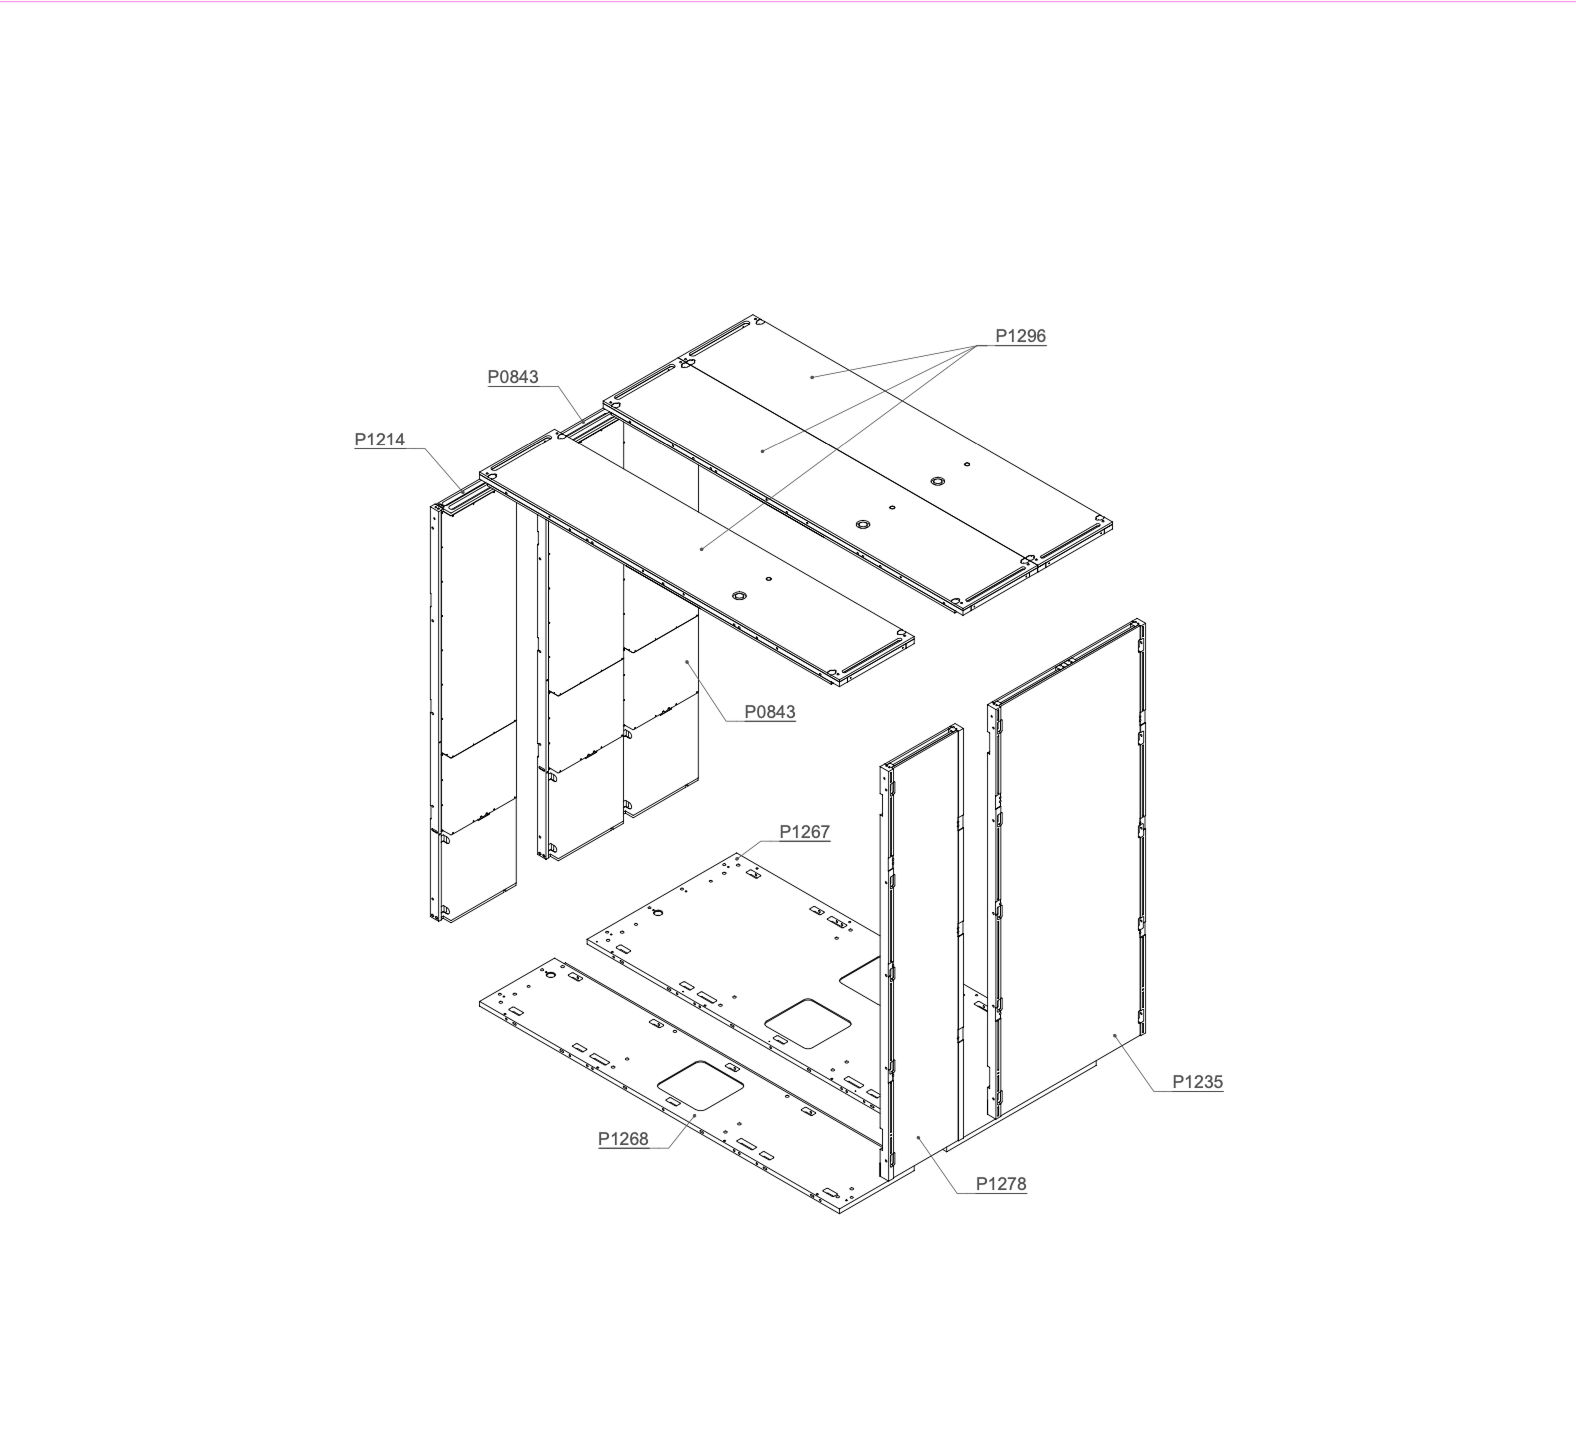
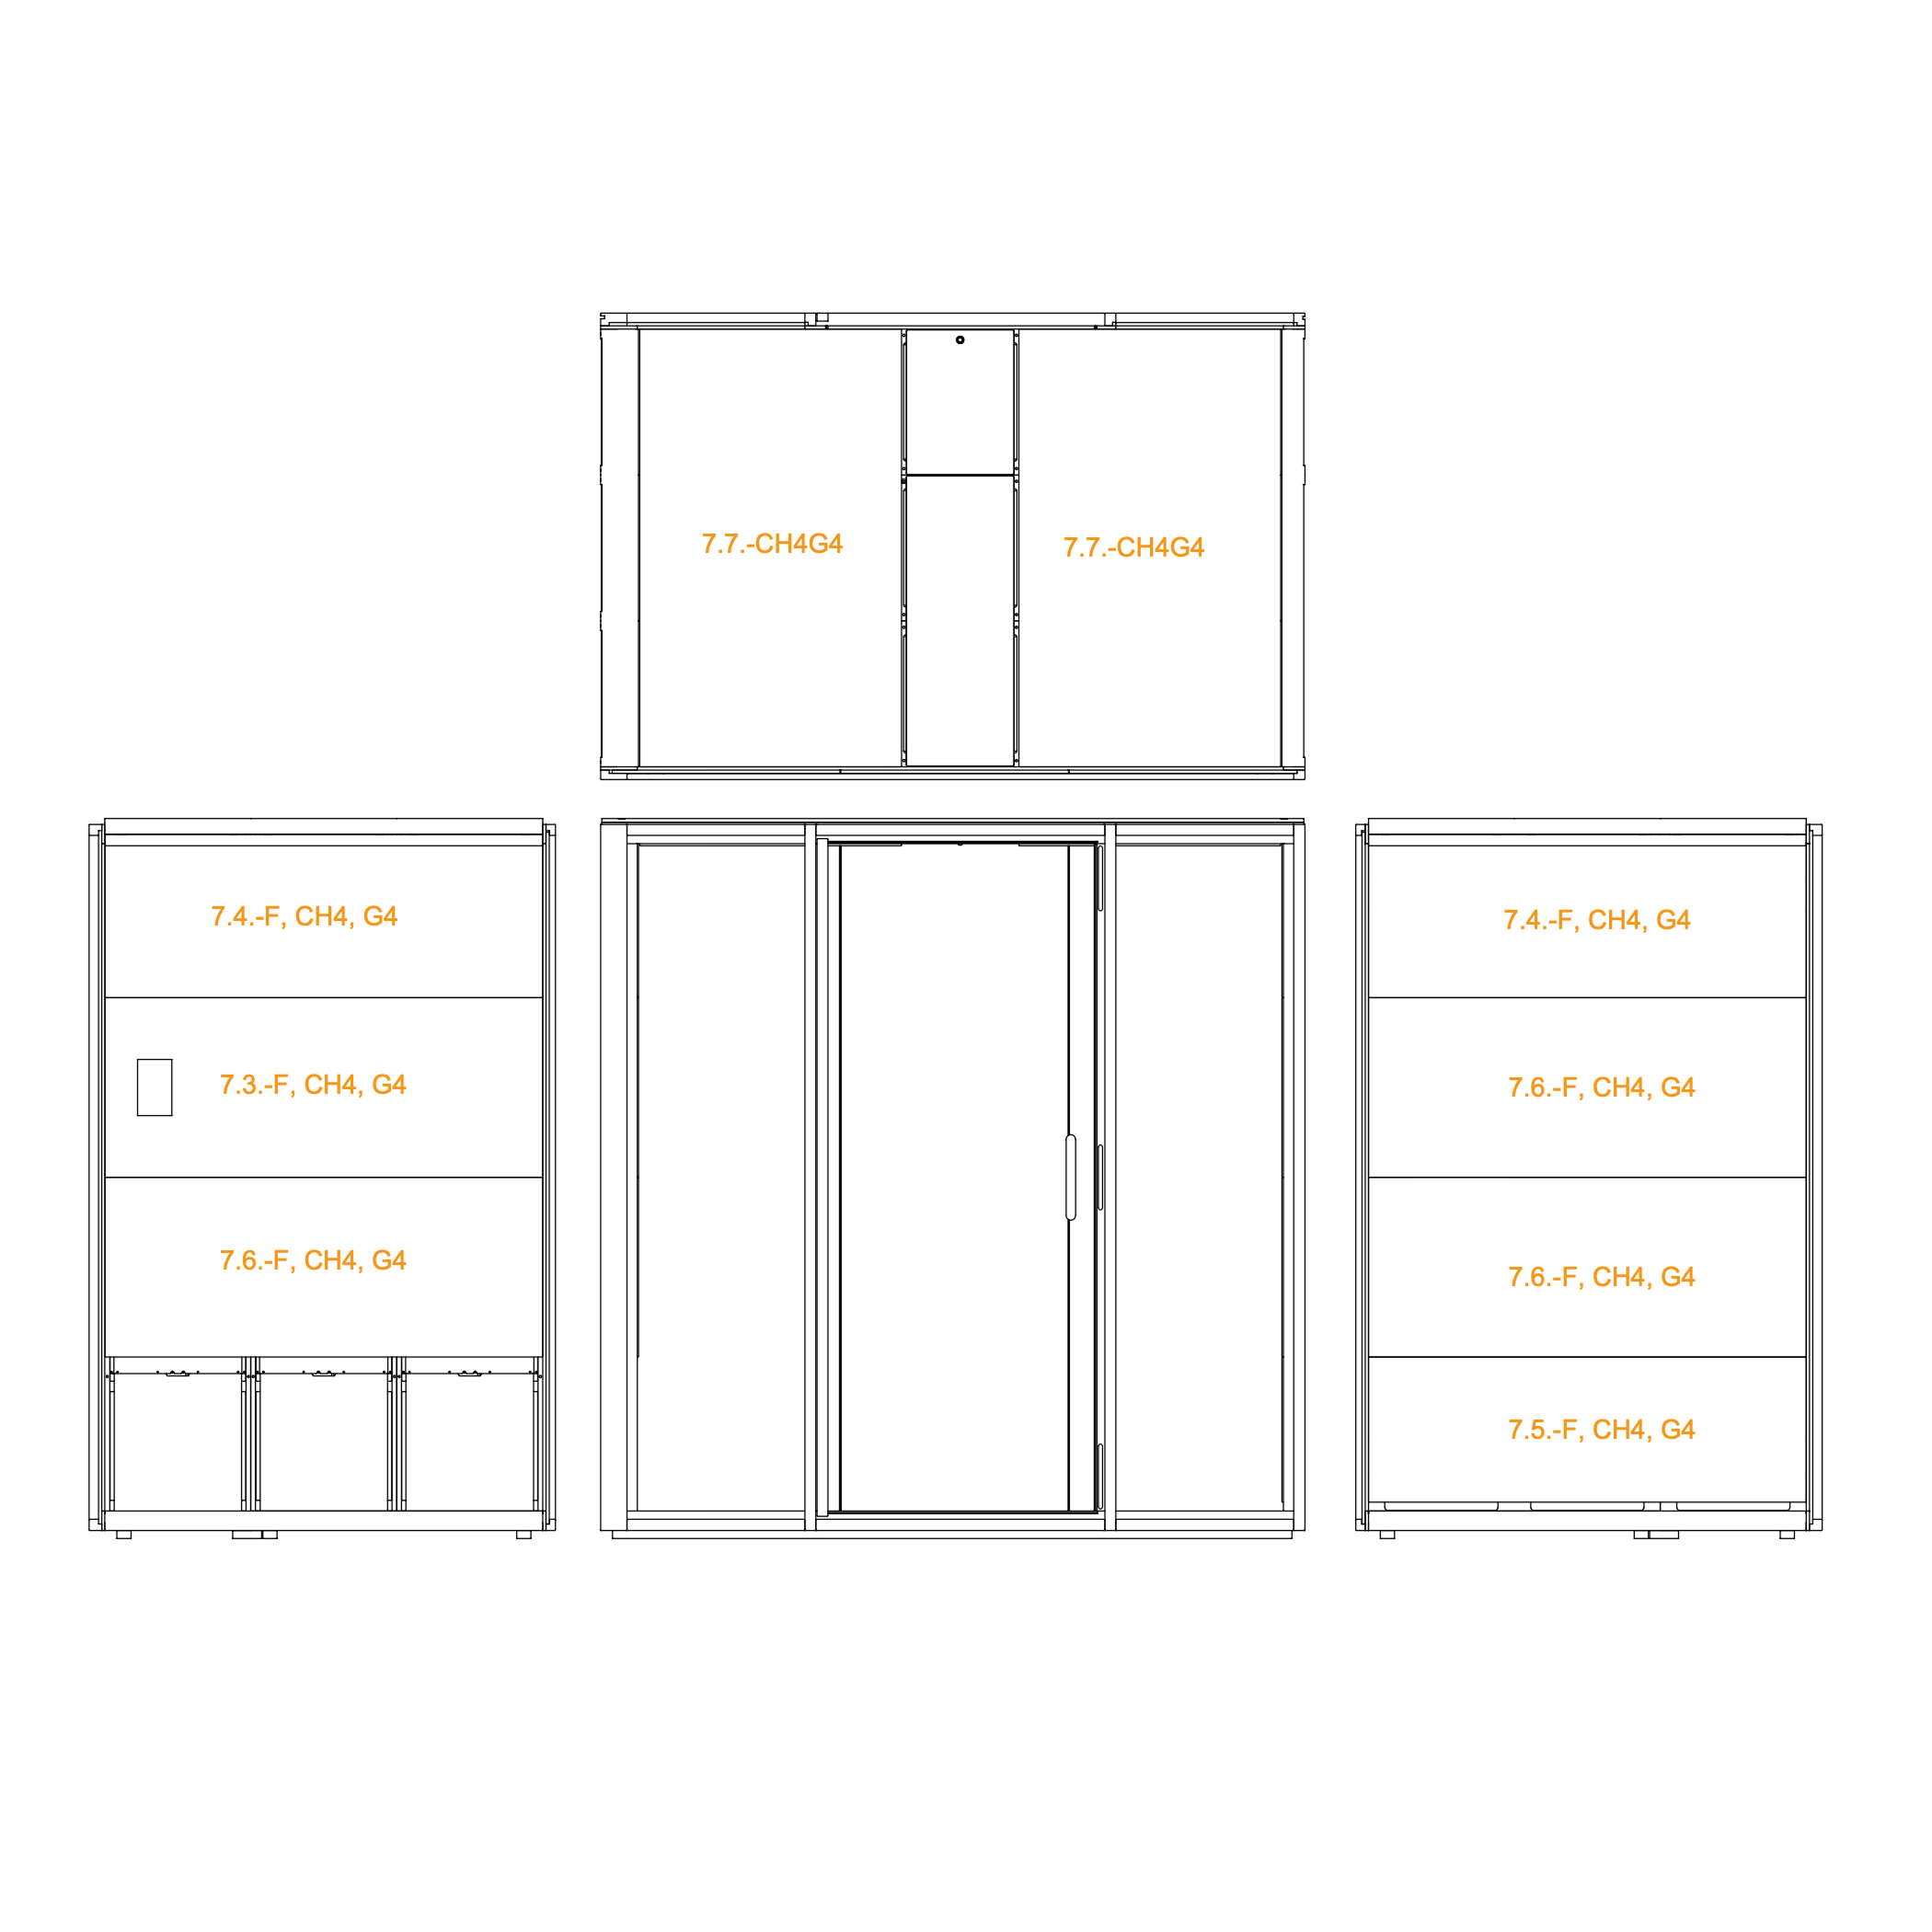
20. Install the interior wall and ceiling panels
Identify and position the interior panels labeled 7.3-F, 7.4-F, 7.5-F, 7.6-F, and 7.7-CHG4.
Mount each panel on its respective wall section, following the illustrated layout.
Ensure panels are properly aligned and seated into place.
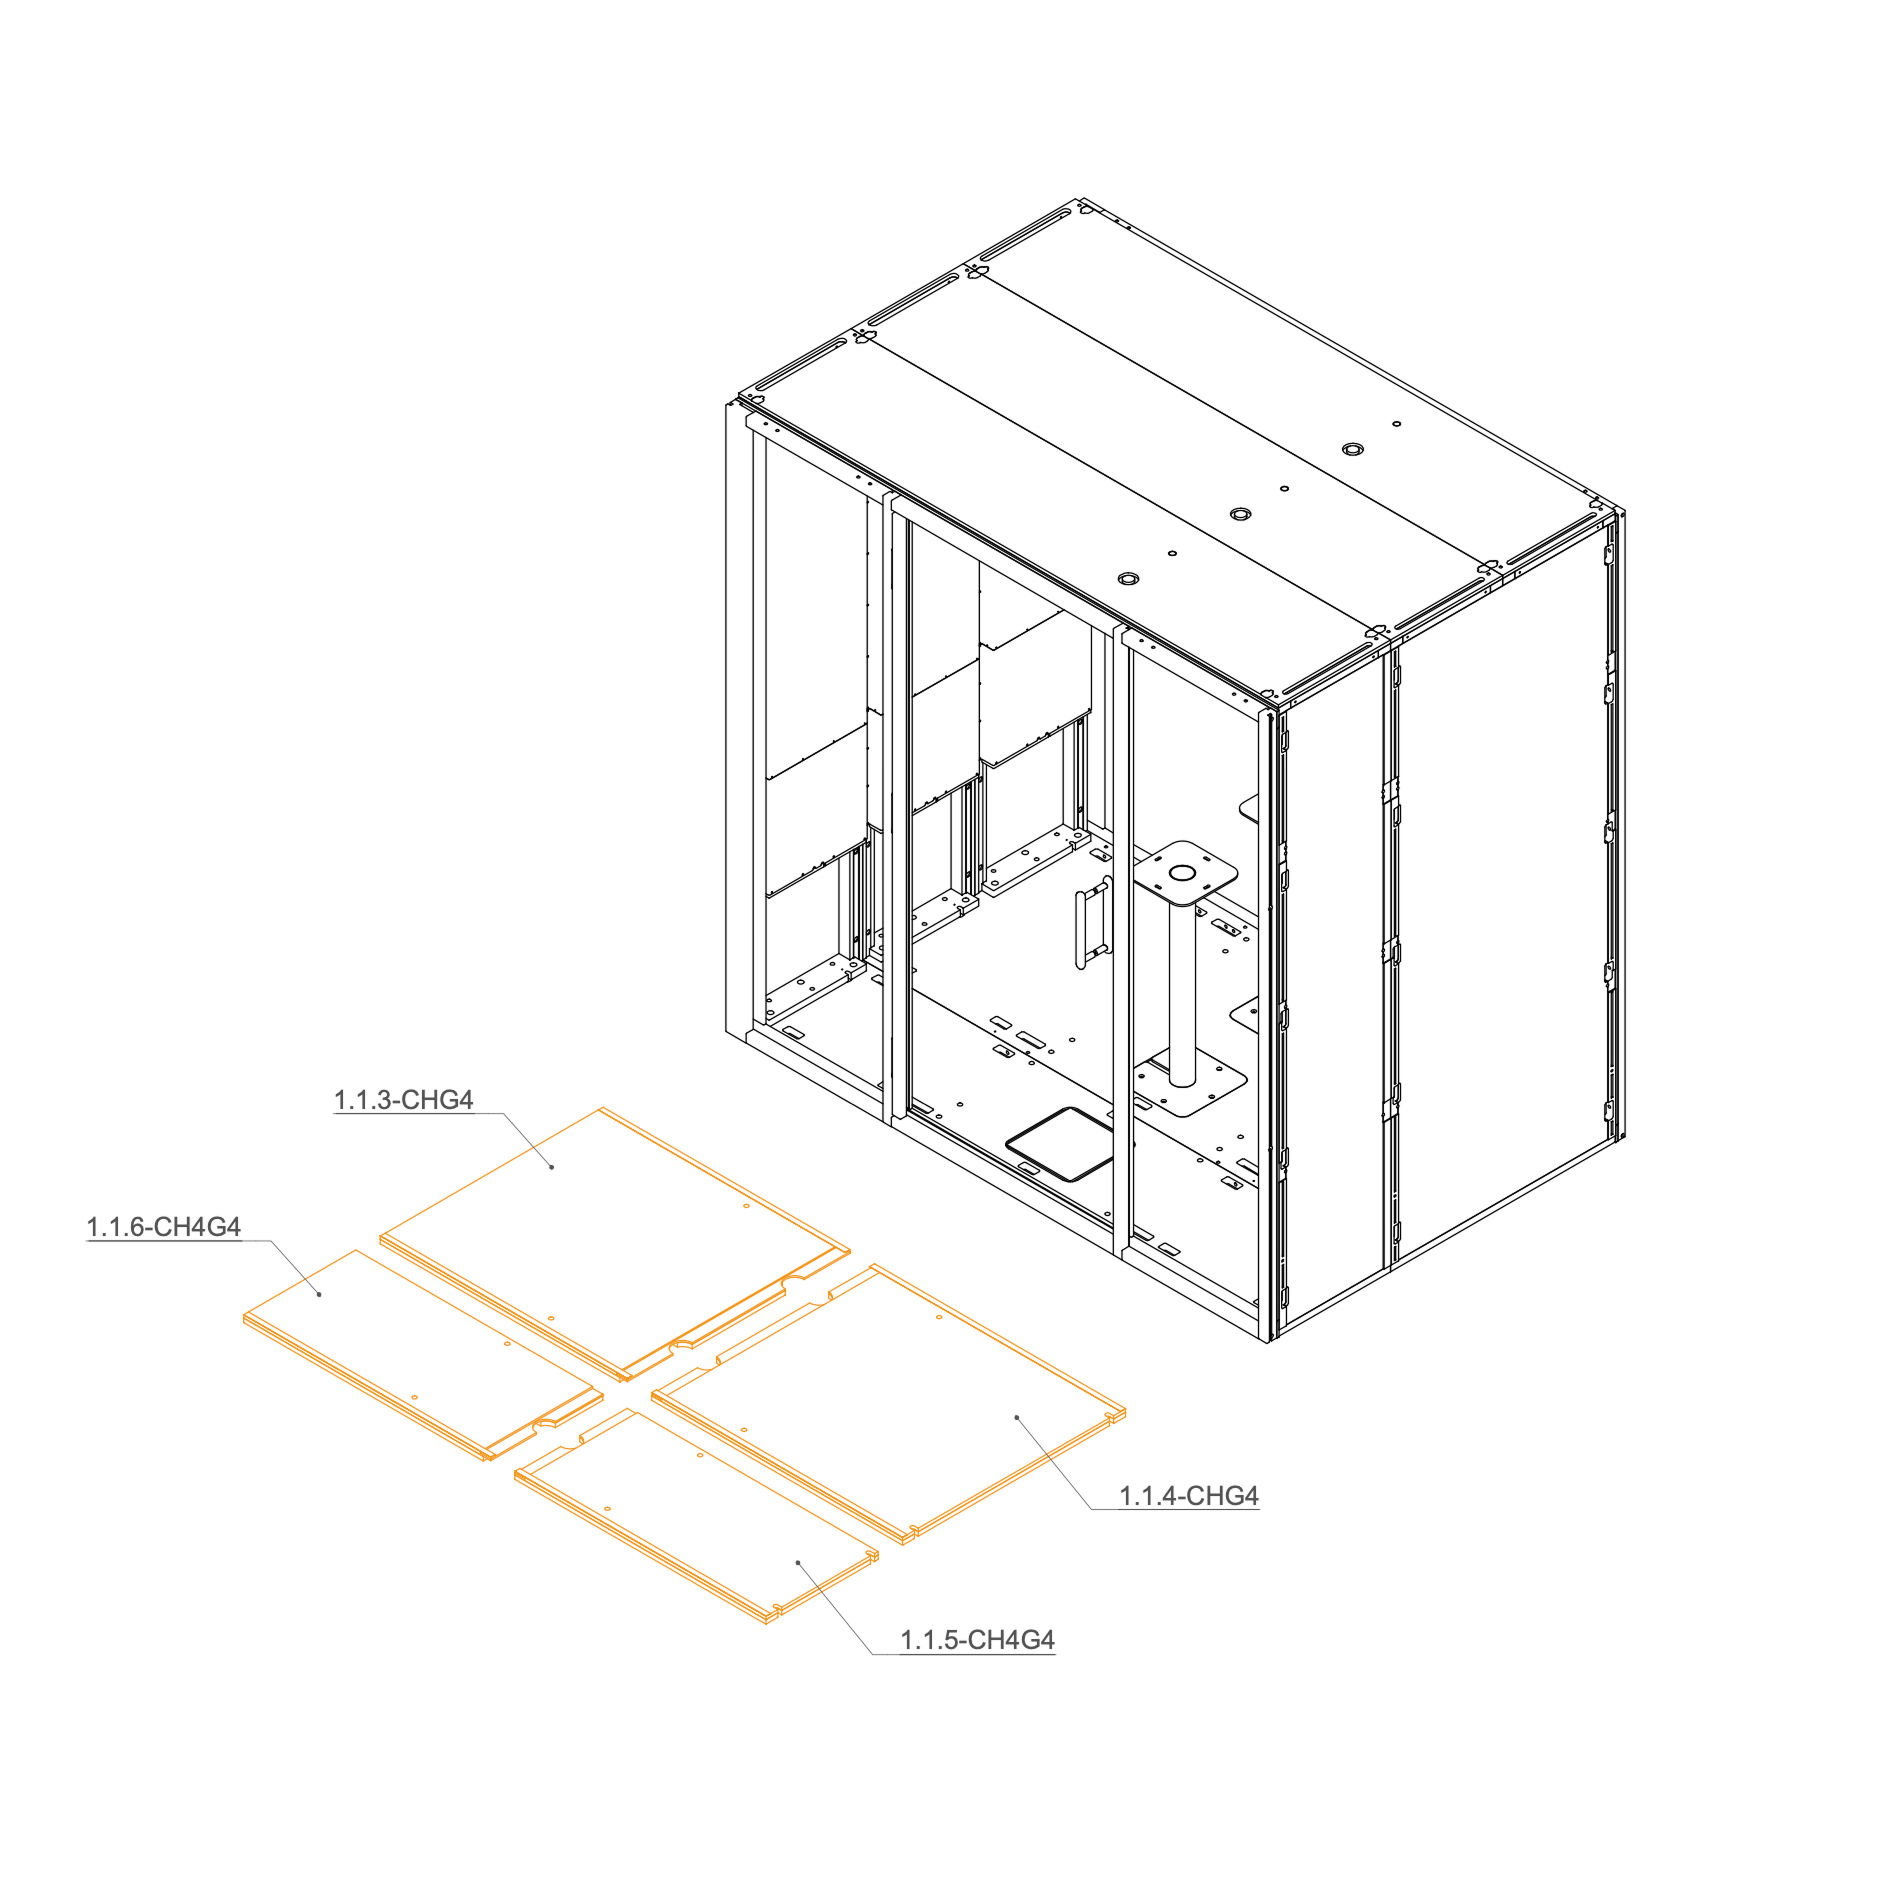
Exterior Panels
21. Install Exterior Panels
Install all exterior panels labeled 8.1-F, CH4G4.
Install at least four dowel connectors on each external panel and add dowel pin to the bottom panel on each side.
Proceed with the remaining panels, making sure each is seated properly and flush with the frame.
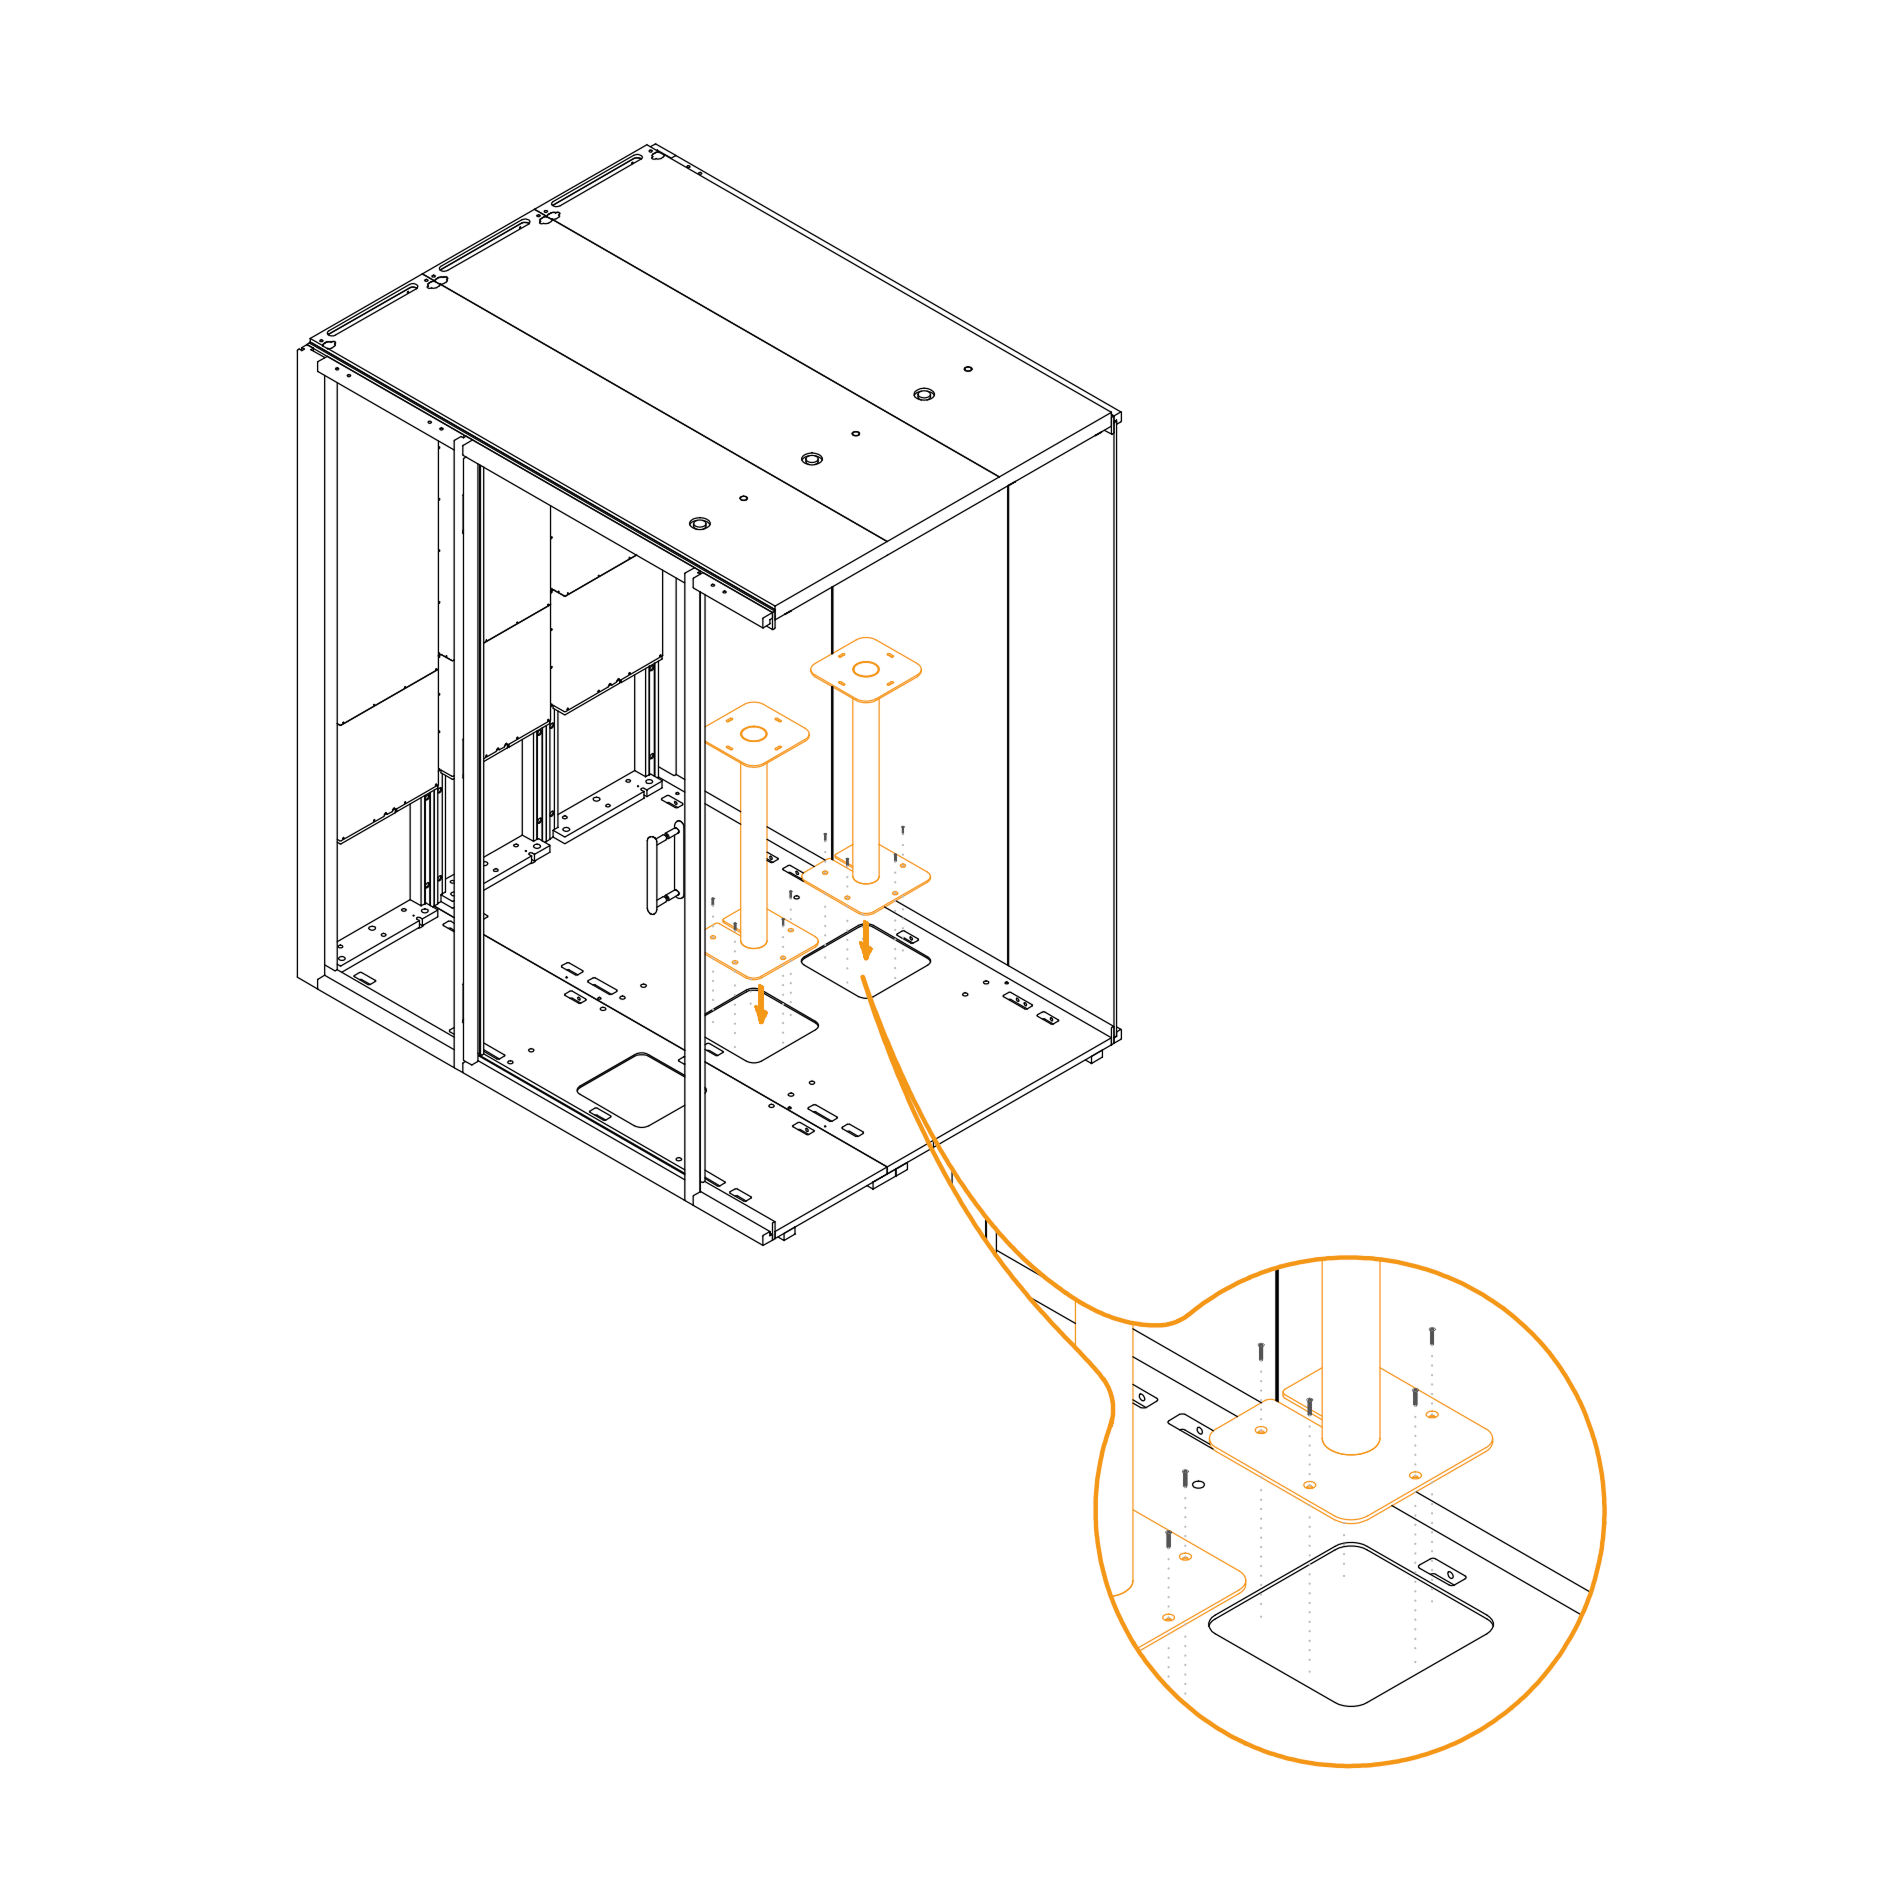
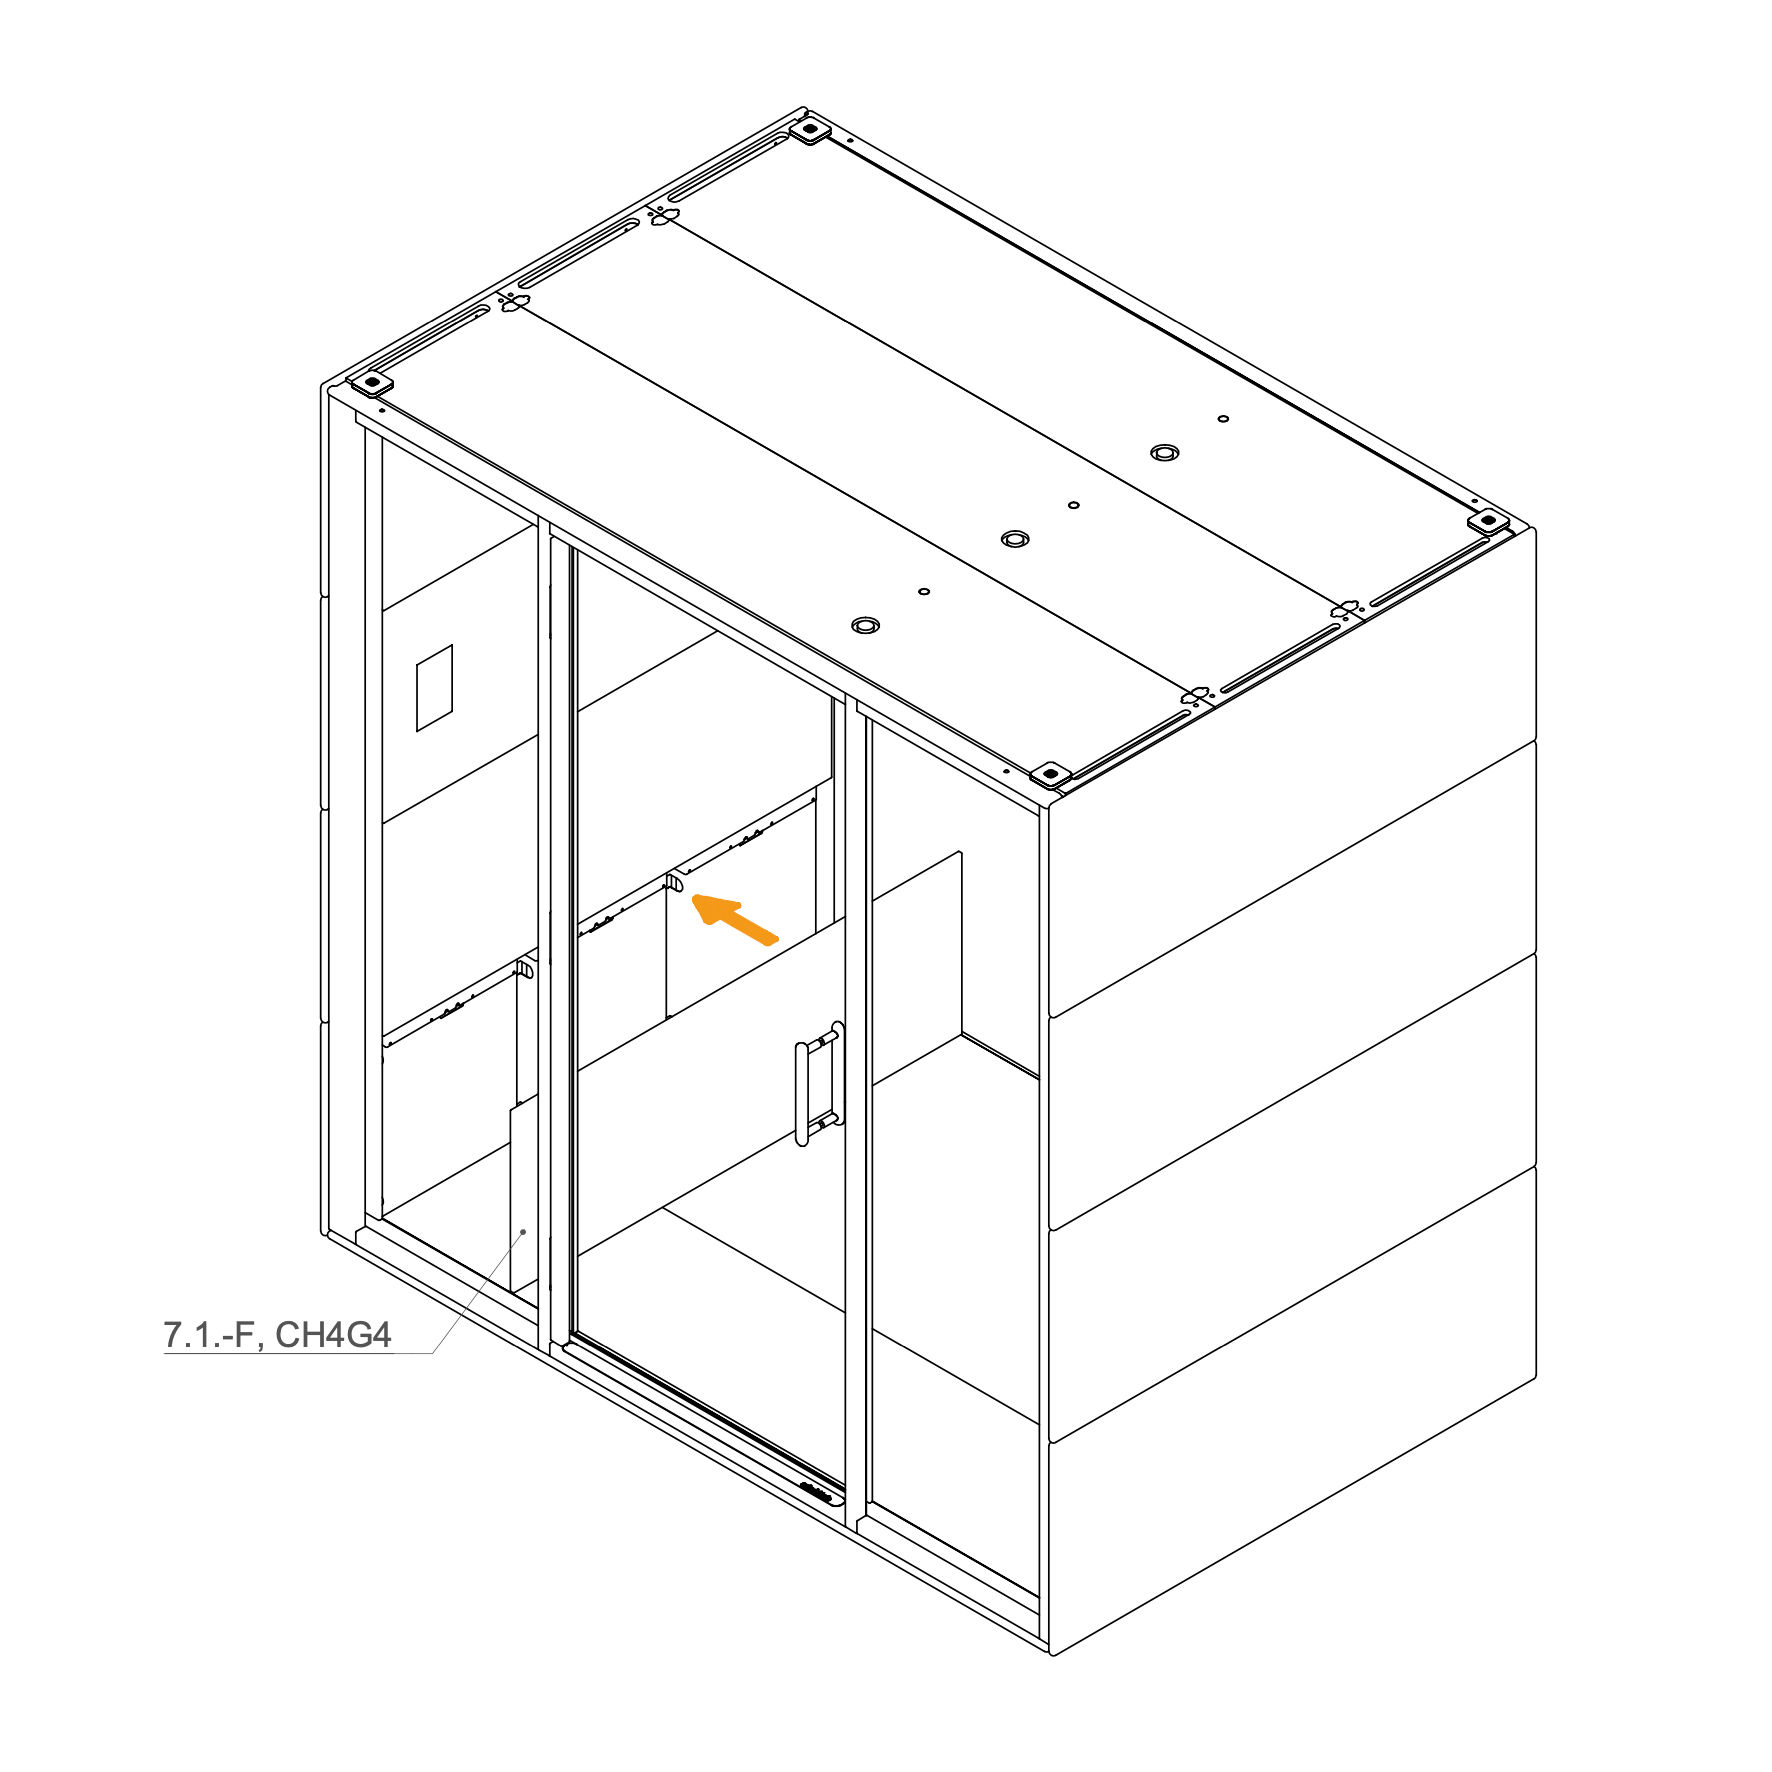
Insert the lower interior panel (7.1-SP, CH2G4) by positioning it into the space under the table.
Ensure the panel is properly aligned and securely seated
Initial Setup
28. Initial Setup
Following assembly, authorized personnel must perform a mandatory initial setup for all GEN4 products. This involves accessing the display settings to configure key parameters, such as the pod model, language, and time synchronization, to ensure all components function correctly.