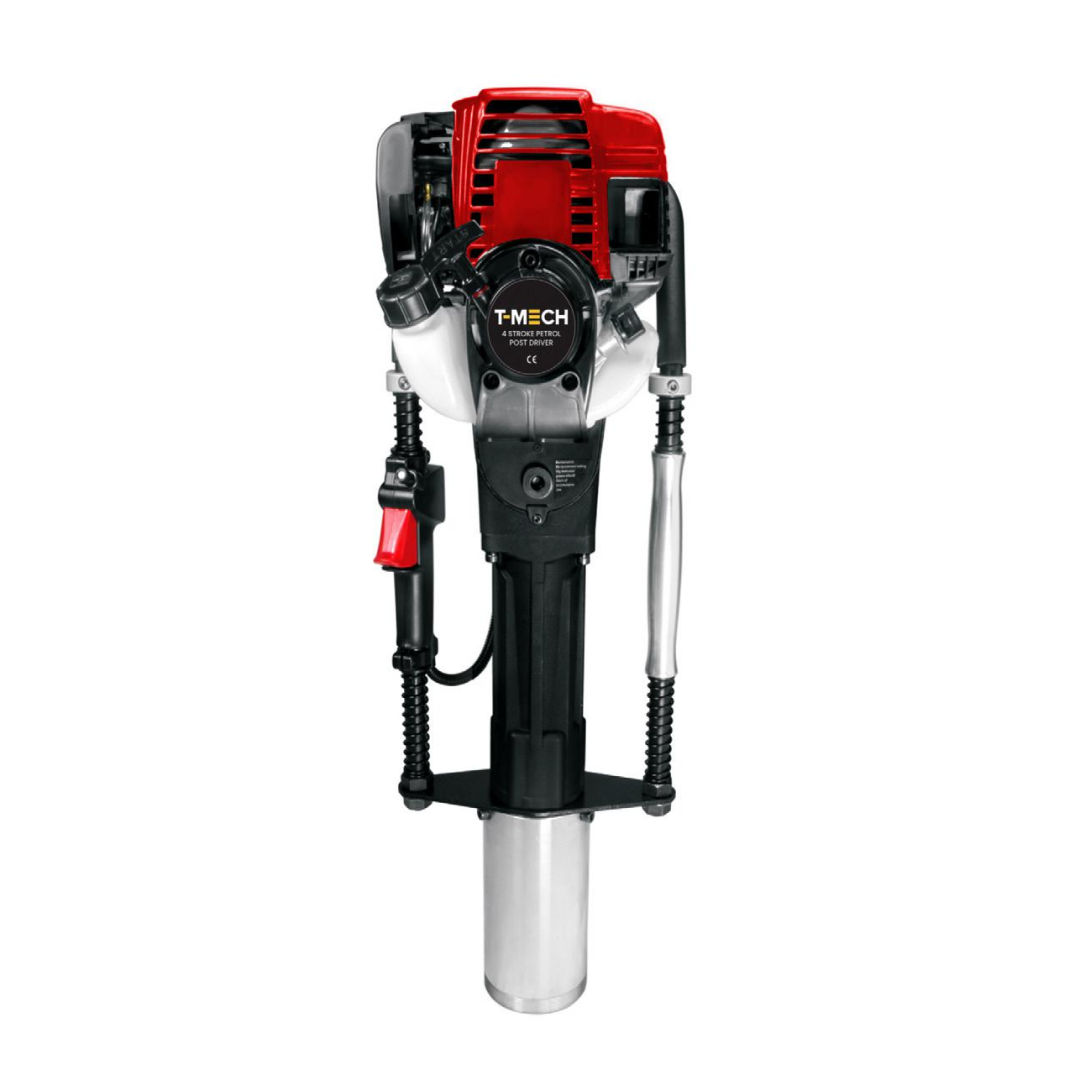
Power through post installations with this premium 4-stroke post driver. Featuring a 37.7cc engine, 1350rpm impact force, and low-vibration handles, it’s perfect for fencing, signs, and more. Includes multiple attachments, tool kit, and carry case for easy transport.
Manufacturer:
Monster Group UK Limited, Monster House
19-23 Alan Farnaby Way,
Industrial Estate Sheriff Hutton,
York
YO60 6PG
Person Responsible:
Rana Harvey, Monster Group UK Limited,
Monster House
19-23 Alan Farnaby Way,
Industrial Estate Sheriff Hutton,
York
YO60 6PG,
England,
+441347878880
EU
Manufacturer:
Monster Group BV,
Van Heemskerckweg 28A & B,
Venlo 5928LL
Netherlands
+441347878880
Person Responsible:
Rana Harvey,
Monster Group BV,
Van Heemskerckweg 28A & B,
Venlo 5928LL,
Netherlands,
+44134787888
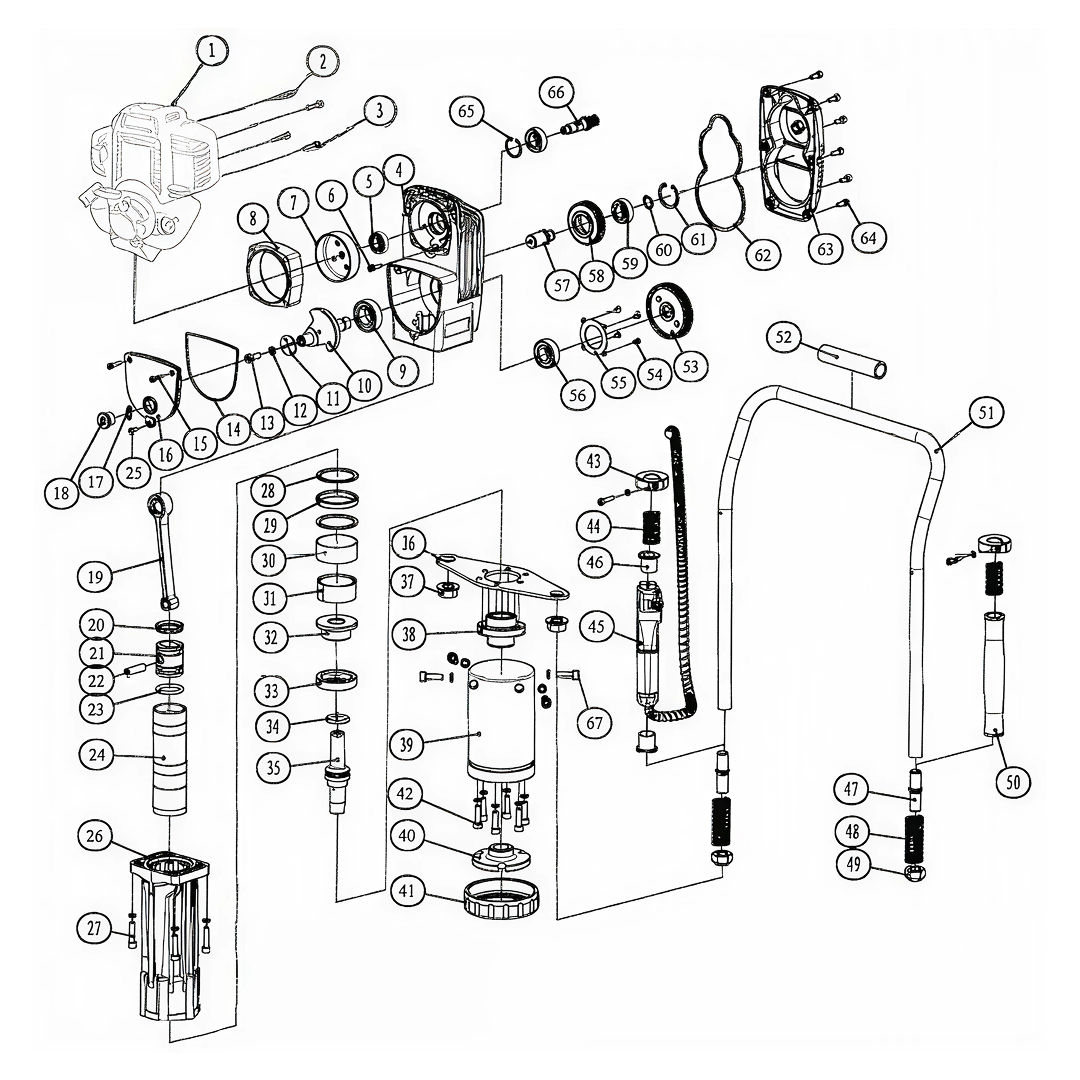
Materials
1
Carrying Handle
2
Fuel Tank
3
Throttle Switch
4
Hammer Case
5
Dampening Spring
6
Guide Sleeve
7
Air Filter
8
Oil Level Gauge
9
Grease Plug
10
Handle
11
Support Plate
12
Guide Sleeve Socket
1. First Fuelling
The engine will need to be filled with oil.
Use unleaded petrol for the fuel tank.
Use SAE10W-30 oil for the oil tank. SAE10W-30 is recommended for general use. Other viscosities shown in the chart may be used when the average temperature in your area is within the indicated range.
Add in a well ventilated place.
Do not add too much oil or unleaded petrol. The oil and petrol should not exceed the neck of their separate filling ports. If any oil or petrol spills, wait until the fuel is removed or volatilizes completely and then restart the engine.
2. Operational Instructions
Press the Start/Stop switch to START.
Set the choke control to the OFF position.
Repeatedly press the primer bulb until you see the fuel flow through the transparent hose from the fuel tank to the carburetor. (Close the air vent when the engine is in the state of cooling, and only open the air vent when the engine is heated).
Set the machine upright and hold the operation handle with one hand while quickly pulling the recoil starter. The engine should start after a few pulls. Open the air vent completely once the engine has started, and move the choke control to the ON position.
Carry out up to 5 minutes of idle operation to warm up the machine.
Once the engine is warmed up, squeeze the throttle lever and hold the handle grip firmly as you slowly lower the Post Driver and make contact with a post.
To stop, release the throttle and turn the Start/Stop switch to STOP.
3. Driving in a Post
Stand the post in the required position by lightly tapping the post into the ground with a hammer. Ensure that the post is stable enough to take the weight of the Post Driver.
Doing this step in batches will save time.
You can use a guide wire to maintain a straight fence line.
Lift the Post Driver over and on to the post. Ensure that the post is in a vertical position and the post driver is on a parallel plane to the post.
Ensure the operator maintains a stable standing position and keeps their body weight balanced.
Pull down on the Post Driver with 5-10kg of downward force. This ensures that the internal hammer mechanism is engaged in the correct operating position, and reduces unexpected movement while driving.
Gently pull the throttle trigger until the hammer action is felt.
Once the post can be seen as being driven into the ground, fully depress the throttle trigger and drive the post to the desired depth.
If the post does not drive into the ground, cease driving and move the post along and try again.
Once the desired depth has been reached, release the throttle so the engine is idling and the hammer action has stopped.
Move to the next post and repeat.
To stop the machine, press the Start/Stop switch to STOP.
4. Maintenance: Spark Plug
The correct air gap should be 0.5mm.
Stop the engine and allow it to cool. Using the multi-tool remove the spark plug.
Clean any dirt from around the spark plug. Do not let any dirt enter the cylinder. Re-gap the spark plug using a Feeler Gauge, replace and tighten.
5. Maintenance: Air Filter
Check the air filter regularly.
Clean the air filter with warm water and detergent, and then dry it thoroughly.
Replace the filter if it is damaged.
The air filter sponge should be replaced after 36 hours of work.
6. Maintenance: Fuel Filter
If the fuel filter is clogging, the speed of the petrol driver will slow and it will have a weak impact upon posts. When cleaning the fuel filter, clean the fuel tank.
7. Maintenance: Carburetor
The fuel tank and carburetor are usually left with residual oil. This will eventually plug the oil line which will stop the engine from working. Therefore, if the machine has not been in use for a long period of time, be sure to take the fuel completely out. Do this by pressing the carburetor primer bulb to drain the oil.
8. Maintenance: Impact Cylinder
After working for an accumulated 50 hours, fill the impact cylinder with grease.
9. Maintenance: Oil Compartment.
Add oil into the oil compartment.
10. Maintenance: Oil Change
Make sure you change the oil regularly as there are many parts in the engine that need to be lubricated. Running the engine with a low oil level can cause engine damage.
Drain the used oil when the engine is warm. Warm oil drains quickly and completely.
Place a suitable container below the engine to catch the used oil.
Remove the oil filler cap/dipstick and drain the oil into the container by tipping the engine toward the oil filler neck. Please dispose of used motor oil in a manner compatible with the environment. Do not throw in the bin, pour on the ground, or down a drain.
With the engine in a level position, fill to the bottom edge of the oil fill hole with the recommended oil.
Reinstall the oil filler cap/dipstick securely.
11. Maintenance: Muffler
Regularly remove dirt on the inlet and outlet of the muffler.
12. Maintenance: Cylinder Heat Sink
Regularly remove dust to ensure cylinder cooling.
13. Post Driver Maintenance Schedule
For normal operating conditions. Under strenuous conditions like dusty environments or long work hours, adjust frequency accordingly.
Before Each Use:
The Whole Machine: Check screw tightness
Control Handle/Stop Button: Check
Fuel Tank / Fuel Tank Cap: Check
Screw and Nut: Check
After Each Use or Every Day:
The Whole Machine: Clean
Air Filter: Clean
Fuel Tank / Fuel Tank Cap: Clean
After Filling Oil:
Fuel Tank / Fuel Tank Cap: Check
Every Week:
Air Filter: Replace
Fuel Filter: Clean
Fuel Tank / Fuel Tank Cap: Tighten
Muffler: Check
Cylinder Cooling Fan: Check
Every Month:
Fuel Filter: Replace
Reduction Gearbox / Impact Cylinder: Clean and add grease
Cross Recessed Countersunk Head Screw M5×10 – Qty: 4
Hearing Holder – Qty: 1
Deep Groove Ball Bearing 6204-2RZ – Qty: 1
Gear Shift – Qty: 1
Middle Gear – Qty: 1
Deep Groove Ball Bearings 6203-2RZ – Qty: 2
Shaft Retainer 17 – Qty: 1
Hole Retainer 40 – Qty: 1
Gearbox Cover Seal – Qty: 1
Gearbox Cover – Qty: 1
Inner Hexagon Cheese-head Screw M6×16 – Qty: 6
Hole Retainer 35 – Qty: 1
Small Gear – Qty: 1
Inner Hexagon Cheese-head Screw M8×20 – Qty: 4
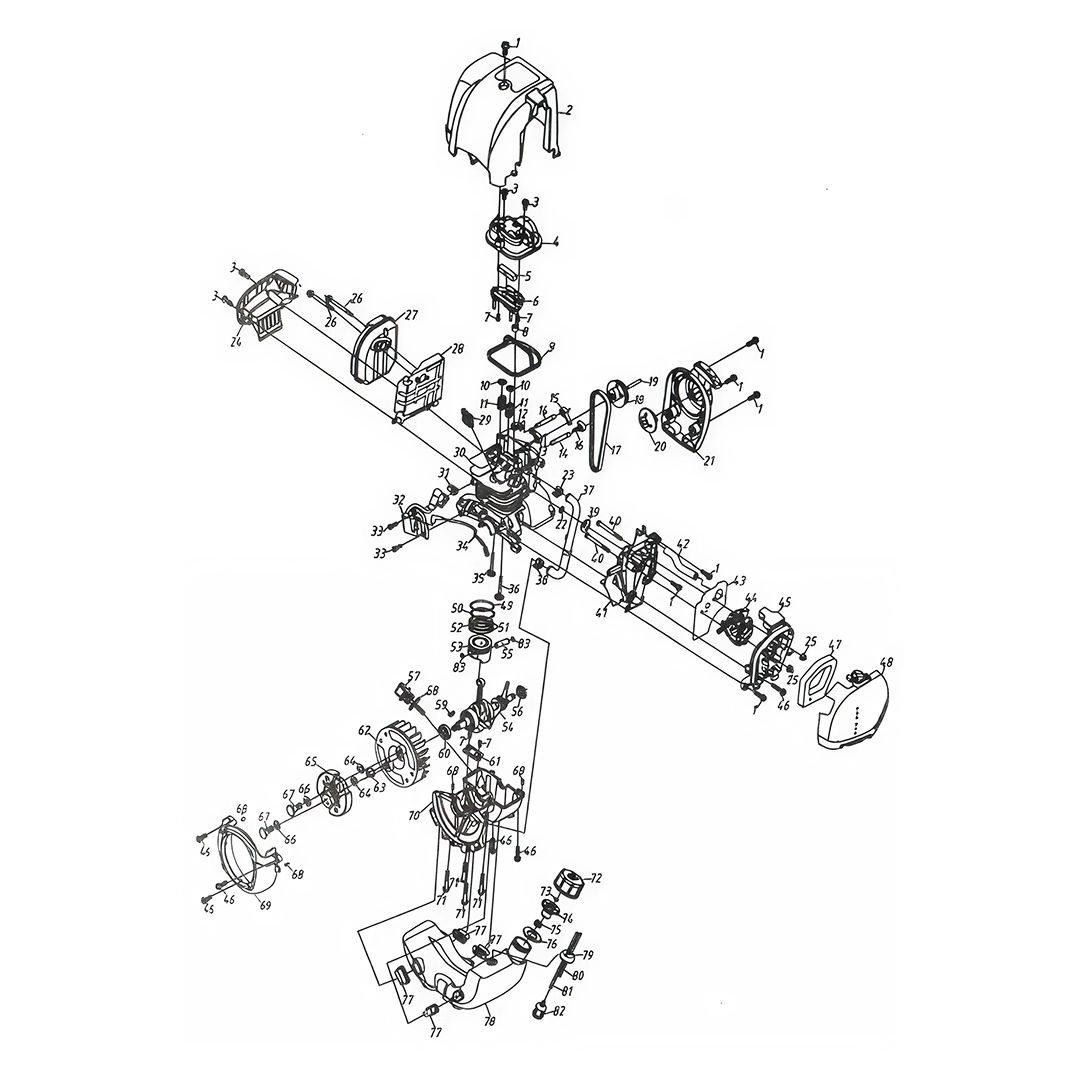
15. Engine Parts List
Socket M5×15 – Qty: 7
Cover – Qty: 1
Socket M5×12 – Qty: 3
Cylinder Head Cover – Qty: 1
Filter – Qty: 1
Inner Head Cover – Qty: 1
Screw M4×8 – Qty: 4
Head Cover Grommet – Qty: 1
Head Cover Seal – Qty: 1
Valve Spring Retainer – Qty: 2
Valve Spring – Qty: 2
Exhaust Valve Rocker – Qty: 1
Intake Valve Rocker – Qty: 1
Rocker Arm Pin – Qty: 2
Exhaust Valve Lifter – Qty: 1
Intake Valve Lifter – Qty: 1
Timing Belt – Qty: 1
Cam Gear – Qty: 1
Cam Pin Roller – Qty: 1
Recoil Starter Pulley – Qty: 1
Starter Assembly – Qty: 1
Intake Pipe Flat Gasket – Qty: 1
Clamp – Qty: 1
Air Guide – Qty: 1
Flange Nut M6 – Qty: 2
Stud Bolt – Qty: 2
Muffler – Qty: 1
Air Exhaust Guide – Qty: 1
Spark Plug – Qty: 1
Cylinder Block – Qty: 1
Ignition Wire Clamp – Qty: 1
Ignition Coil Assembly – Qty: 1
Socket M4×14 – Qty: 2
Stop Wire – Qty: 1
Exhaust Valve – Qty: 1
Intake Valve – Qty: 1
Oil Tube – Qty: 1
Clamp – Qty: 1
Intake O-Ring – Qty: 1
Bolt M5×55 – Qty: 2
Intake Shroud – Qty: 1
Breather Tube – Qty: 1
Carburetor Gasket – Qty: 1
Carburetor – Qty: 1
Air Cleaning Housing – Qty: 1
Socket M5×22 – Qty: 6
Filter Element – Qty: 1
Air Cleaner Cover – Qty: 1
First Piston Ring – Qty: 1
Second Piston Ring – Qty: 1
Oil Rings – Qty: 2
Cushion Spring – Qty: 1
Piston – Qty: 1
Crankshaft Assembly – Qty: 1
Piston Pin – Qty: 1
Oil Seal – Qty: 1
Oil Level Gauge – Qty: 1
O-Shaped Seal Ring 14 × 2.65 – Qty: 1
Woodruff Key 3×5×13 – Qty: 1
Oil Seal – Qty: 1
Oil Valve – Qty: 1
Flywheel – Qty: 1
Nut M8 – Qty: 1
Spacer – Qty: 2
Clutch – Qty: 1
Clutch Washer – Qty: 2
Clutch Bolt – Qty: 1
Pin B4×8 – Qty: 4
Fan Cover – Qty: 1
Lower Crankcase – Qty: 1
Socket M5×32 – Qty: 4
Fuel Tank Cap – Qty: 1
Intake Nozzle – Qty: 1
Inner Cap – Qty: 1
End Cap – Qty: 1
Gasket – Qty: 1
Rubber Shock Absorber – Qty: 4
Fuel Tank – Qty: 1
Fuel Line Grommet – Qty: 1
Fuel Return Tube – Qty: 1
Fuel Inlet Tube – Qty: 1
Fuel Filter – Qty: 1
Piston Pin Retainer – Qty: 2
16. Resolution Guide
What do I do if there are missing parts from my order?
If there appears to be any part missing from your order, contact our friendly and helpful Customer Support Team within 7 days of receipt.
Please read through the guide below if you have any issues or faults with your device. The information covers and resolves the majority of frequently asked questions.
There are parts missing from my order.
If there appears to be any part missing from your package, contact our Customer Support team via the details on the Contact Us page within 7 days of receipt.
I am having difficulties starting the engine in its cooling state.
Check the choke control position and the engine start/stop switch are in the correct position. There might also be moisture on the spark plug—if this is the case, you will need to dry the igniter plug. If the spark plug is producing an electrical spark, you will need to replace the igniter plug. It also might be that too much fuel has been absorbed, and you will have to lessen the fuel supply.
I am having difficulties restarting the machine after a sudden stop.
The fuel may have run out or the carburetor is blocked. If this is the case, you will need to refill the fuel tank or clean the carburetor. The fuel filter may be blocked and will therefore need to be cleaned. However, it could be due to there being too much carbon deposit in the igniter plug—if this is the case, you will have to remove the carbon deposit.
My hammer mechanism is stuck in the casing.
To loosen the hammer mechanism to change it, simply twist the casing out of the fixing. If the casing becomes stuck, insert the metal bar into the holes on the casing and give it a tap. This should detach the casing from the main body without causing any damage.
For all other issues, please contact our Customer Support Team.
Previous stepCopy link to sharePrint / PDFNext step