Enhance your outdoor space with our composite fencing featuring integrated solar-powered LED lighting. Designed for both durability and style, this fencing combines the strength and low maintenance of composite materials with energy-efficient lighting that automatically activates at dusk. The discreetly embedded LEDs in each post provide ambient illumination, improving safety and visibility while adding a modern touch to your garden or property.
SKU
214896,214897,214898,214900,214901
GPSR Information
UK
Manufacturer:
Monster Group UK Limited, Monster House
19-23 Alan Farnaby Way,
Industrial Estate Sheriff Hutton,
York
YO60 6PG
Person Responsible:
Rana Harvey, Monster Group UK Limited,
Monster House
19-23 Alan Farnaby Way,
Industrial Estate Sheriff Hutton,
York
YO60 6PG,
England,
+441347878880
EU
Manufacturer:
Monster Group BV,
Van Heemskerckweg 28A & B,
Venlo 5928LL
Netherlands
+441347878880
Person Responsible:
Rana Harvey,
Monster Group BV,
Van Heemskerckweg 28A & B,
Venlo 5928LL,
Netherlands,
+44134787888
Materials
Fence Assembly
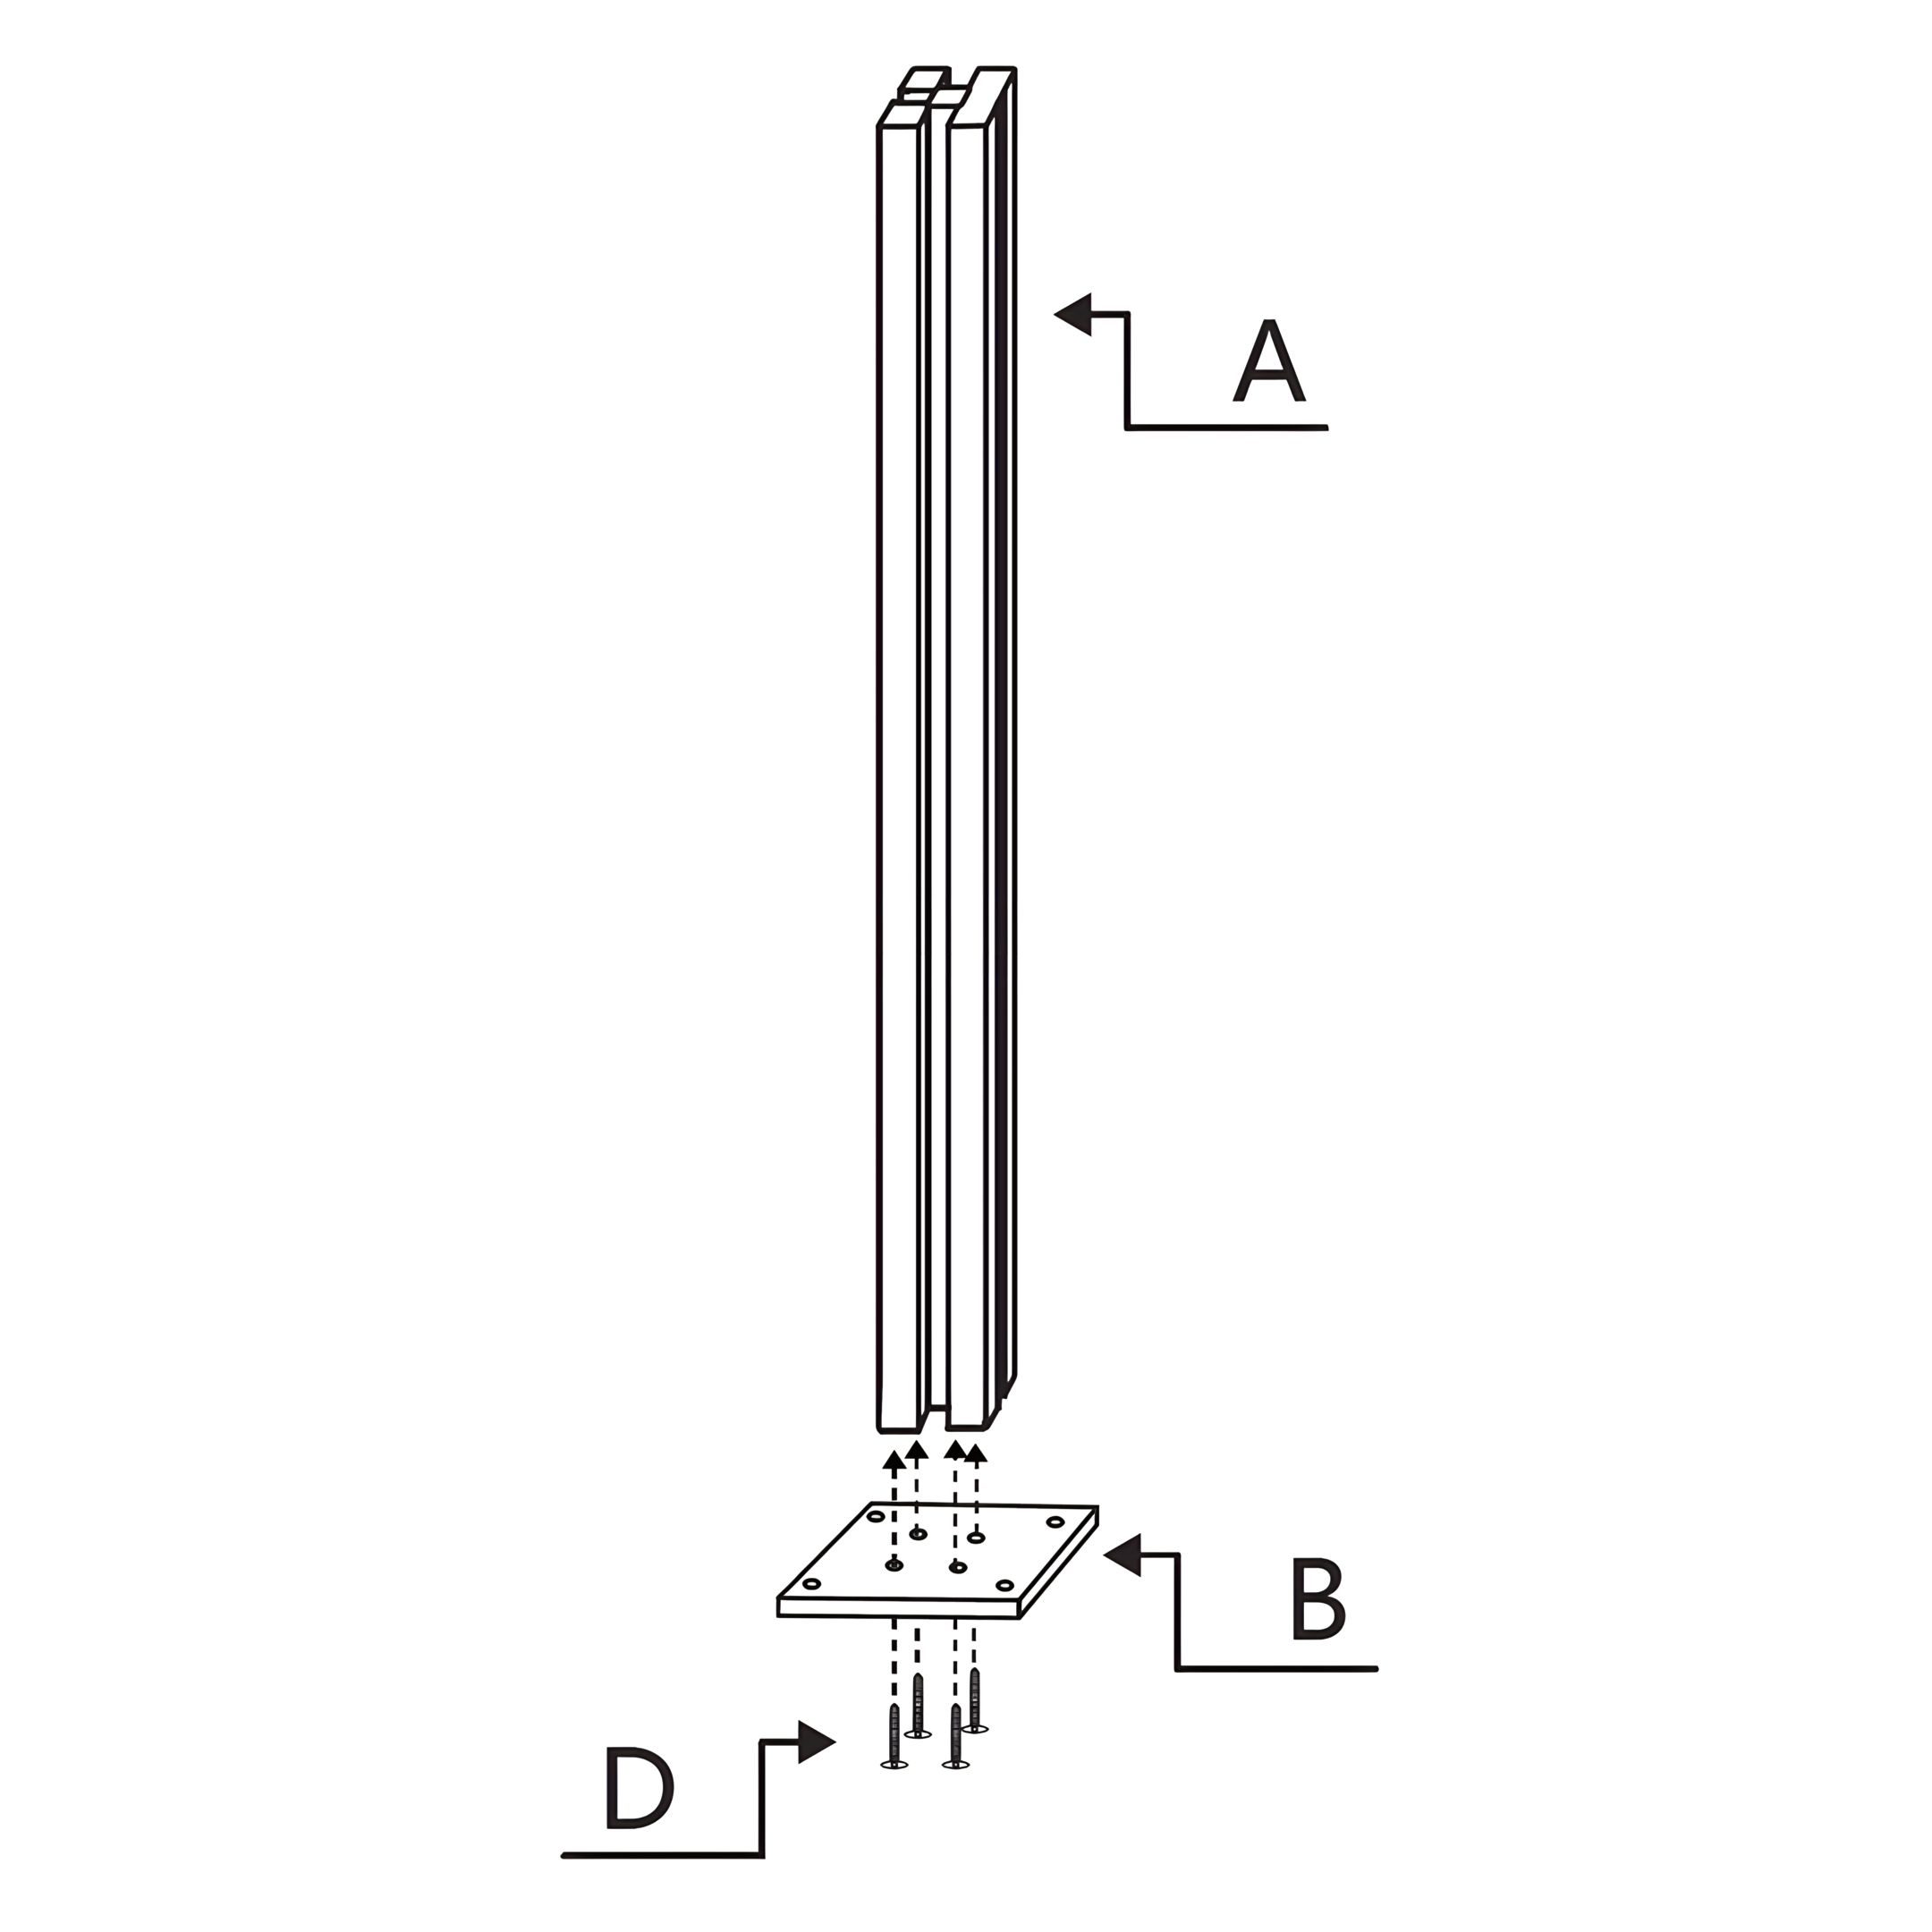
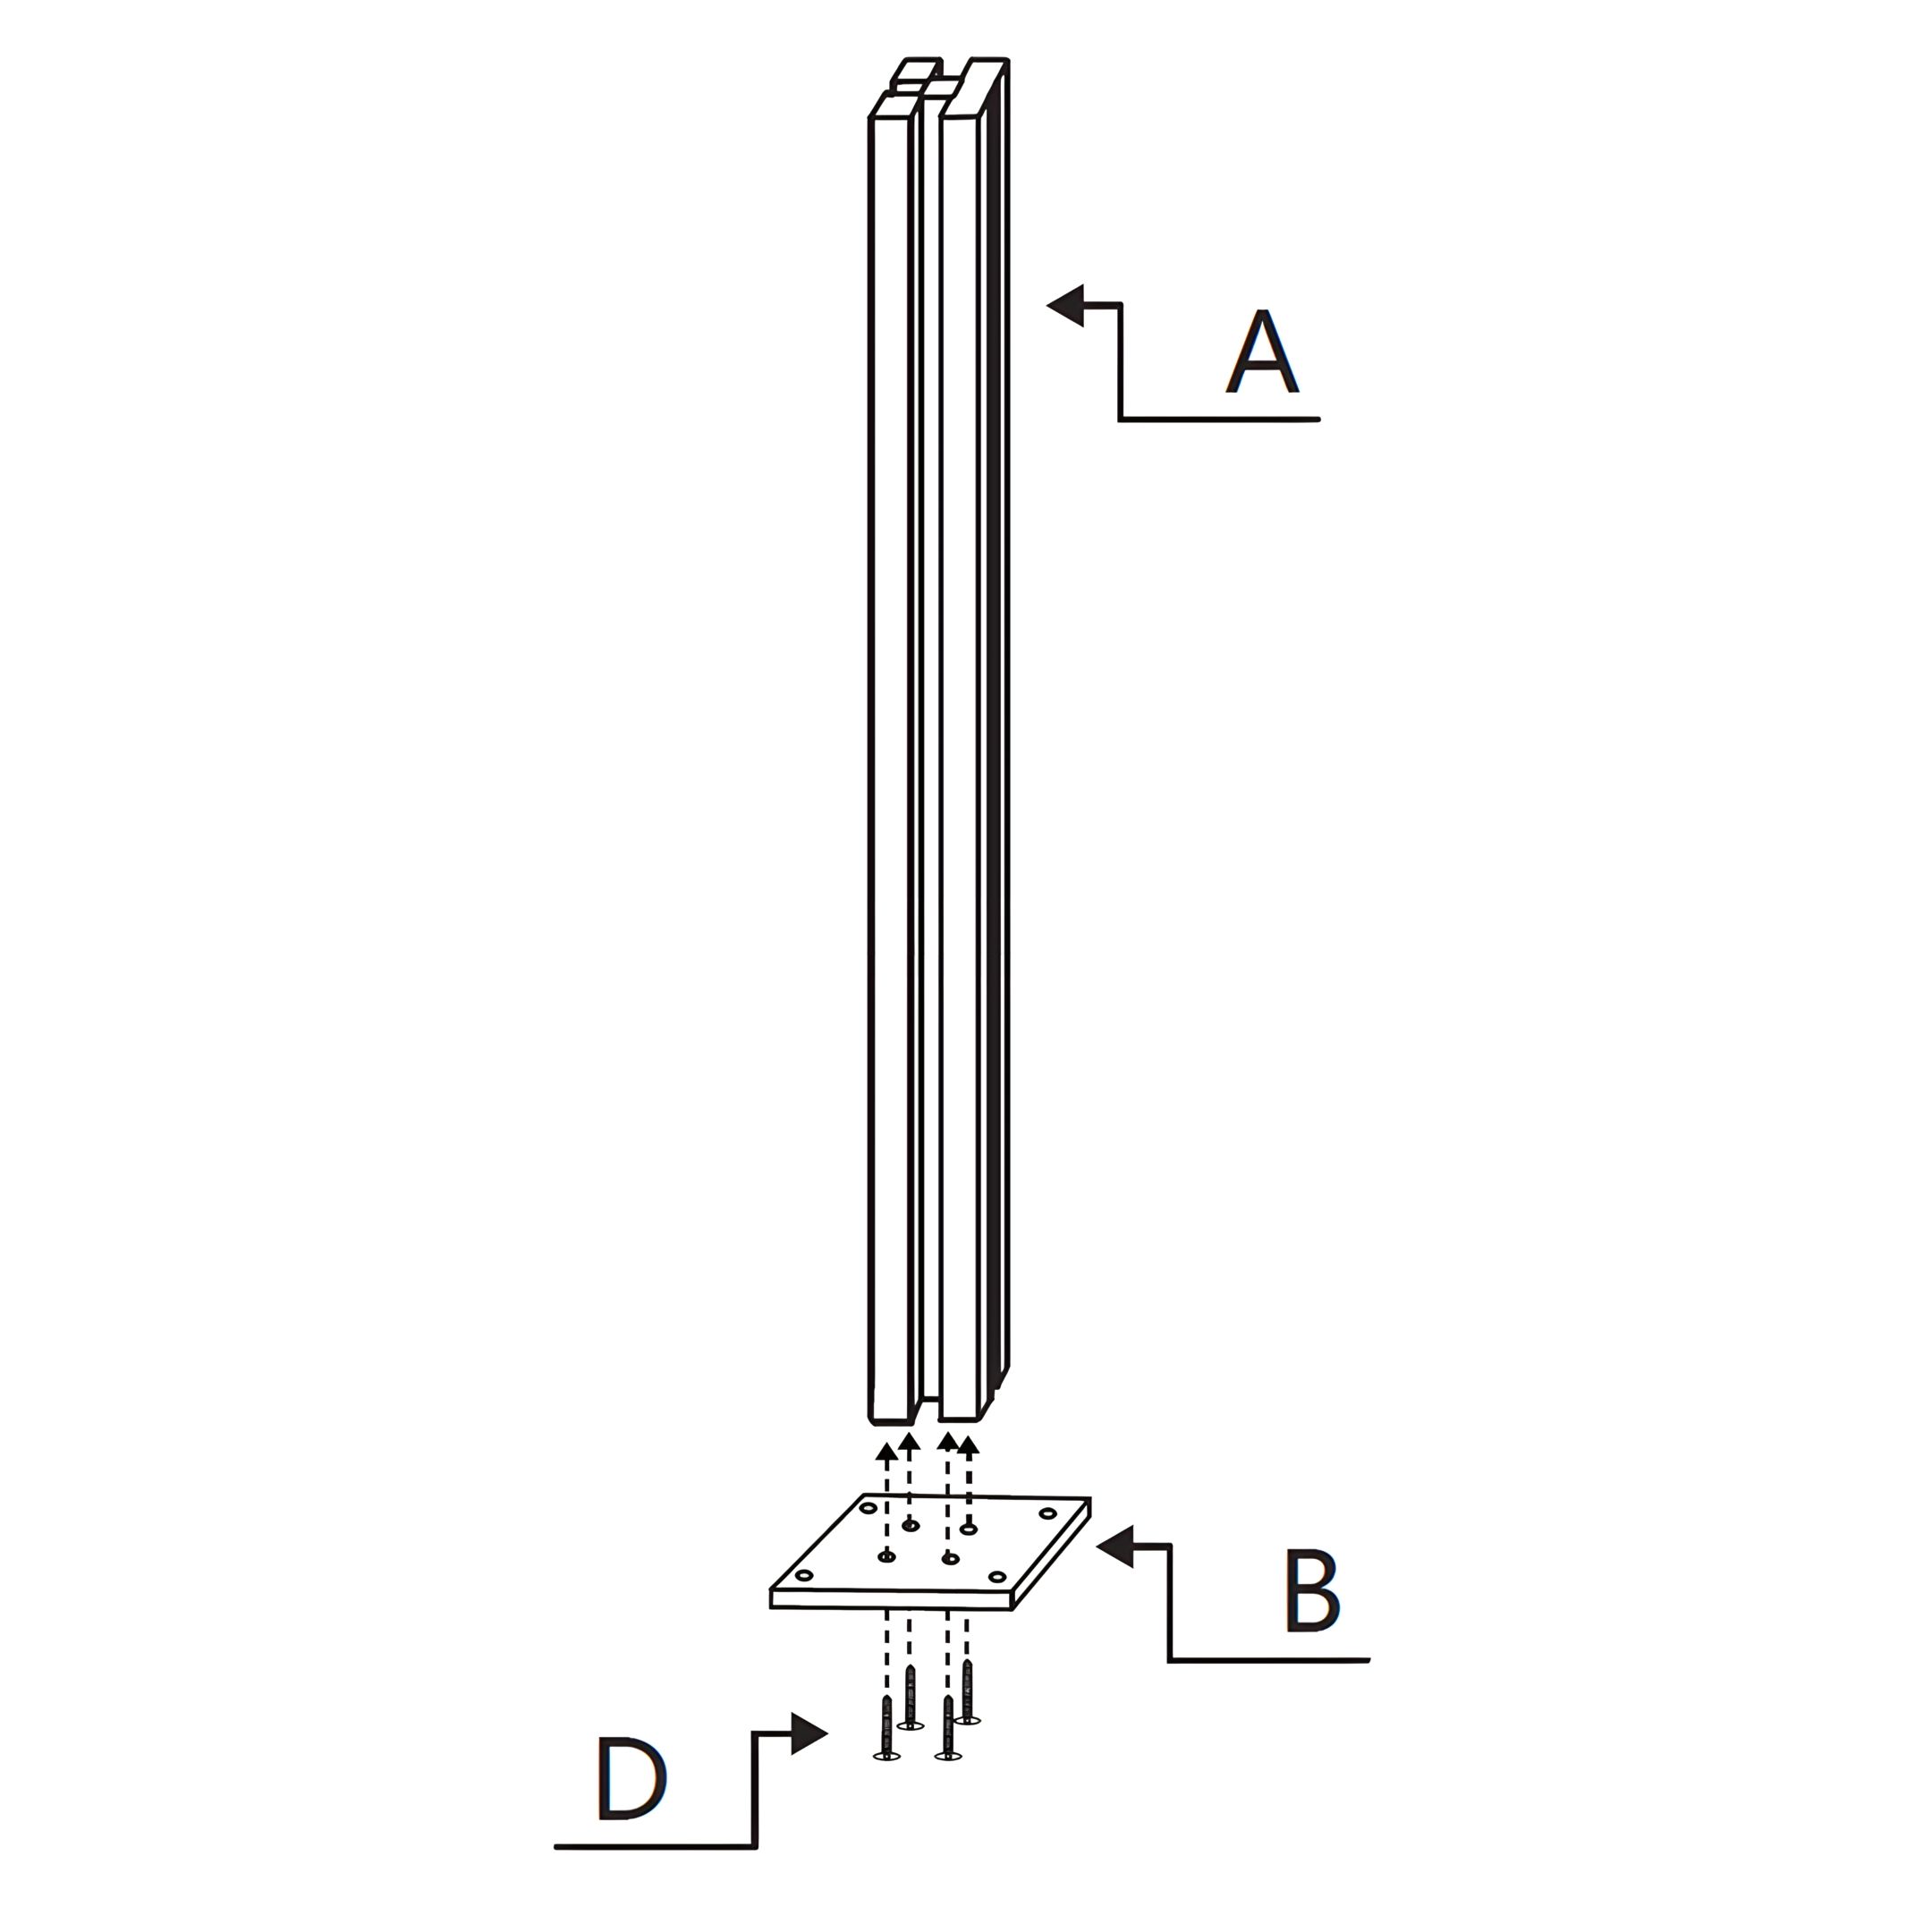
1. Post Assembly and Securing
To begin the assembly of the composite fencing system, follow these steps:
Secure the Fence Post Base (Part B) to the ground using the appropriate anchoring method.
Align the Aluminium LED Fence Post (Part A) with the Fence Post Base (Part B).
Attach the post to the base using the M4x45mm Screws (Part D), ensuring all screws are tightened securely.
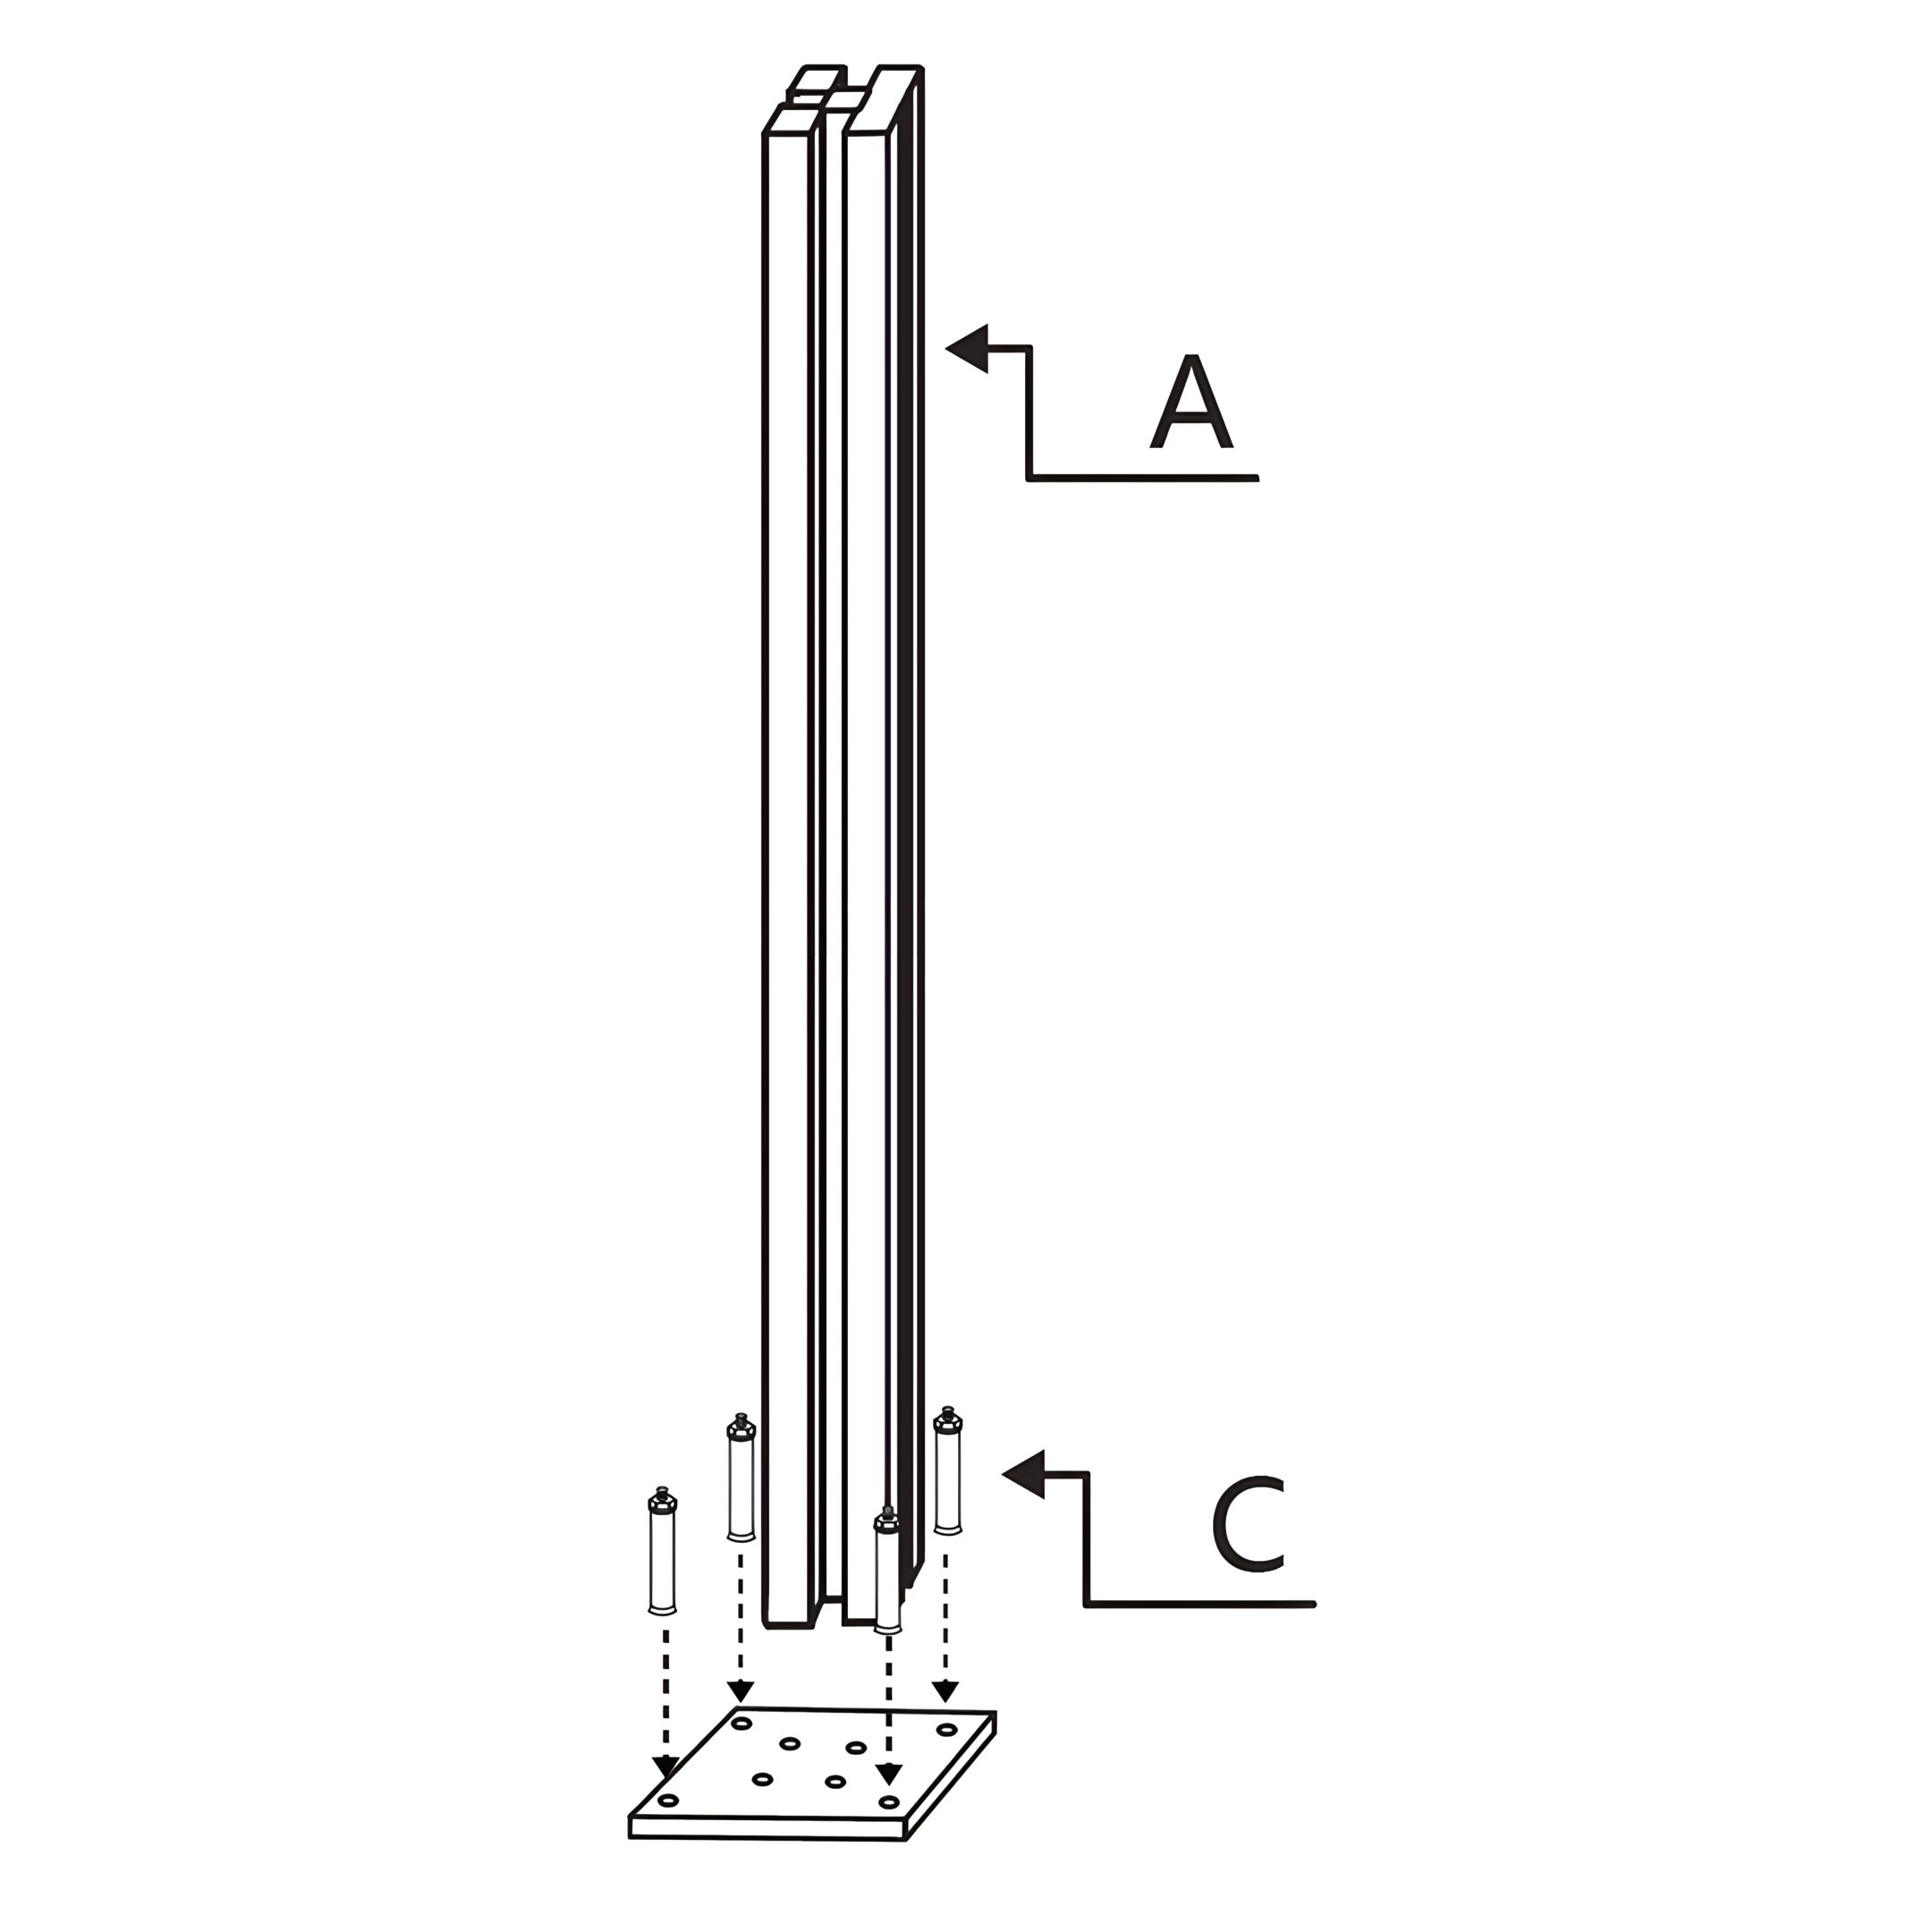
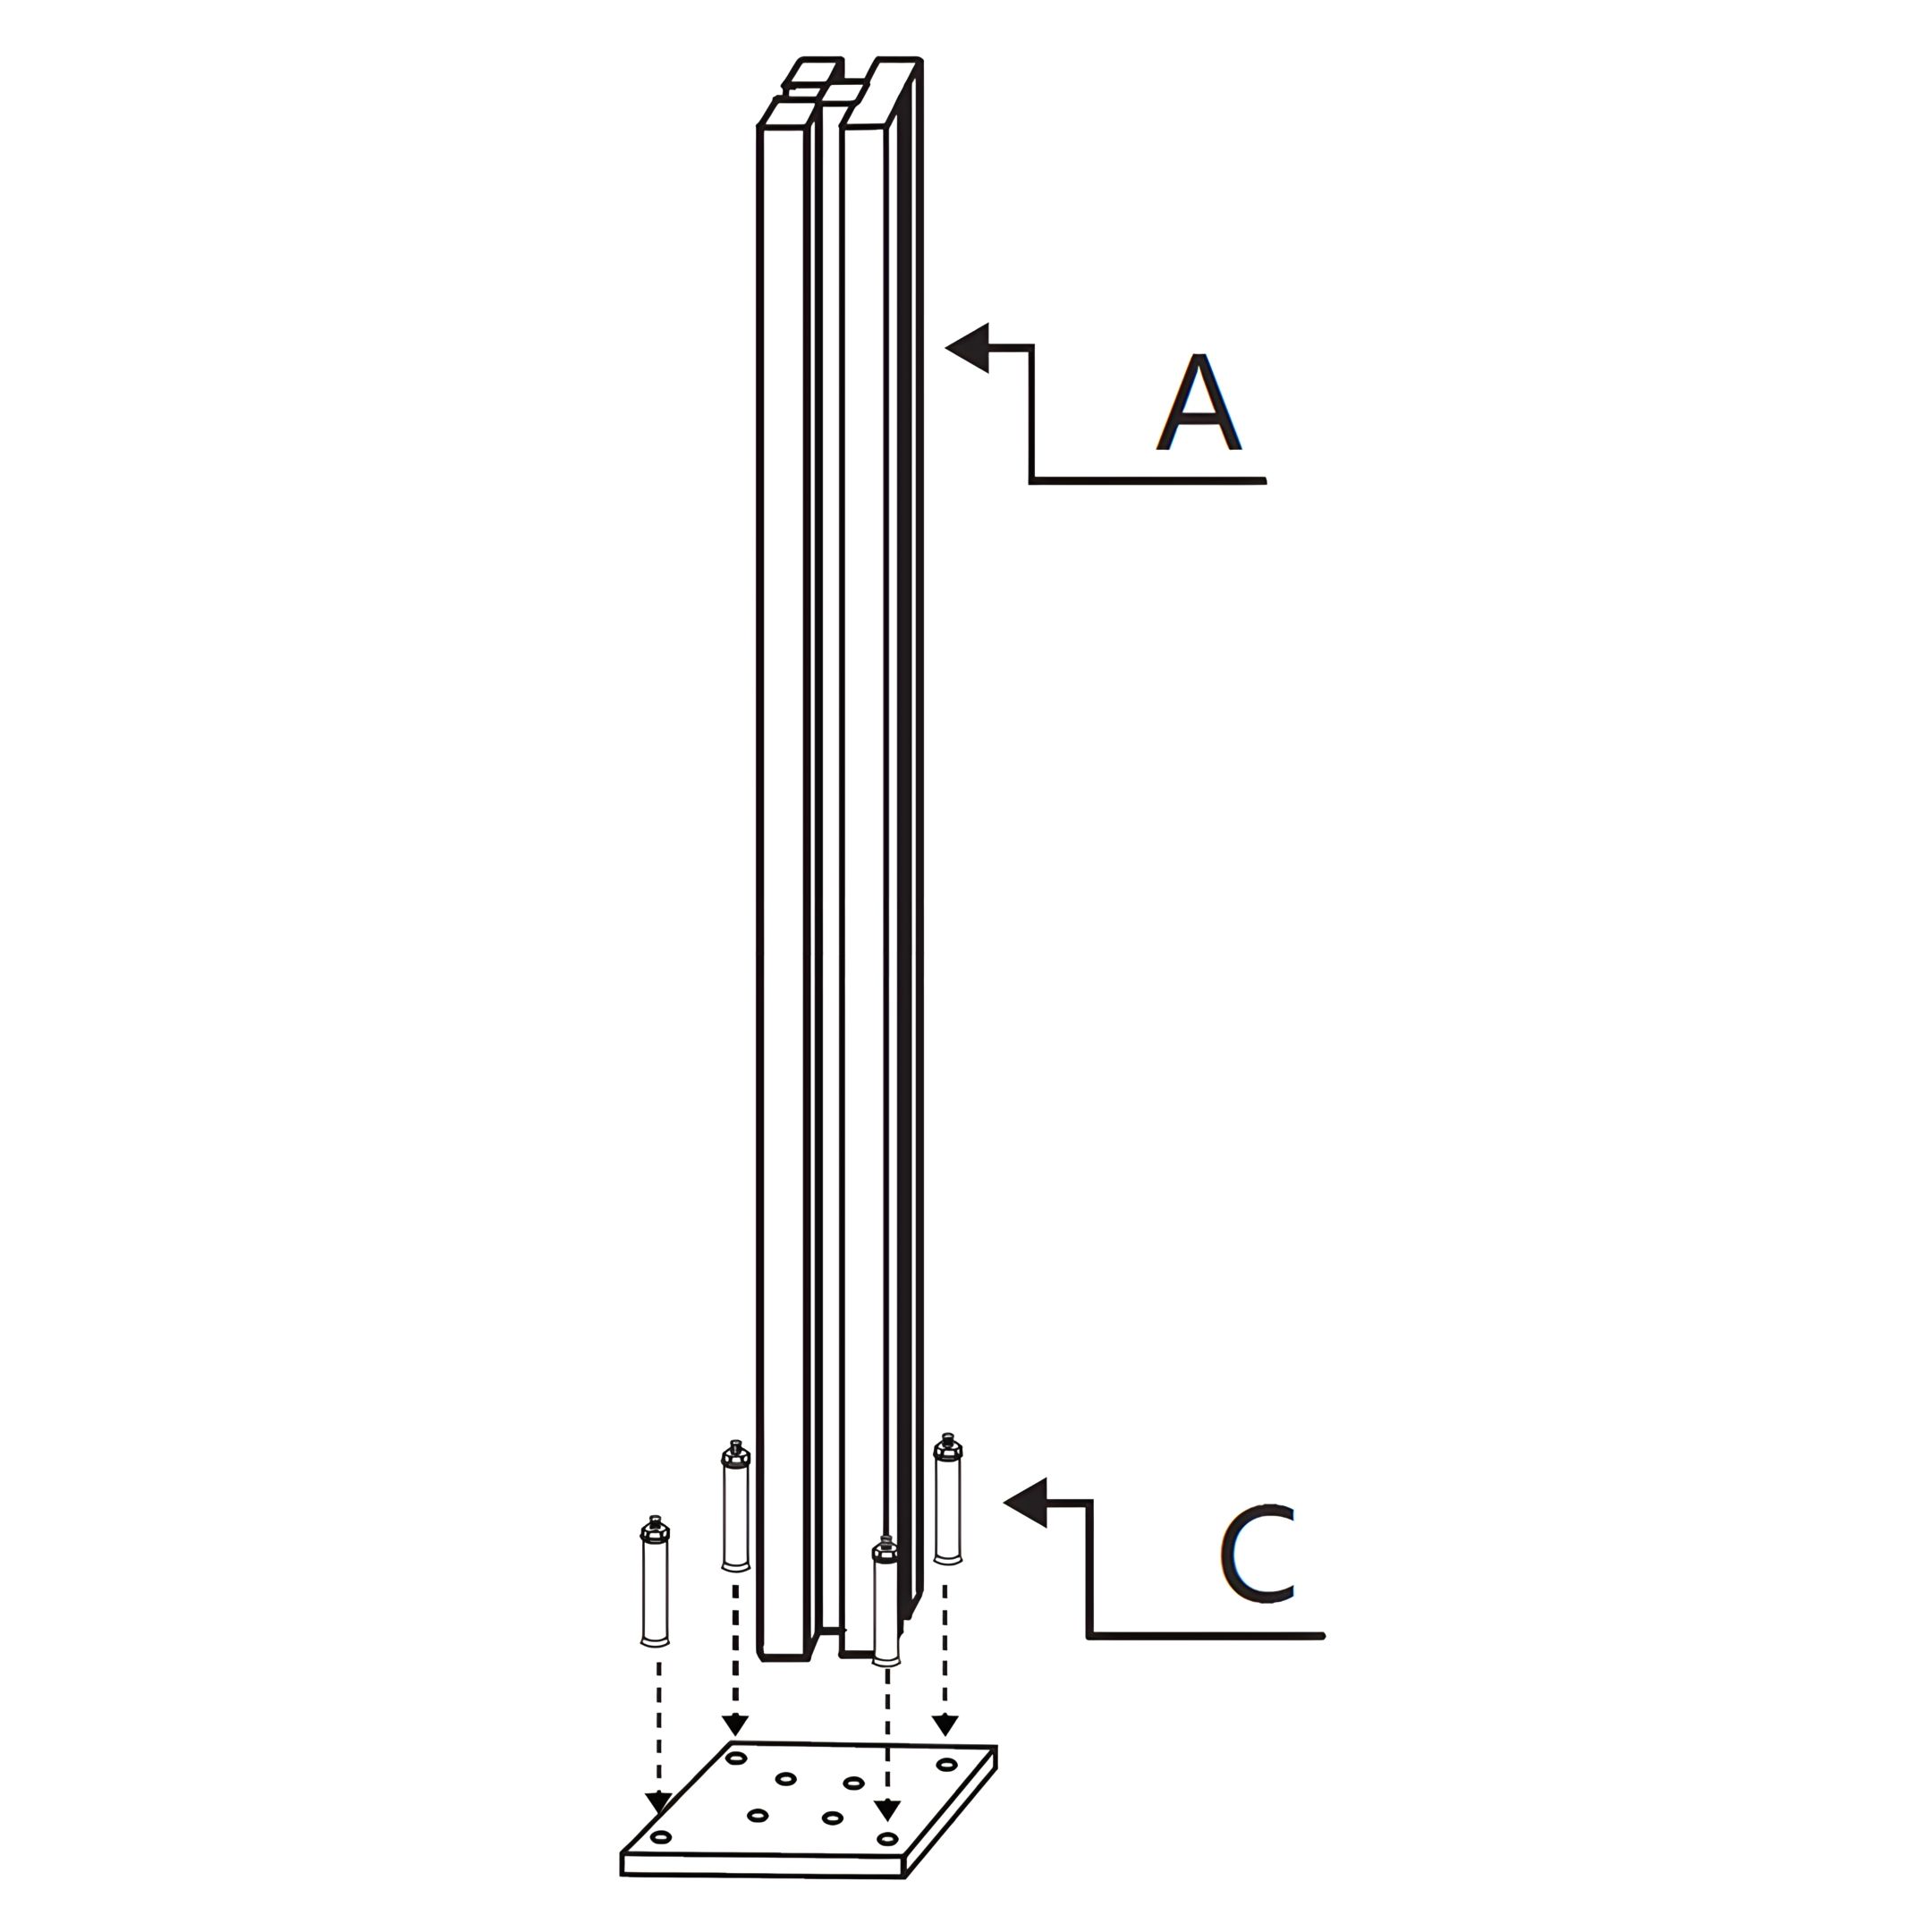
2. Post Installation and Securing
To install the Aluminium LED Fence Posts, follow these steps:
Position the Corner Fence Part A - Aluminium LED Fence Posts onto the Corner Fence Part B - Fence Post Base.
Secure the posts by inserting and tightening the Corner Fence Part C - Floor Anchoring Bolts into the designated holes on the base.
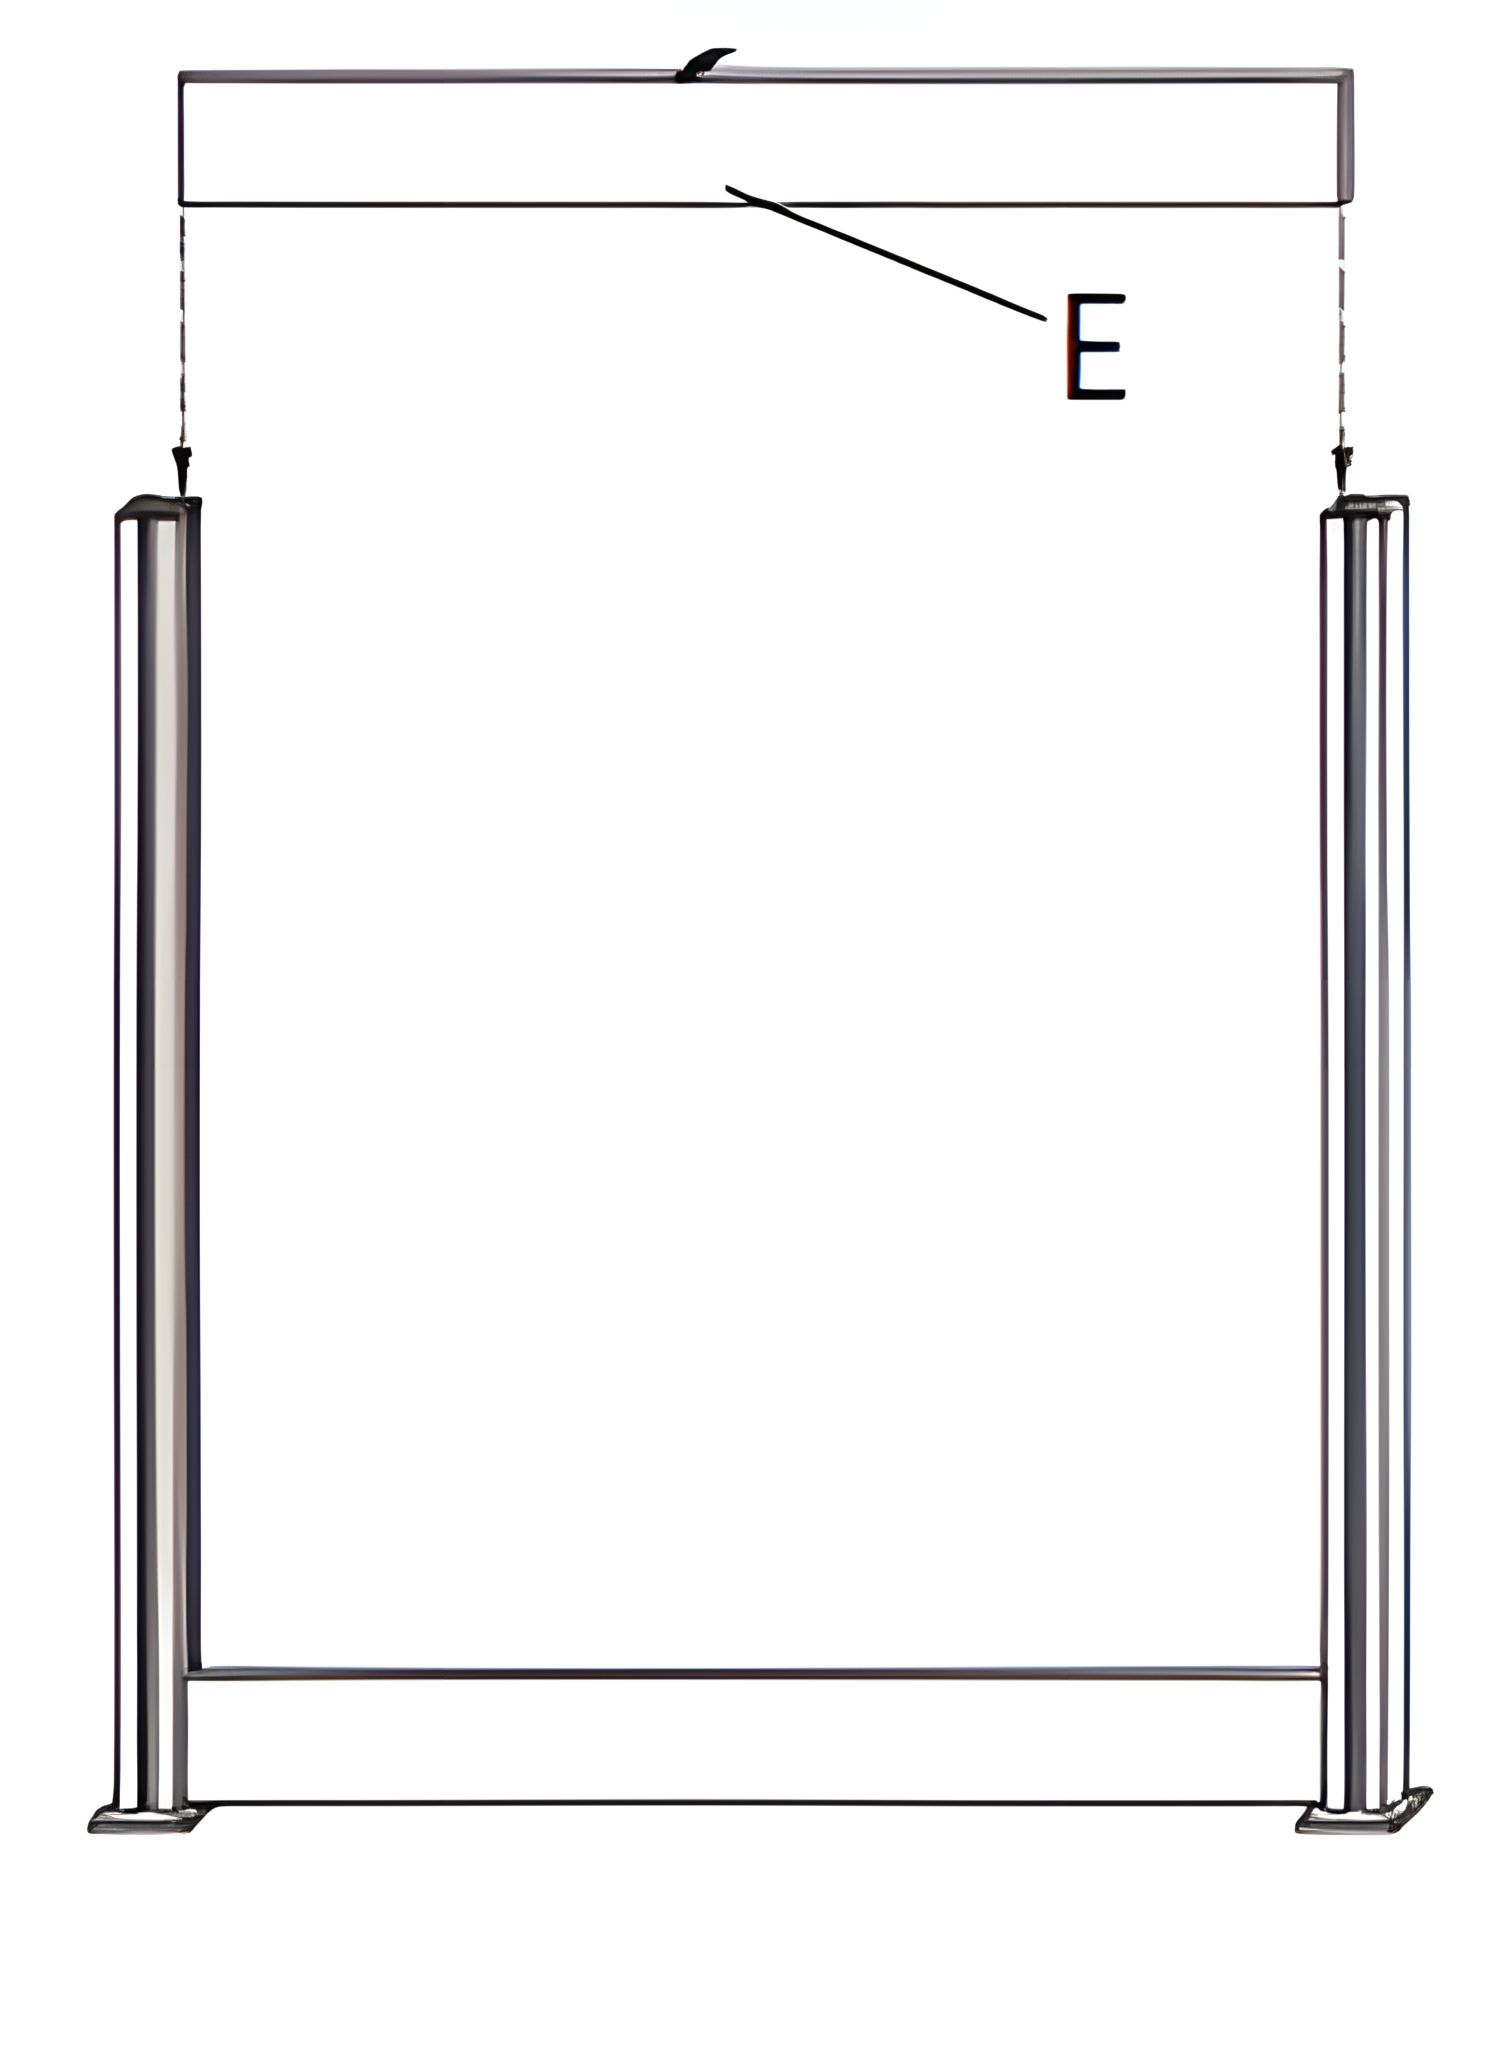
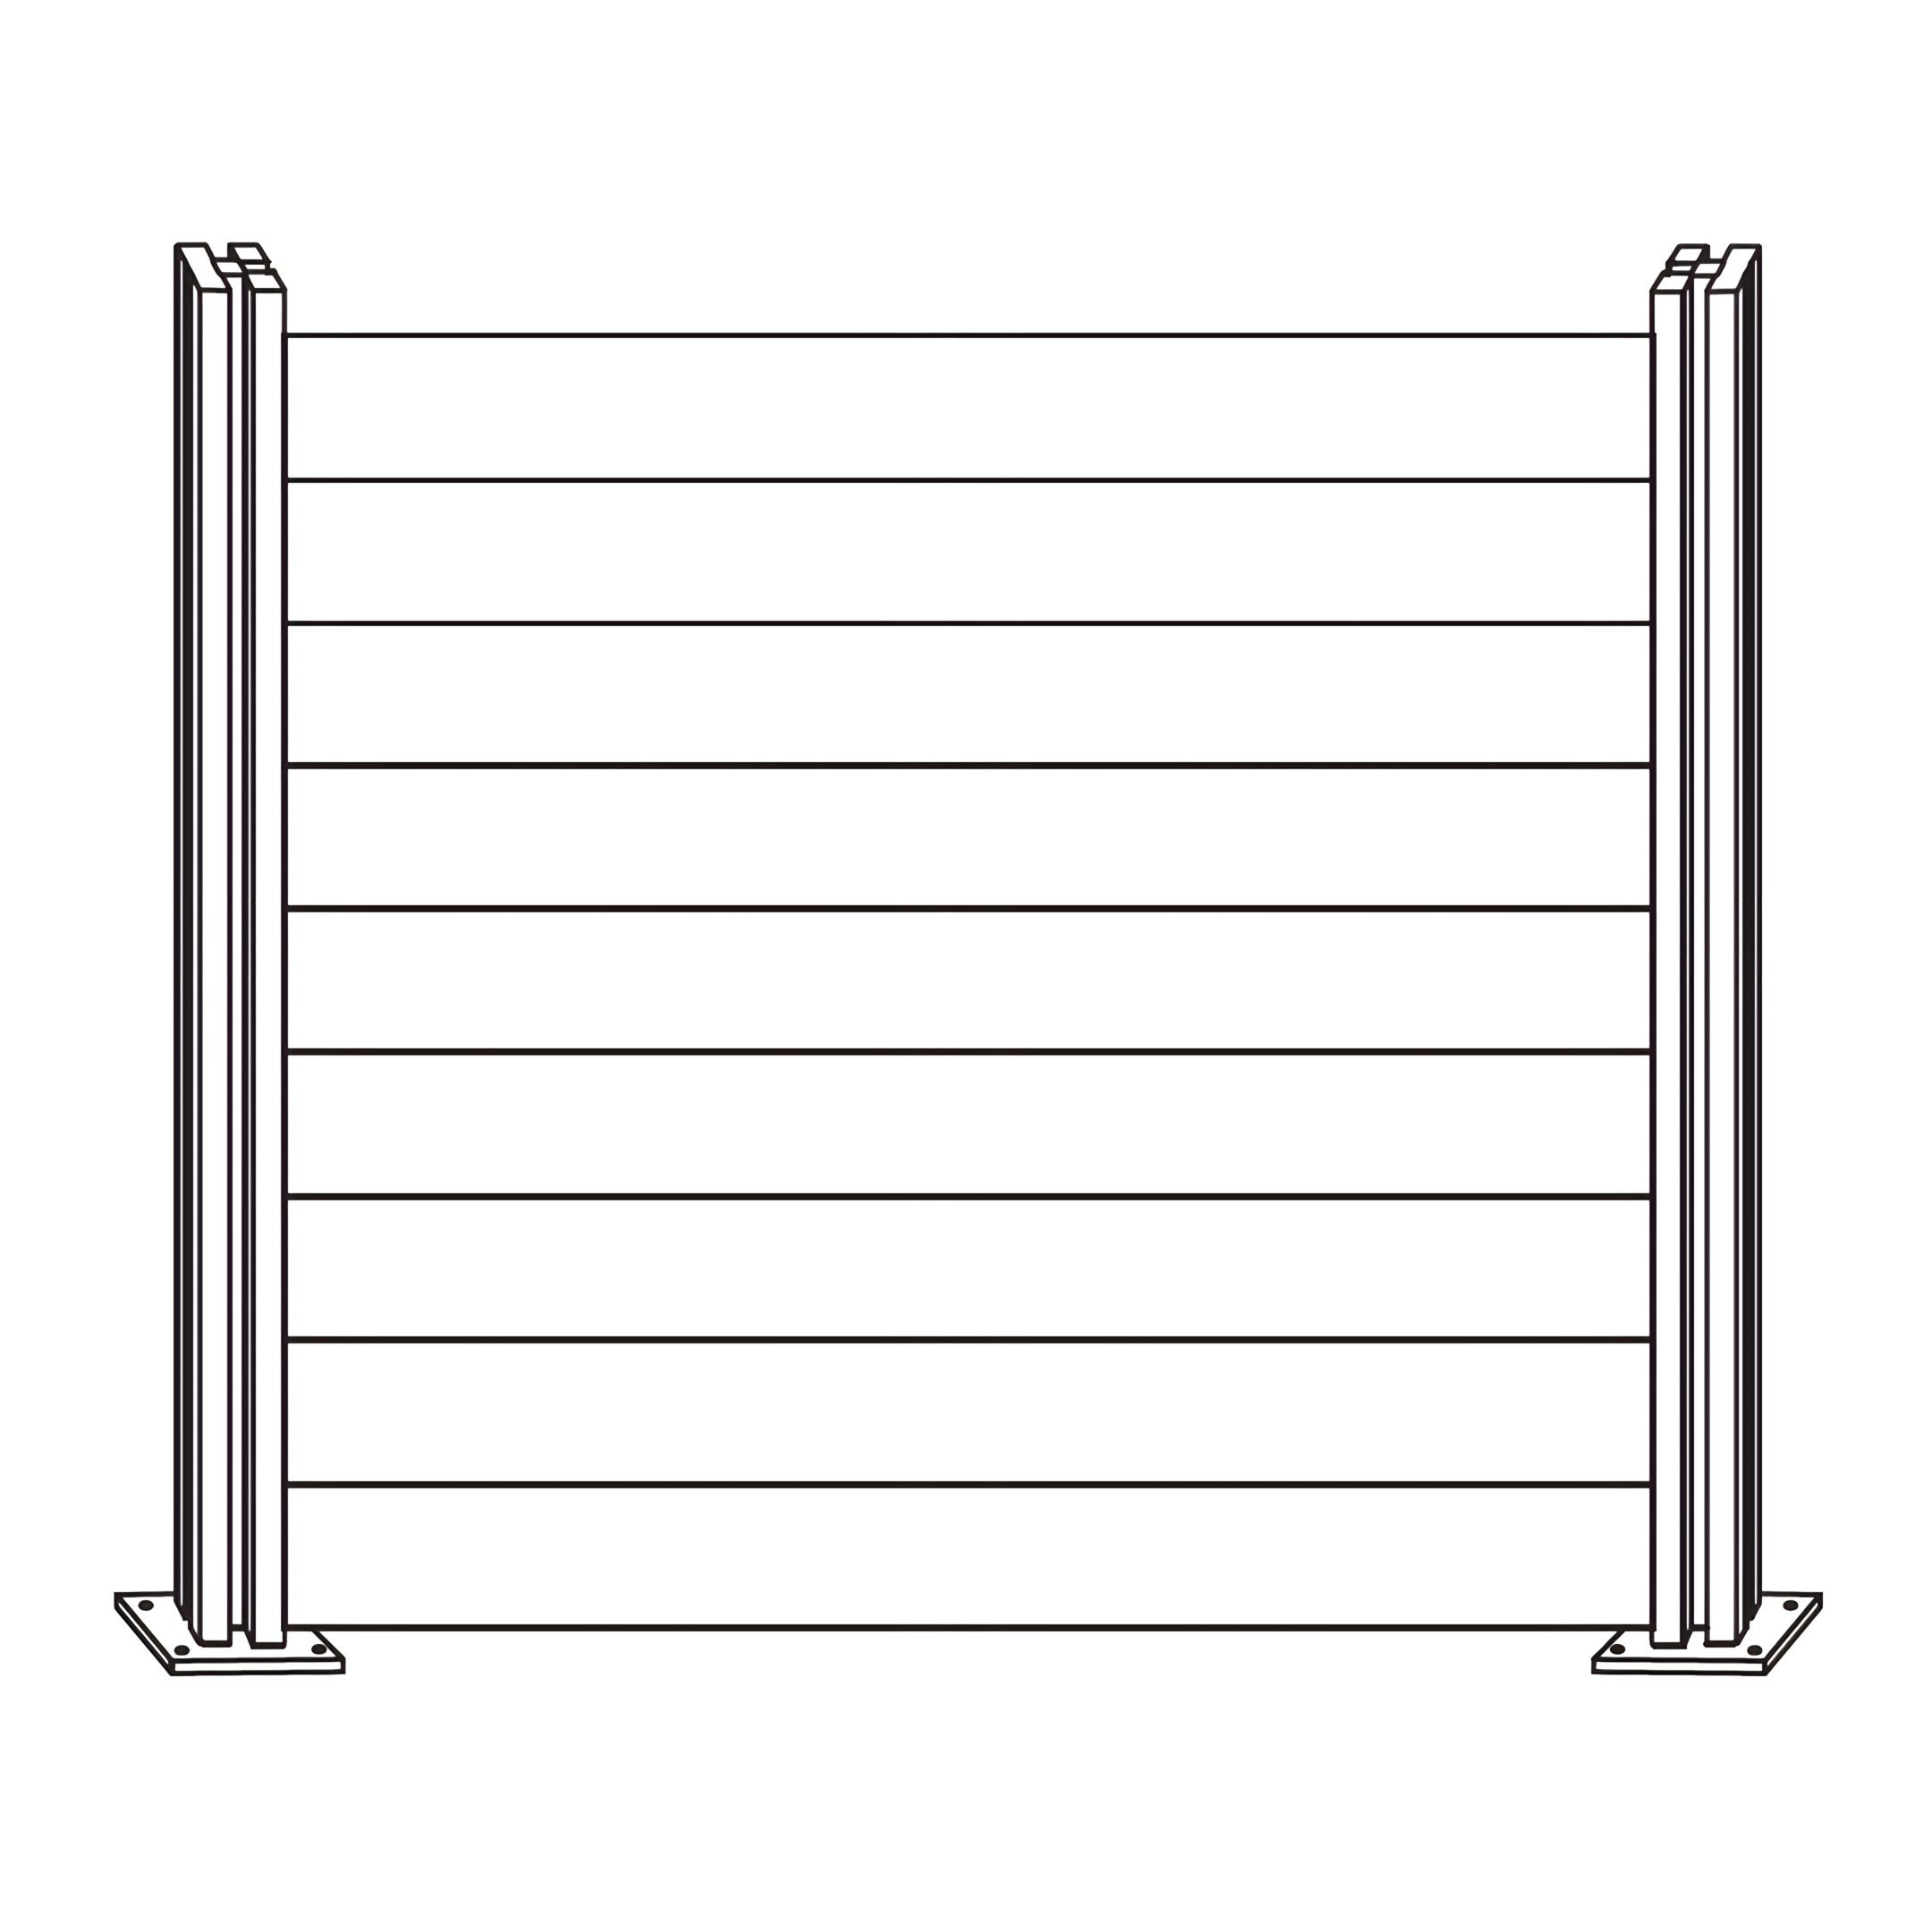
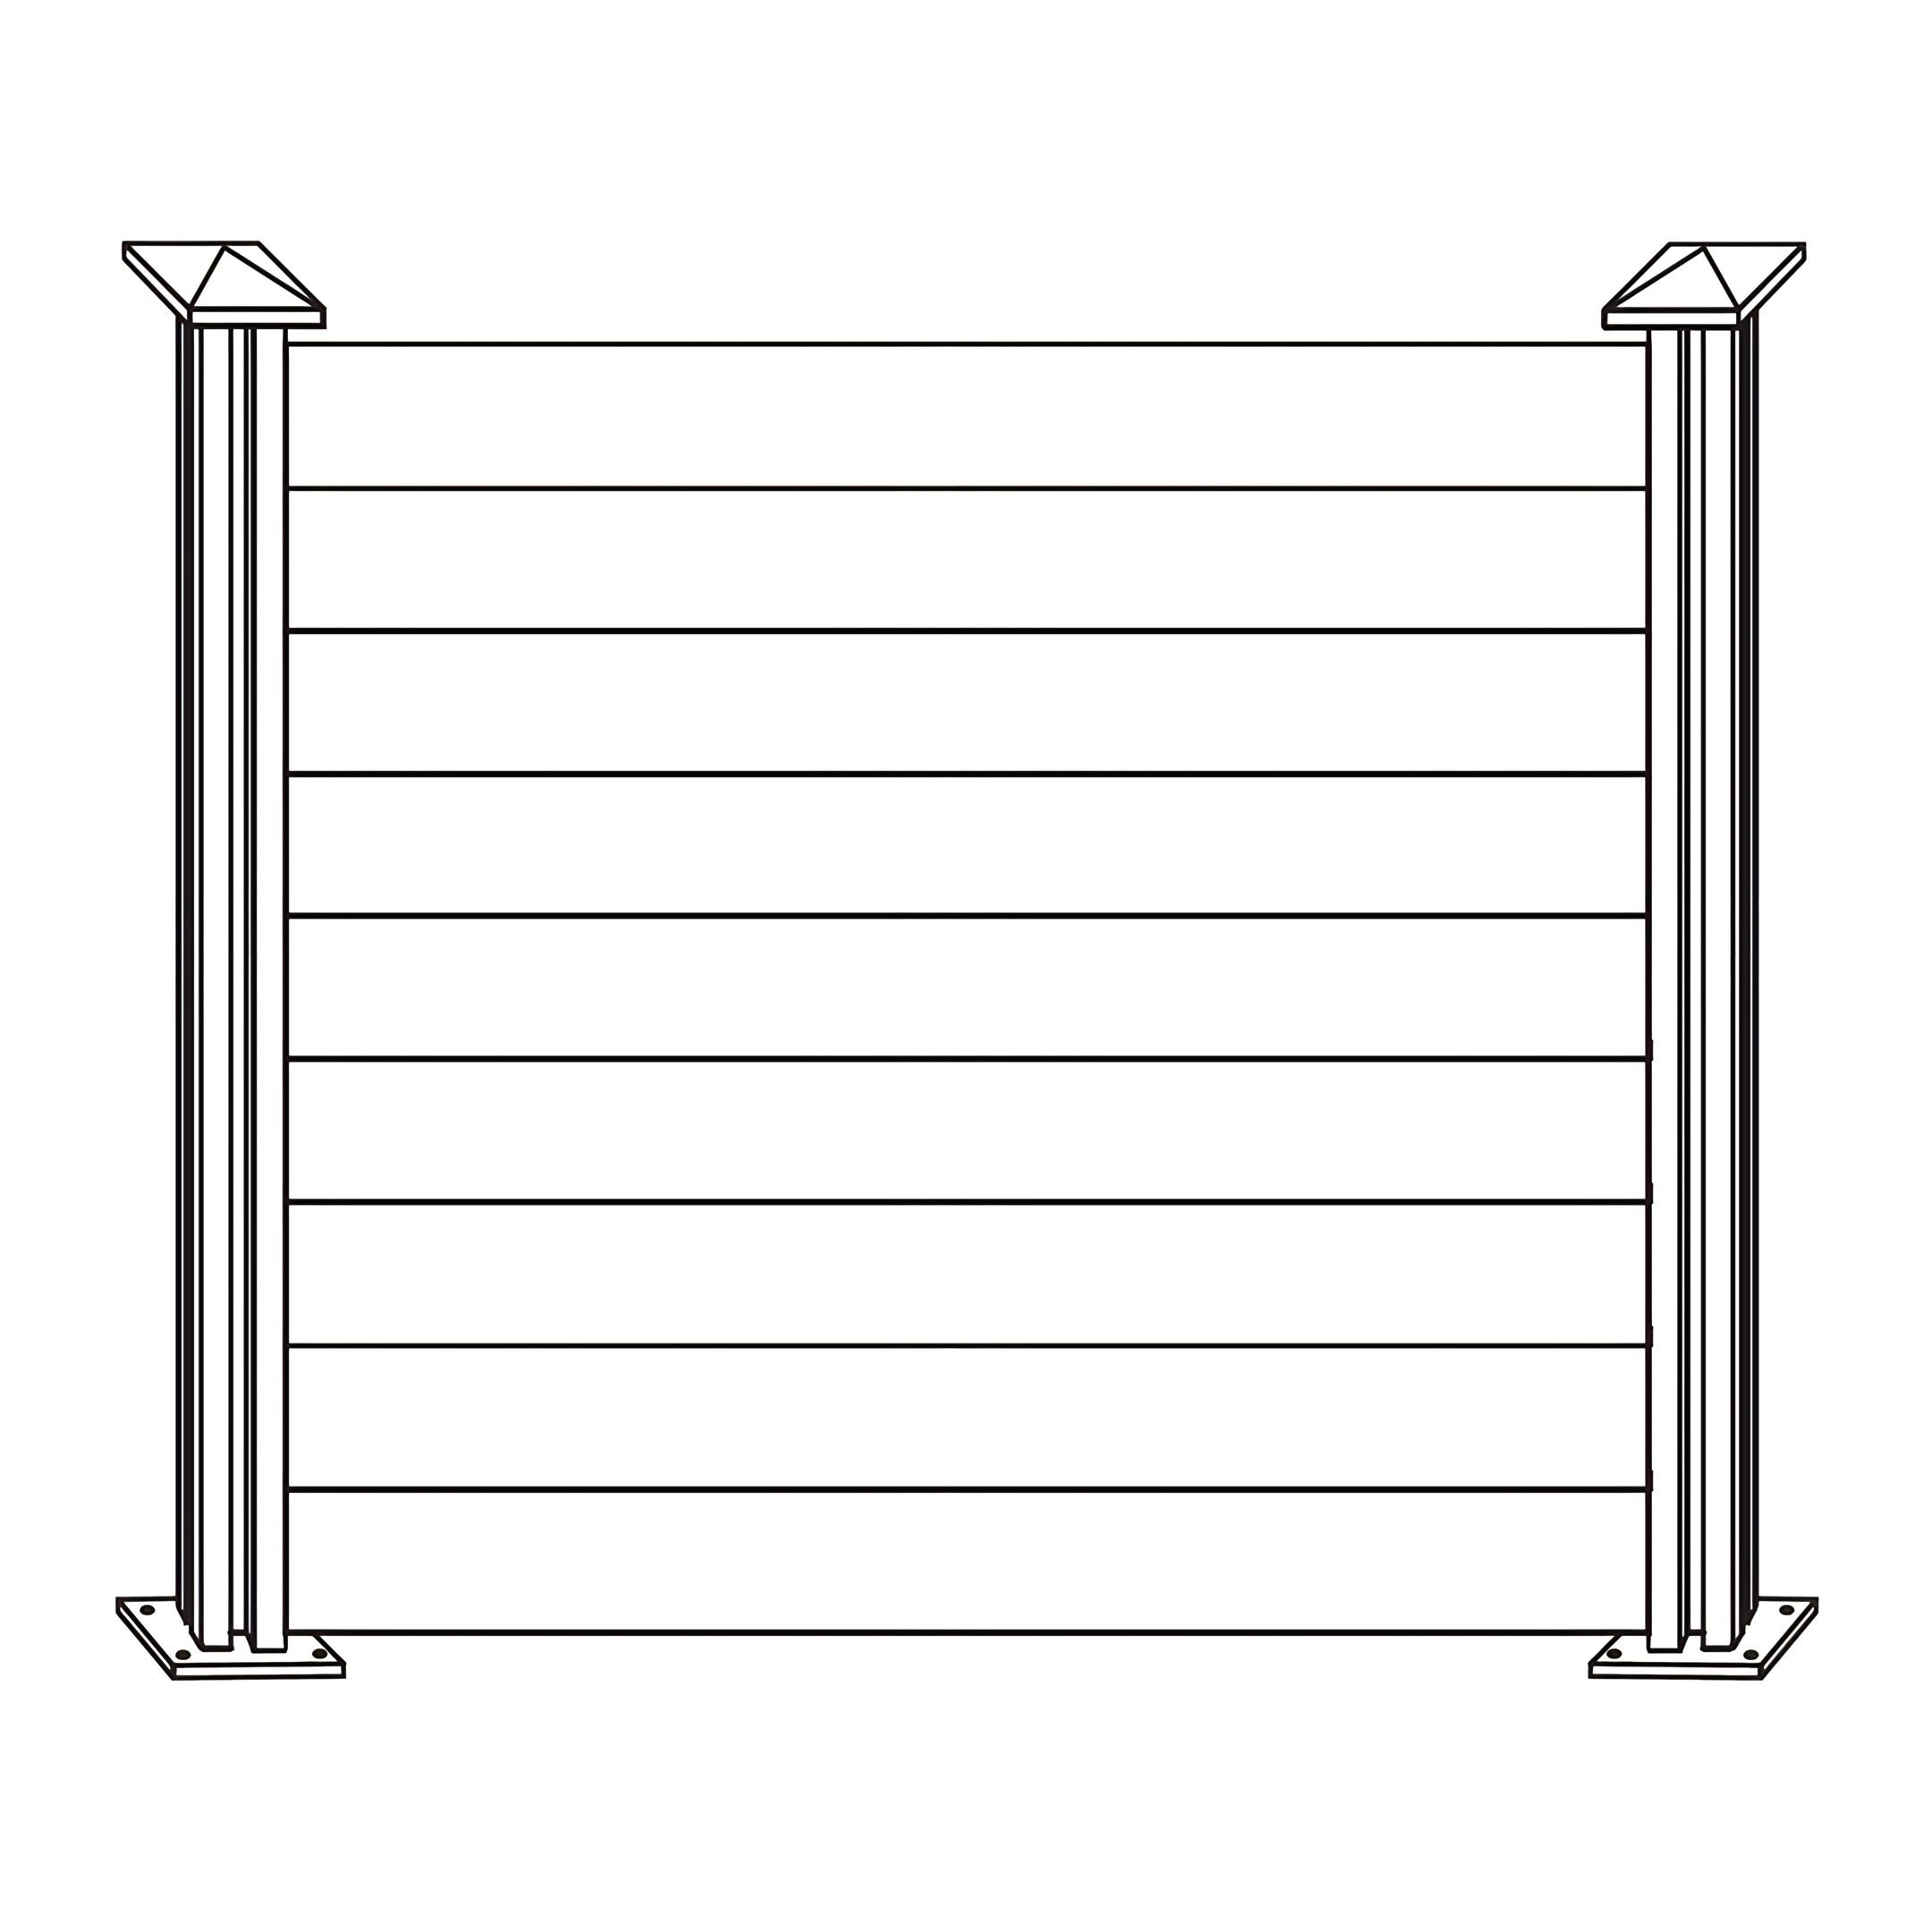
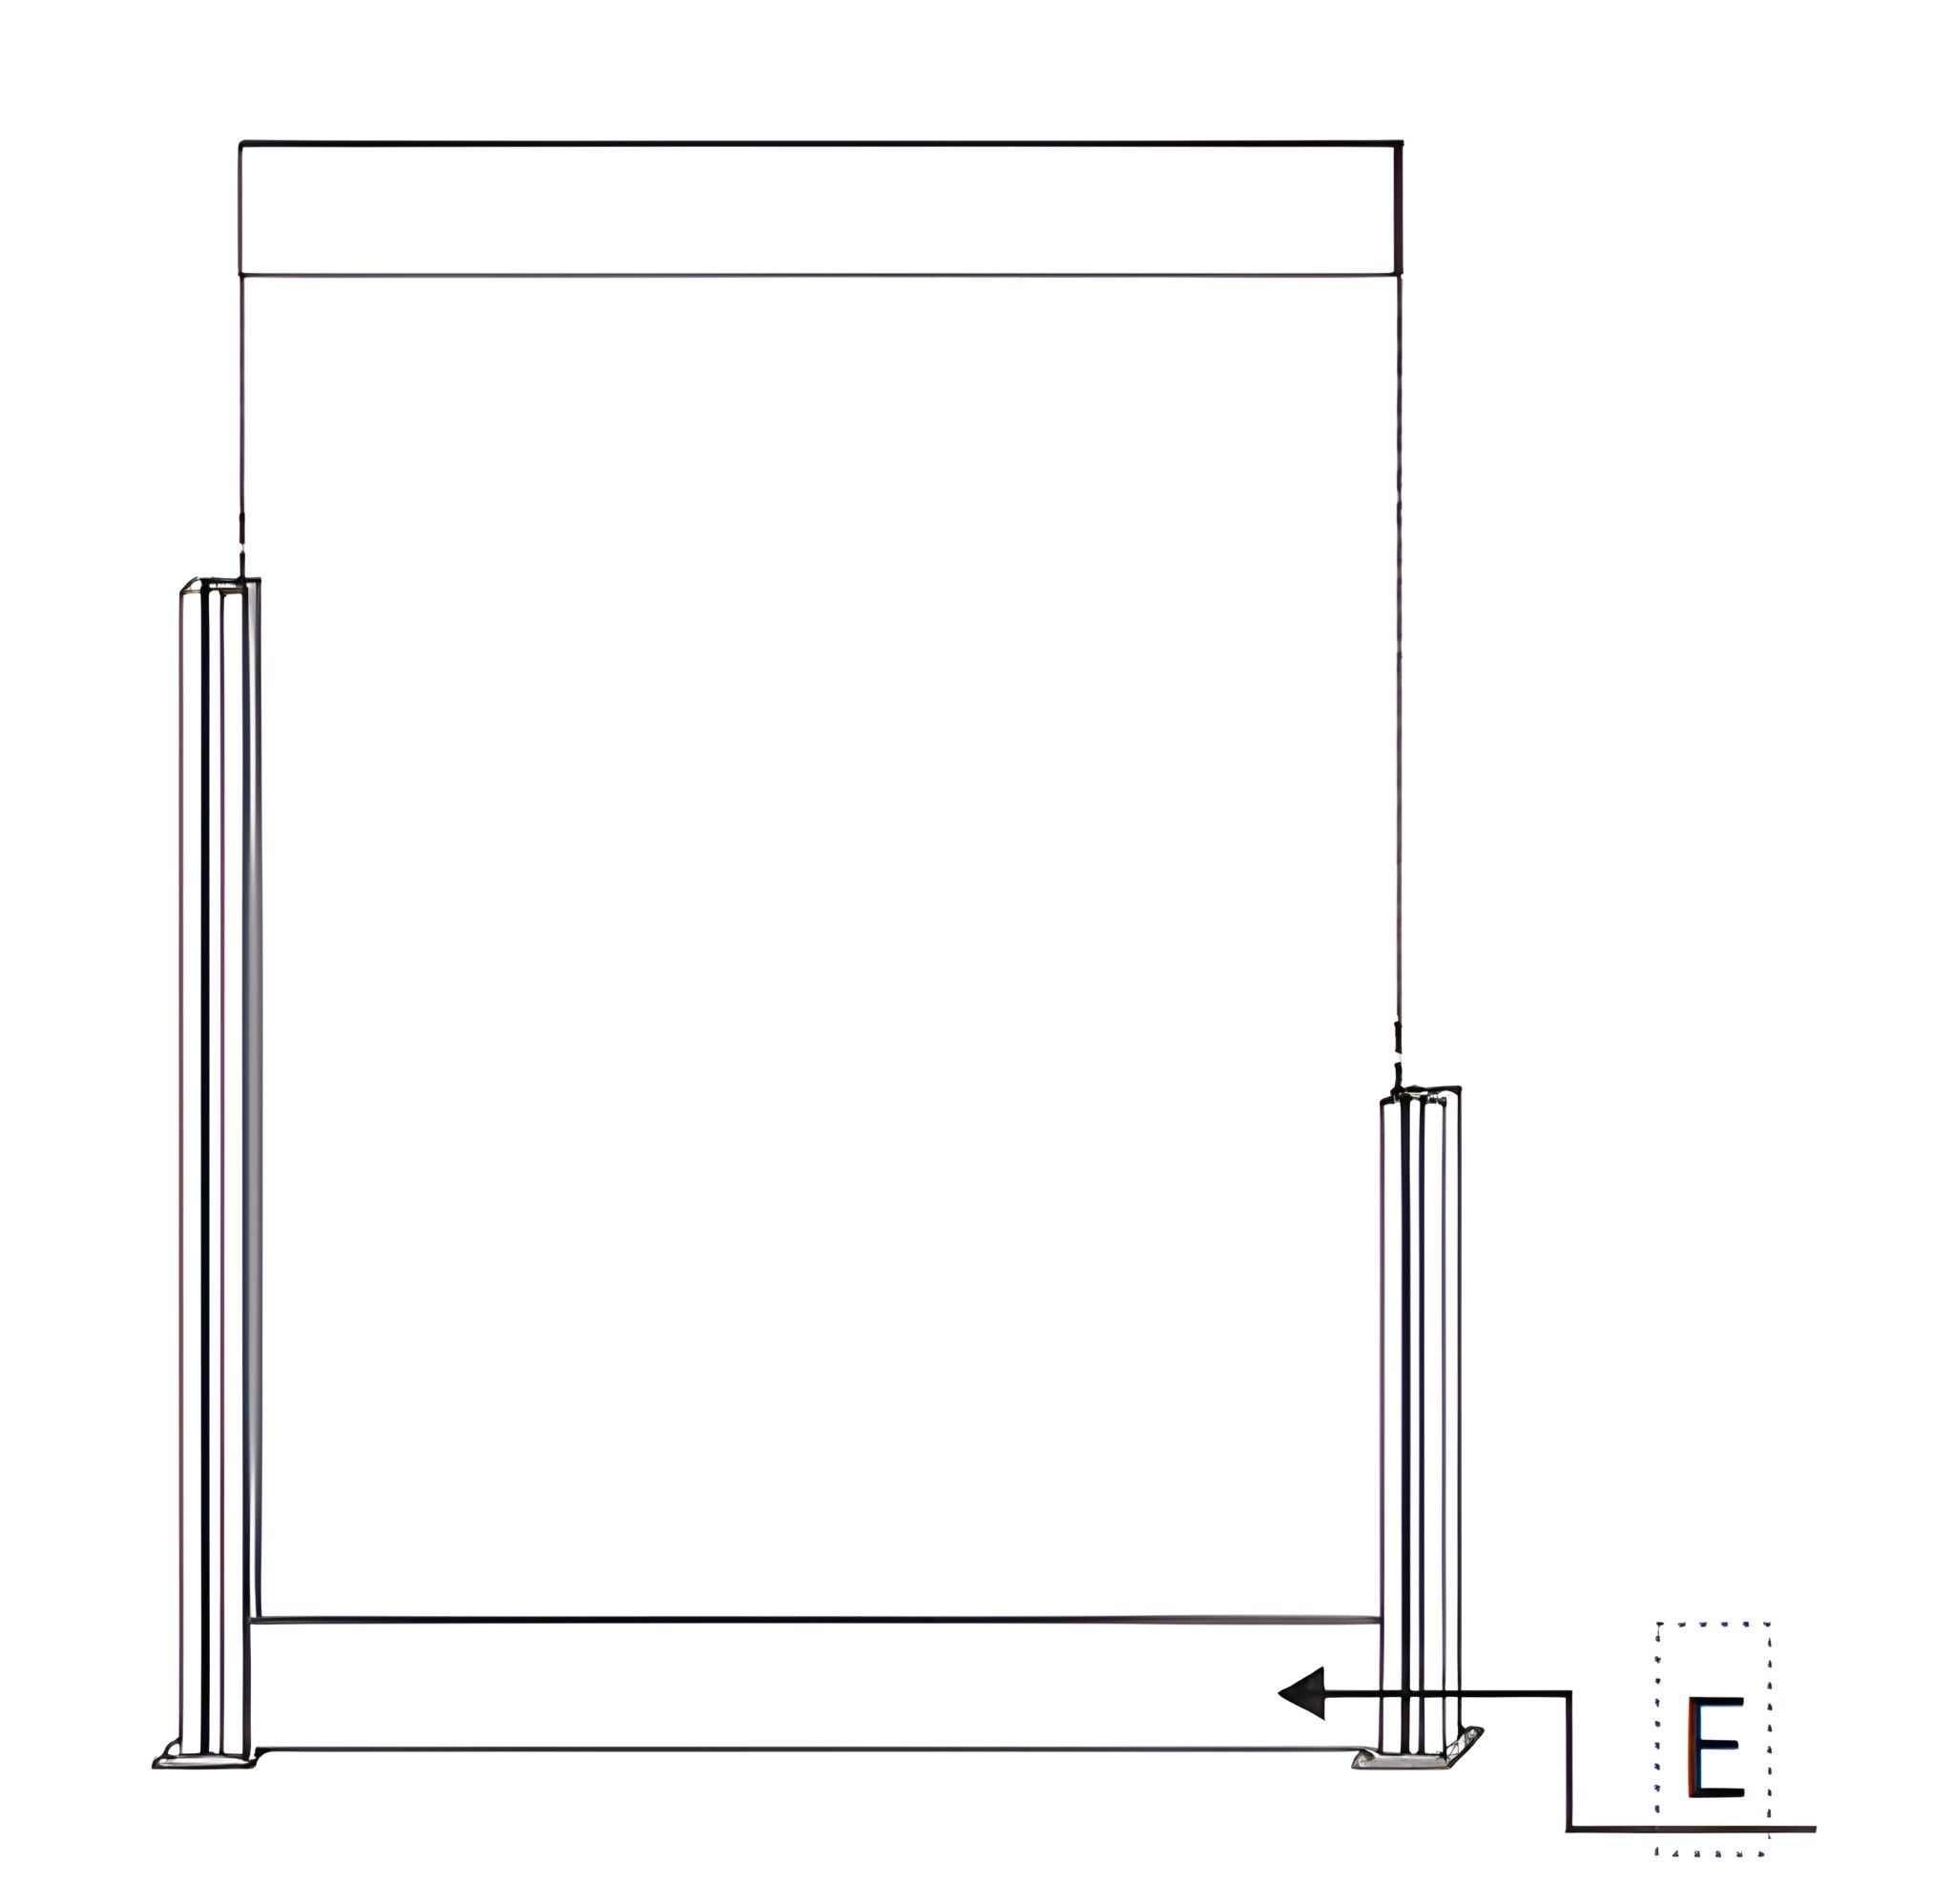
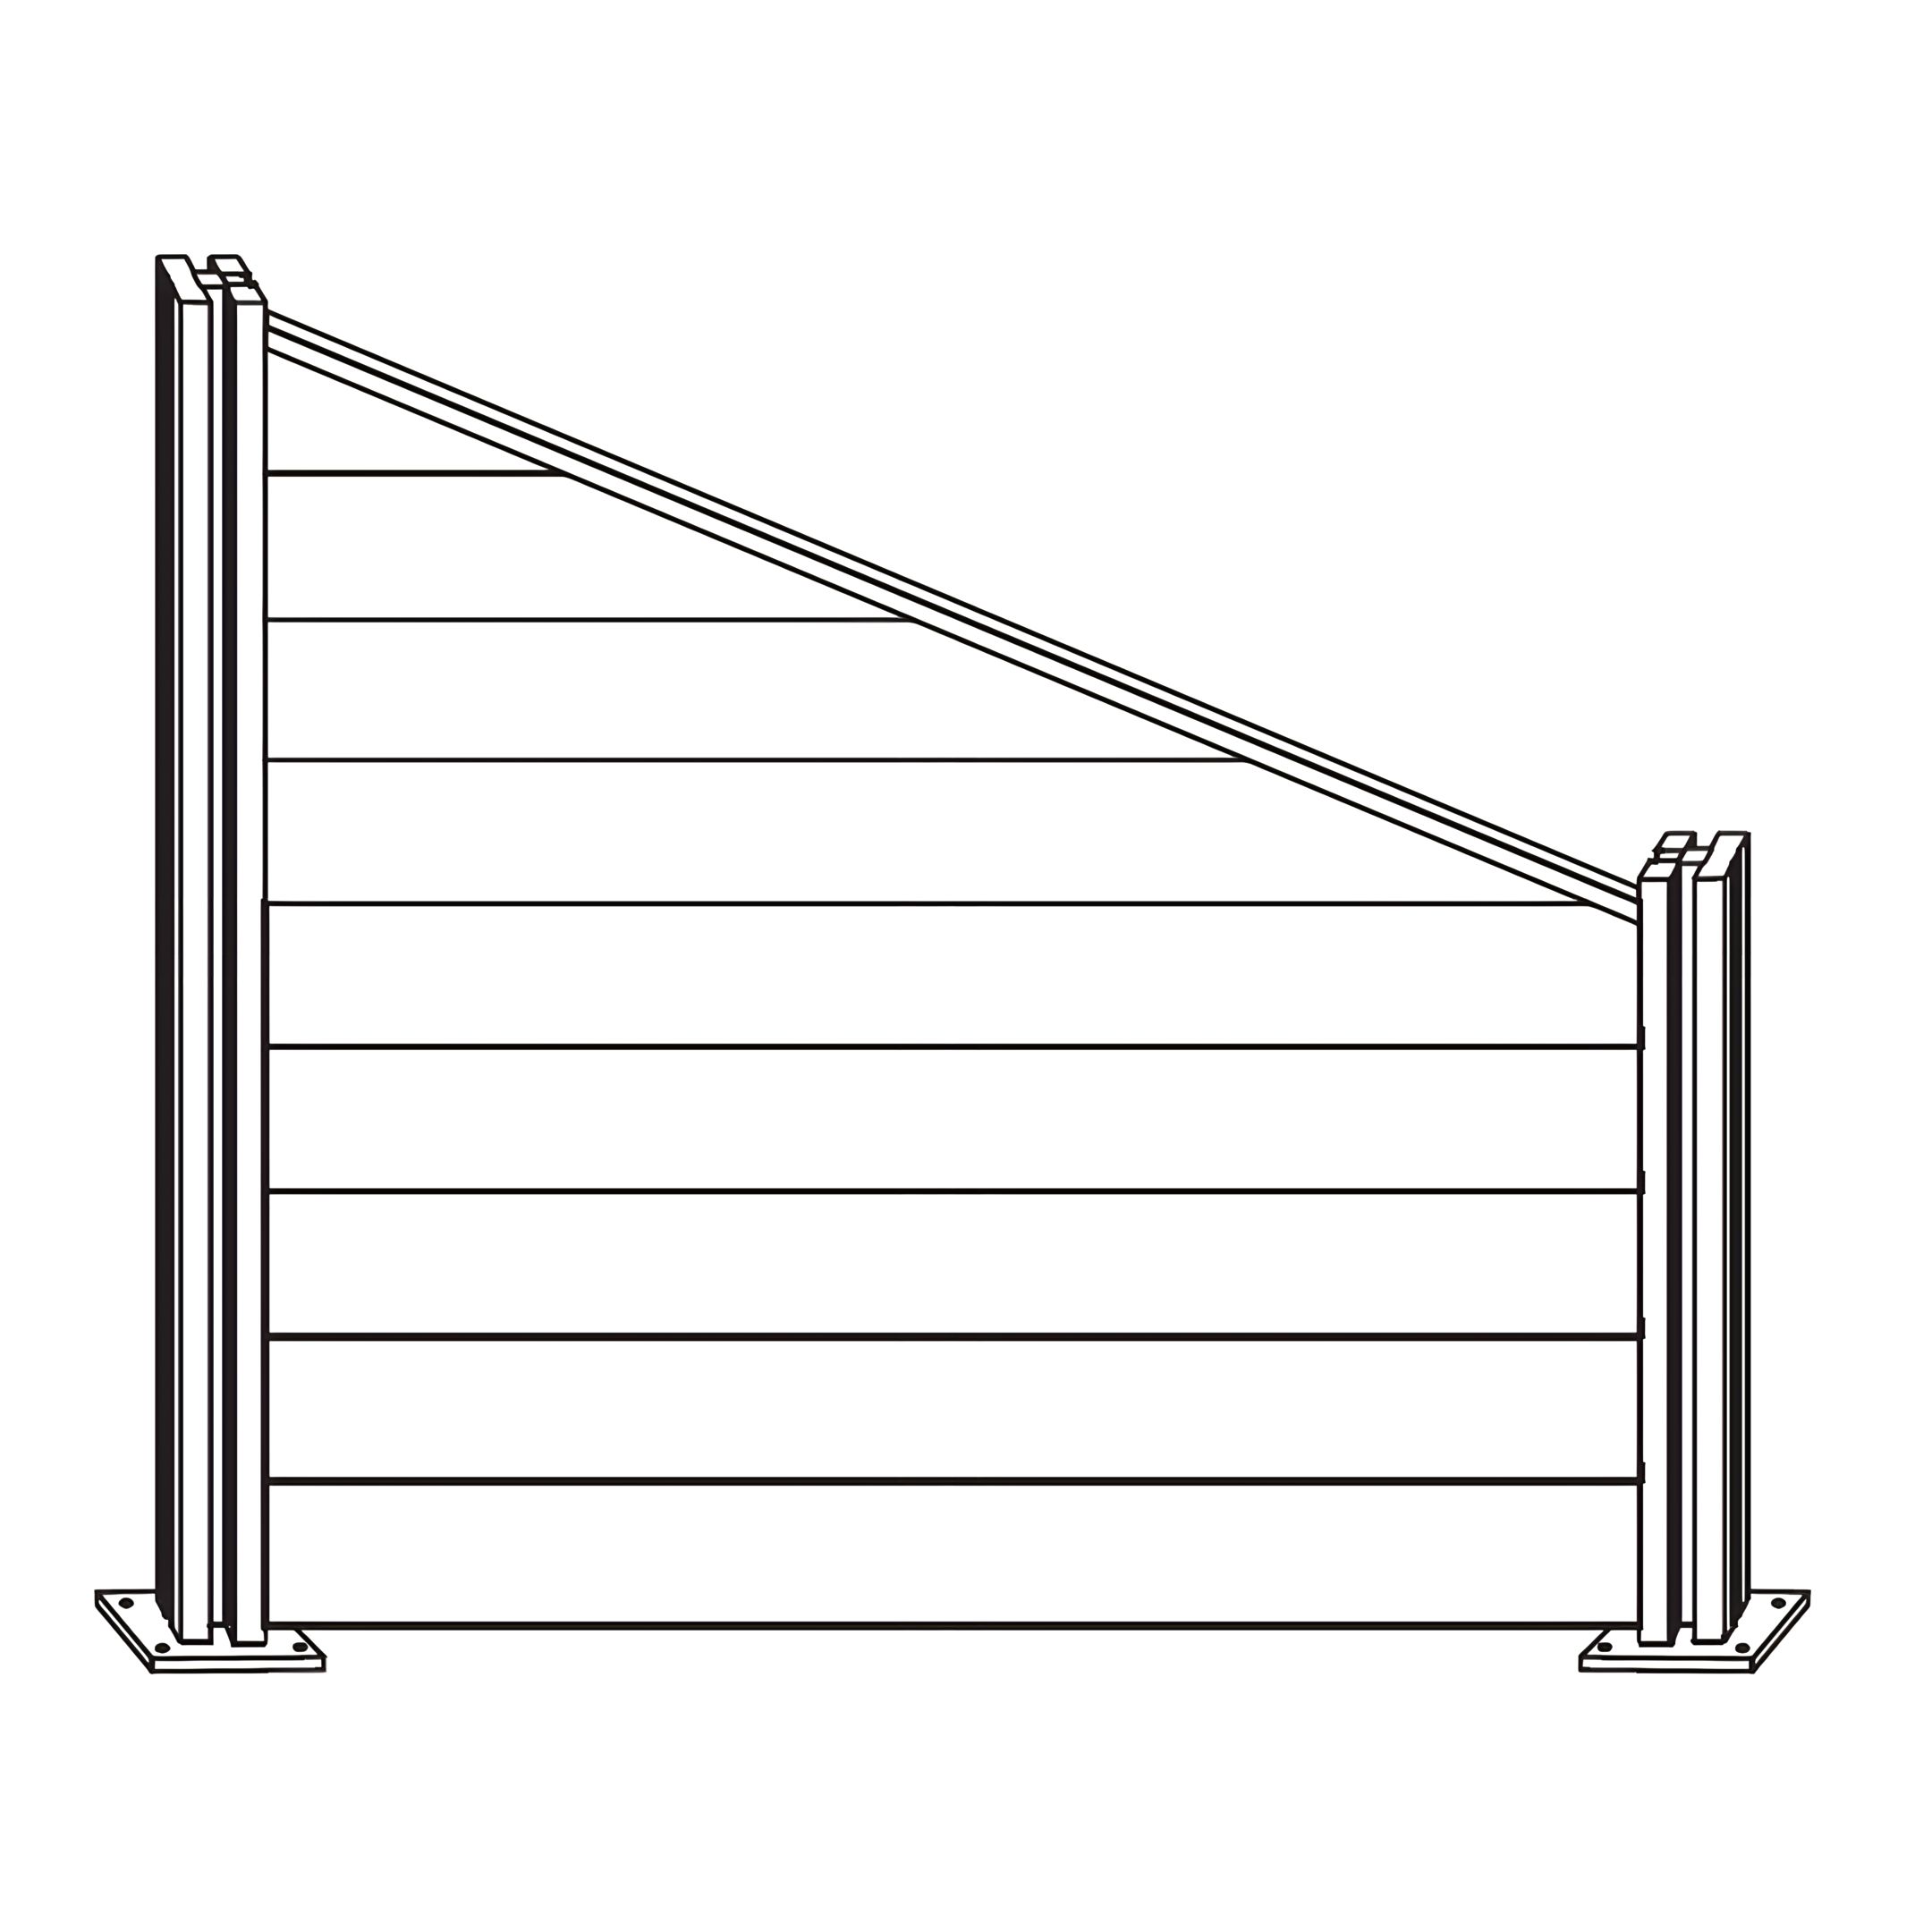
3. Slat Positioning and Spacing
To insert the fence slats, follow these steps:
Align the Fence Slats (Part E) between the installed Aluminium LED Fence Posts (Part A).
Ensure the slats fit securely into the grooves of the posts.
Repeat the process for each slat, maintaining alignment and spacing.
4.
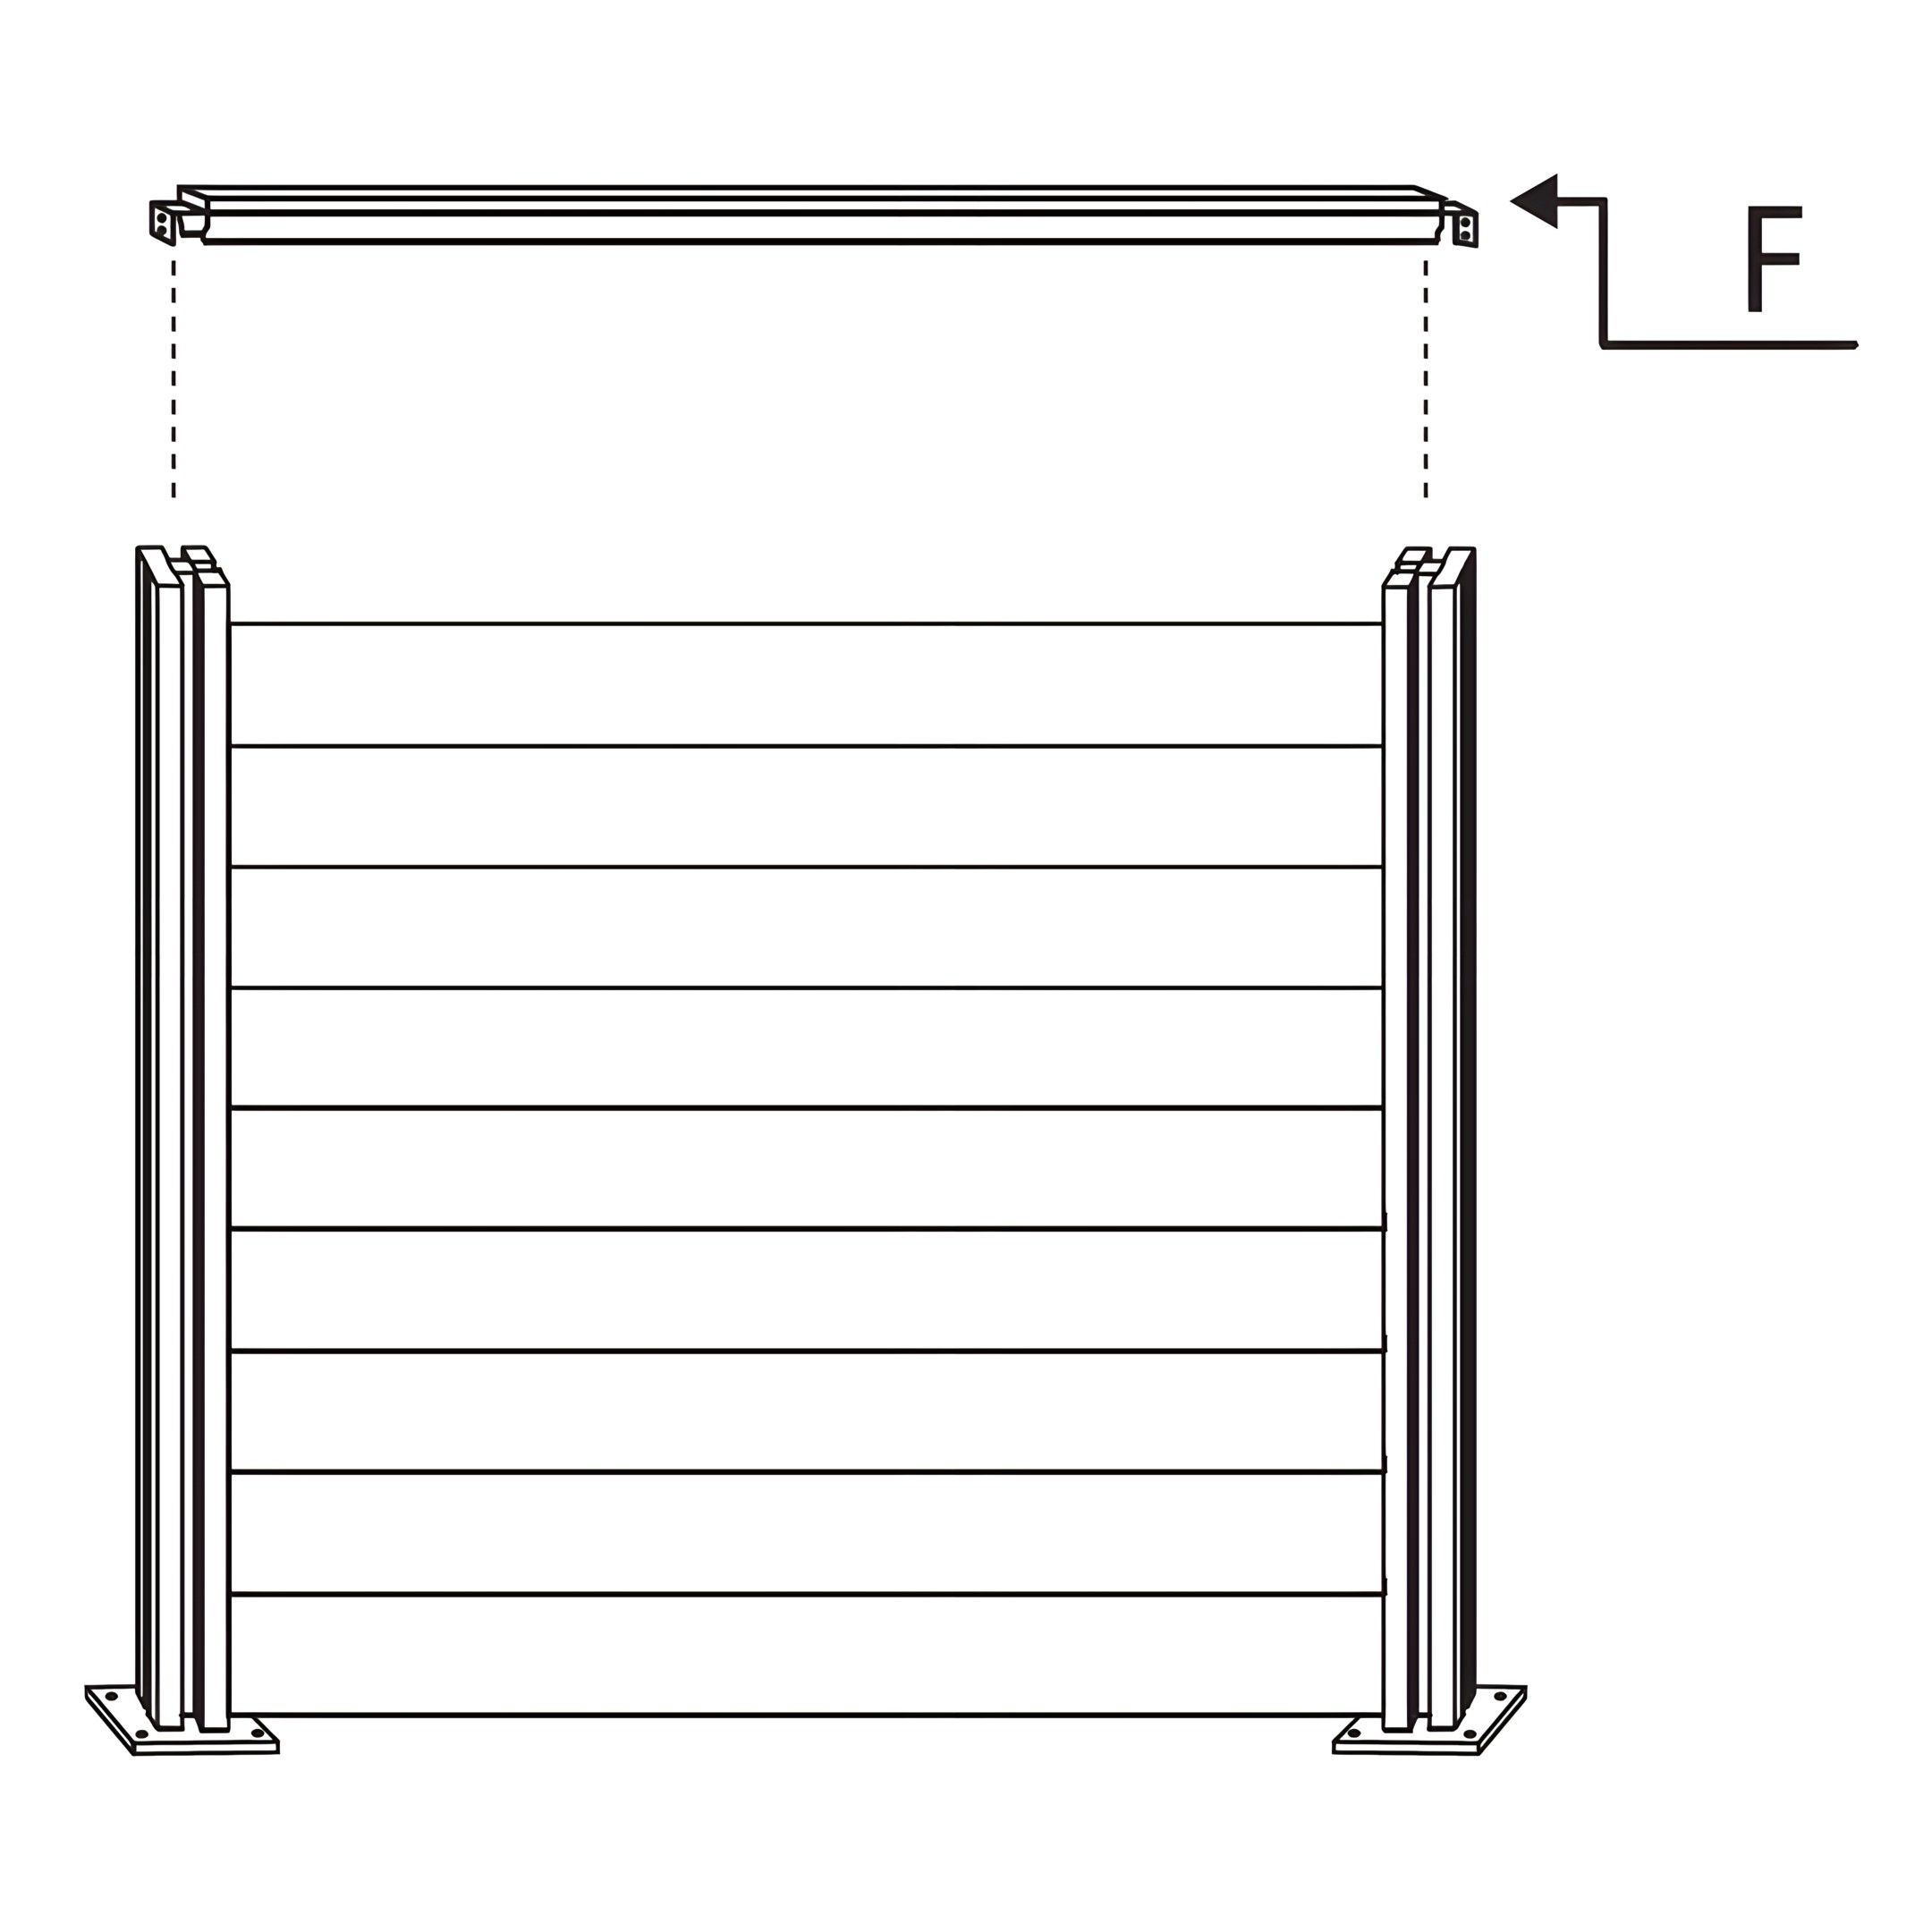
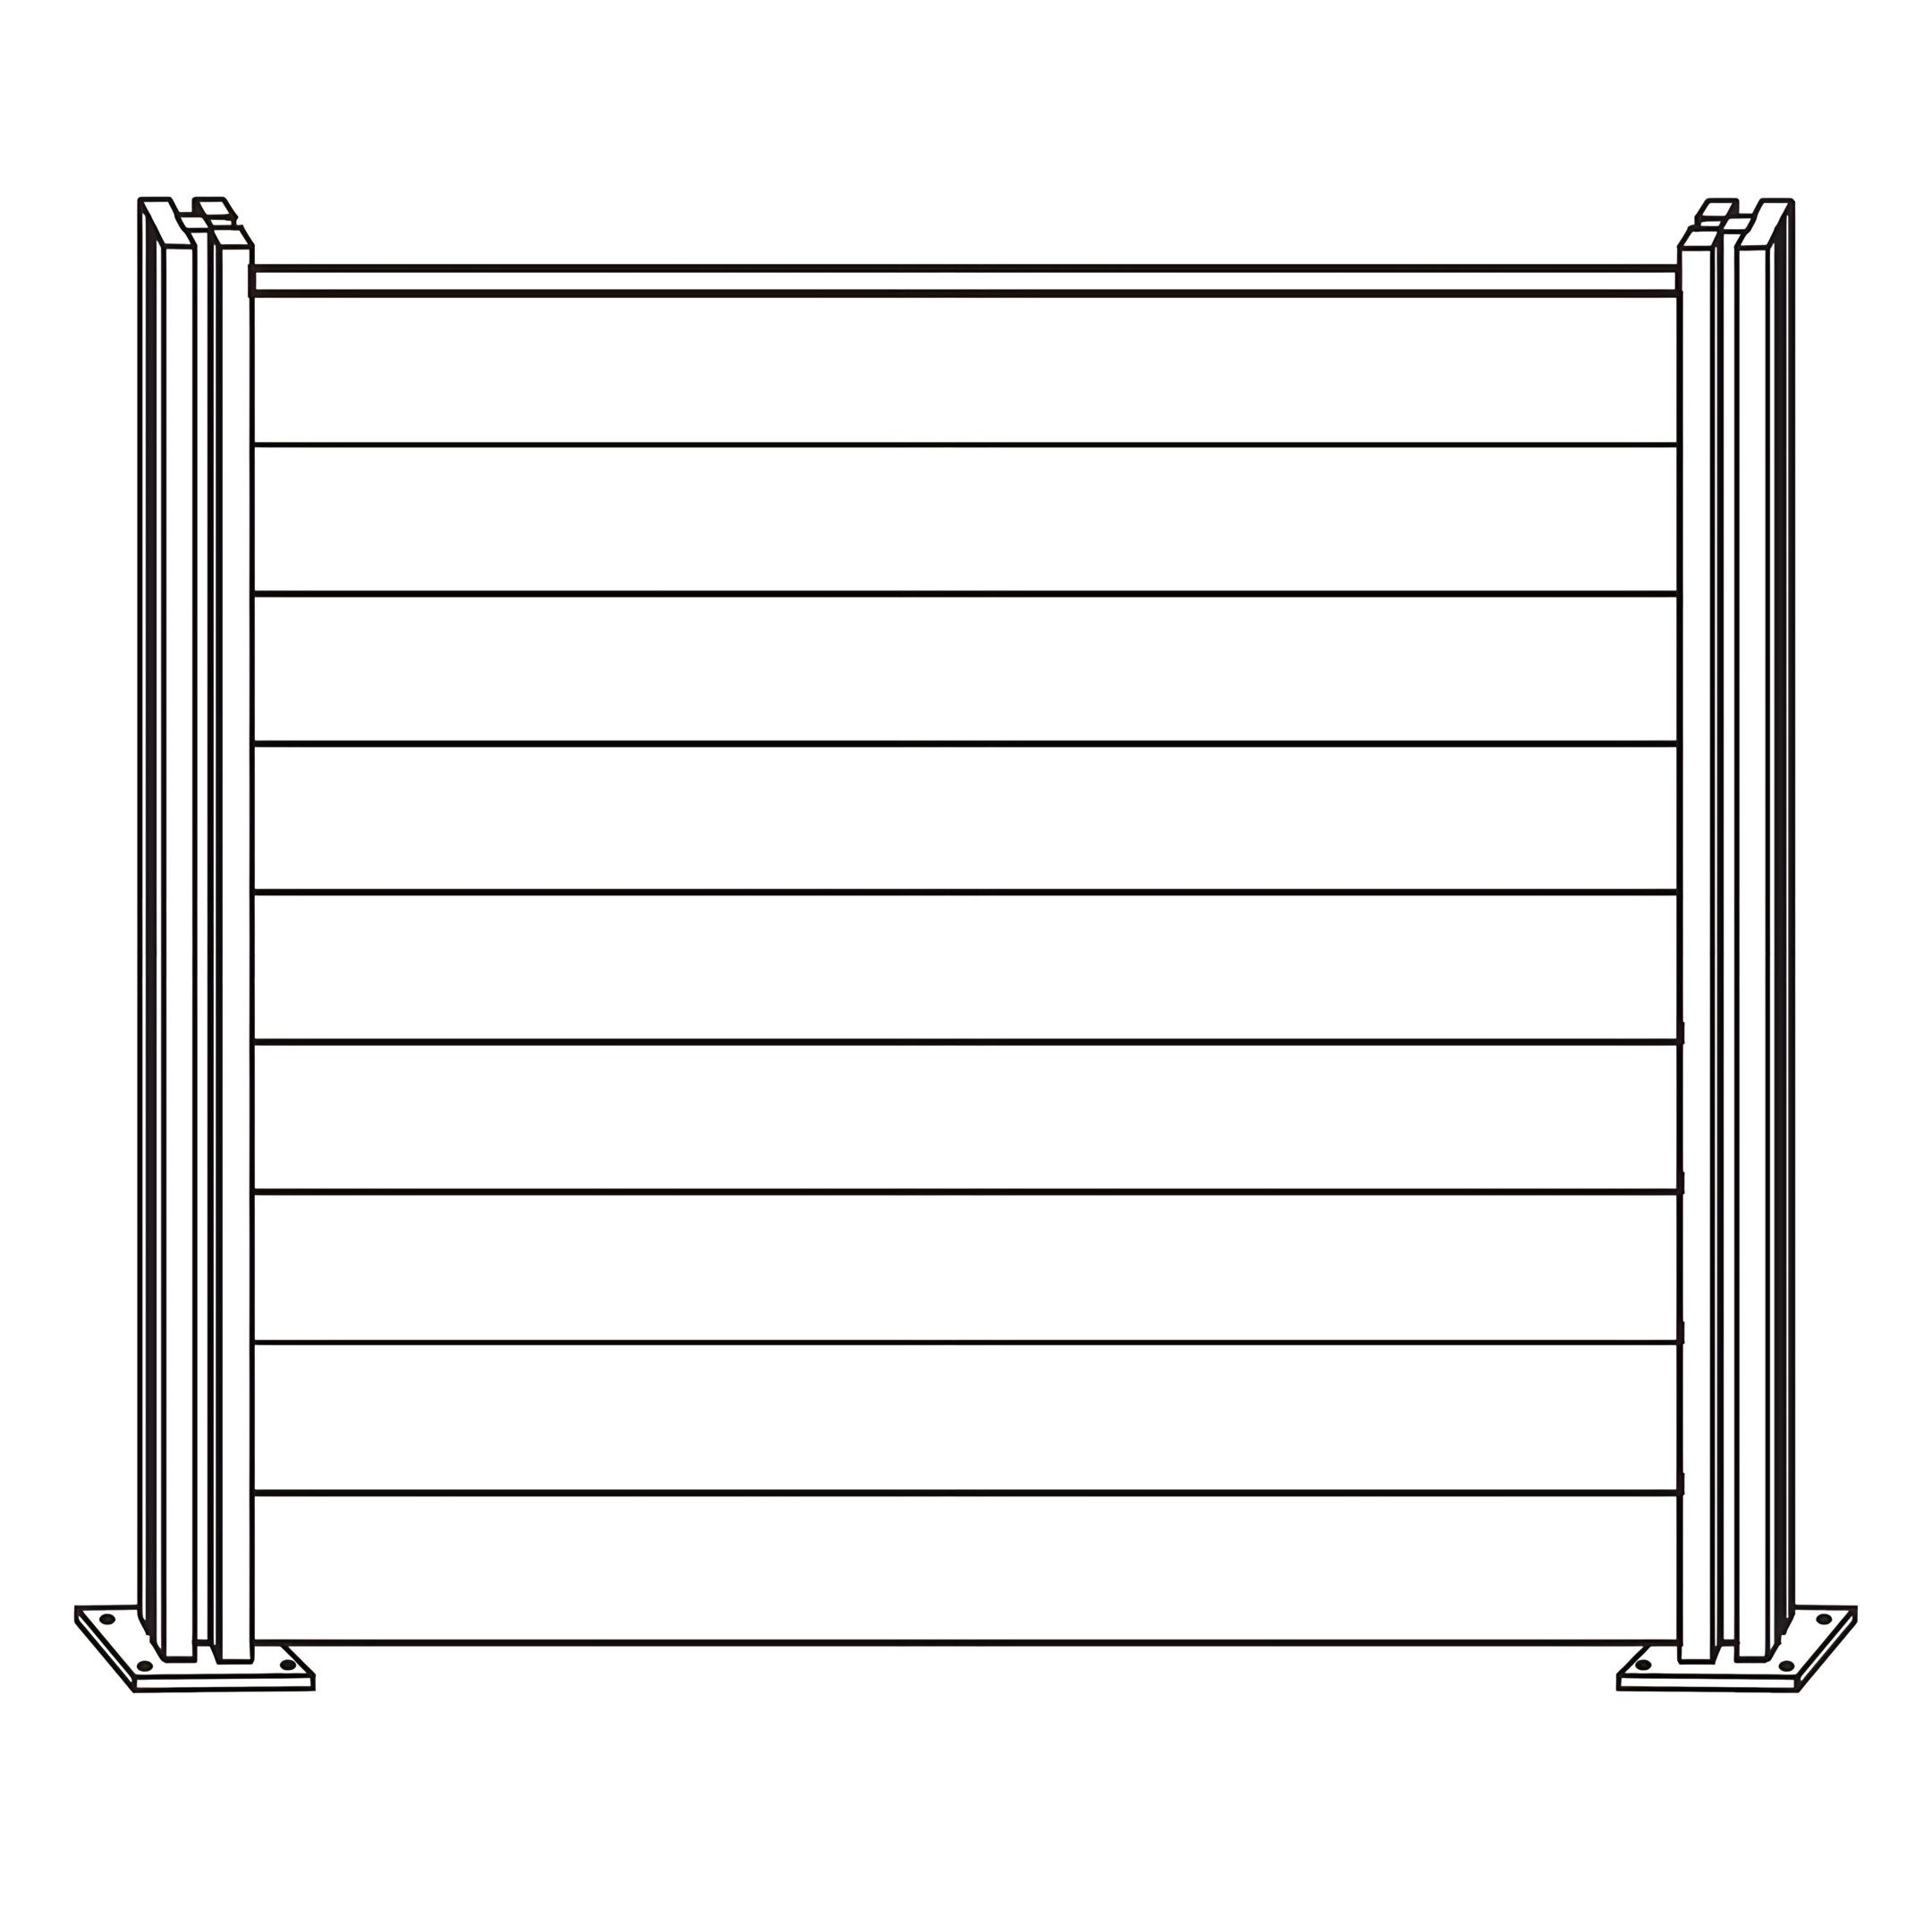
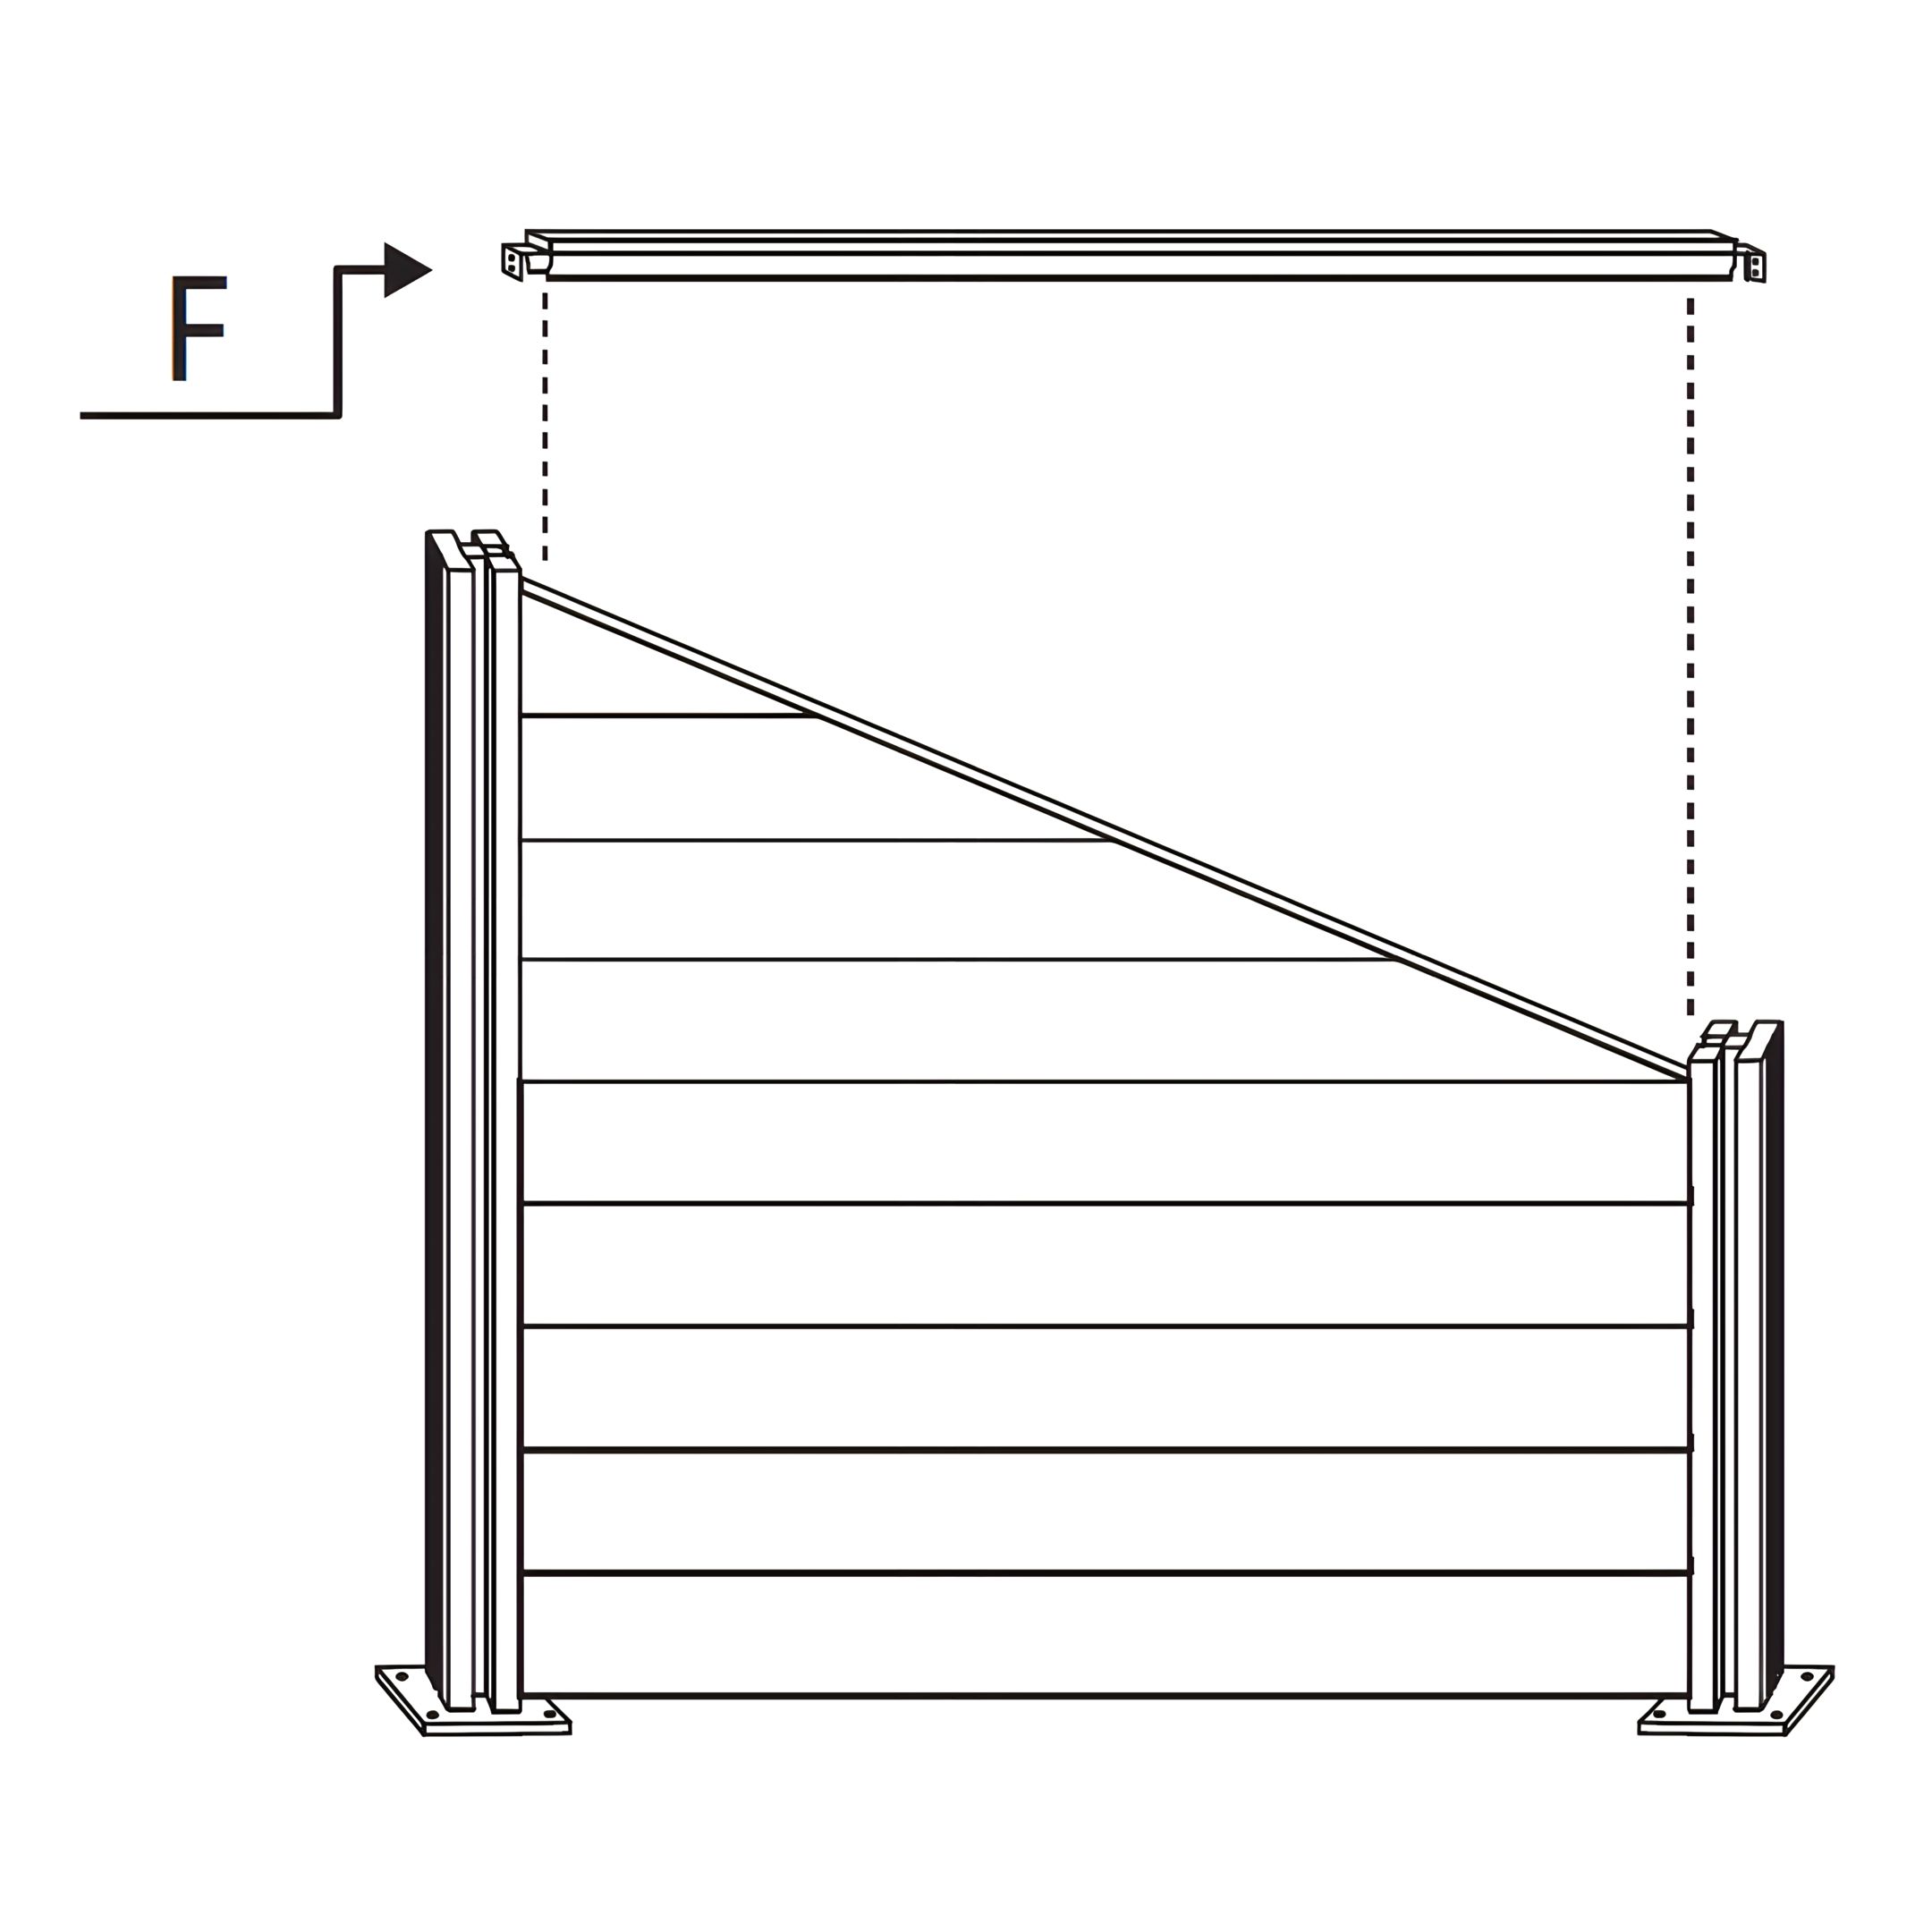
5. Topper Alignment and Securing
To install the fence slat topper, follow these steps:
Align the Fence Slat Topper (Part F) above the installed fence slats.
Ensure the topper fits securely into the grooves of the Aluminium LED Fence Posts (Part A).
Press down gently to secure the topper in place, ensuring it is aligned properly with the posts.
6.
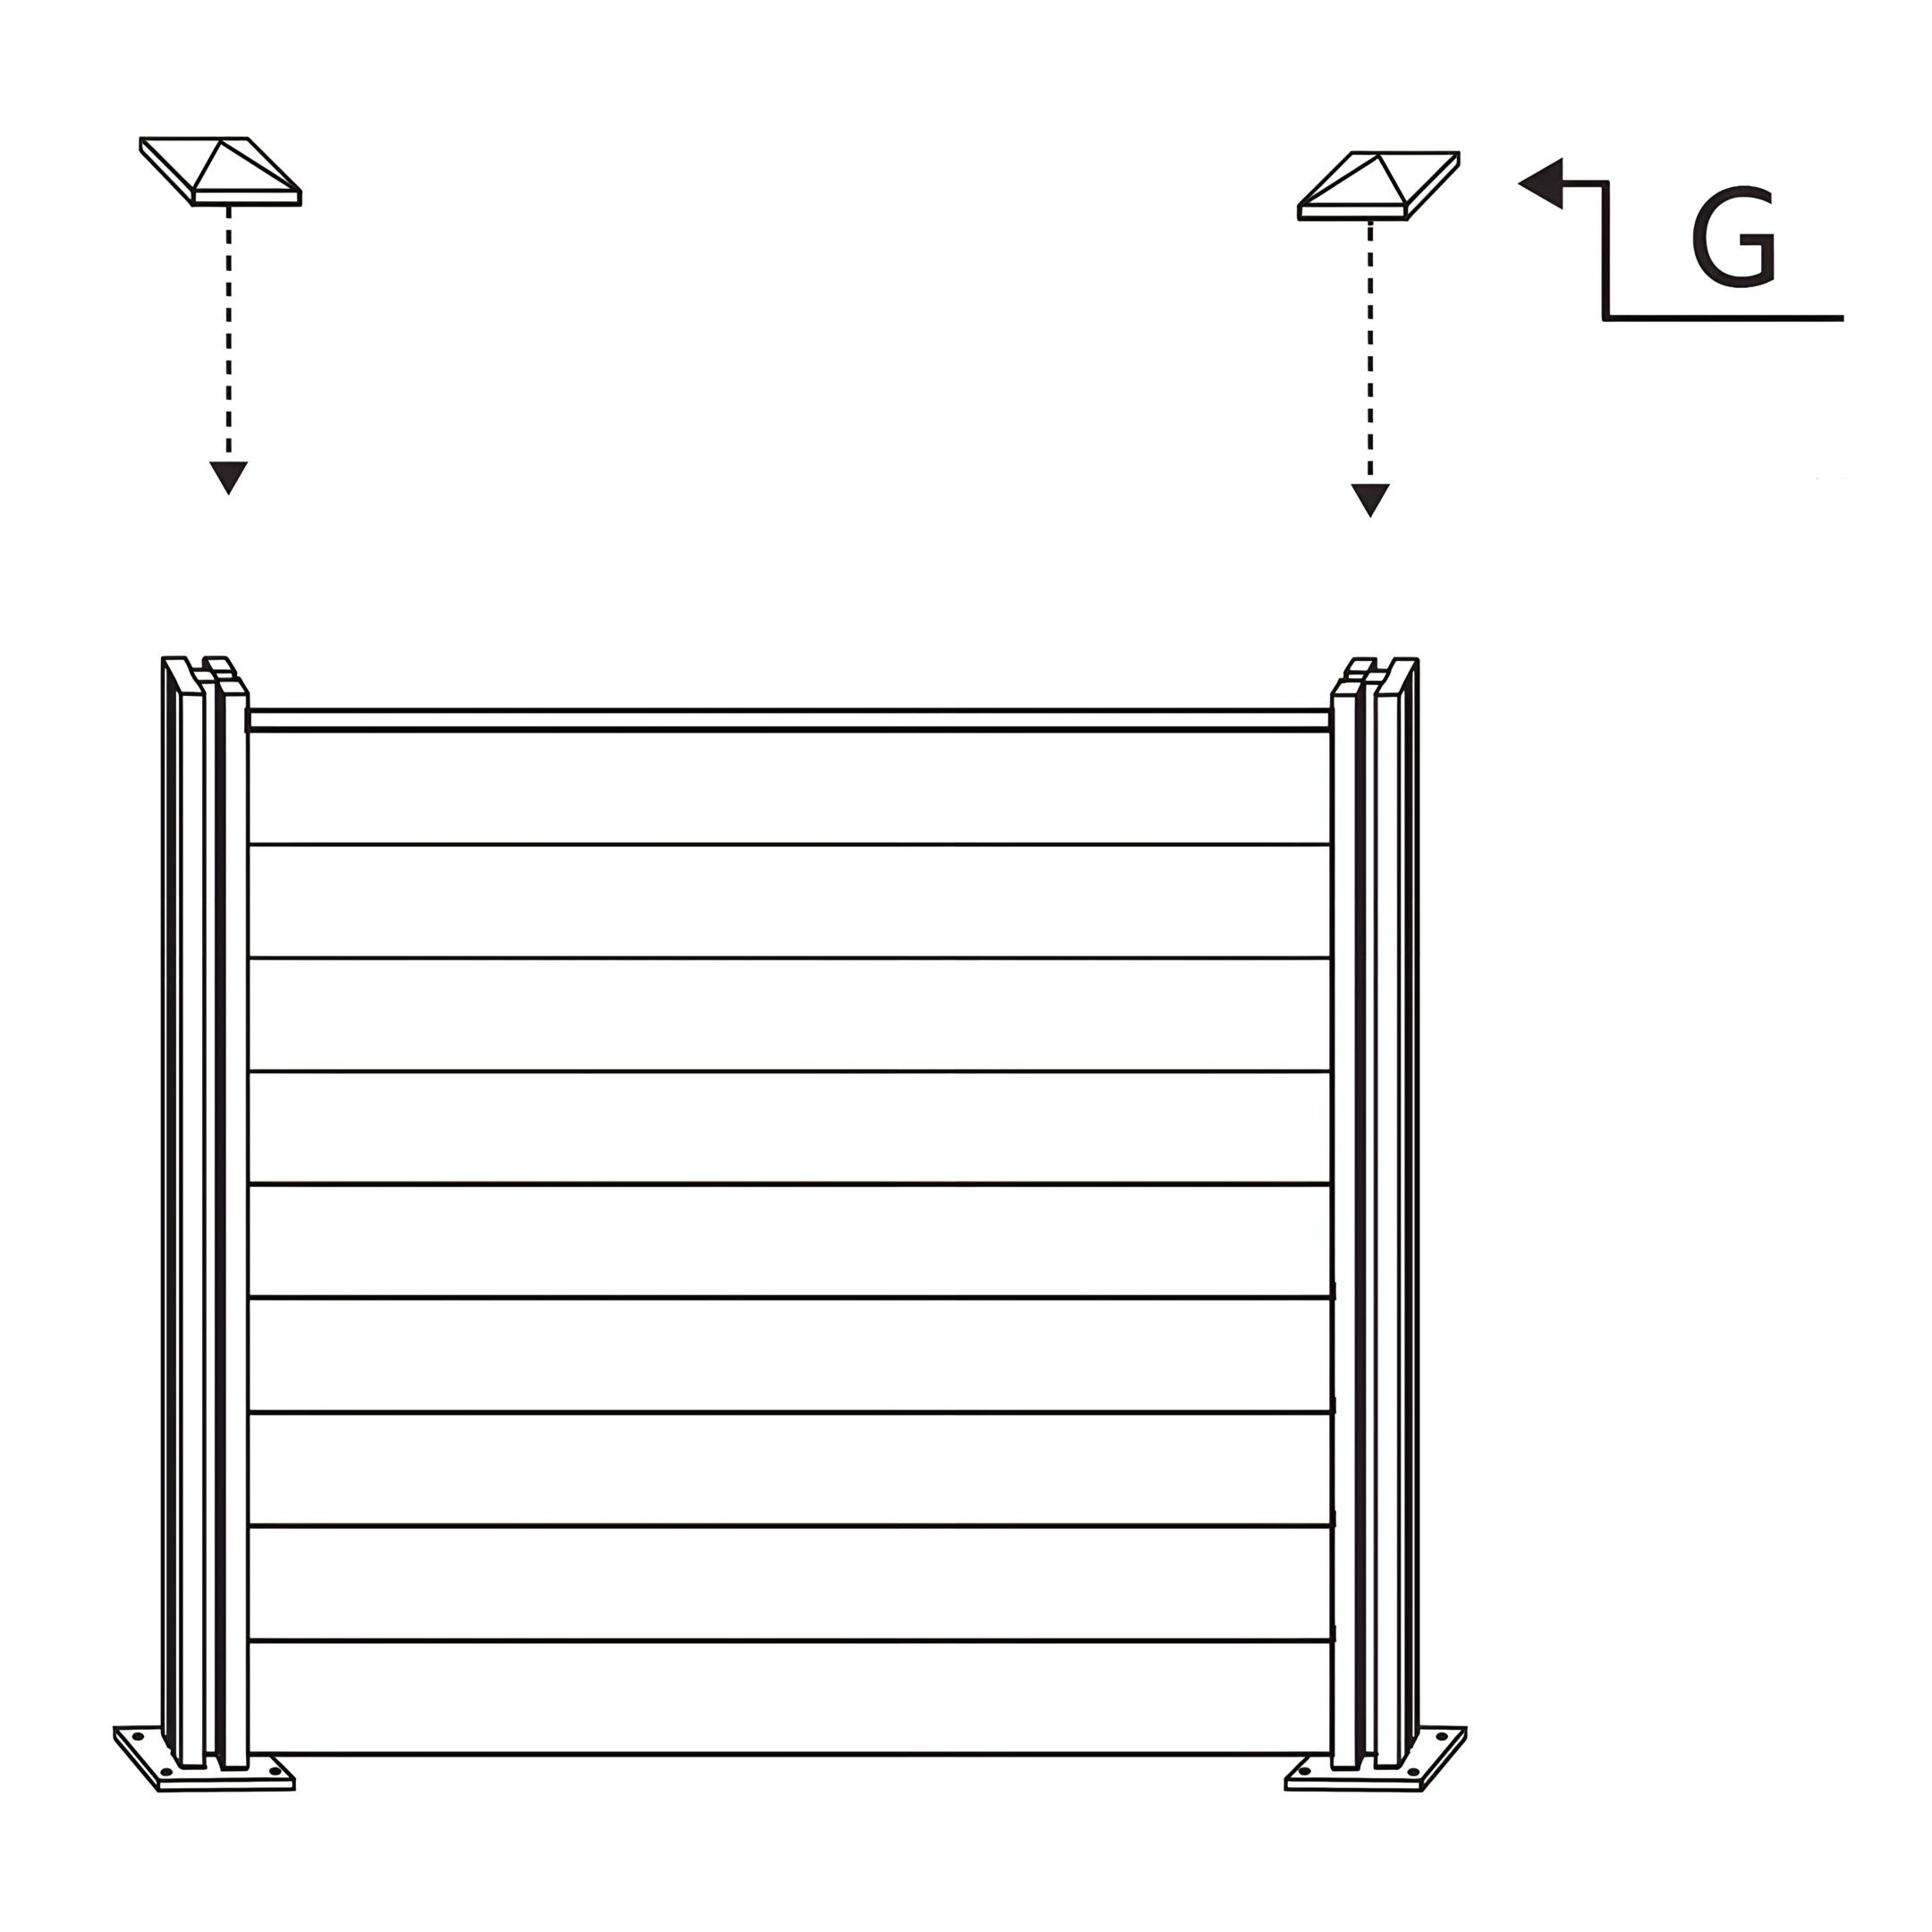
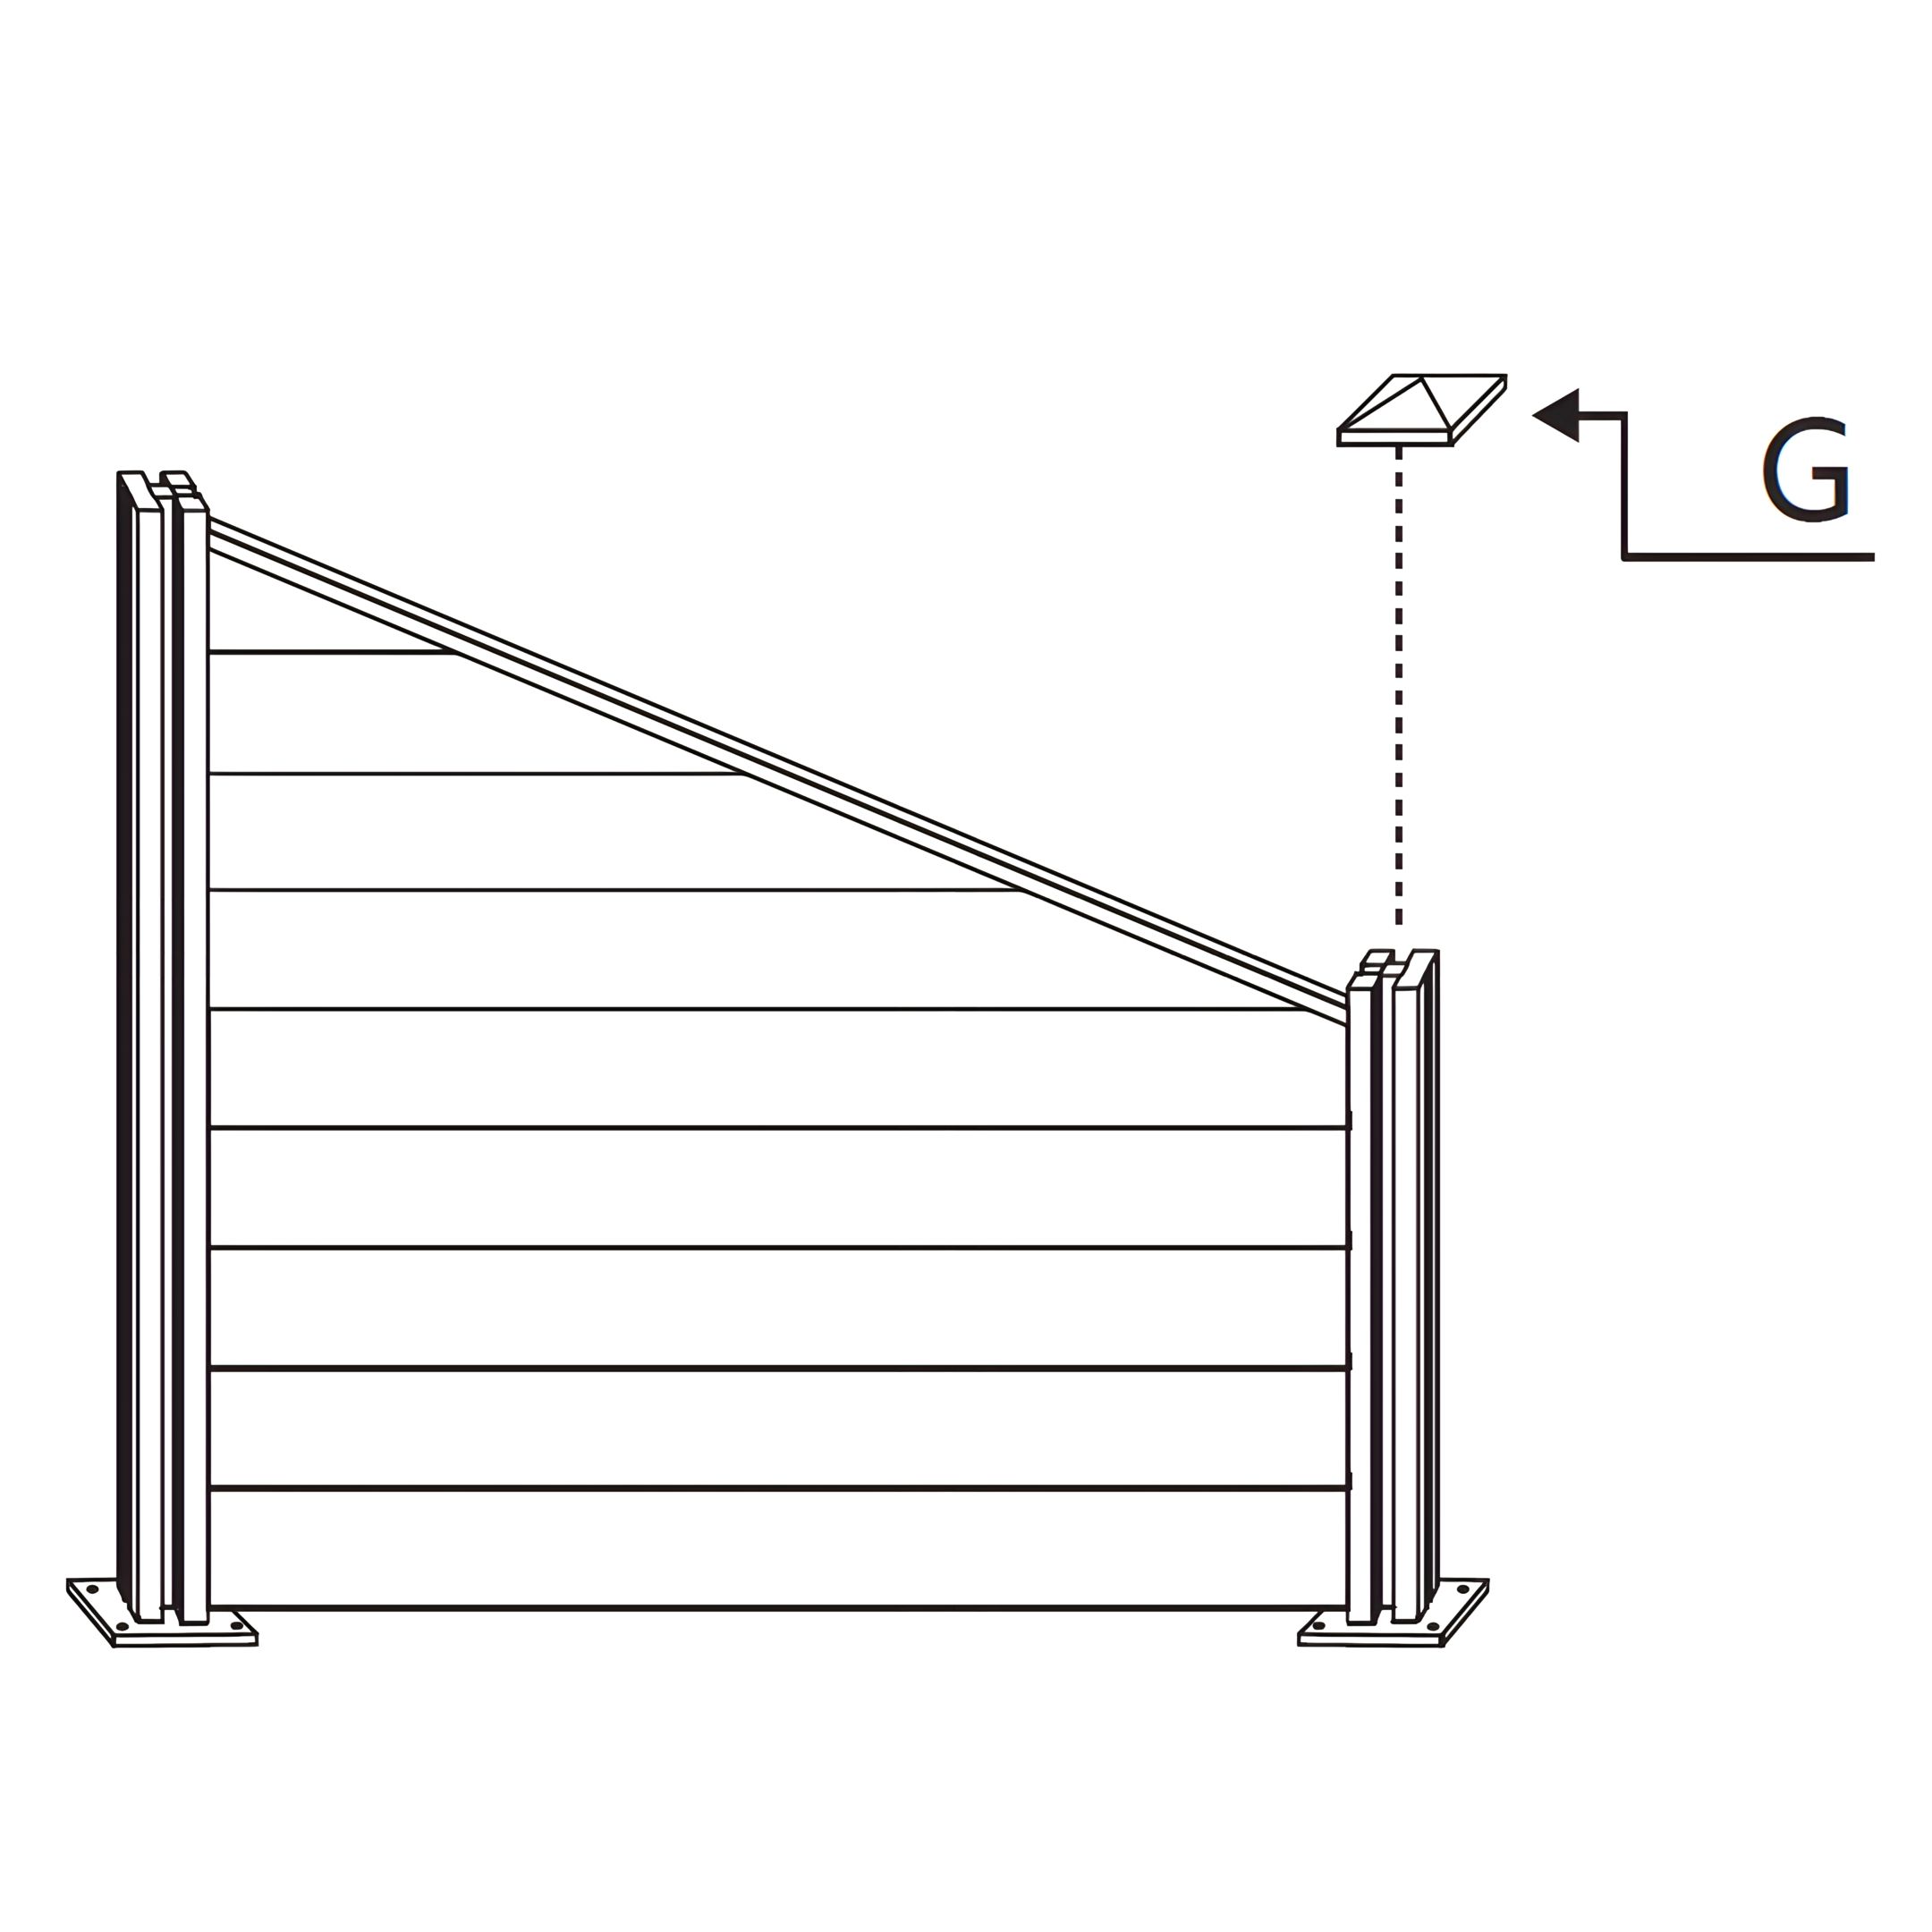
7. Topper Placement and Stabilization
To install the fence post toppers, follow these steps:
Align the Fence Post Topper (Part G) above each Aluminium LED Fence Post (Part A).
Ensure each topper fits securely onto the top of the posts.
Press down gently to secure the toppers in place, ensuring proper alignment with the posts.
8.
Corner Fence Assembly
9.
We recommend using a strong adhesive to attach the LED strips to the Aluminium posts.
10. Post Assembly and Alignment
Attach the Corner Fence Part A - Aluminium LED Fence Posts to the Corner Fence Part B - Fence Post Base using the Corner Fence Part D - M4x45mm Screws. Ensure the post is aligned correctly with the base and securely fasten the screws to hold the post in place.
11. Post Stabilization and Ground Anchoring
Secure the Corner Fence Part A - Aluminium LED Fence Posts to the ground by inserting the Corner Fence Part C - Floor Anchoring Bolts through the base holes and into the ground. Ensure the posts are stable and properly aligned.
12. Fence Slat Insertion and Alignment
Insert the Corner Fence Part E - Fence Slats between the two Corner Fence Part A - Aluminium LED Fence Posts. Ensure the slats are properly aligned and securely fit into the grooves of the posts.
13. Slat Installation and Alignment
Install the Corner Fence Part E1 - Top Fence Slat, Corner Fence Part E2 - Second Fence Slat, Corner Fence Part E3 - Third Fence Slat, and Corner Fence Part E4 - Fourth Slat between the two Corner Fence Part A - Aluminium LED Fence Posts. Ensure each slat is properly aligned and securely fits into the grooves of the posts, creating a stepped design.
14. Topper Alignment and Installation
Install the Corner Fence Part F - Fence Slat Topper by aligning it with the top of the installed fence slats. Ensure it fits securely across the top, completing the stepped design of the fence.
15.
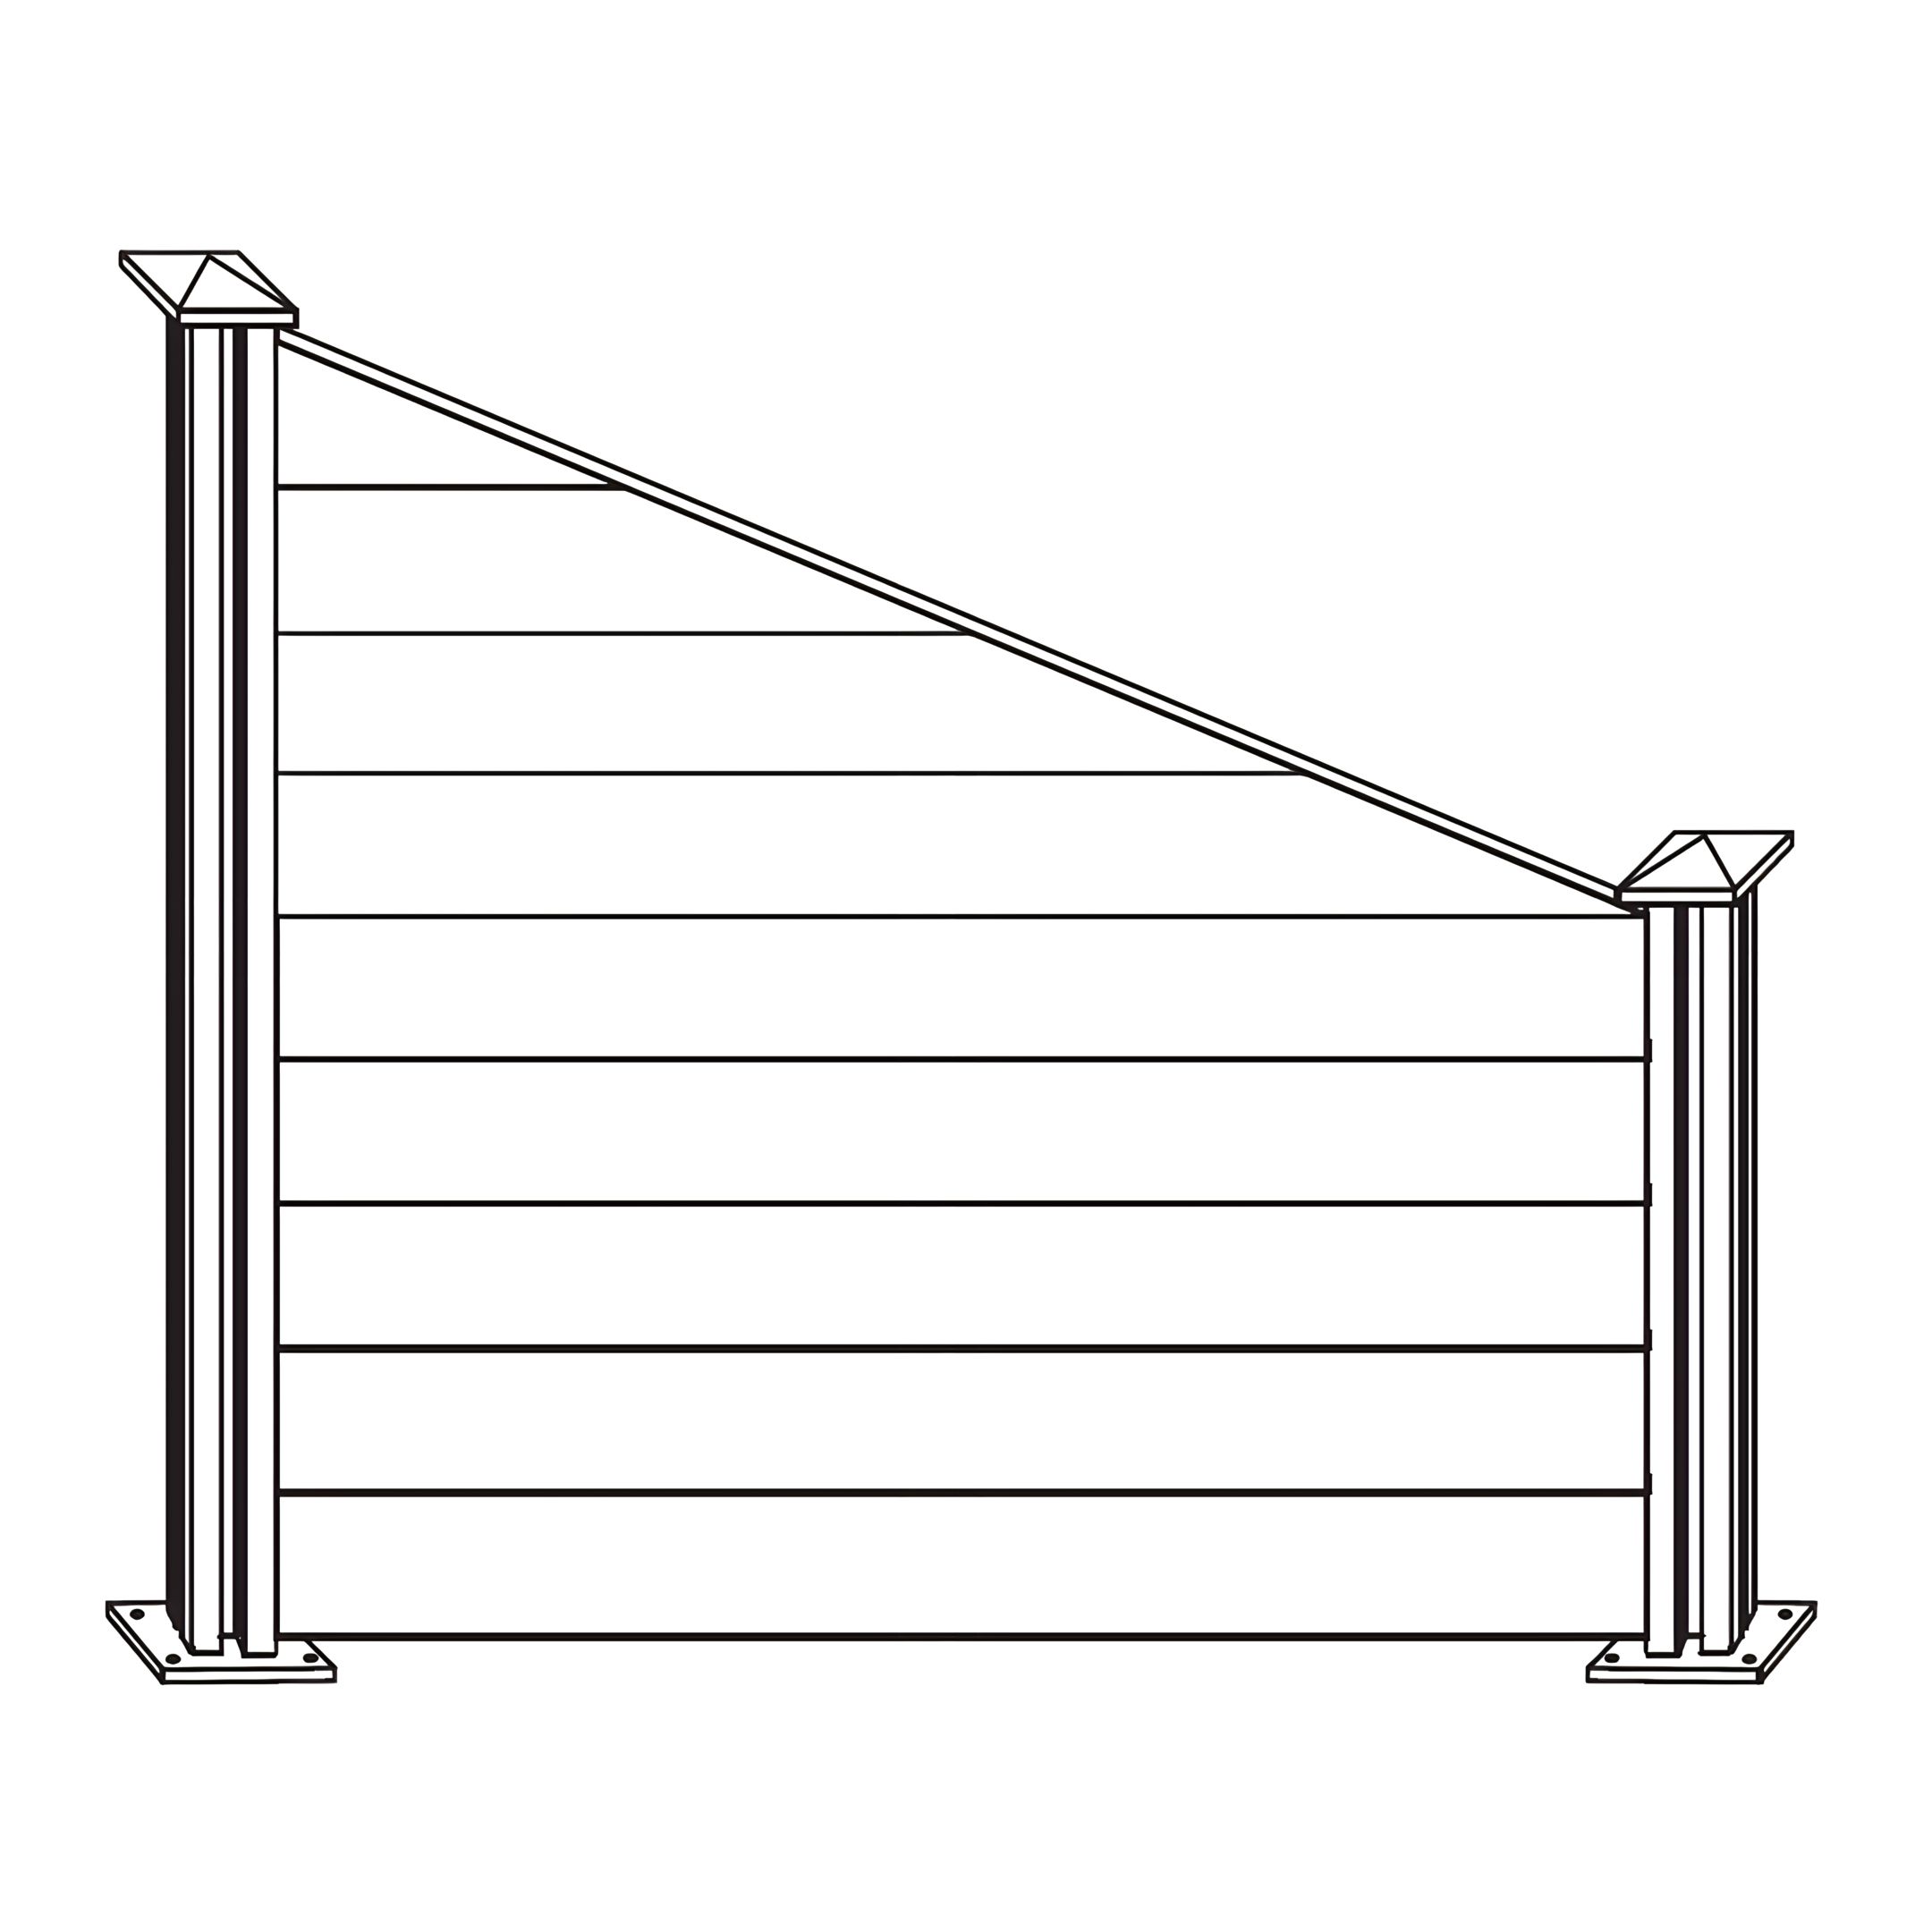
16. Topper Installation and Securing
Install the Corner Fence Part G - Fence Post Topper by aligning it with the top of the Corner Fence Part A - Aluminium LED Fence Posts. Ensure it is securely placed to complete the assembly of the fence structure.
17.
LED Post Assembly
18. Install with Glue
You can apply a layer of glue inside the groove of post, or put glue on the groove of the post in at least 5 points before inserting the LED strip light.
To ensure the LED strip remains securely in place, please use tape to fix at least 5 points (the tape can be removed after 24 hours). You can skip this step if the LED strip is securely installed and won't come out.
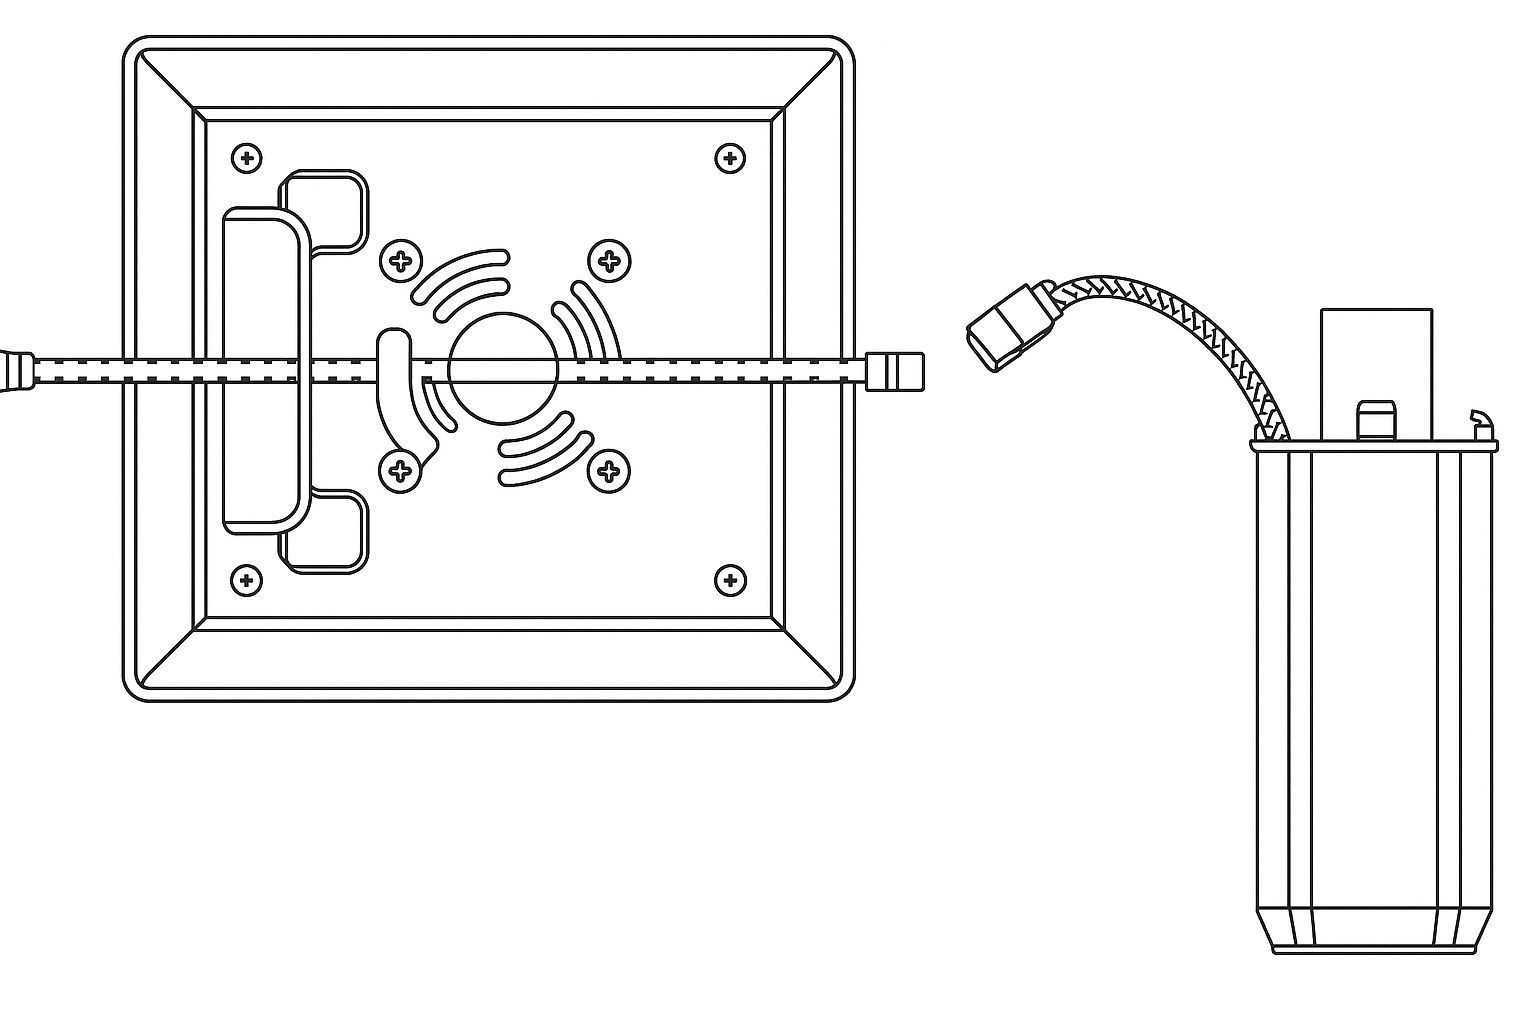
19. Solar Post Cap (Light) Installation
Connect the post cap to the battery with connectors;
Align the battery box with the hole on the post cap and rotate it counterclockwise to install. Please note that all wires must be inserted into the battery box to avoid damaging the wires during rotation;
Connect the post cap to the LED strip with connectors;
Insert the post cap into the post.
20. Replacing the Battery
Follow the instructions below and replace with a new rechargeable 18650 3.7V 1800mAh lithium battery (18650 3.7V 1500mAh lithium battery for Solar post cap).
Remove the solar cap (light) from the post, disconnect the battery, replace with a new battery, then refer to the Solar Post Cap (Light) Installation above;
Please recycle the used battery or dispose of it properly according to local laws or regulations.
Do not puncture, short circuit or burn it in fire
21. Recharge Procedure
Remove the solar post cap (light) from the post, disconnect the post cap and LED strip light;
Double check the location of the solar panel to ensure it's in a clear location without any shading and always make it south facing;
Leave it to recharge for 3-5 sunny days at daytime, remember to turn off the light to terminate discharging of the battery;
After 3-5 days charging, battery may recover to normal working status;
If your light still does not work or just lighting for a short period of time after dark, change the old battery with a new 3.7V 1800mAh lithium battery;
Maintenance & Troubleshooting
22. Maintenance
Routine Cleaning: Occasionally rinse the fencing with water to remove dust, pollen, or debris. For more thorough cleaning, use a soft brush and mild soapy water.
Avoid Harsh Chemicals: Do not use bleach, strong solvents, or abrasive cleaners, as they may damage the surface finish.
Check LED Functionality: Periodically inspect the solar LED lights to ensure they are free from dirt or obstructions that may block sunlight.
Snow and Ice: If snow accumulates, gently remove it using a plastic shovel to avoid scratching the surface. Avoid using salt or chemical de-icers near the base.
Prevent Plant Overgrowth: Trim nearby plants or vines to avoid contact that might cause staining or trap moisture.
23. Troubleshooting
WHAT DO I DO IF THERE ARE MISSING PARTS FROM MY ORDER?
If there appears to be any part missing from your order, contact our friendly and helpful Customer Support Team within 7 days of receipt.
FOR ALL OTHER ISSUES, PLEASE CONTACT OUR CUSTOMER SUPPORT TEAM.
Previous stepCopy link to sharePrint / PDFNext step