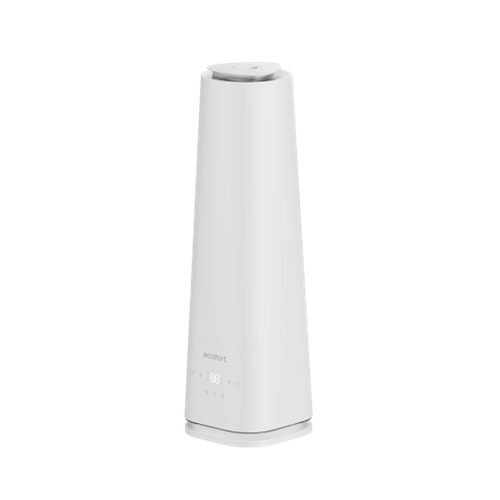
ecoQ HumidAir U500 Step-by-step guide for setting up, operating, and maintaining the ecoQ HumidAir U500. Covers filling, mist levels, heating, humidity settings, timer, Wi-Fi control via the ecofort App, cleaning, descaling, and troubleshooting for optimal performance and air quality. -
Directions for Use 1. Set Up
-
Select a firm, level, flat location - at least 15 cm from any wall or object for proper air flow.
-
Place the humidifier on a water-resistant surface, as water can damage furniture and some flooring.
-
Do not place unit directly on carpet, towels, blankets or other absorbent surfaces.
Note: We will not accept responsibility for damage caused by water spillage.
-
2. Filling
-
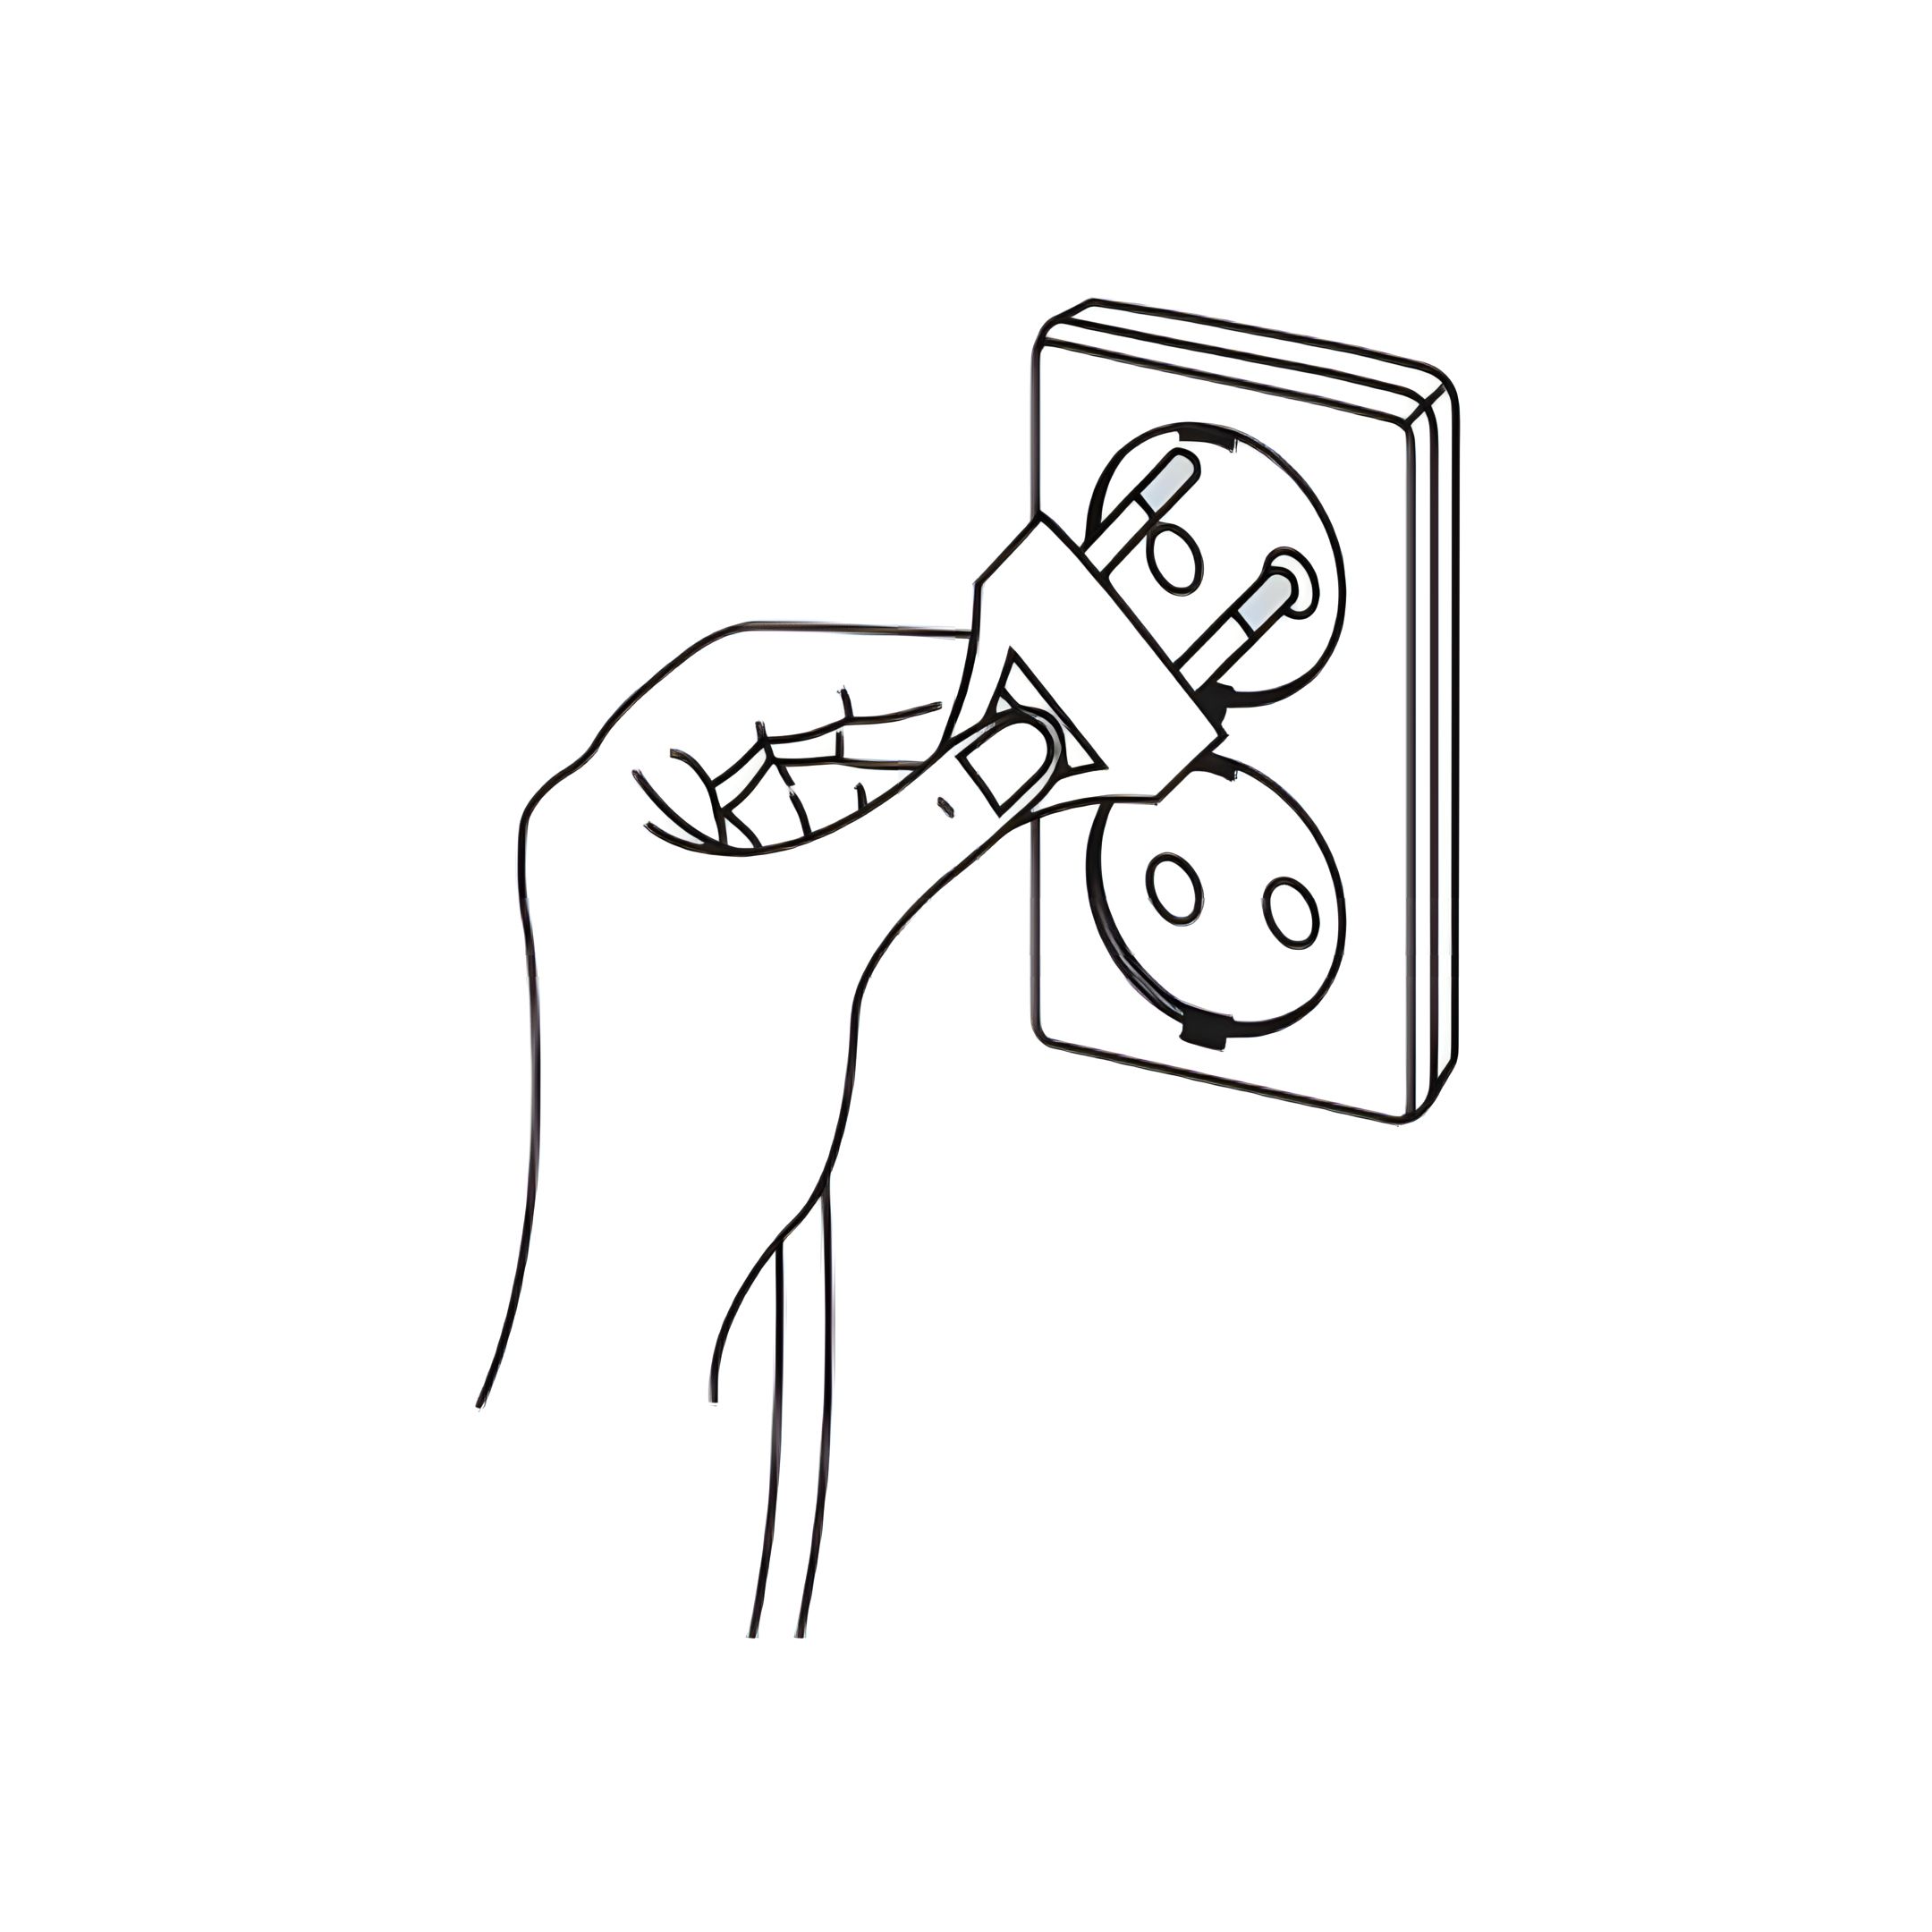
Make sure unit is unplugged
-
Add water to humidifier
- Remove the top cap and add water directly to the tank.
-
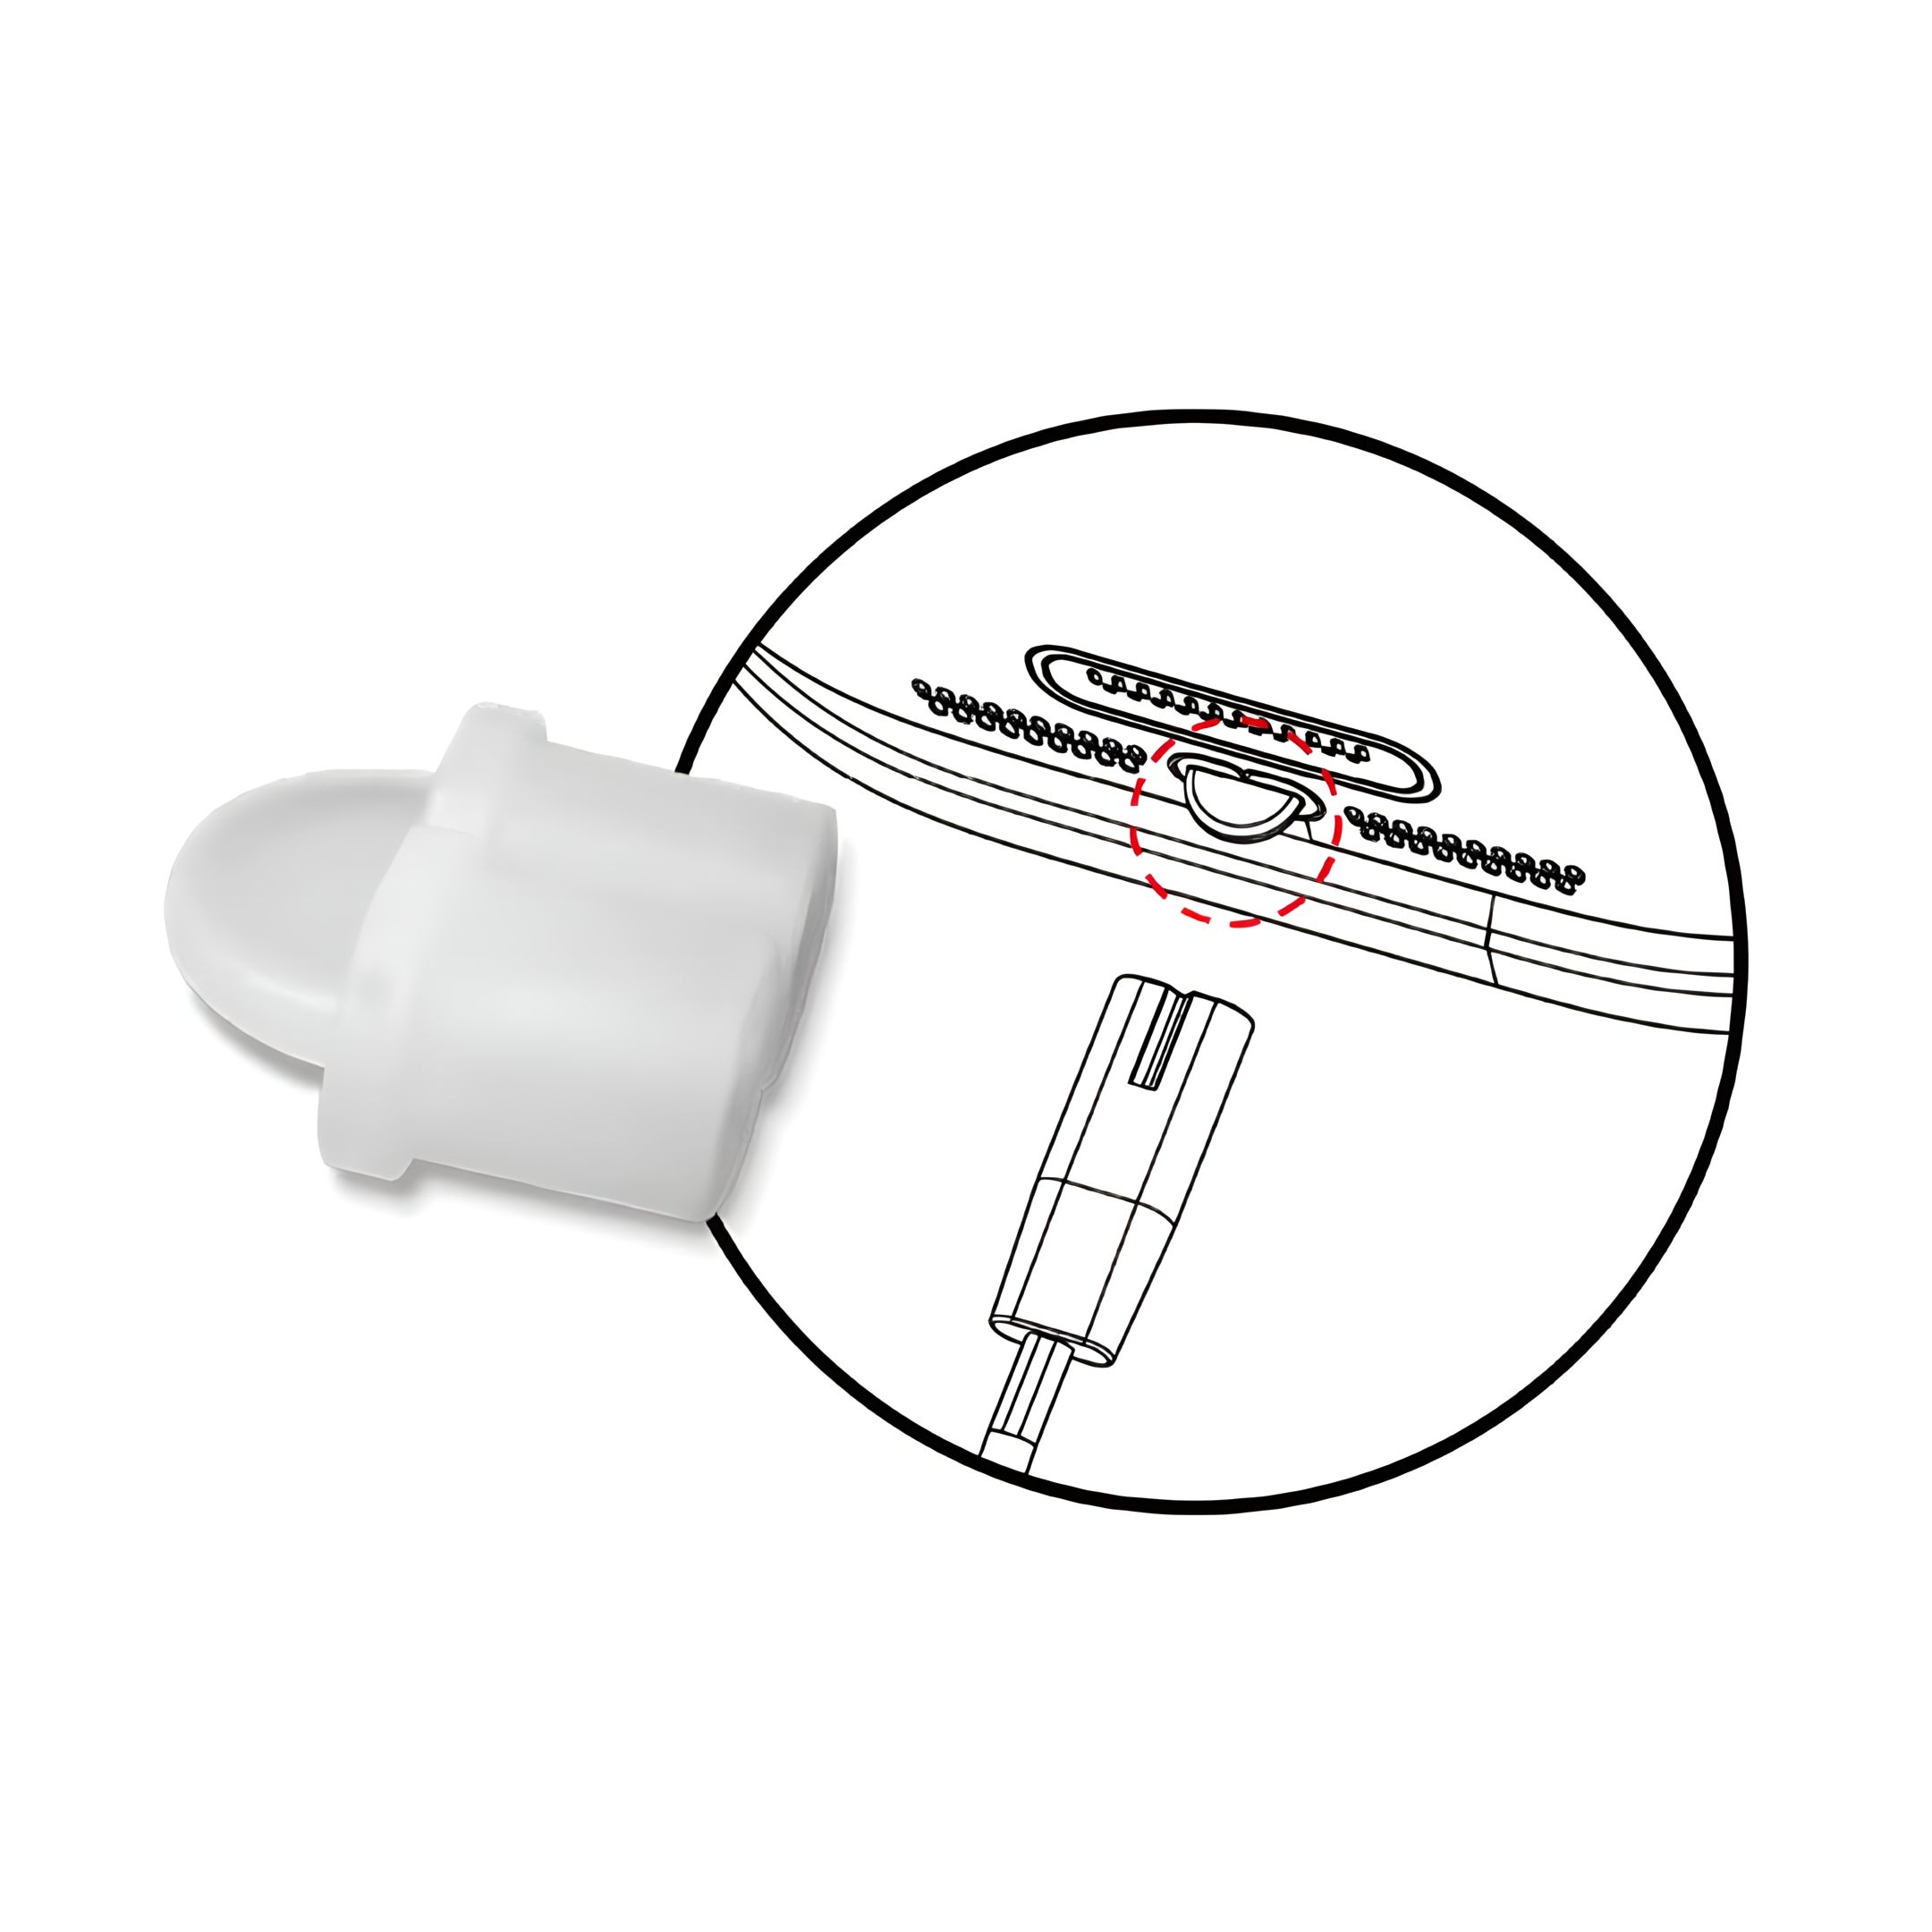
3. Humidifier Tube Installation Instructions To install the humidifier tube, rotate it clockwise to the end position, aligning it with the valve.
Important: Incorrect installation may allow water to enter the main unit, potentially causing
damage.
- Align the humidifier tube with the groove below.
- Holding the entire tube (excluding the nozzle), rotate it clockwise until it stops completely. Do not shake or force it.
-
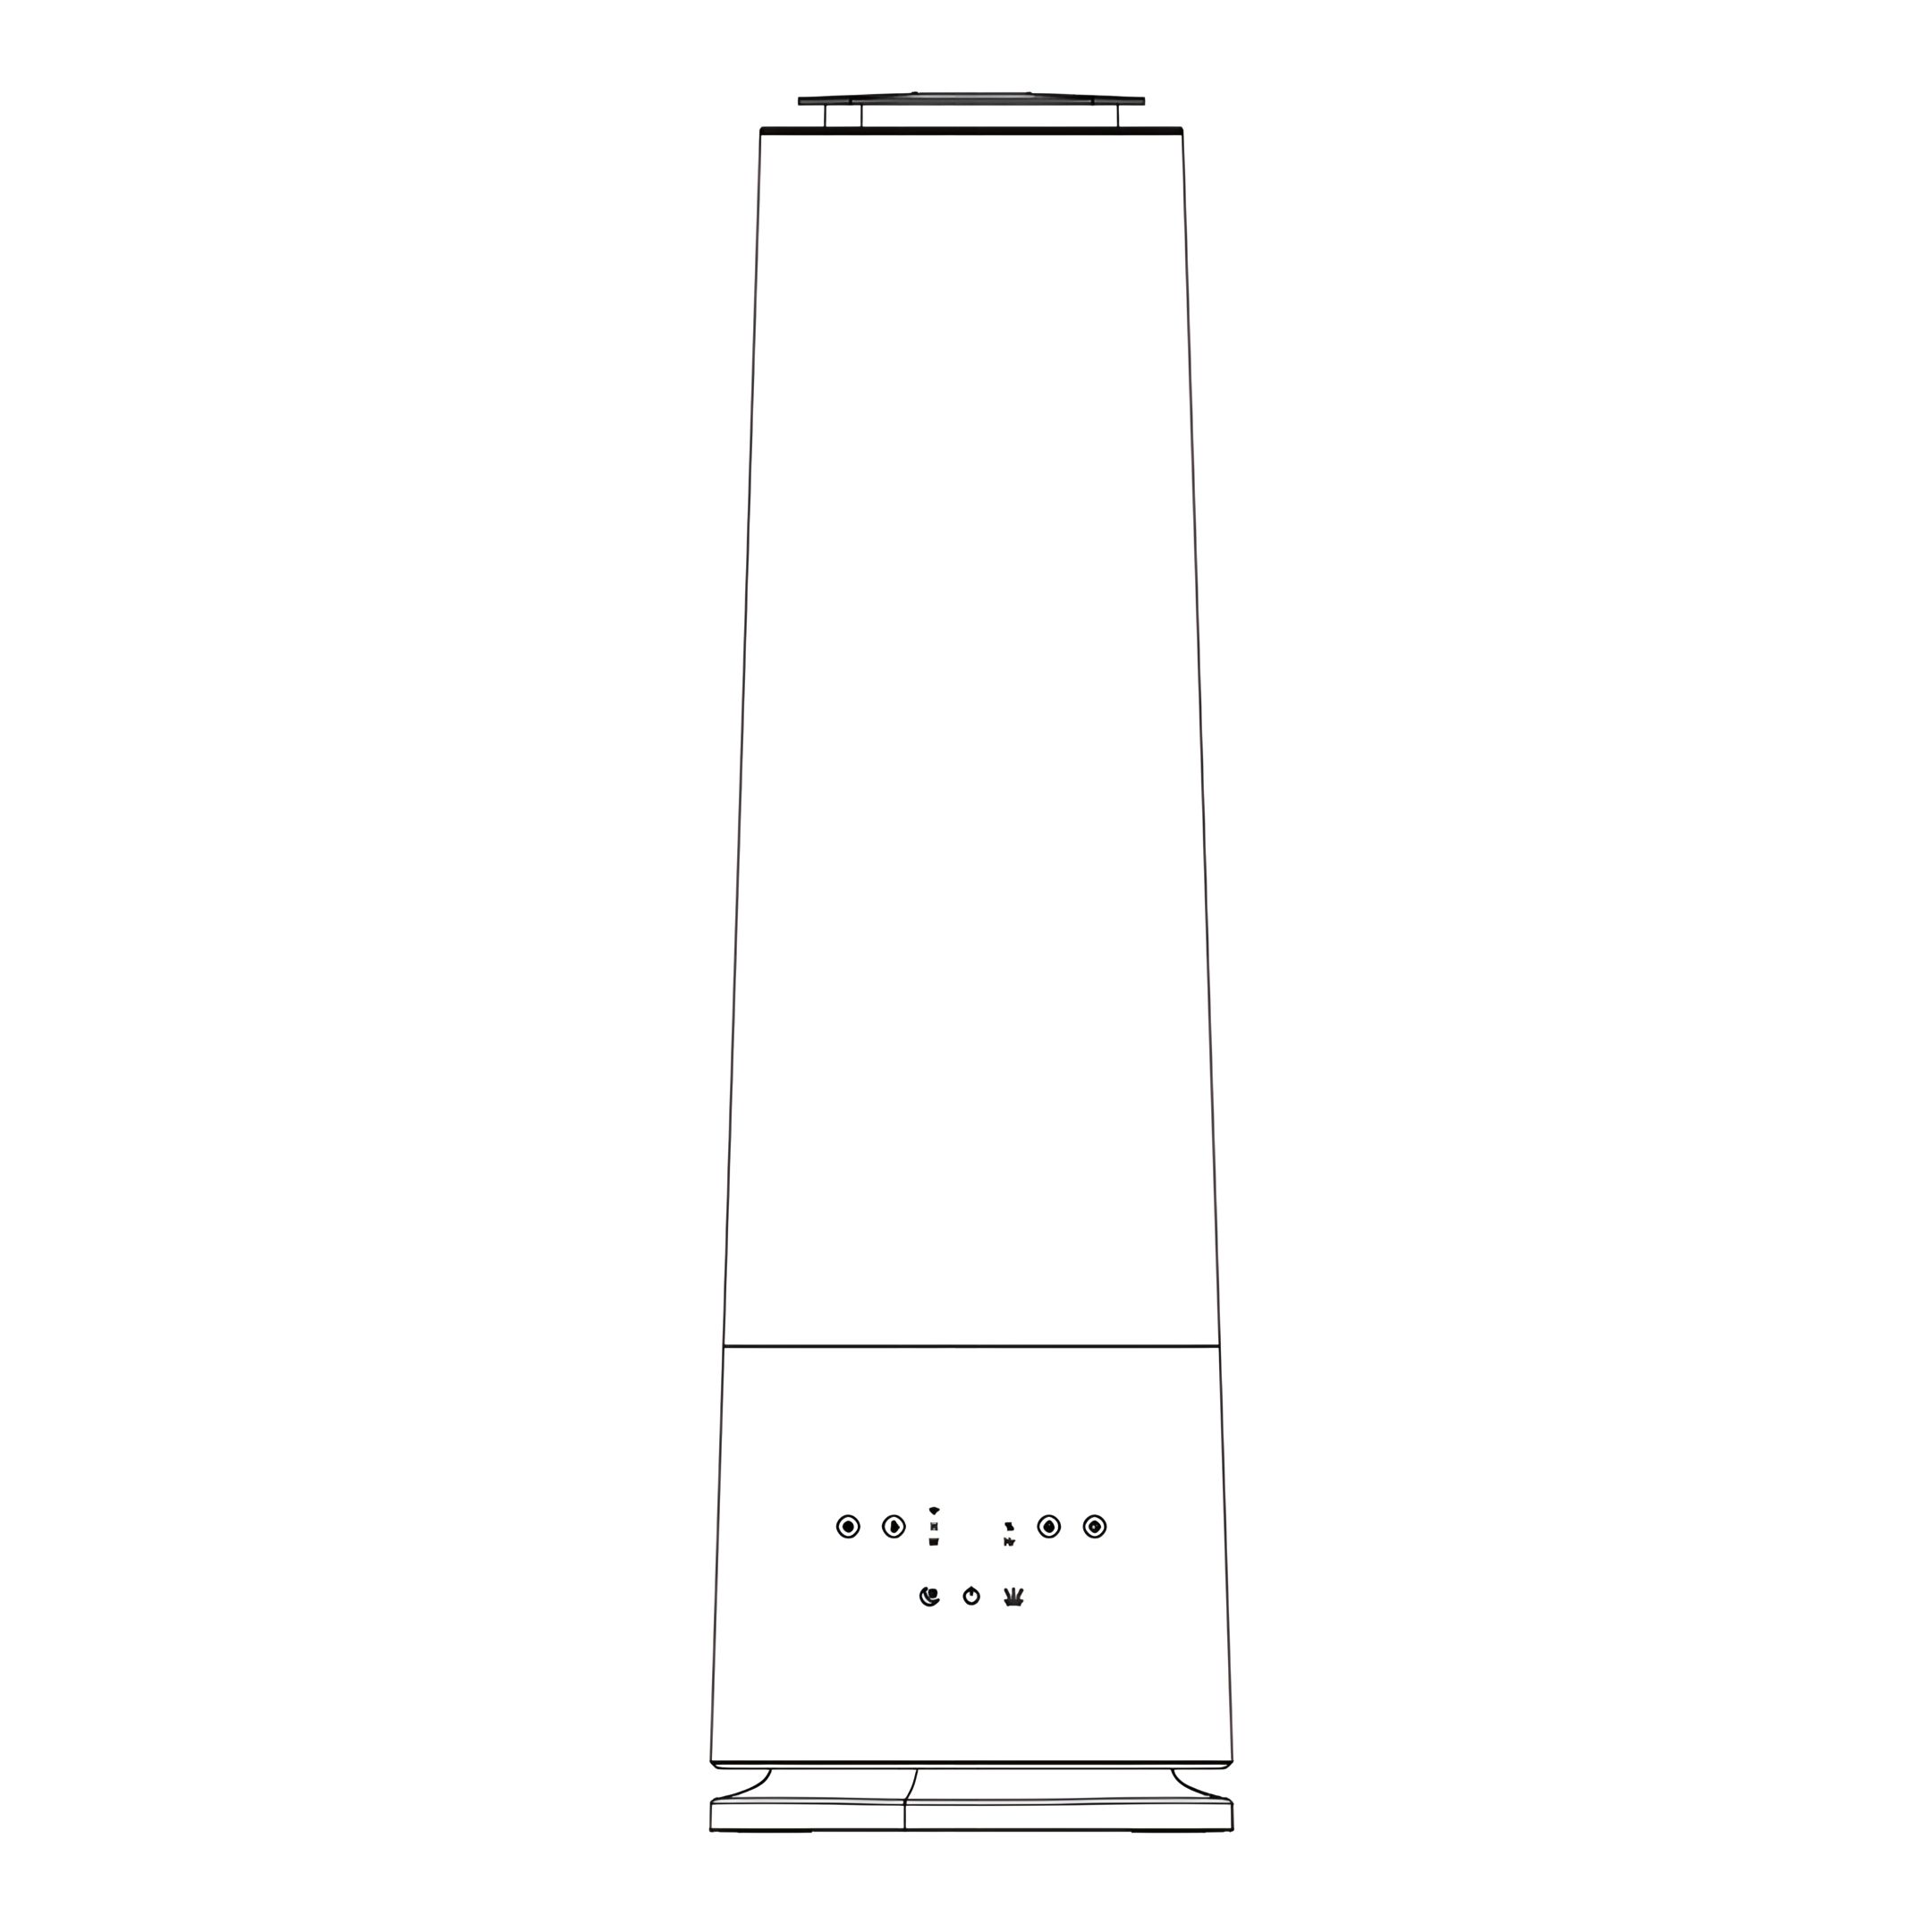
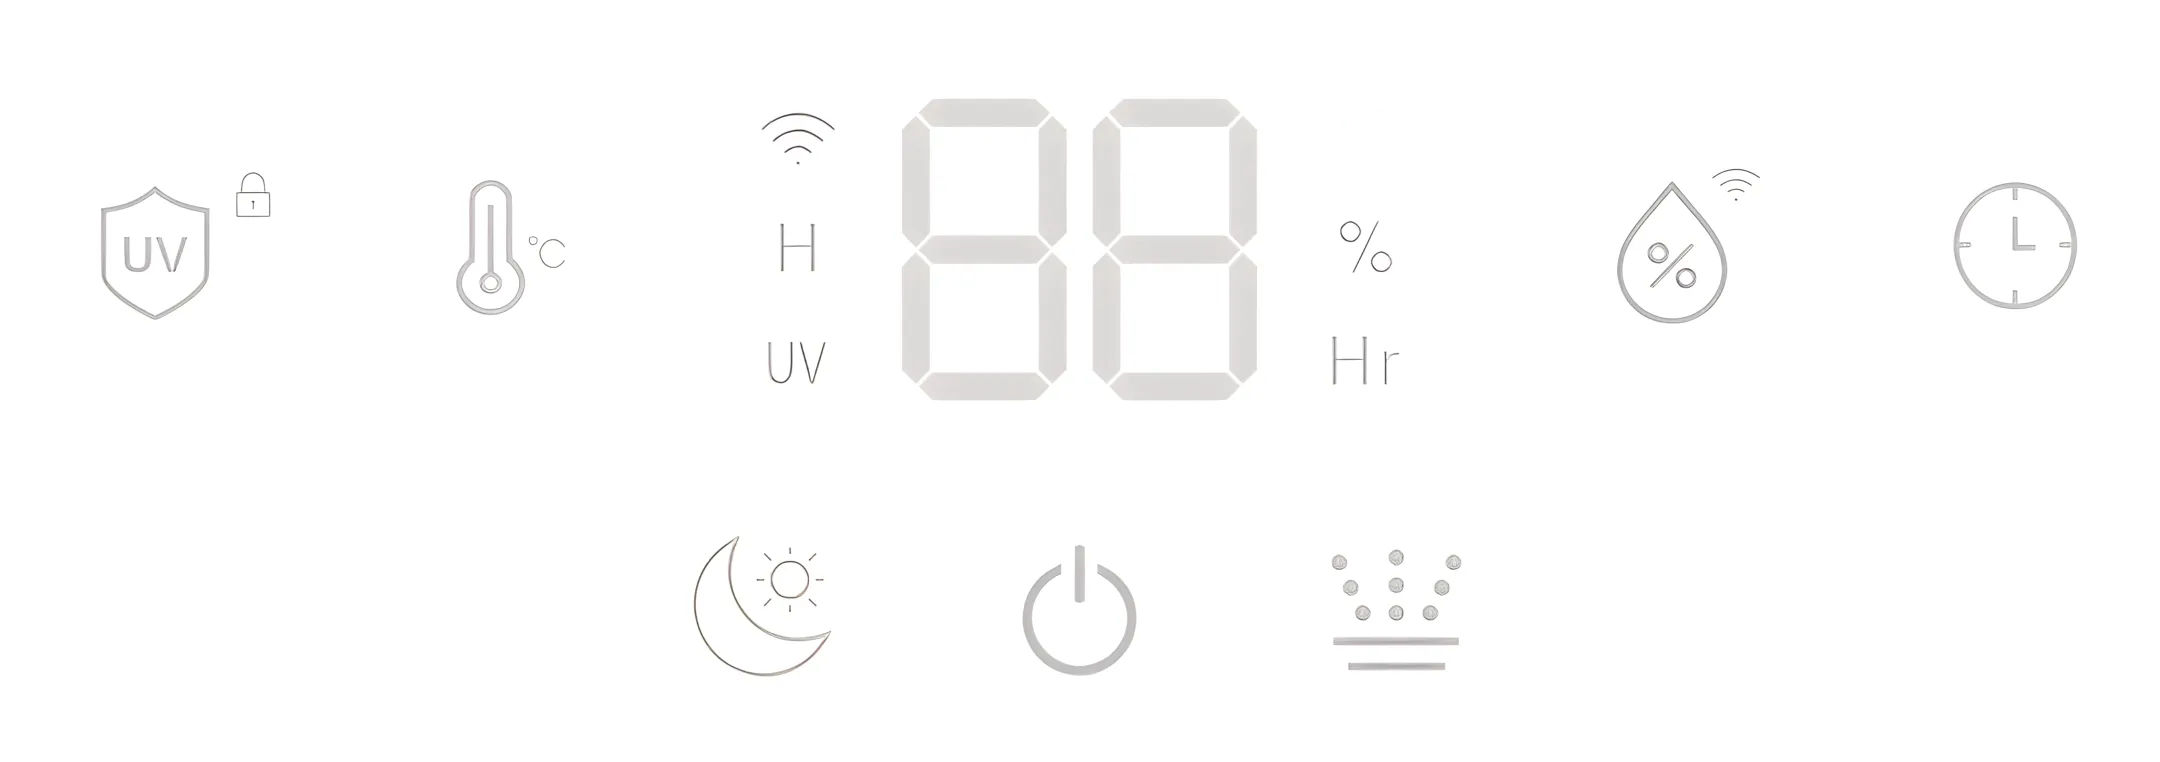
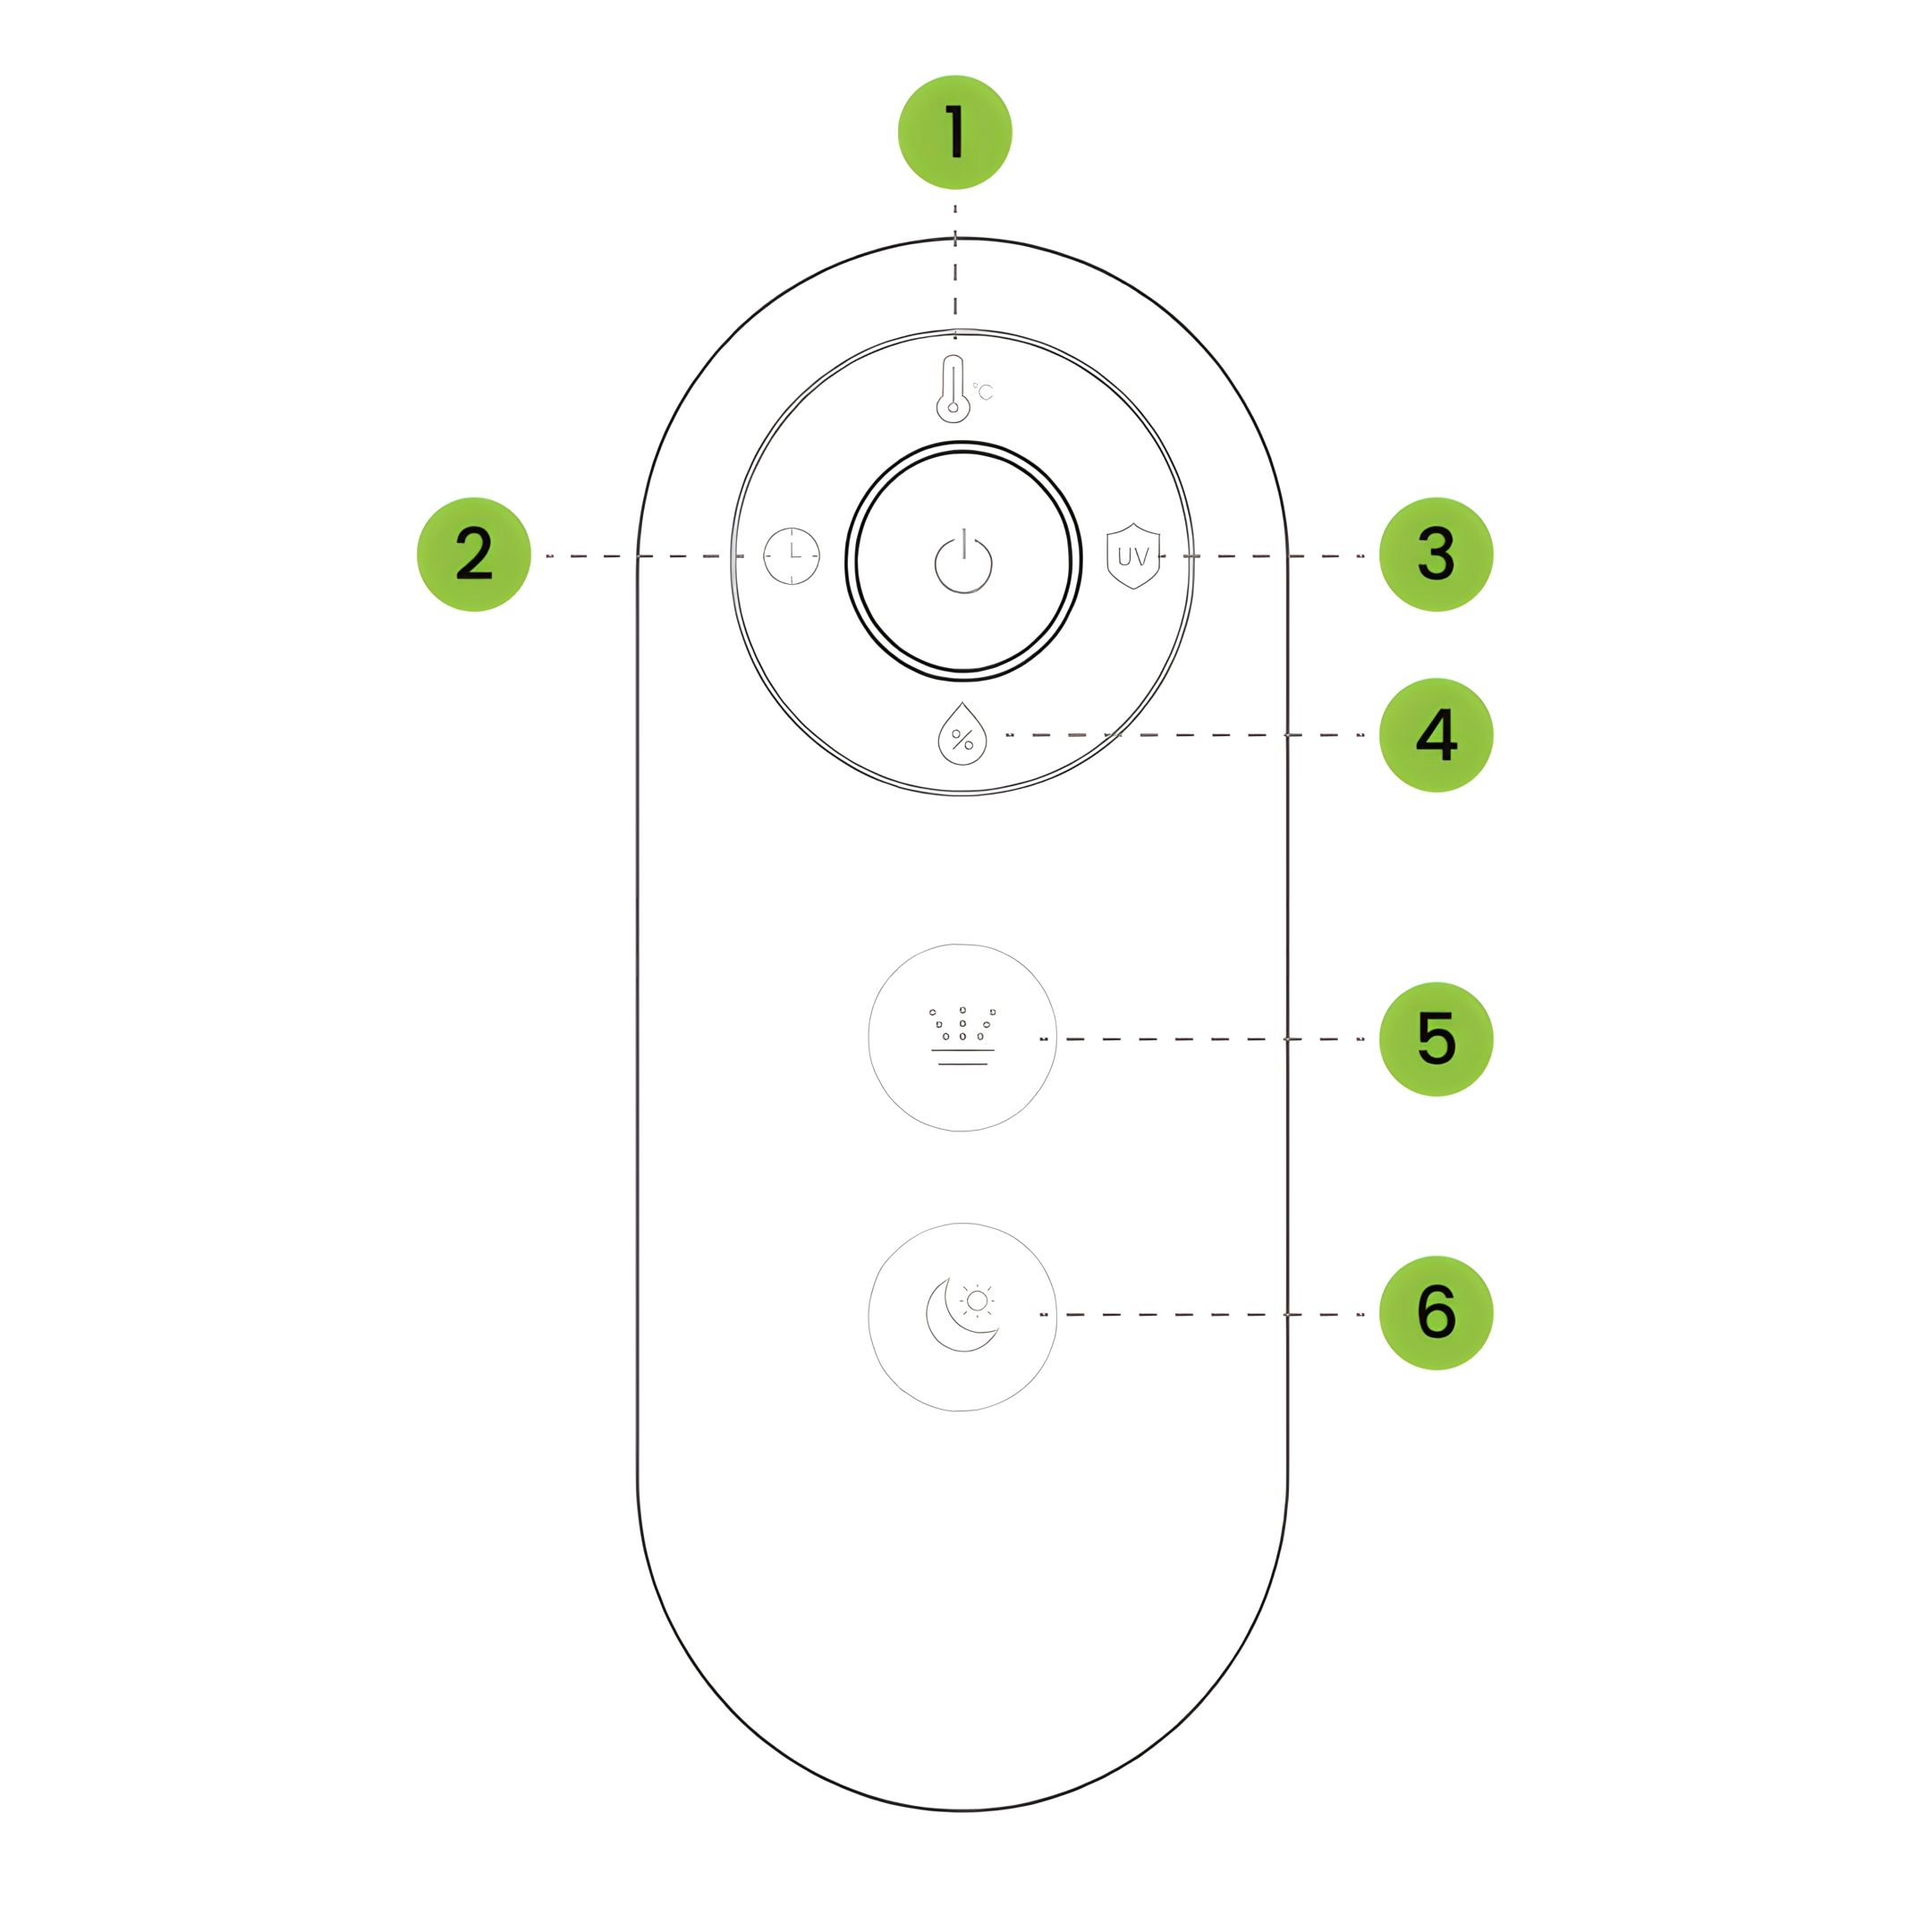
Functions and Features 4. Display -
5. Remote Control
- Heating
- Timer
- UV Lamp
- Humidity
- Mist Level
- Sleep Mode
-
6. Power-On and Humidity Level Display
-
When the unit is plugged in, the buzzer beeps once and all indicator lights briefly turn on for 2 seconds.
-
After that, the
device enters standby mode.
-
When you press the Power button, the unit automatically measures the current
humidity in the environment and displays one of three colors, indicating the humidity level:
-
Environmental humidity<40% RH: The colored light shows a red light, and the fan is operating at high speed
-
40% RH ≤ Environmental humidity ≤ 60% RH: The color light displays green light, and the fan operates in mid
range
-
Environmental humidity>60% RH: The color light shows blue light , and the fan operates at low gear
-
7. Power On/Off
- Touch the Power button to turn device On/Off.
- After switching off, the fan runs for 60s before shutting down automatically
-
8. Sleep Mode
- 1st press: Activates Sleep Mode. The display shows “SP”, then all lights turn off and the device runs quietly.
- 2nd press: Exits Sleep Mode. The display shows the current ambient relative humidity again.
-
9. Adjusting Mist Level
-
Press the Mist Level button to cycle through the available settings.
-
Each press increases the level; the display updates accordingly:
- 1st press → Level 1 (low)
- 2nd press → Level 2 (medium)
- 3rd press → Level 3 (high)
- 4th press → Auto mode (display shows “AU”)
-
The display will indicate the currently active mist level or auto mode. After the fourth press, the
cycle restarts at level 1.
-
10. Timer Setting
- Use the Timer button to set the desired operating time.
- You can choose a duration from 1 to 12 hours.
- Once the set time has elapsed, all functions will stop automatically.
- The internal fan will continue running for 15 seconds, then shut off completely.
-
11. UV Lamp & Key Lock
- Short press: Turns the UV function on or off (UV indicator light on when active).
- Long press (3 s): Activates Key Lock (“LC” shown for 5 s, then current humidity).
- While active, buttons only wake the display. Long press again to deactivate.
-
12. Heating Function Touch the Heating button to switch the heating function on or off.
-
13. Humidity Setting
- Touch the Humidity button to set the desired relative humidity (%).
- While adjusting, the value is shown on the display. After 5 s of inactivity, the display returns to the current ambient humidity.
- The target can be set from 30% to 80% in 5% increments.
- Above 80%, “CO” indicates continuous operation without a humidity limit.
CO-30%-35%-40%-45%-50%-55%-60%-65%-70%-75%-80%-CO
-
ecofort SMART App 14. Wi-Fi Connection The ecofort SMART app is available for free on Android and iOS. Scan the QR code to get directly to the download:
-
15. Prerequisites Before connecting, please ensure the following:
- The "ecofort SMART" app is installed on your smartphone and you have created a user account.
- The device is plugged in and in pairing mode (the Wi-Fi symbol on the device is flashing).
- Your smartphone is near the device.
- Bluetooth is enabled on your smartphone.
Your smartphone is connected to your 2.4 GHz Wi-Fi network. (Note: 5 GHz networks are not supported).
-
16. Establishing the Connection (Pairing)
- Activate Pairing Mode on the Device: When the device is switched on, press and hold the Humidity button for approximately 5 seconds until the WiFi symbol starts flashing rapidly.
- Open the ecofort SMART App: Open the app on your smartphone.
- Find Device: The app should now automatically detect the device via Bluetooth and display it on the screen. Follow the on-screen instructions to select the device.
- Enter Wi-Fi Details: The app will ask you to enter the password for your Wi-Fi network. The credentials will then be securely transferred to the device.
- Connection Complete: Once the connection is successfully established, the Wi-Fi symbol on the device will light up steadily. You can now operate the device via the app.
Note: If the connection is not established after 3 minutes, the device will cancel the pairing attempt and the Wi-Fi indicator will turn off. In this case, please restart the process.
-
17. Disconnecting To permanently disconnect the Wi-Fi connection from the device, press and hold the Humidity button on the device for approx. 5 seconds until the Wi-Fi indicator turns off.
-
Cleaning 18. General Cleaning Always unplug the unit before servicing in any way.
-
19. Descaling
-
Depending on usage and water quality, descaling may be necessary once a week or every other week to maintain optimal performance.
-
If you live in an area with hard water, we recommend using distilled water in your humidifier. This helps to reduce mineral buildup and prevents the formation of so-called “white dust.”
Warning:
Do not clean the unit or water tank with cleaning chemicals of any kind as they may contain bleach. Use dish washing liquid or vinegar solution ONLY.
-
20. Cleaning the Ultrasonic Disk
- Unplug the unit from the power source.
- Remove the water tank and empty all water from both the tank and the base.
- Locate the ultrasonic disk in the centre of the base.
- Use only the supplied cleaning brush to gently clean the disk and remove any mineral buildup or residue.
- Drain any remaining water from the base in the indicated direction. Make sure no water flows into the dry air outlet.
Important: Do not scrub, scrape, or use sharp tools on the ultrasonic disk – this may damage the component.
-
21. Removing Hard Scale If scale becomes difficult to remove with brush:
-
Fill the base with a mixture of 1 teaspoon white vinegar and 1 teaspoon water.
-
Let the solution sit for 5 minutes.
-
While the vinegar solution is still in the base, clean all interior surfaces with a soft cloth or brush to help dissolve and remove scale.
-
Also check the mist nozzle, filter, and mist tube inside the water tank. Clean these parts as needed.
-
Finally, rinse the base thoroughly with clean water to remove any remaining scale or vinegar residue.
-
22. End of Season Storage
-
Clean and descale the humidifier before storing.
-
Make sure the device is completely dry – do not store it with water remaining in the base or tank.
-
Pack the unit in its original box and store it in a cool, dry place.
Note: Do not attempt to open or disassemble the motor housing or any internal parts of the humidifier. Any unauthorised manipulation may damage the device, pose a safety risk, and will void the warranty.
-
23. Power Cord Silicone Retainer Management Please do not discard the silicone retainer located at the bottom rear of the main unit. Reinstall
it after cleaning to keep the power cord secure.
Caution: Water entering this area during cleaning may cause malfunction.
-
Troubleshooting 24. Error Codes The Power button turns red and the display shows E1, E2 or E3.
- E1: Water tank is empty
- E2: Water tank is missing
- E3: No water in the base (basin)
- E4: Temperature in the base exceeds 60 °C (The display shows E4, no light indication).
If an error code is active, all buttons will be disabled until the issue is resolved.
-
25. Water vapour and humidity are not produced. Power plug not connected properly → Unplug and plug in again
-
26. Air blows but water vapor is not produced.
- Excessive Water: Remove a certain amount of water from the base.
- Detergent residue and/or oil ingredients from cosmetics, etc may be in tank or filter; wash out tank, filter and try again.
- The surface of the ultrasonic disk is dirty: Clean ultrasonic disk.
- If you use hard water, replace with softer water.
-
27. Humidity level is low Ultrasonic disk is dirty → Clean the disk
-
28. The humidity has a bad smell Dirty tank or stagnant water → Clean both tank
and base thoroughly, refill with fresh water
-
29. White dust is forming on nearby furniture
-
Hard water may deposit a certain amount of dust.
-
Dust in the air also settles because of added humidity in the room.
-
Use distilled water if this becomes a nuisance.
-
Remember to clean the filter interior surface after use for a short time.
-
30. Unit has stopped working No or low water. Unplug unit and refill tank.
-
31. Water is accumulating outside of unit or area surrounding unit.
- Saturation of humidity.
- Lower mist control setting.
- Unit not level and water is accumulating.
- Unplug and place on level surface.
- Point spray away from objects.
- Raise unit on a water-resistant level surface 2-3 feet off of floor.
-
32. Water dripping when refilling. Water remaining on bottom of tank. Wipe tank or tilt to drain
before transporting.
-
33. Increased noise level Unit must be placed on a flat, level, hard surface. Make sure it
is NOT placed on a soft or absorbent surface.
-
34. Red light on power button Indicates low water. Unplug and refill tank.
|