ecoQ CleanVac Station Step-by-step guide for assembling, operating, and maintaining the ecoQ CleanVac Station with cordless vacuum and charging station. Covers installation, accessory use, cleaning modes, station operation, and care for top performance and long life. -
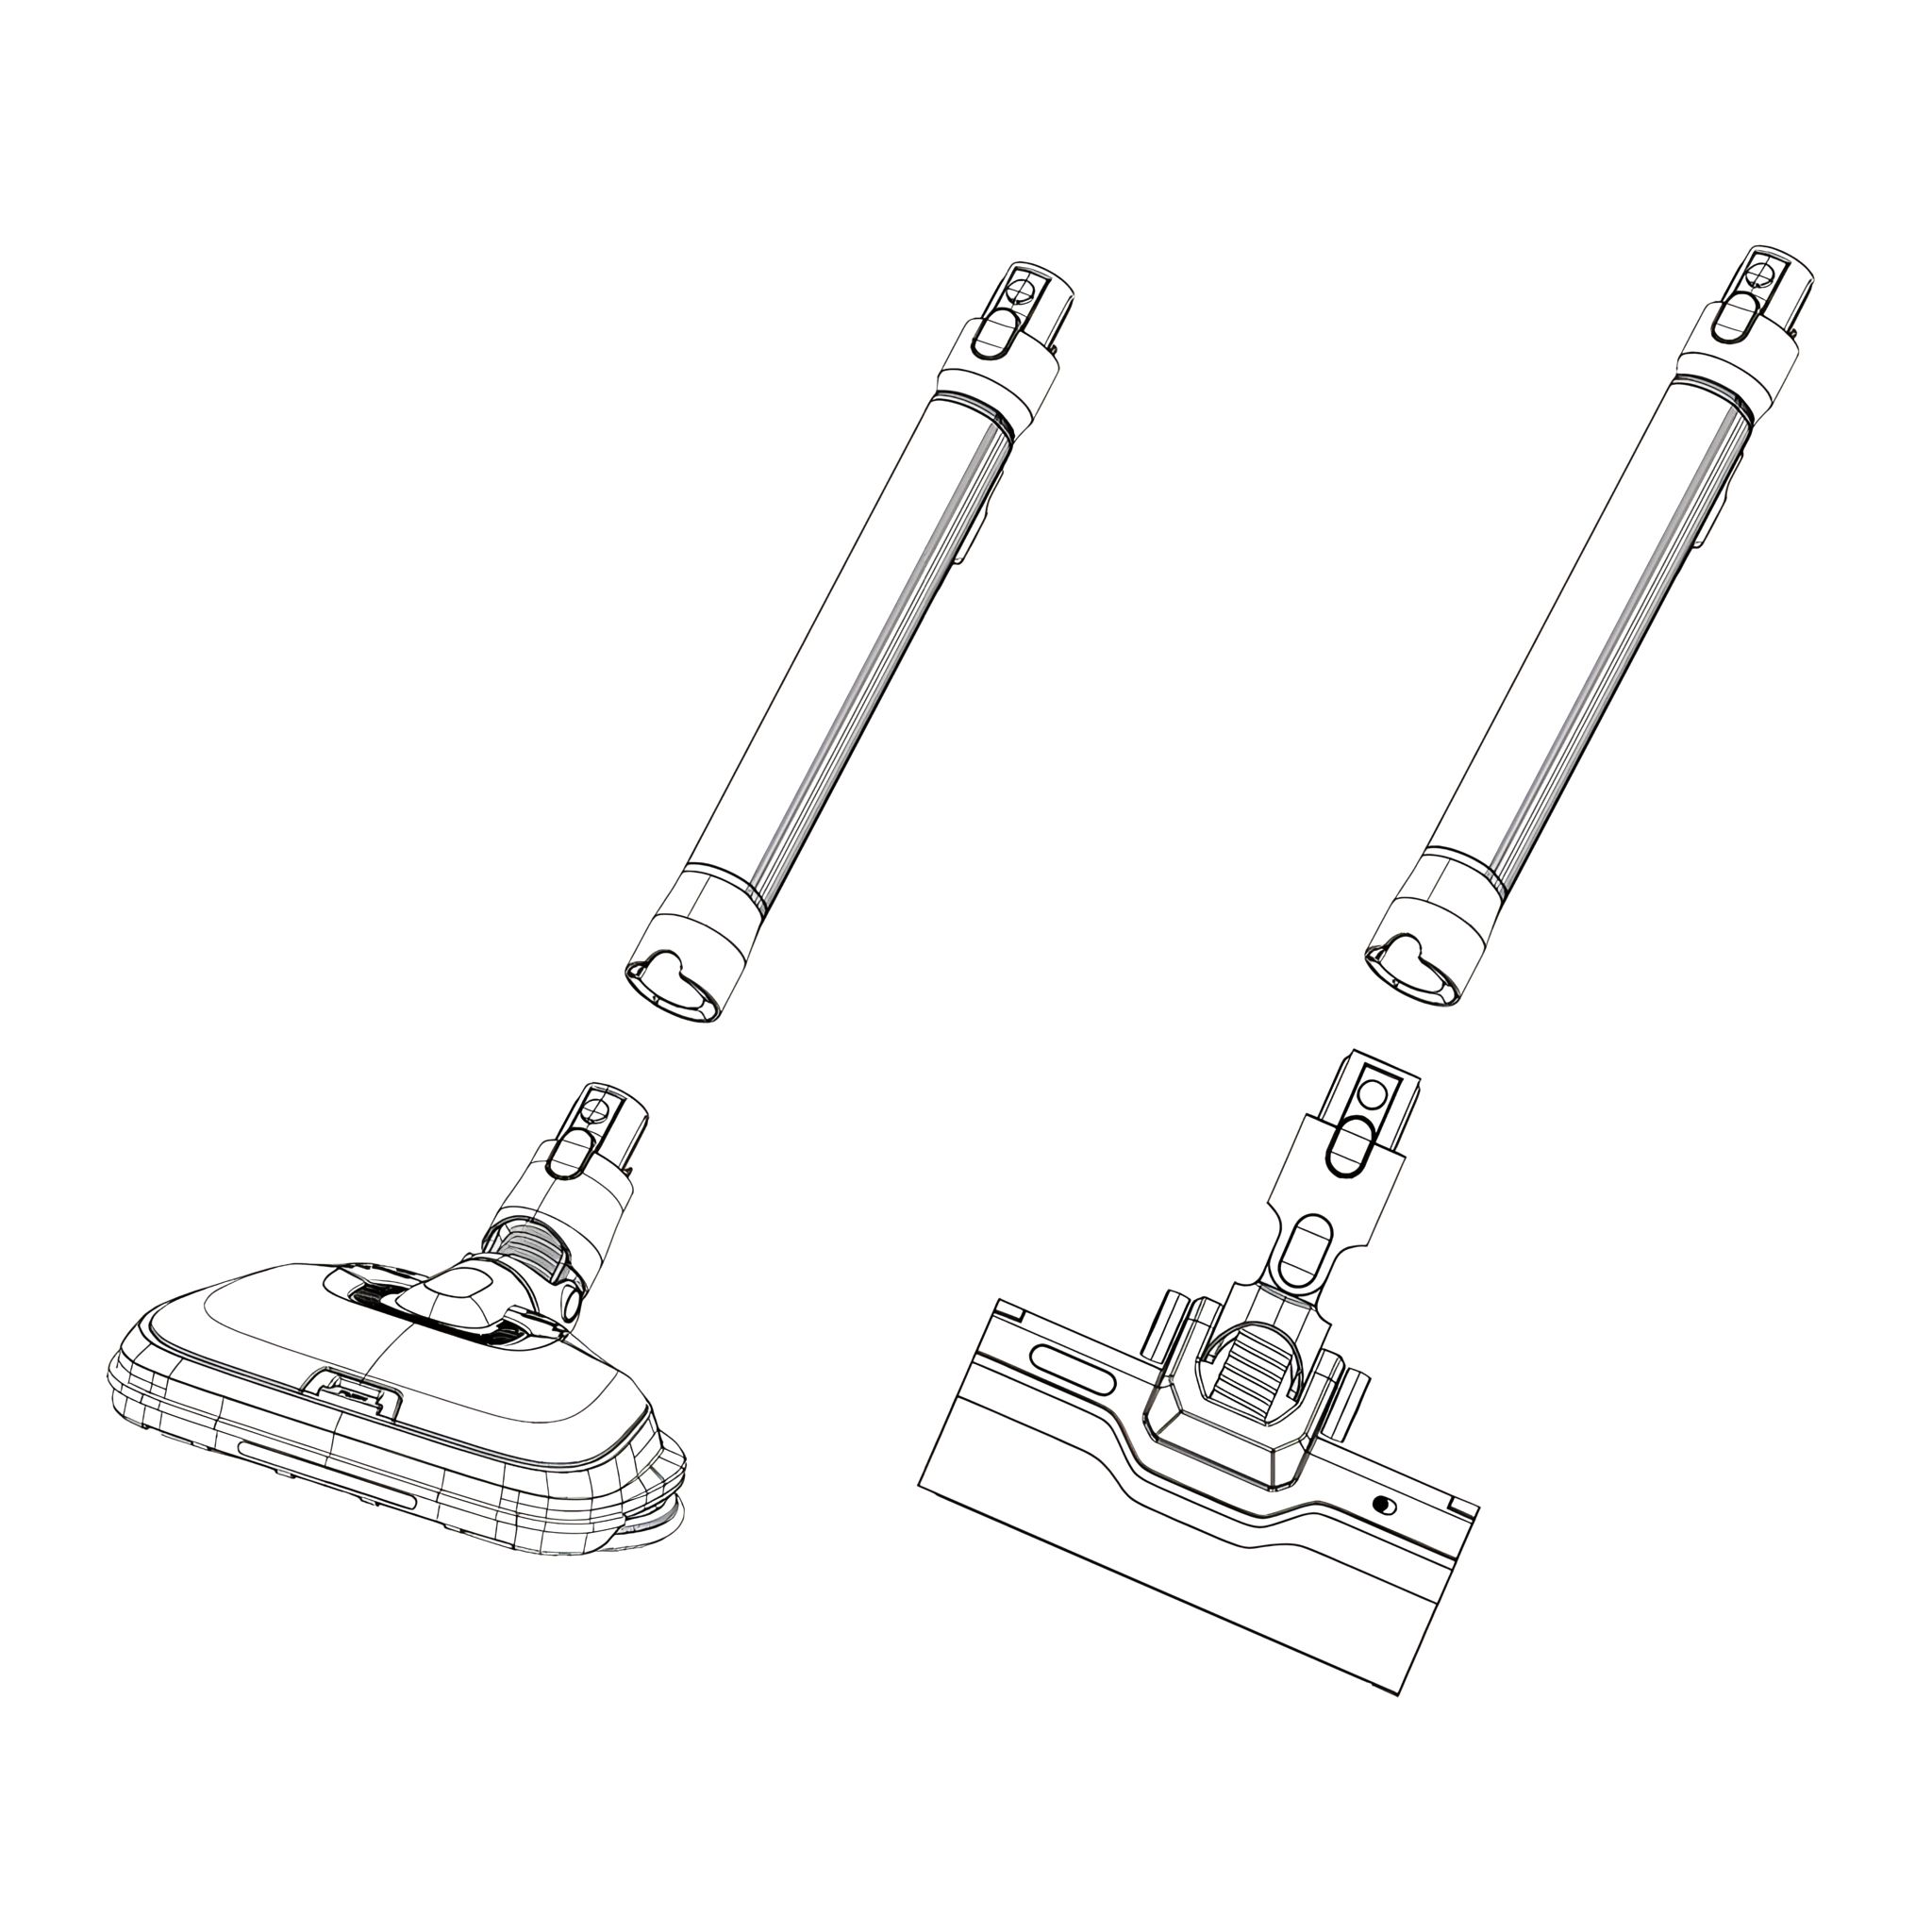
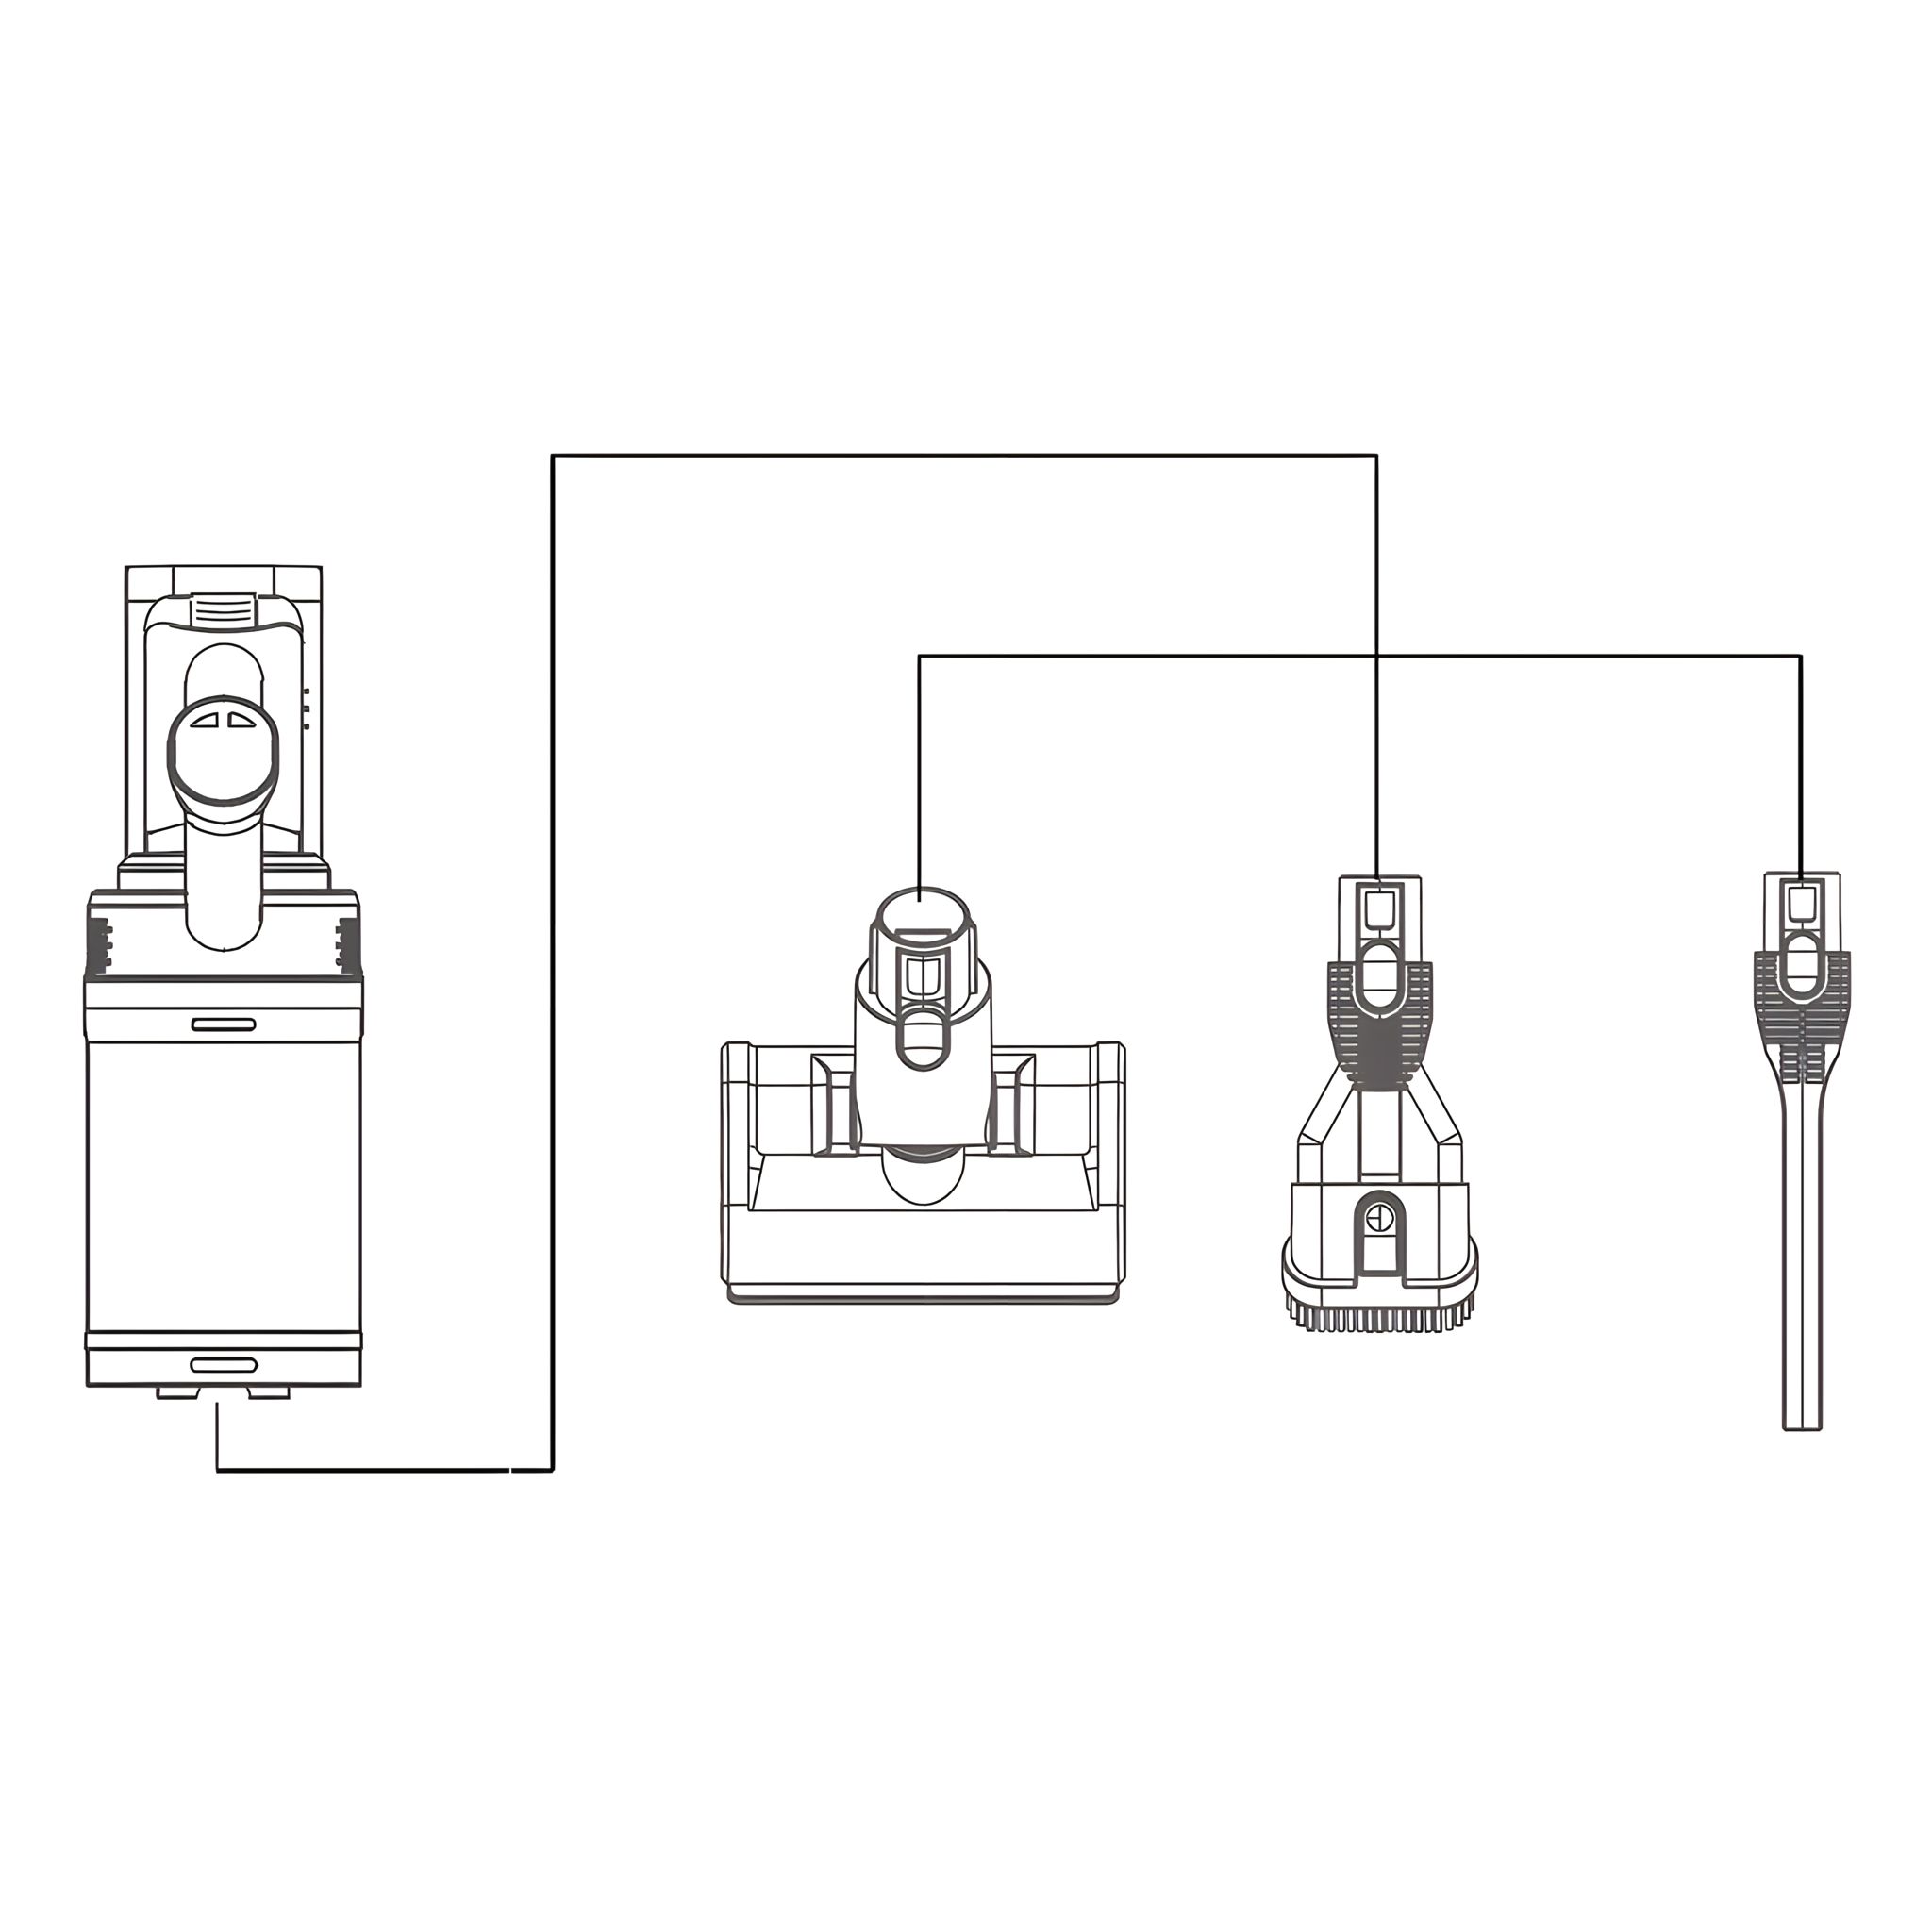
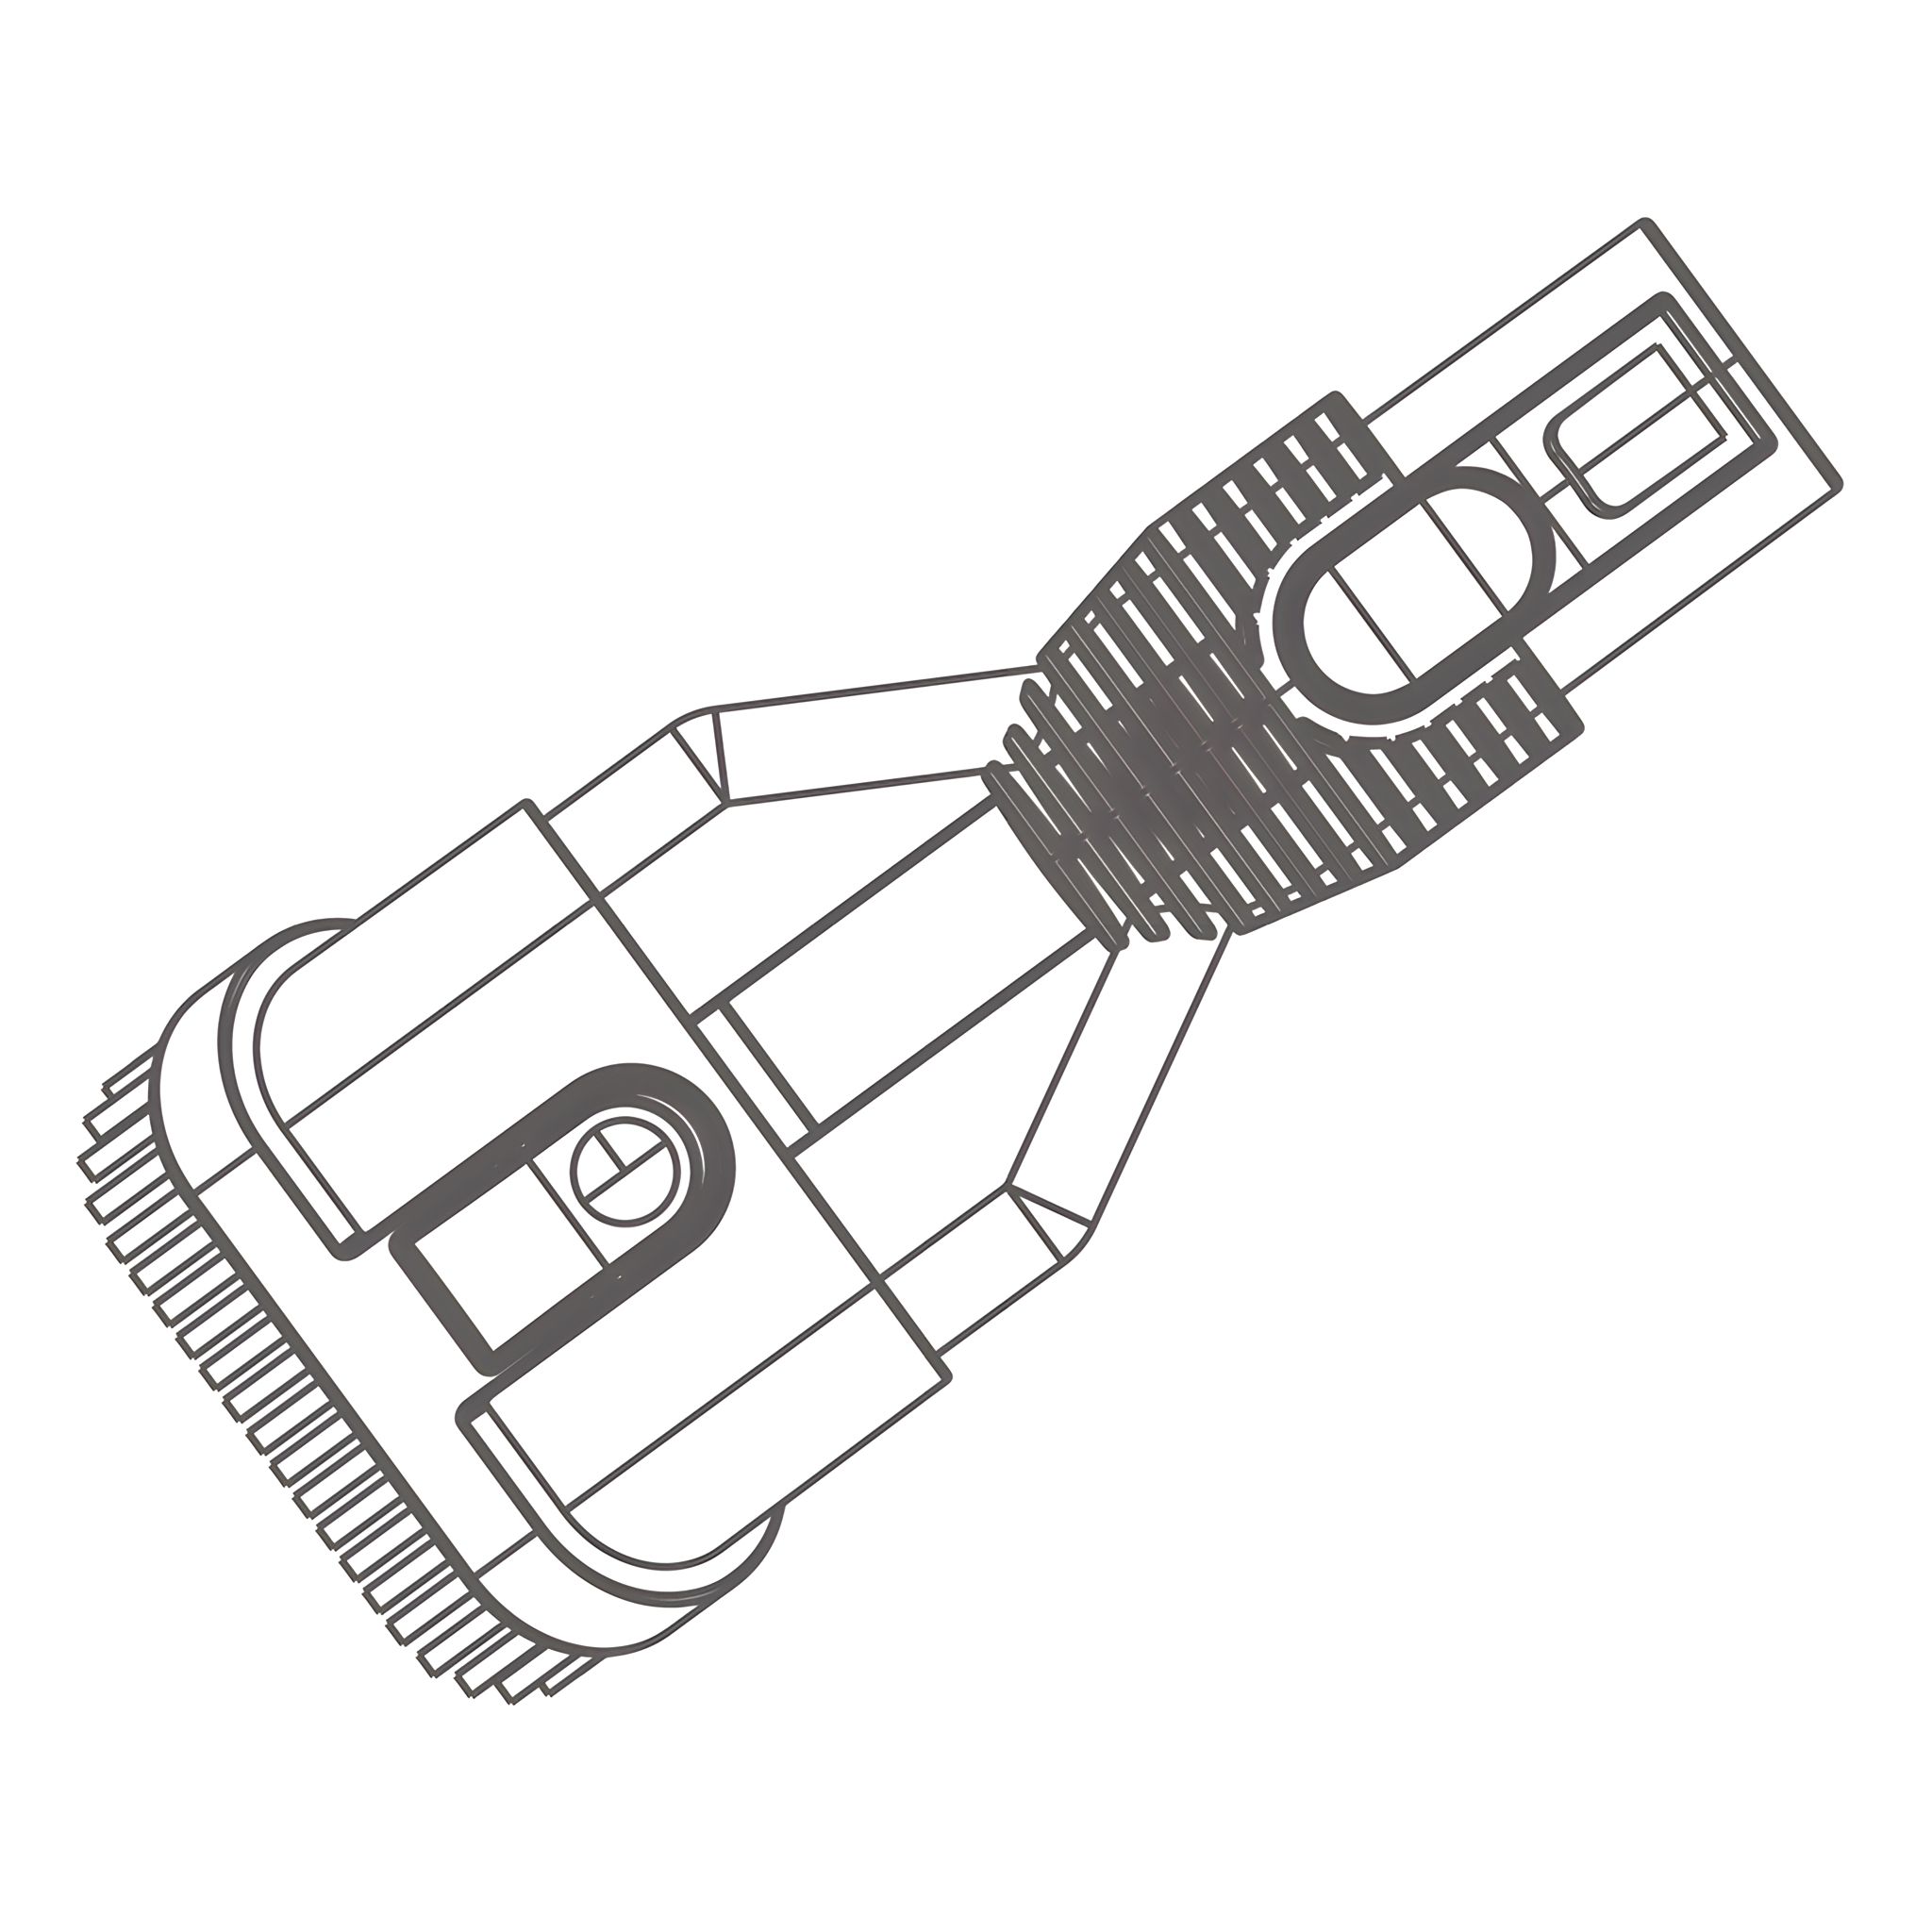
Product Installation and Disassembly 1. Installation of Motorized Brush/Steam Mop Kit
- As shown in the figure, align the motorized brush or steam mop kit to telescopic tube connector,
push it gently.
- The installation is finished when a “click” is heard (for disassembly, just press the
lock button as shown in the figure, and pull it downward).
-
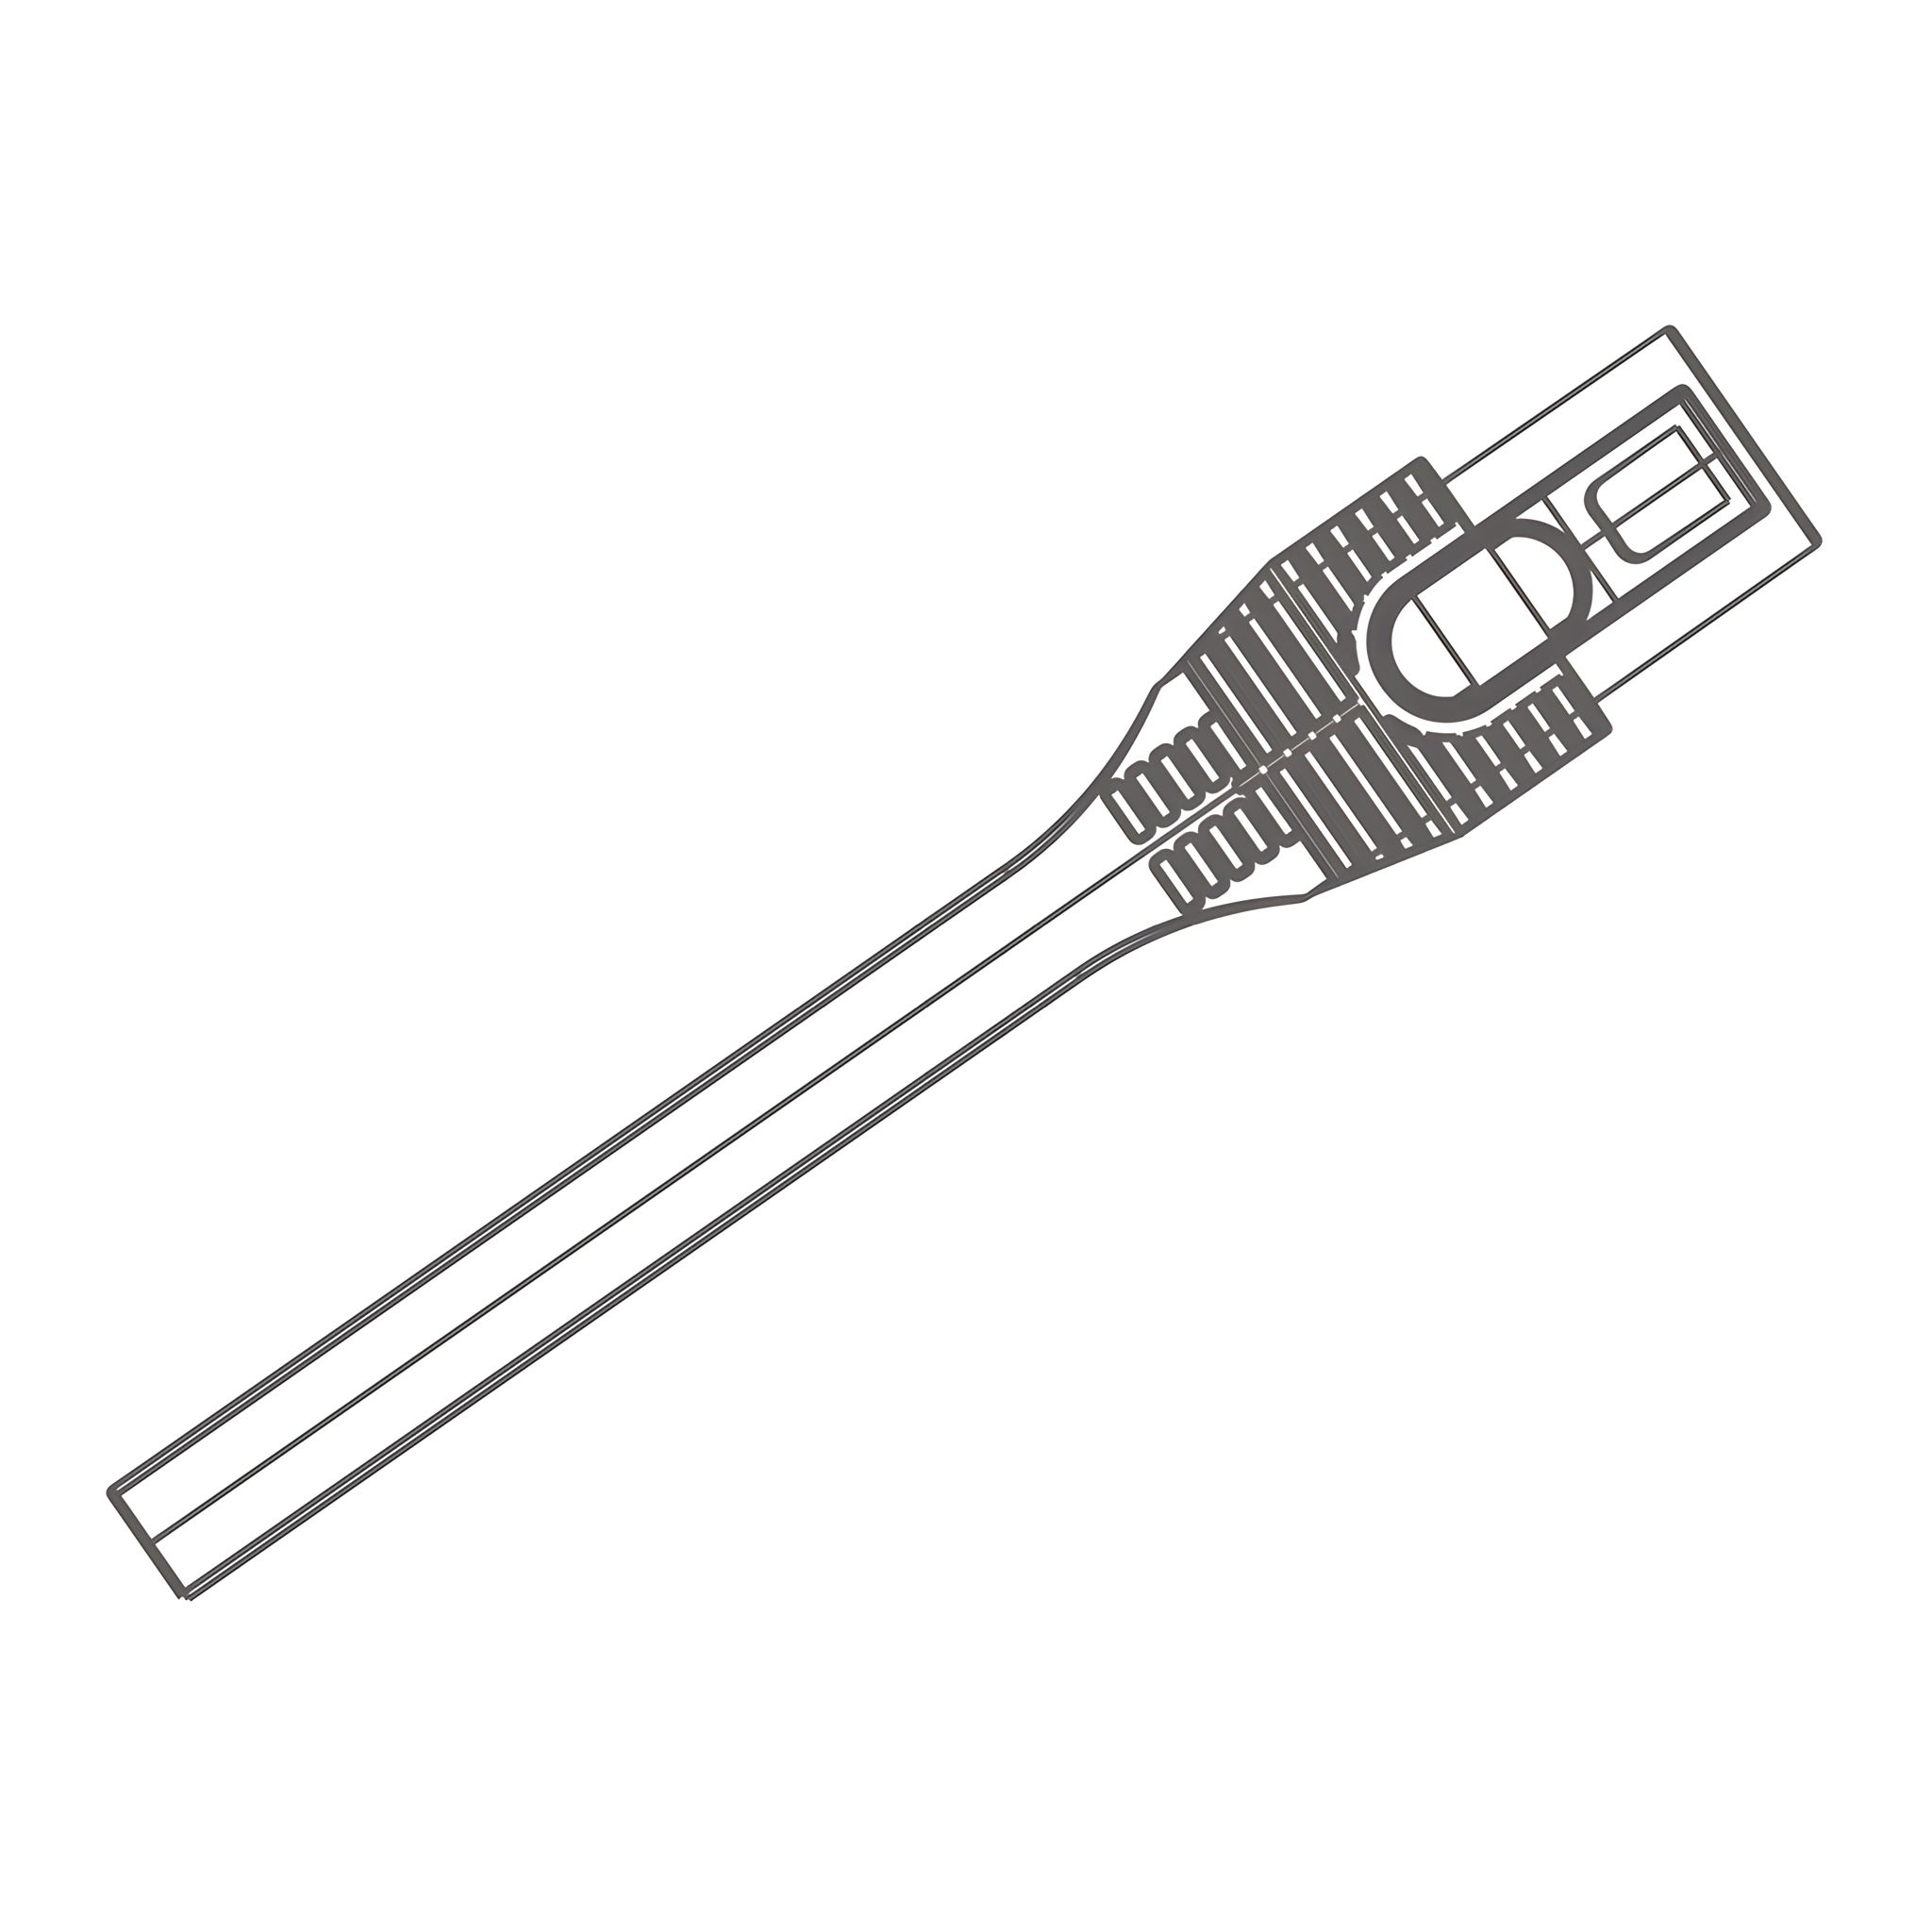
2. Installation of Telescoping Tube -
3. Installation of Mattress Brush Crevice Nozzle/Dusting Brush
-
As shown in the figure, align the mattress brush/crevice nozzle to the machine body connector,
and push it gently.
-
The installation is finished when a "click" is heard (for disassembly, just
press the lock button shown in the figure and pull it downward):
-
Connect the mattress brush to clean the area (bed surface, sofa and other textile materials
surface dust and mites.)
-
Connect the crevice nozzle to clean the area (such as ceiling, curtain and air conditioning inlet)
that is hard to clean.
-
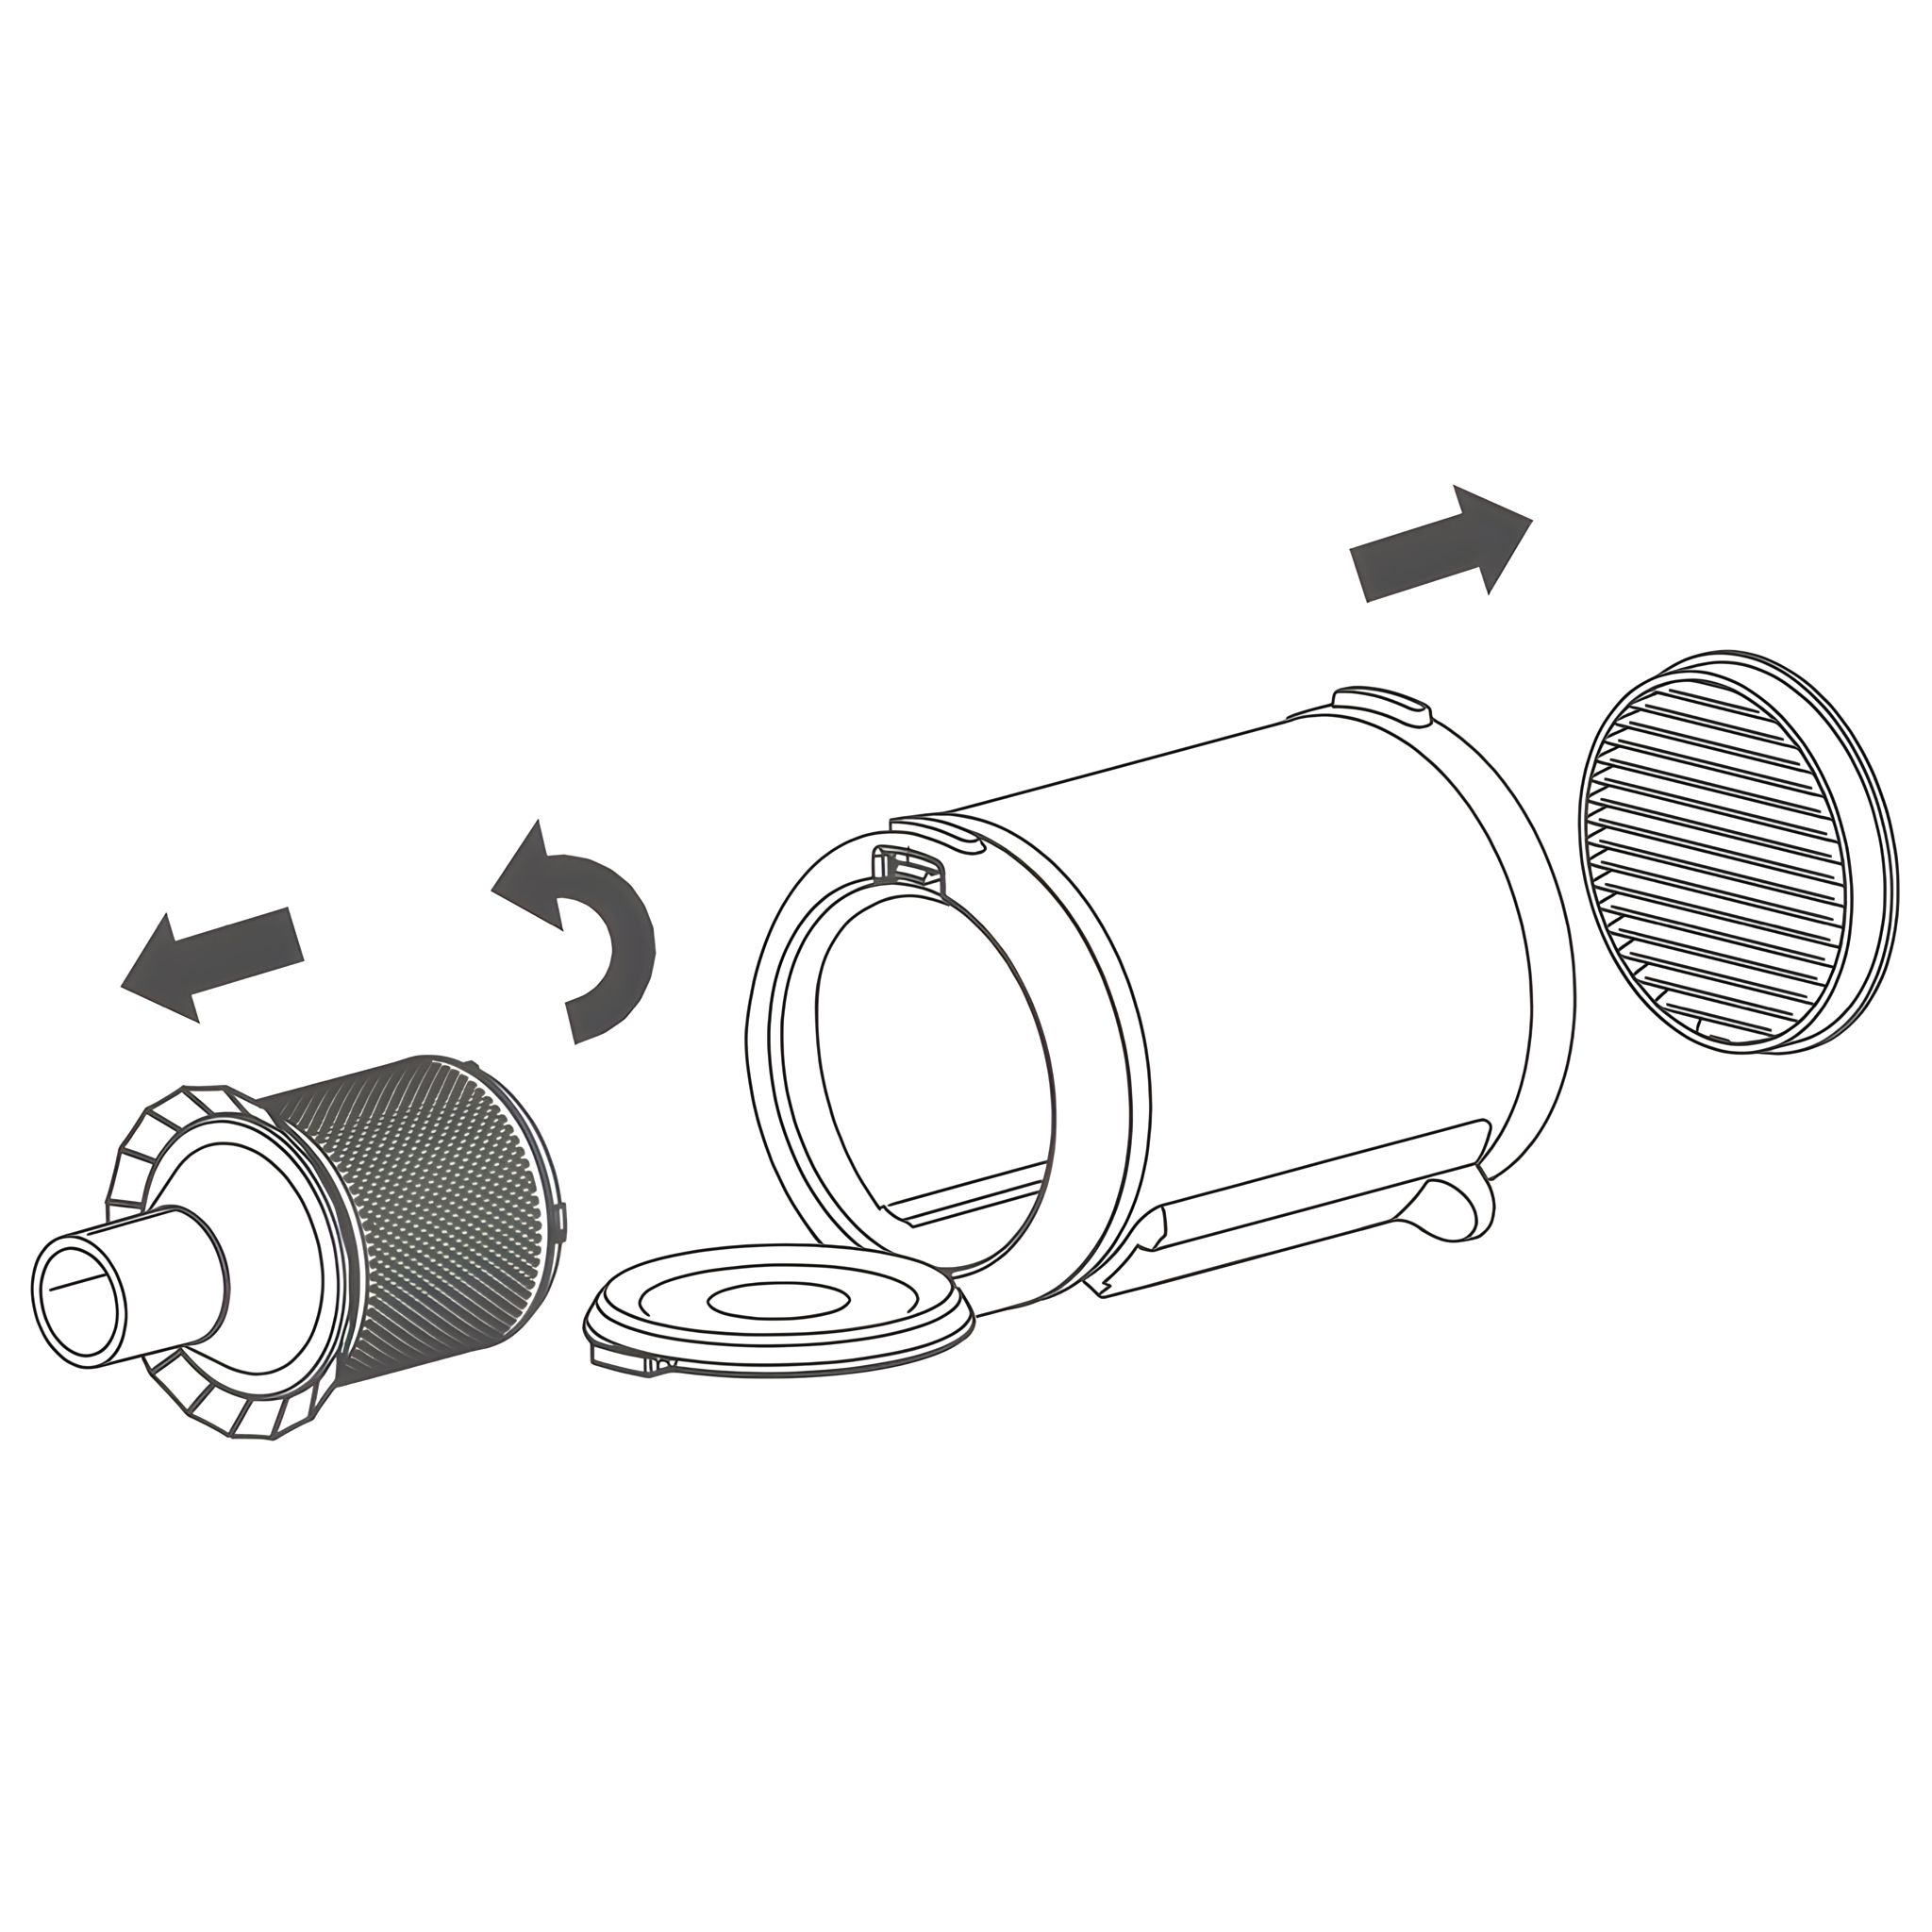
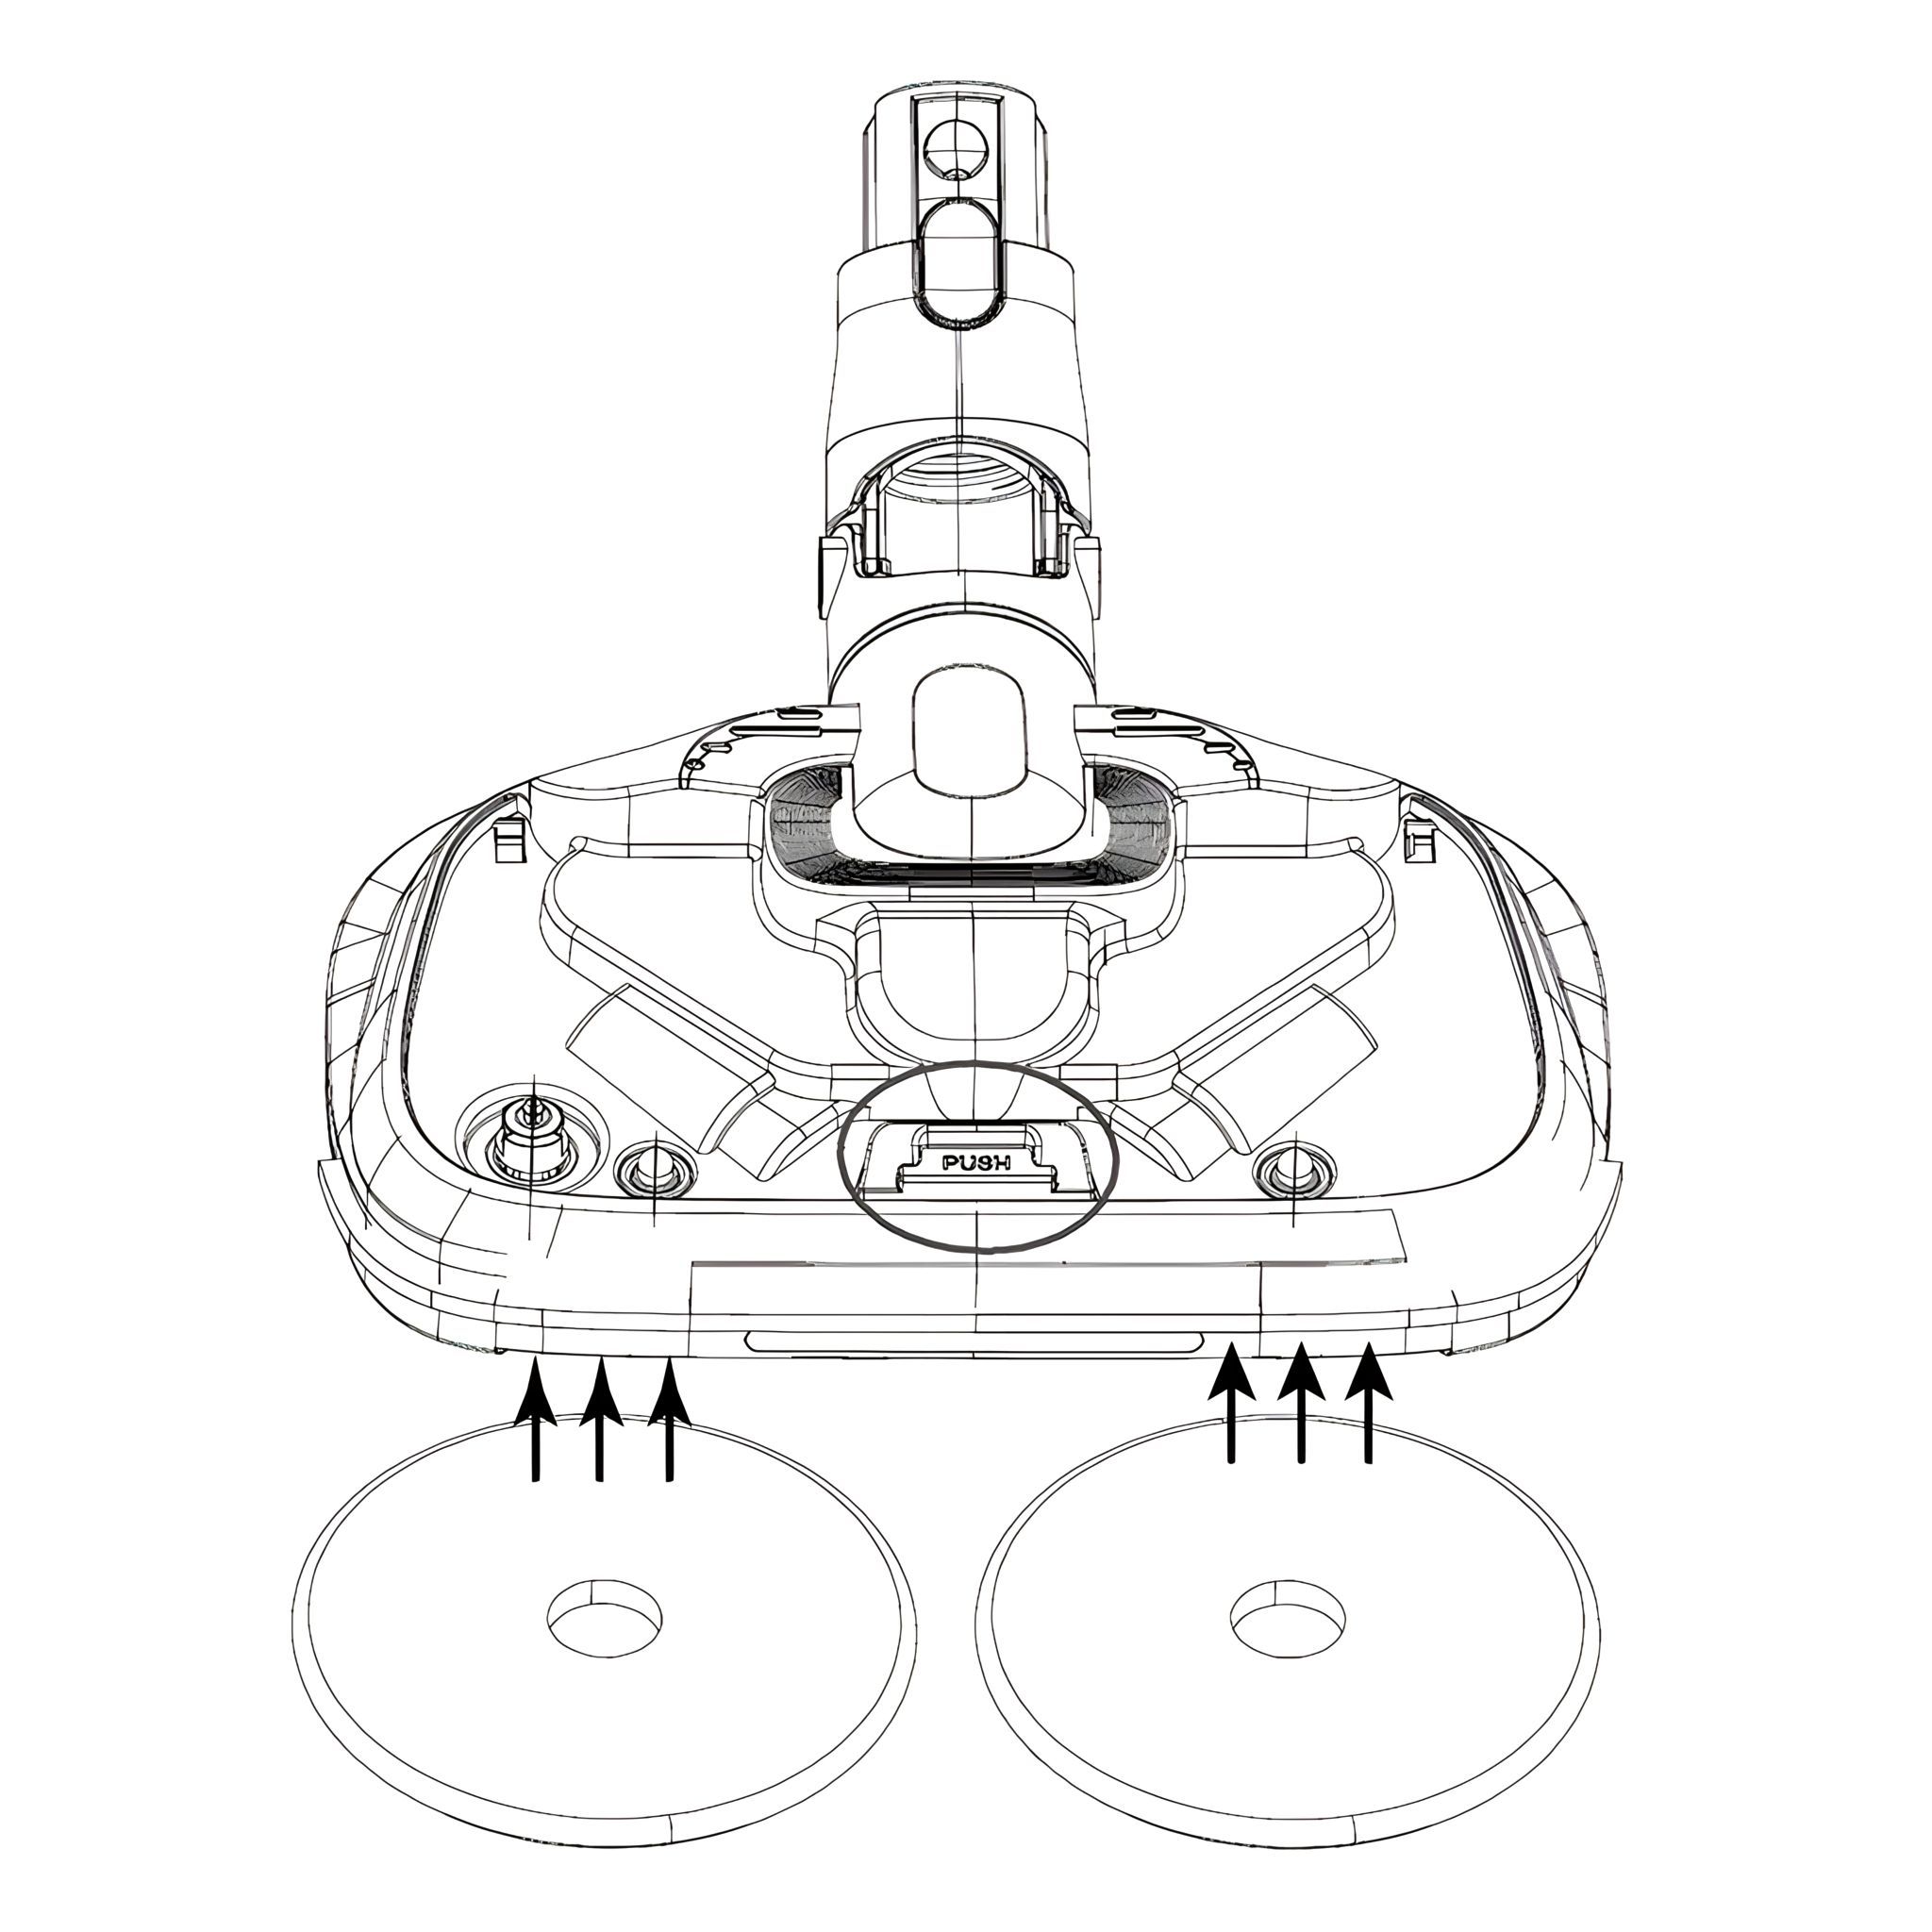
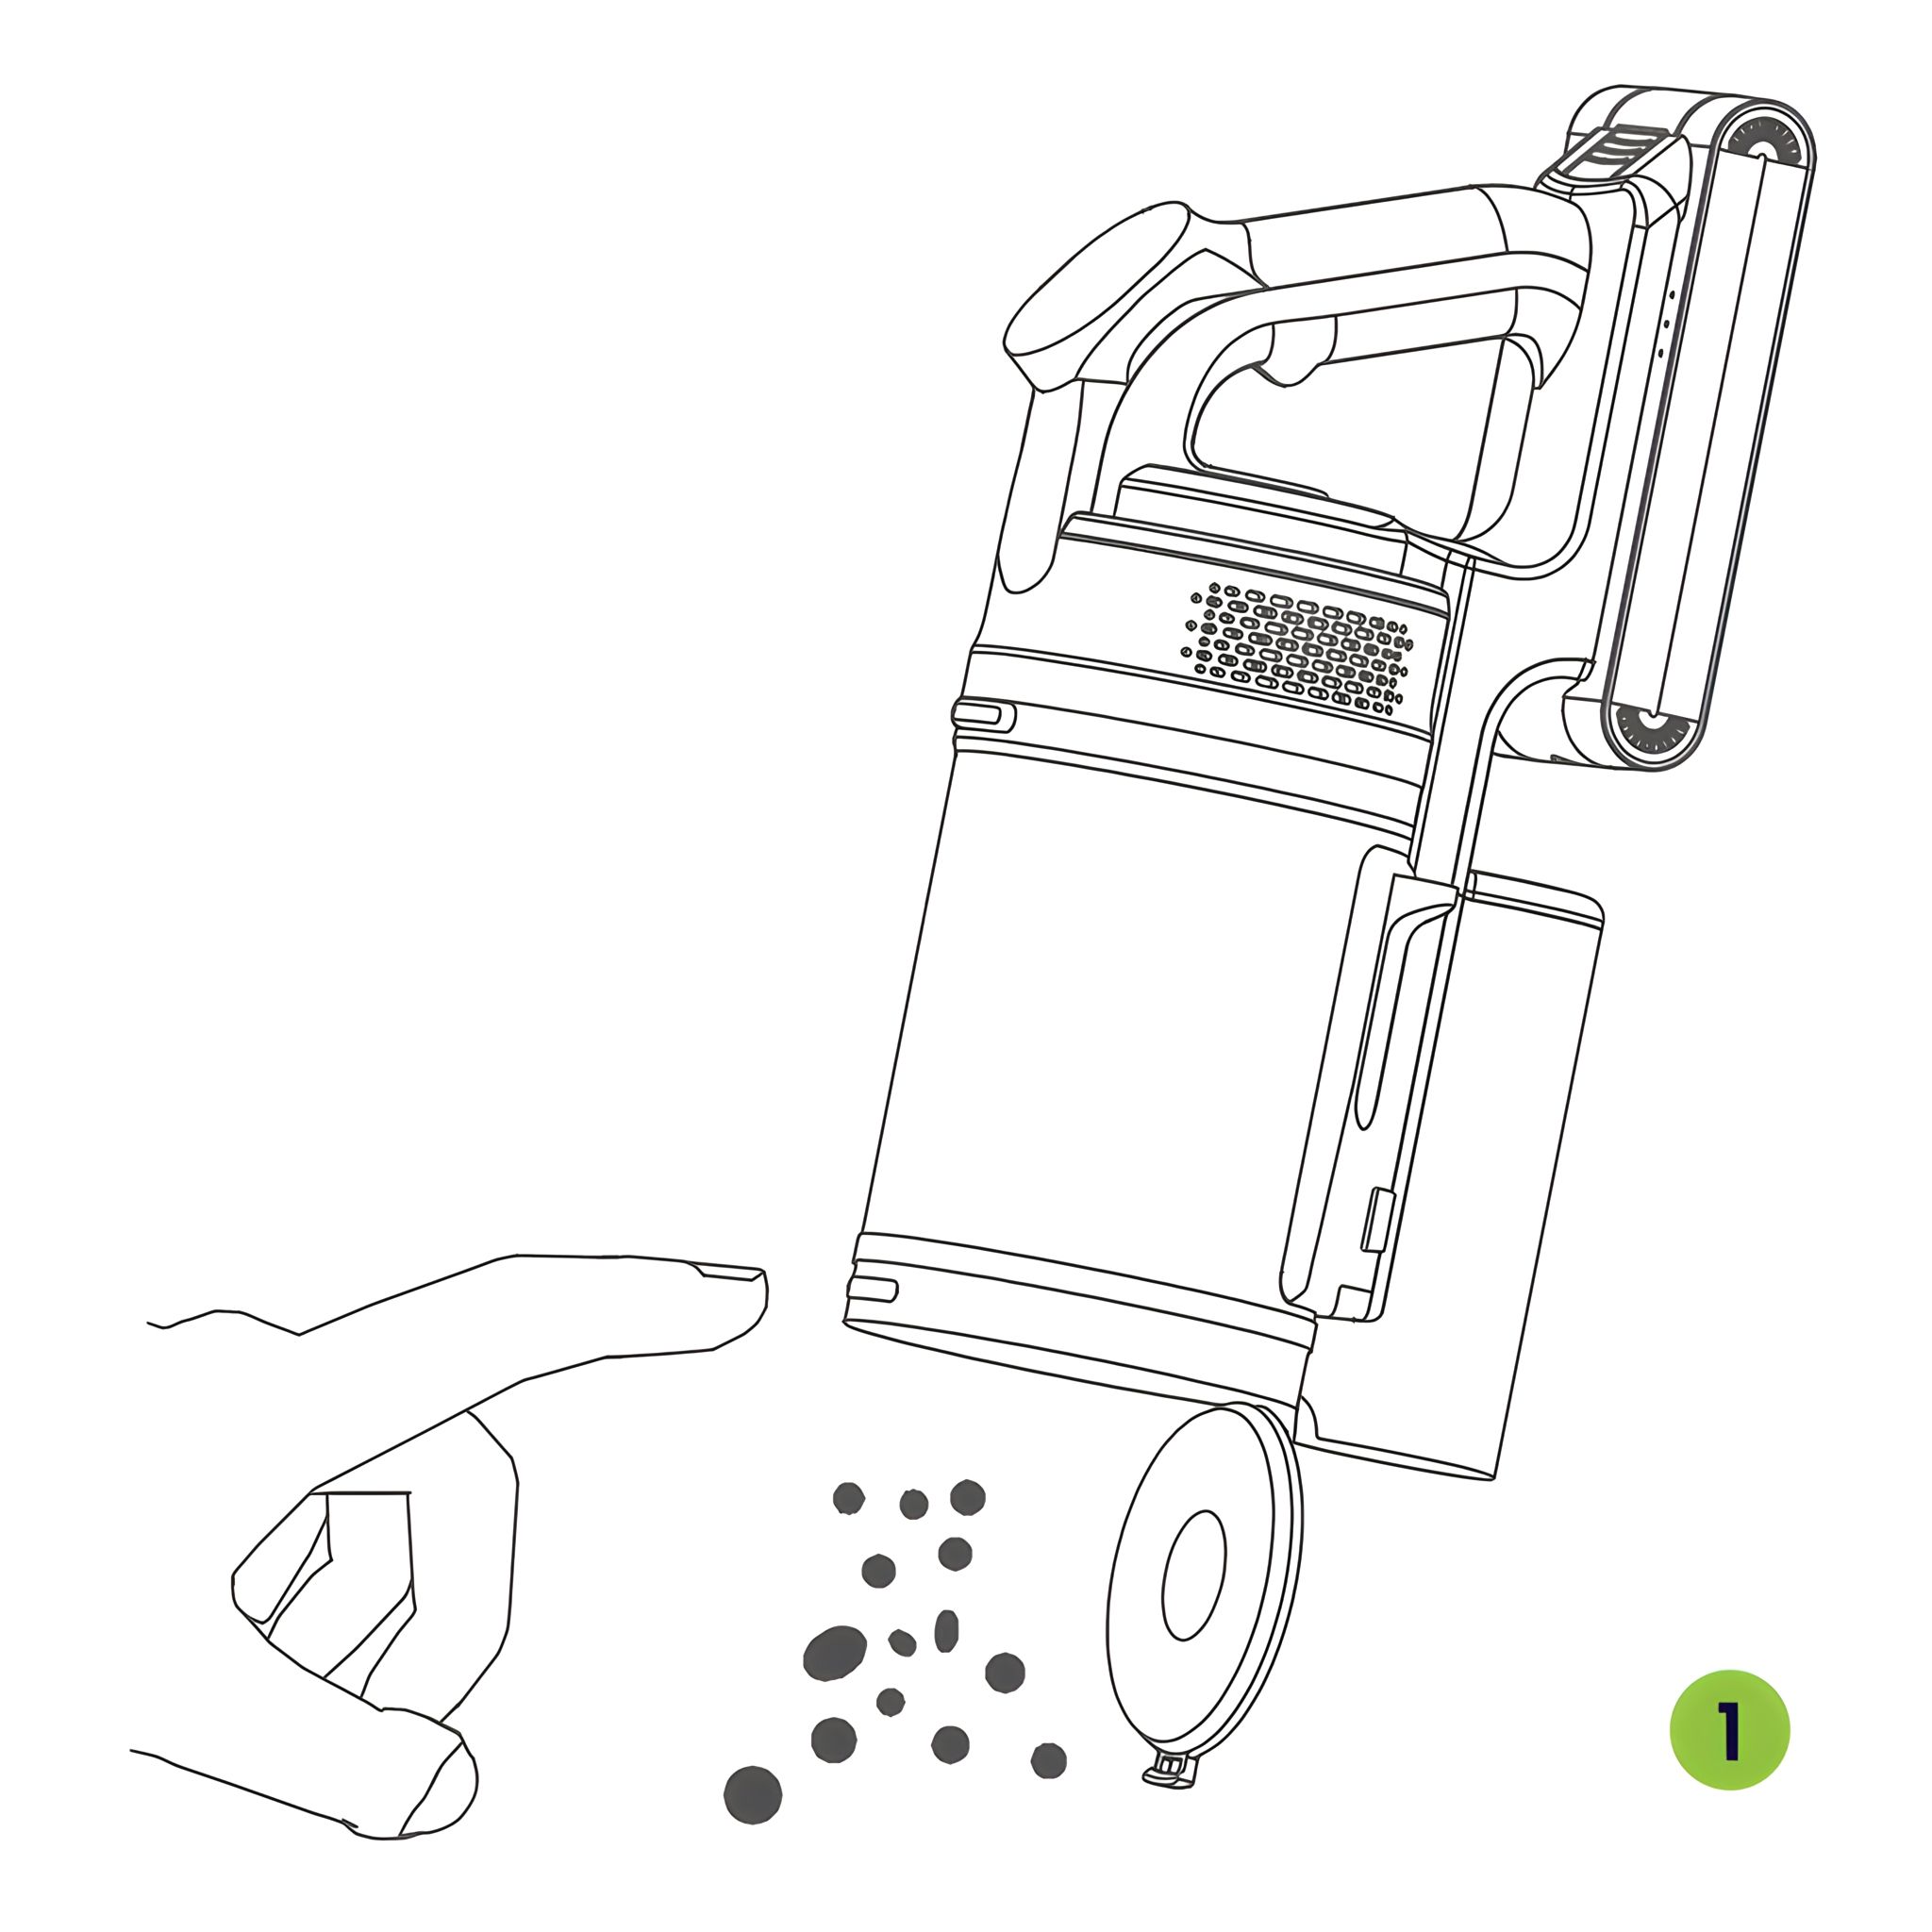
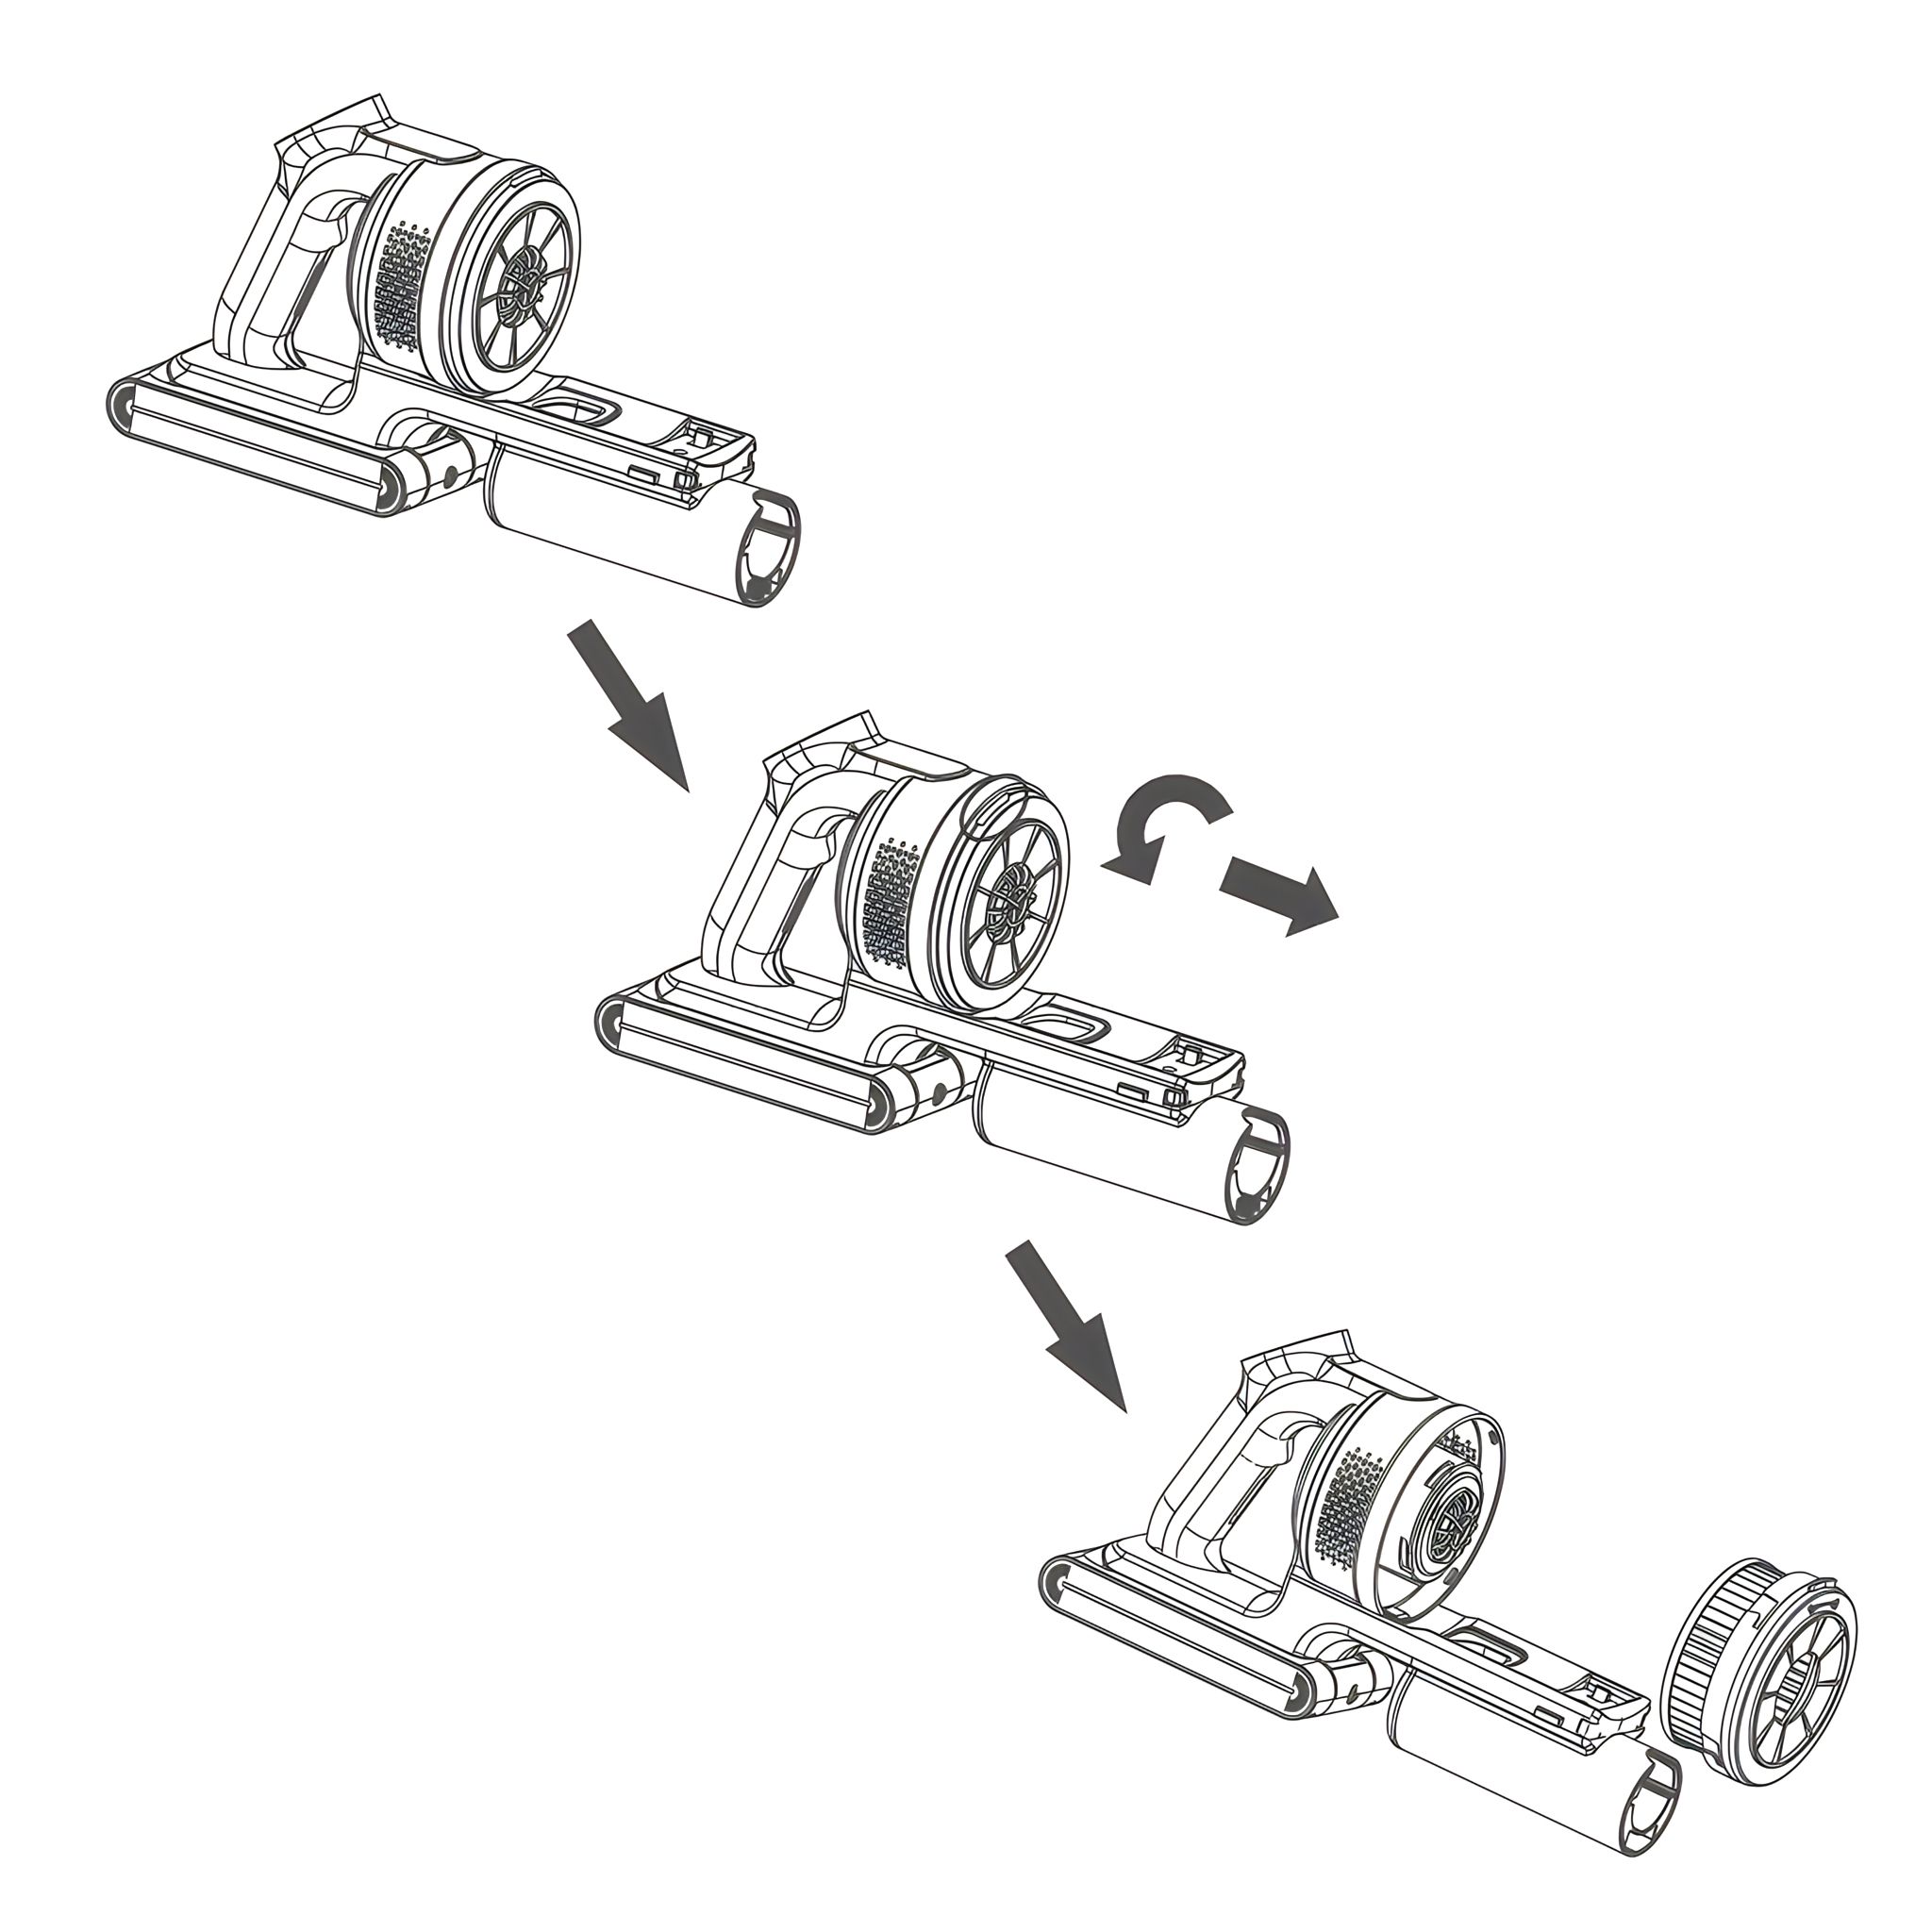
4. Removal of Dust Container
- Press the release button (1) of the dust container on both the left and right
sides as shown in the picture, then remove the dust container in the direction
indicated by the arrow.
- Remove the filters and HEPA from the dust container.
-
5. Installation of Dust Container
- Align the convex point of the filters with the notch position of the dust
container as shown in the picture, then place the filters into the dust container.
Make sure the gaps are perfectly aligned (1) before inserting the HEPA.
- Place the notch in dust container at the convex point on the top of
machine, as shown in the picture on the right, press down to install dust
container in place.
-
6. Removal and Change of Dust Bag
- Hold the grips on the cover and pull the cover off in the direction of the arrow.
- Press the button to open the cover automatically.
- Pull the dust bag out in the direction of the arrow.
-
7. Installation of Accessory Holder
- Please insert the two accessory holders to the
main body.
- Hang the steam floor attachment and mattress brush on the top hooks.
- Insert the dusting brush and long crevice nozzle underneath.
-
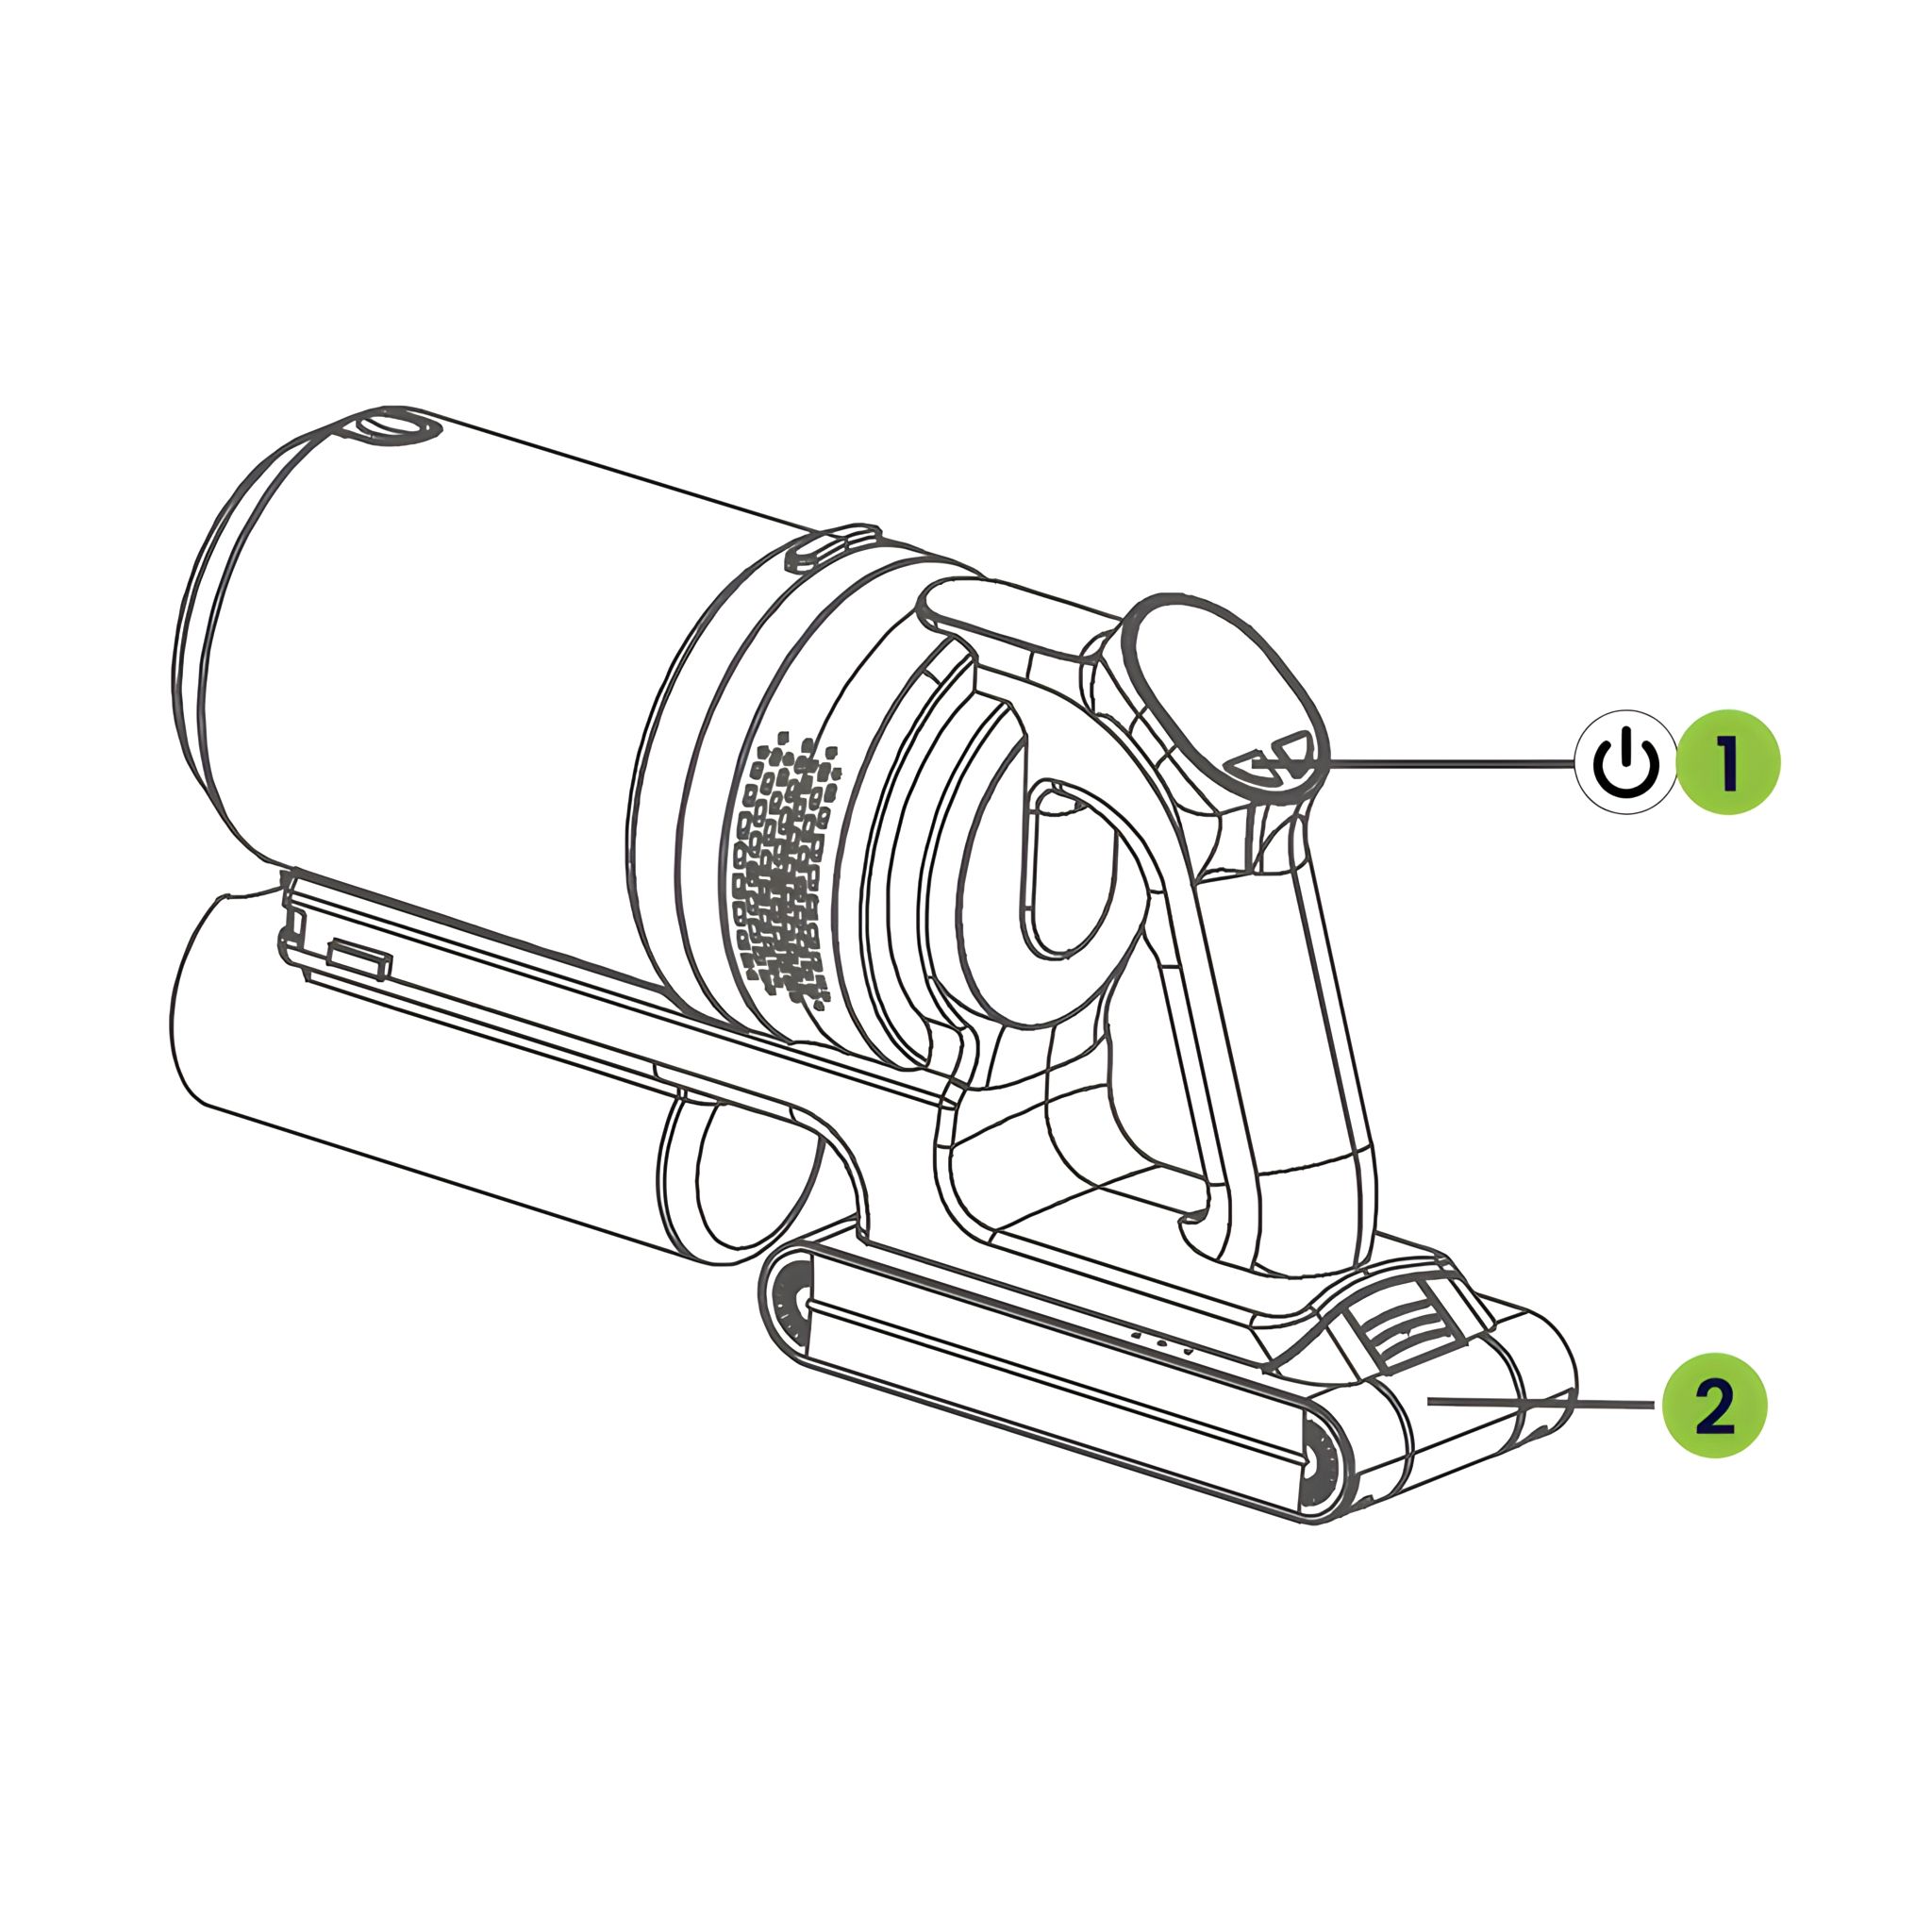
Use of Product 8. Start of Cleaner
-
Pack battery into machine first as shown.
-
After installation, press button (1) to start machine.
-
When in use, the battery pack (2) indicator light turns blue.
-
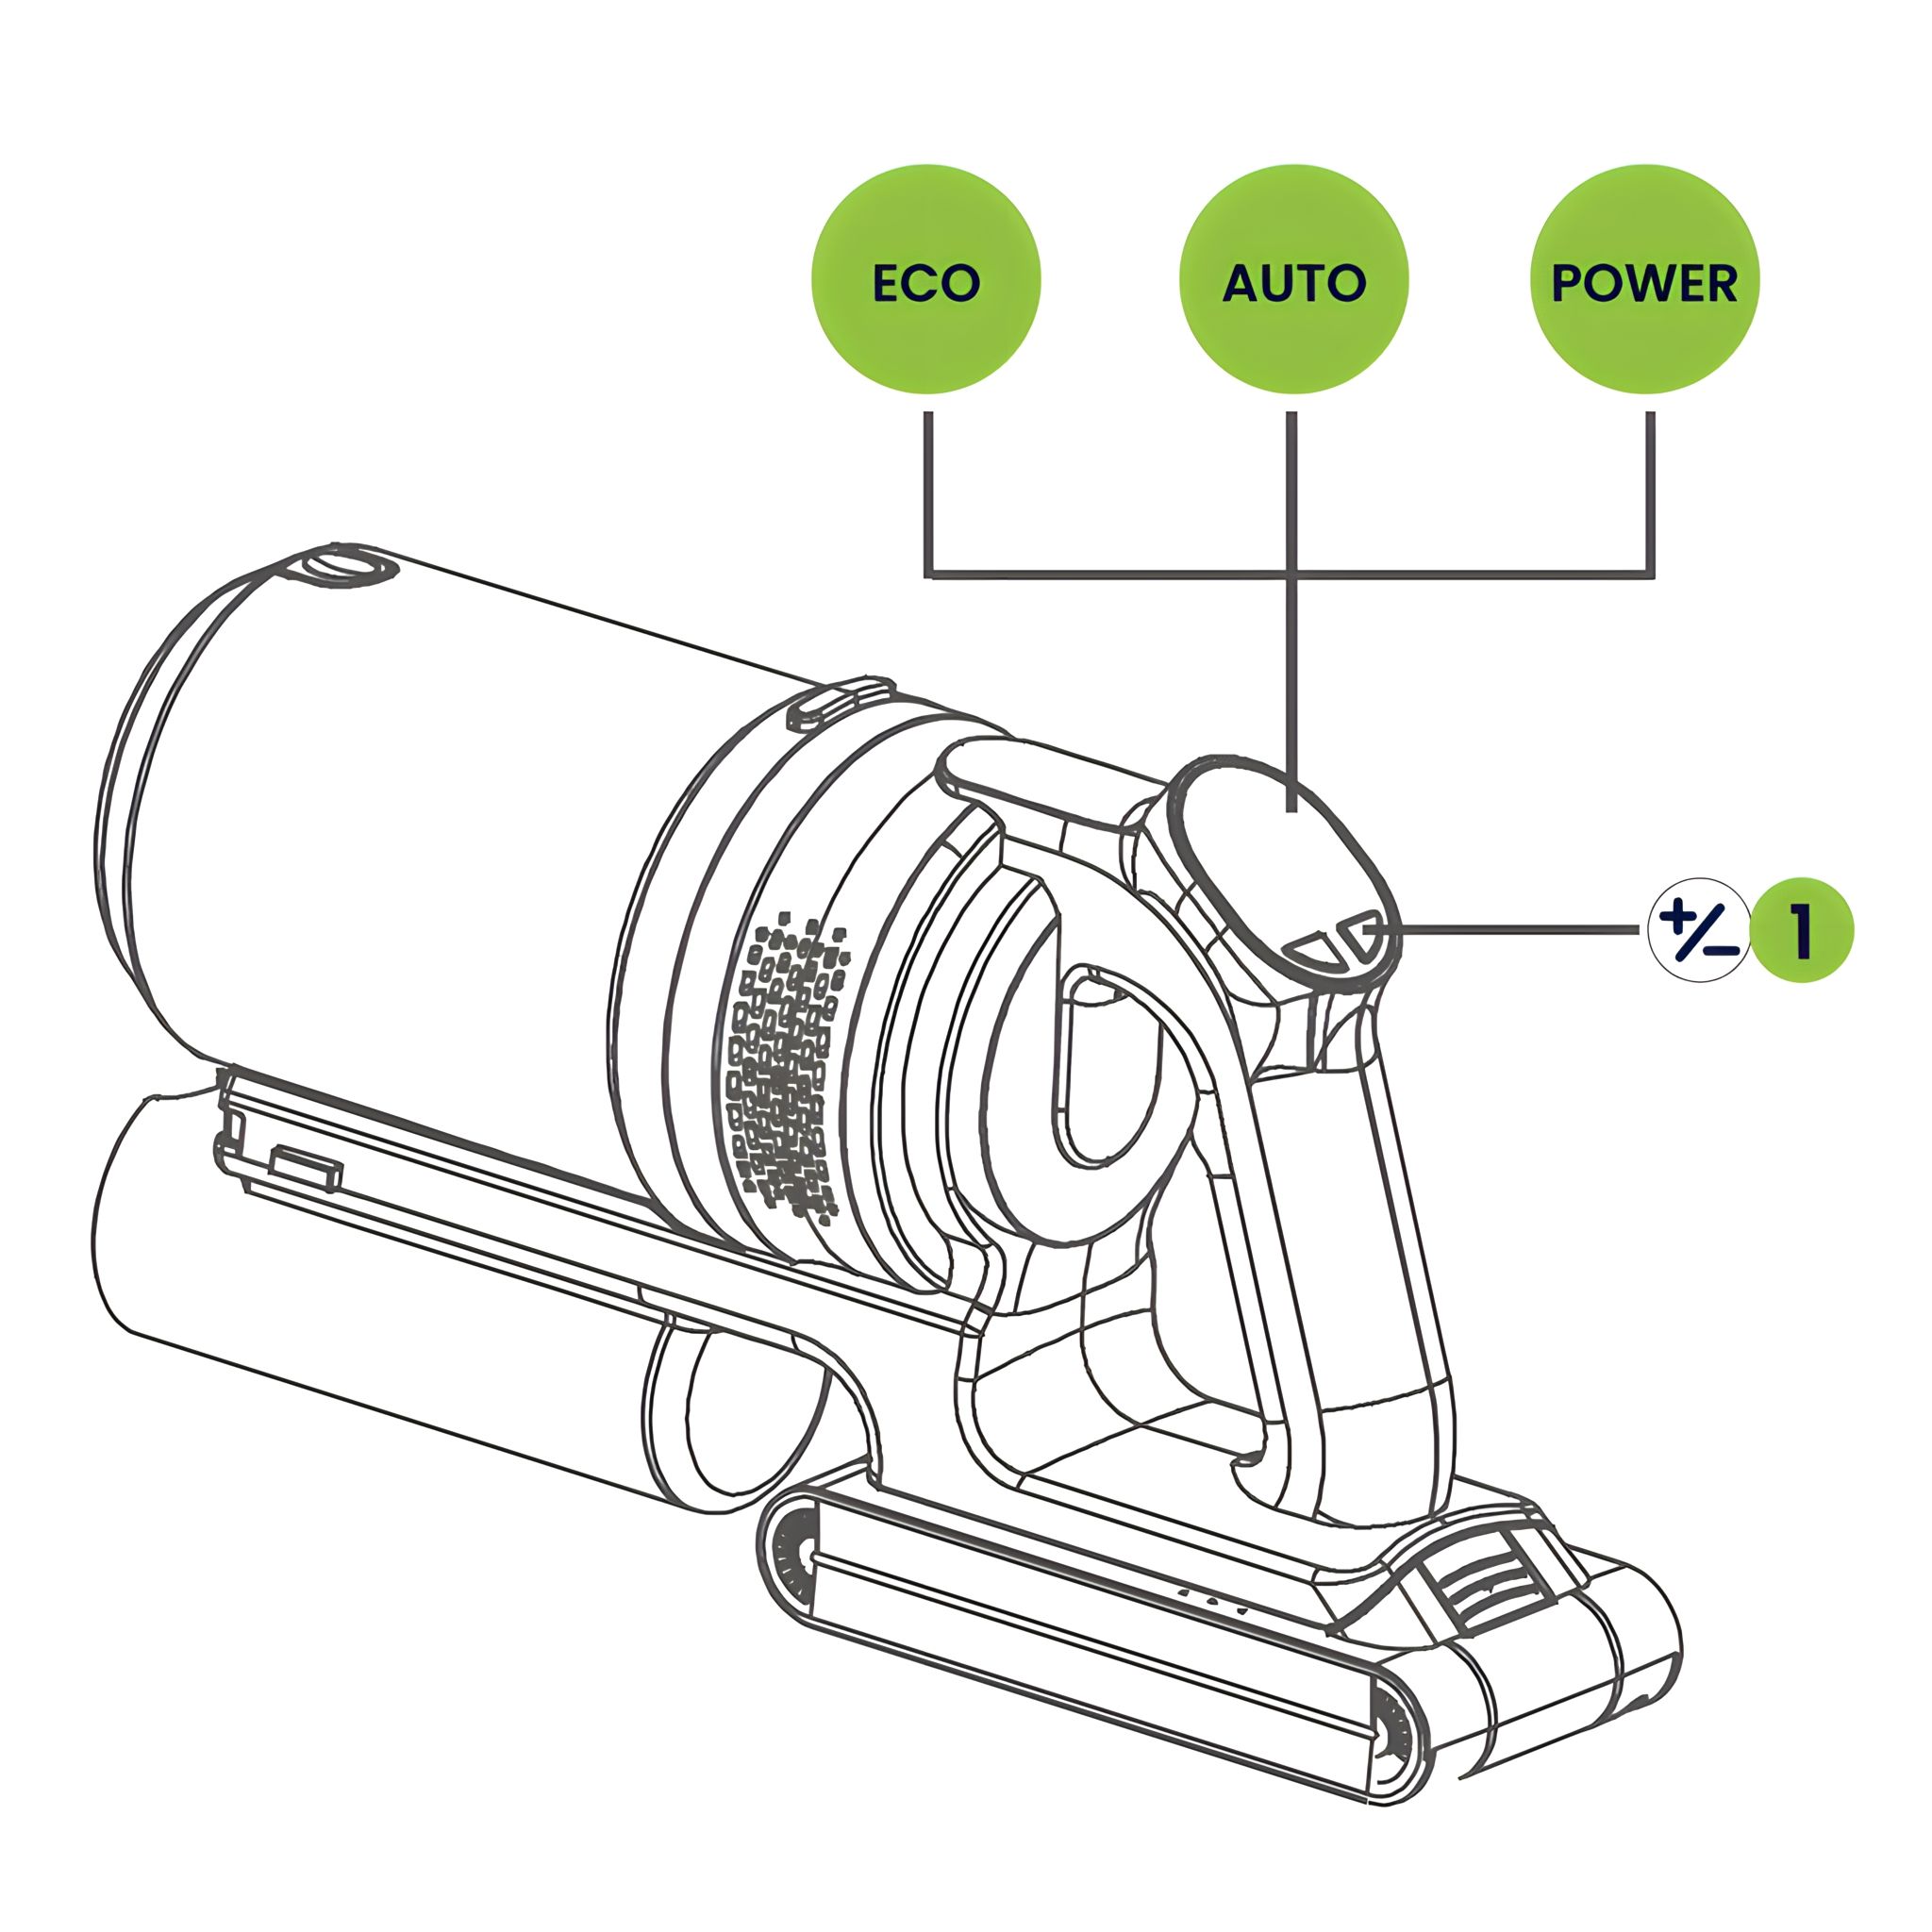
9. Adjustment of Suction Power
-
After the machine is started, it will enter ECO mode.
-
After pressing button (1), the machine will enter automatic mode,
the screen will display AUTO. The machine will automatically
adjust the suction according to ground dust and garbage.
-
Press button (1) again, machine will enter POWER mode.
-
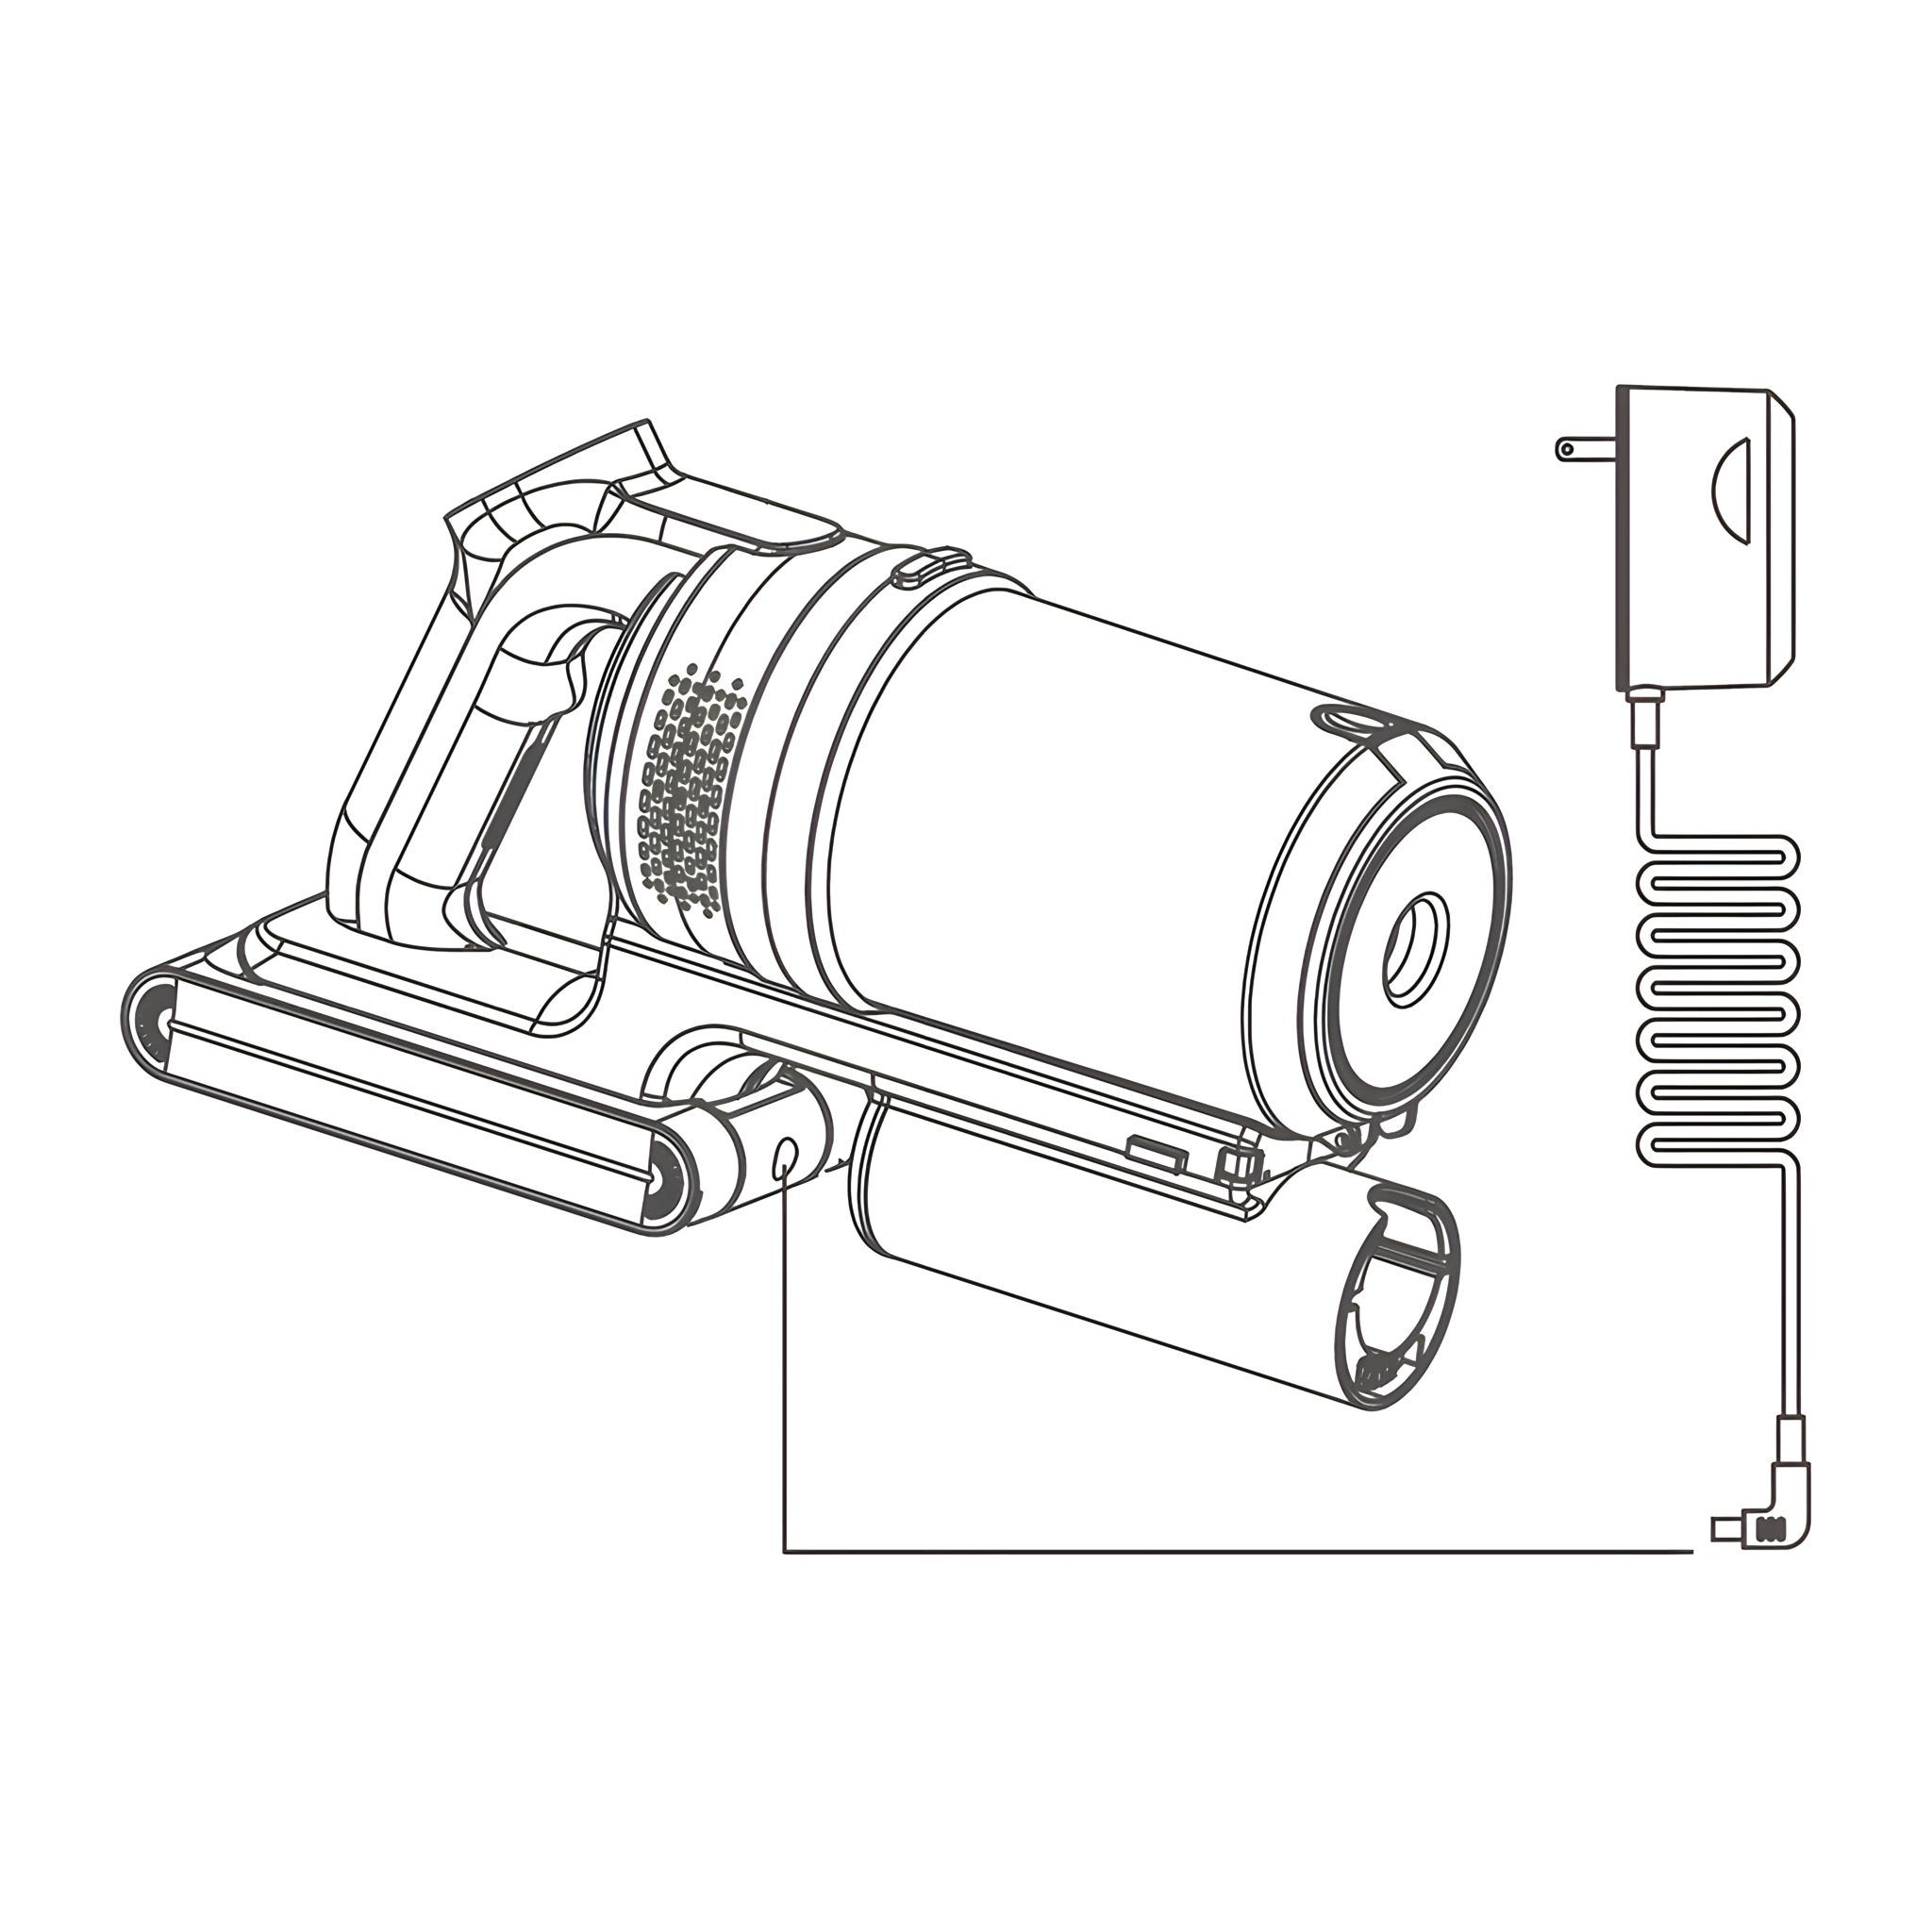
10. Charge and Discharge
-
Connect adapter to the charging port
in the battery pack, and then connect
the power supply to enter the charging state.
-
During charging, the blue indicator lights blink. When all three are solid blue, charging is complete.
Notice: Please use original 30V-0.5A charger!
-
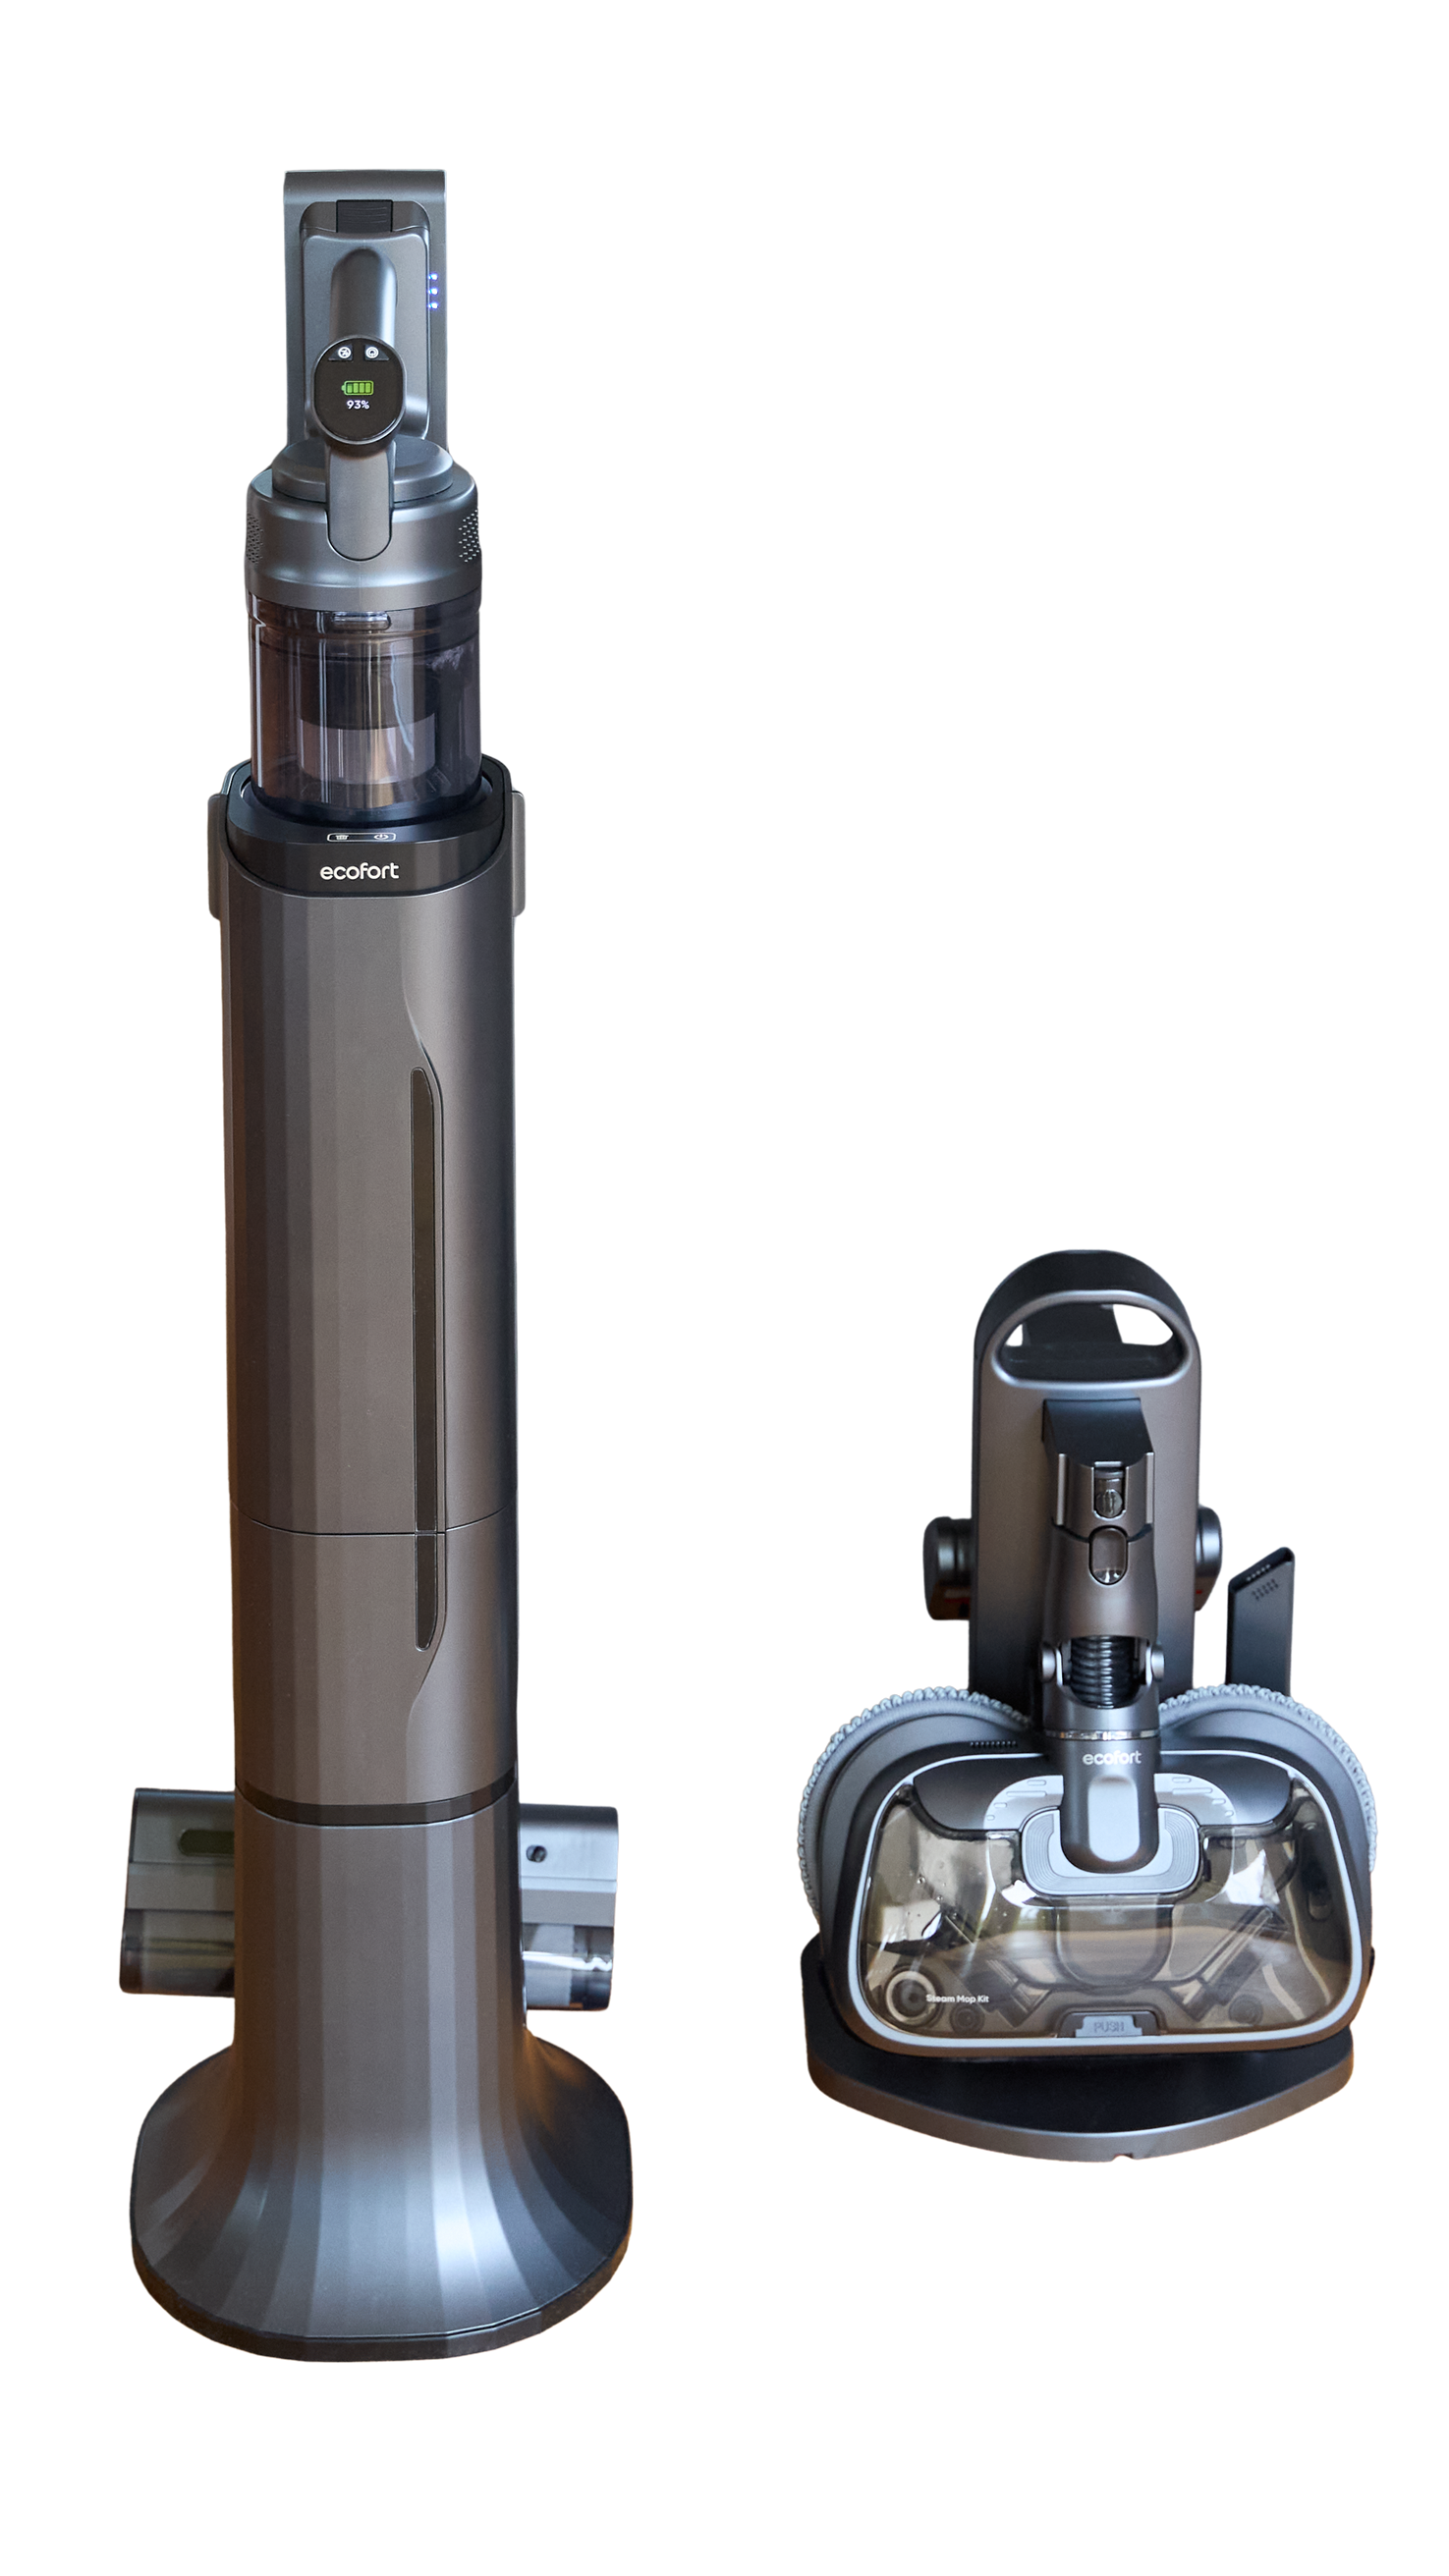
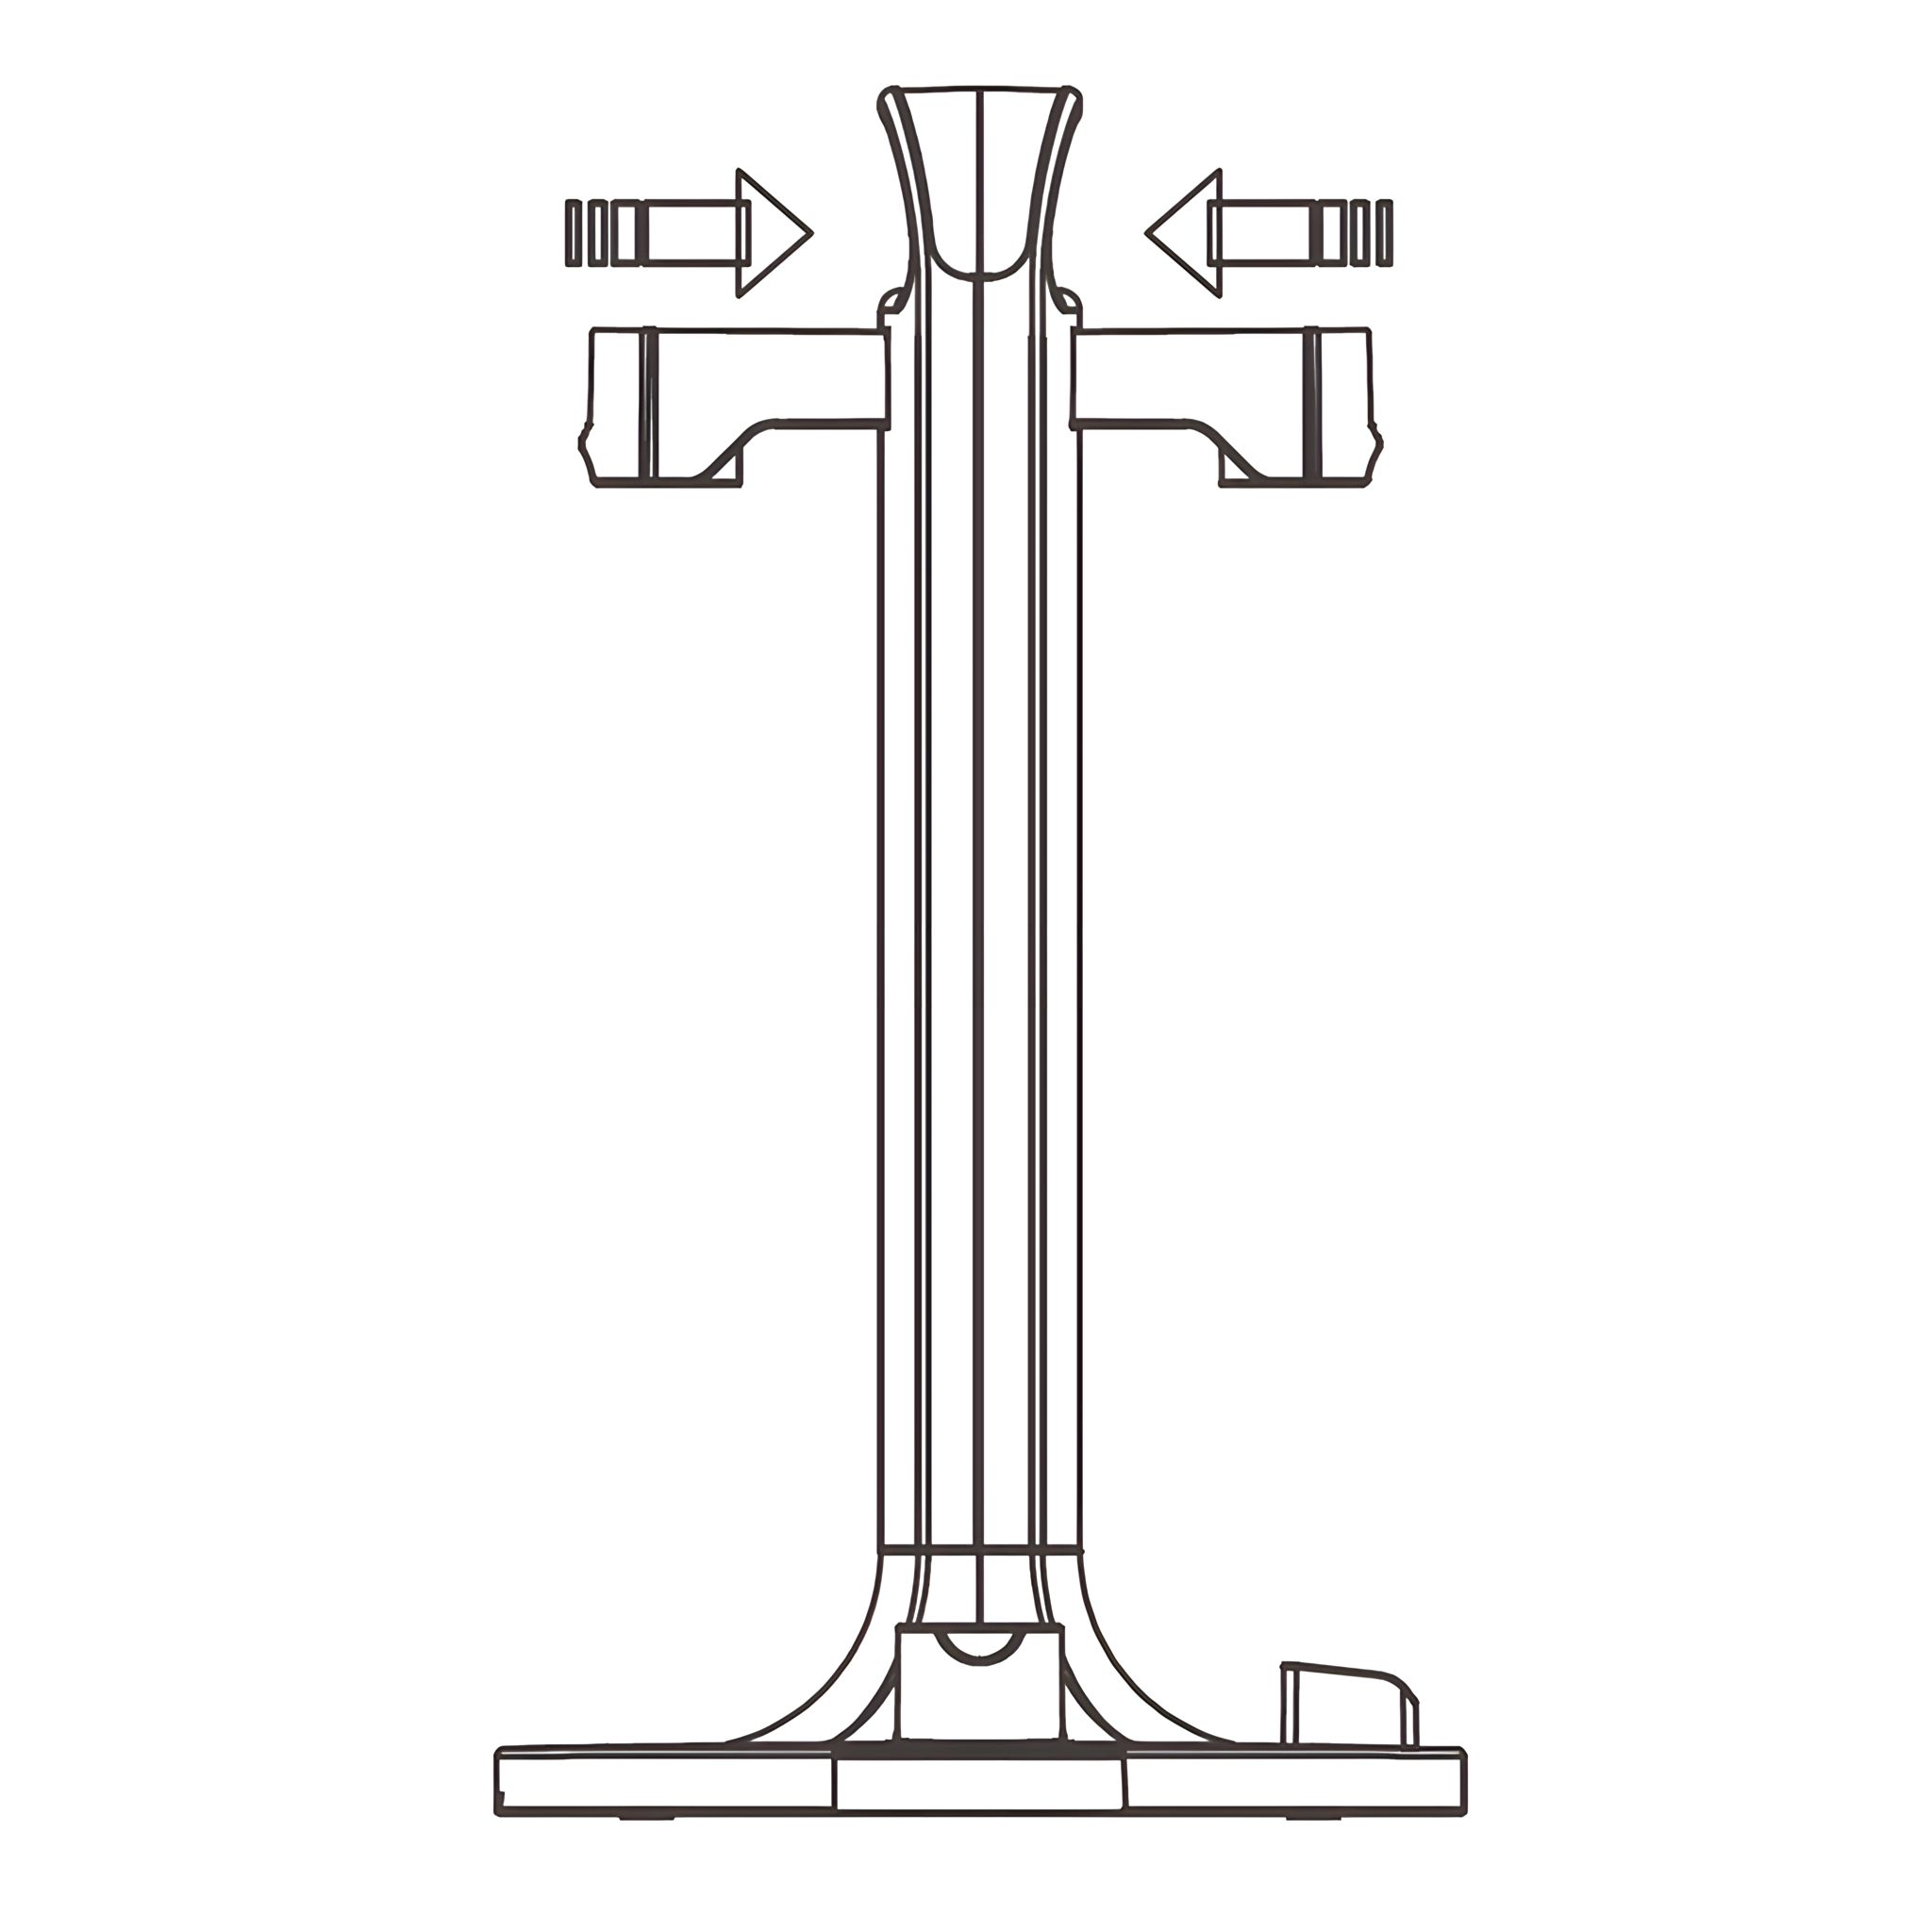
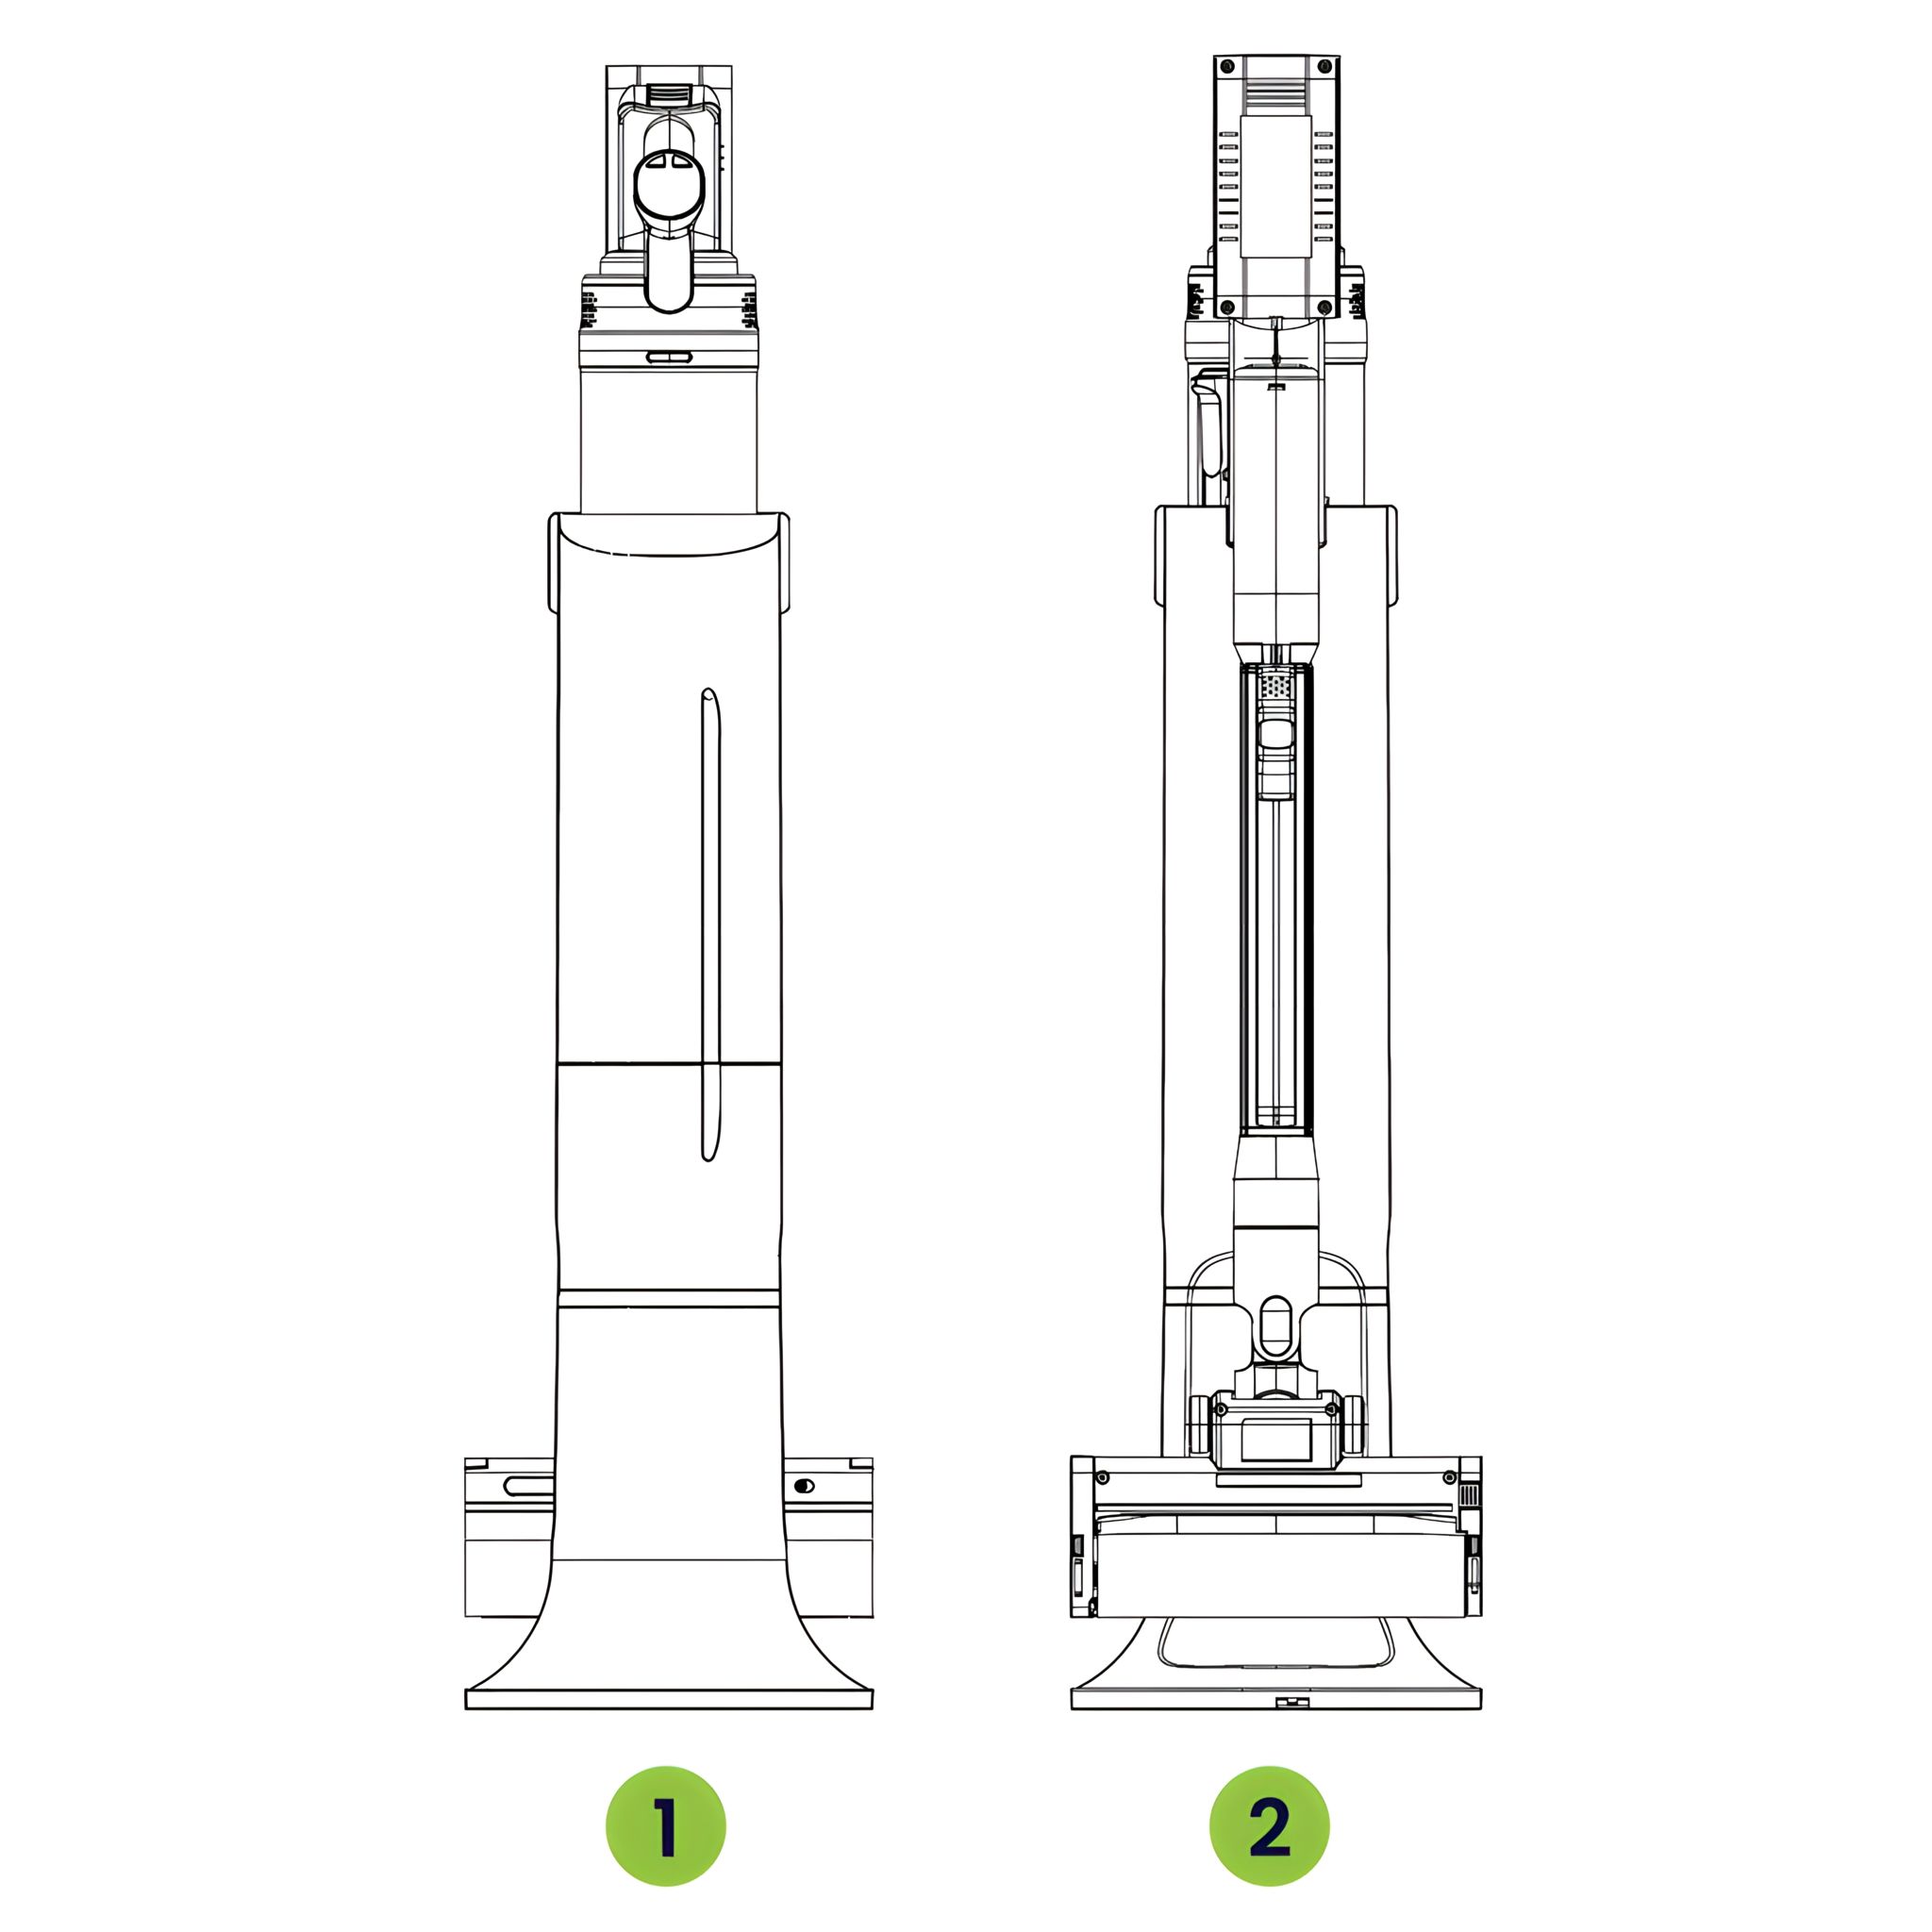
11. Station After placing the Automatic Clean Station on a stable, level surface, insert the vacuum cleaner as shown in the picture.
- Front
- Back
-
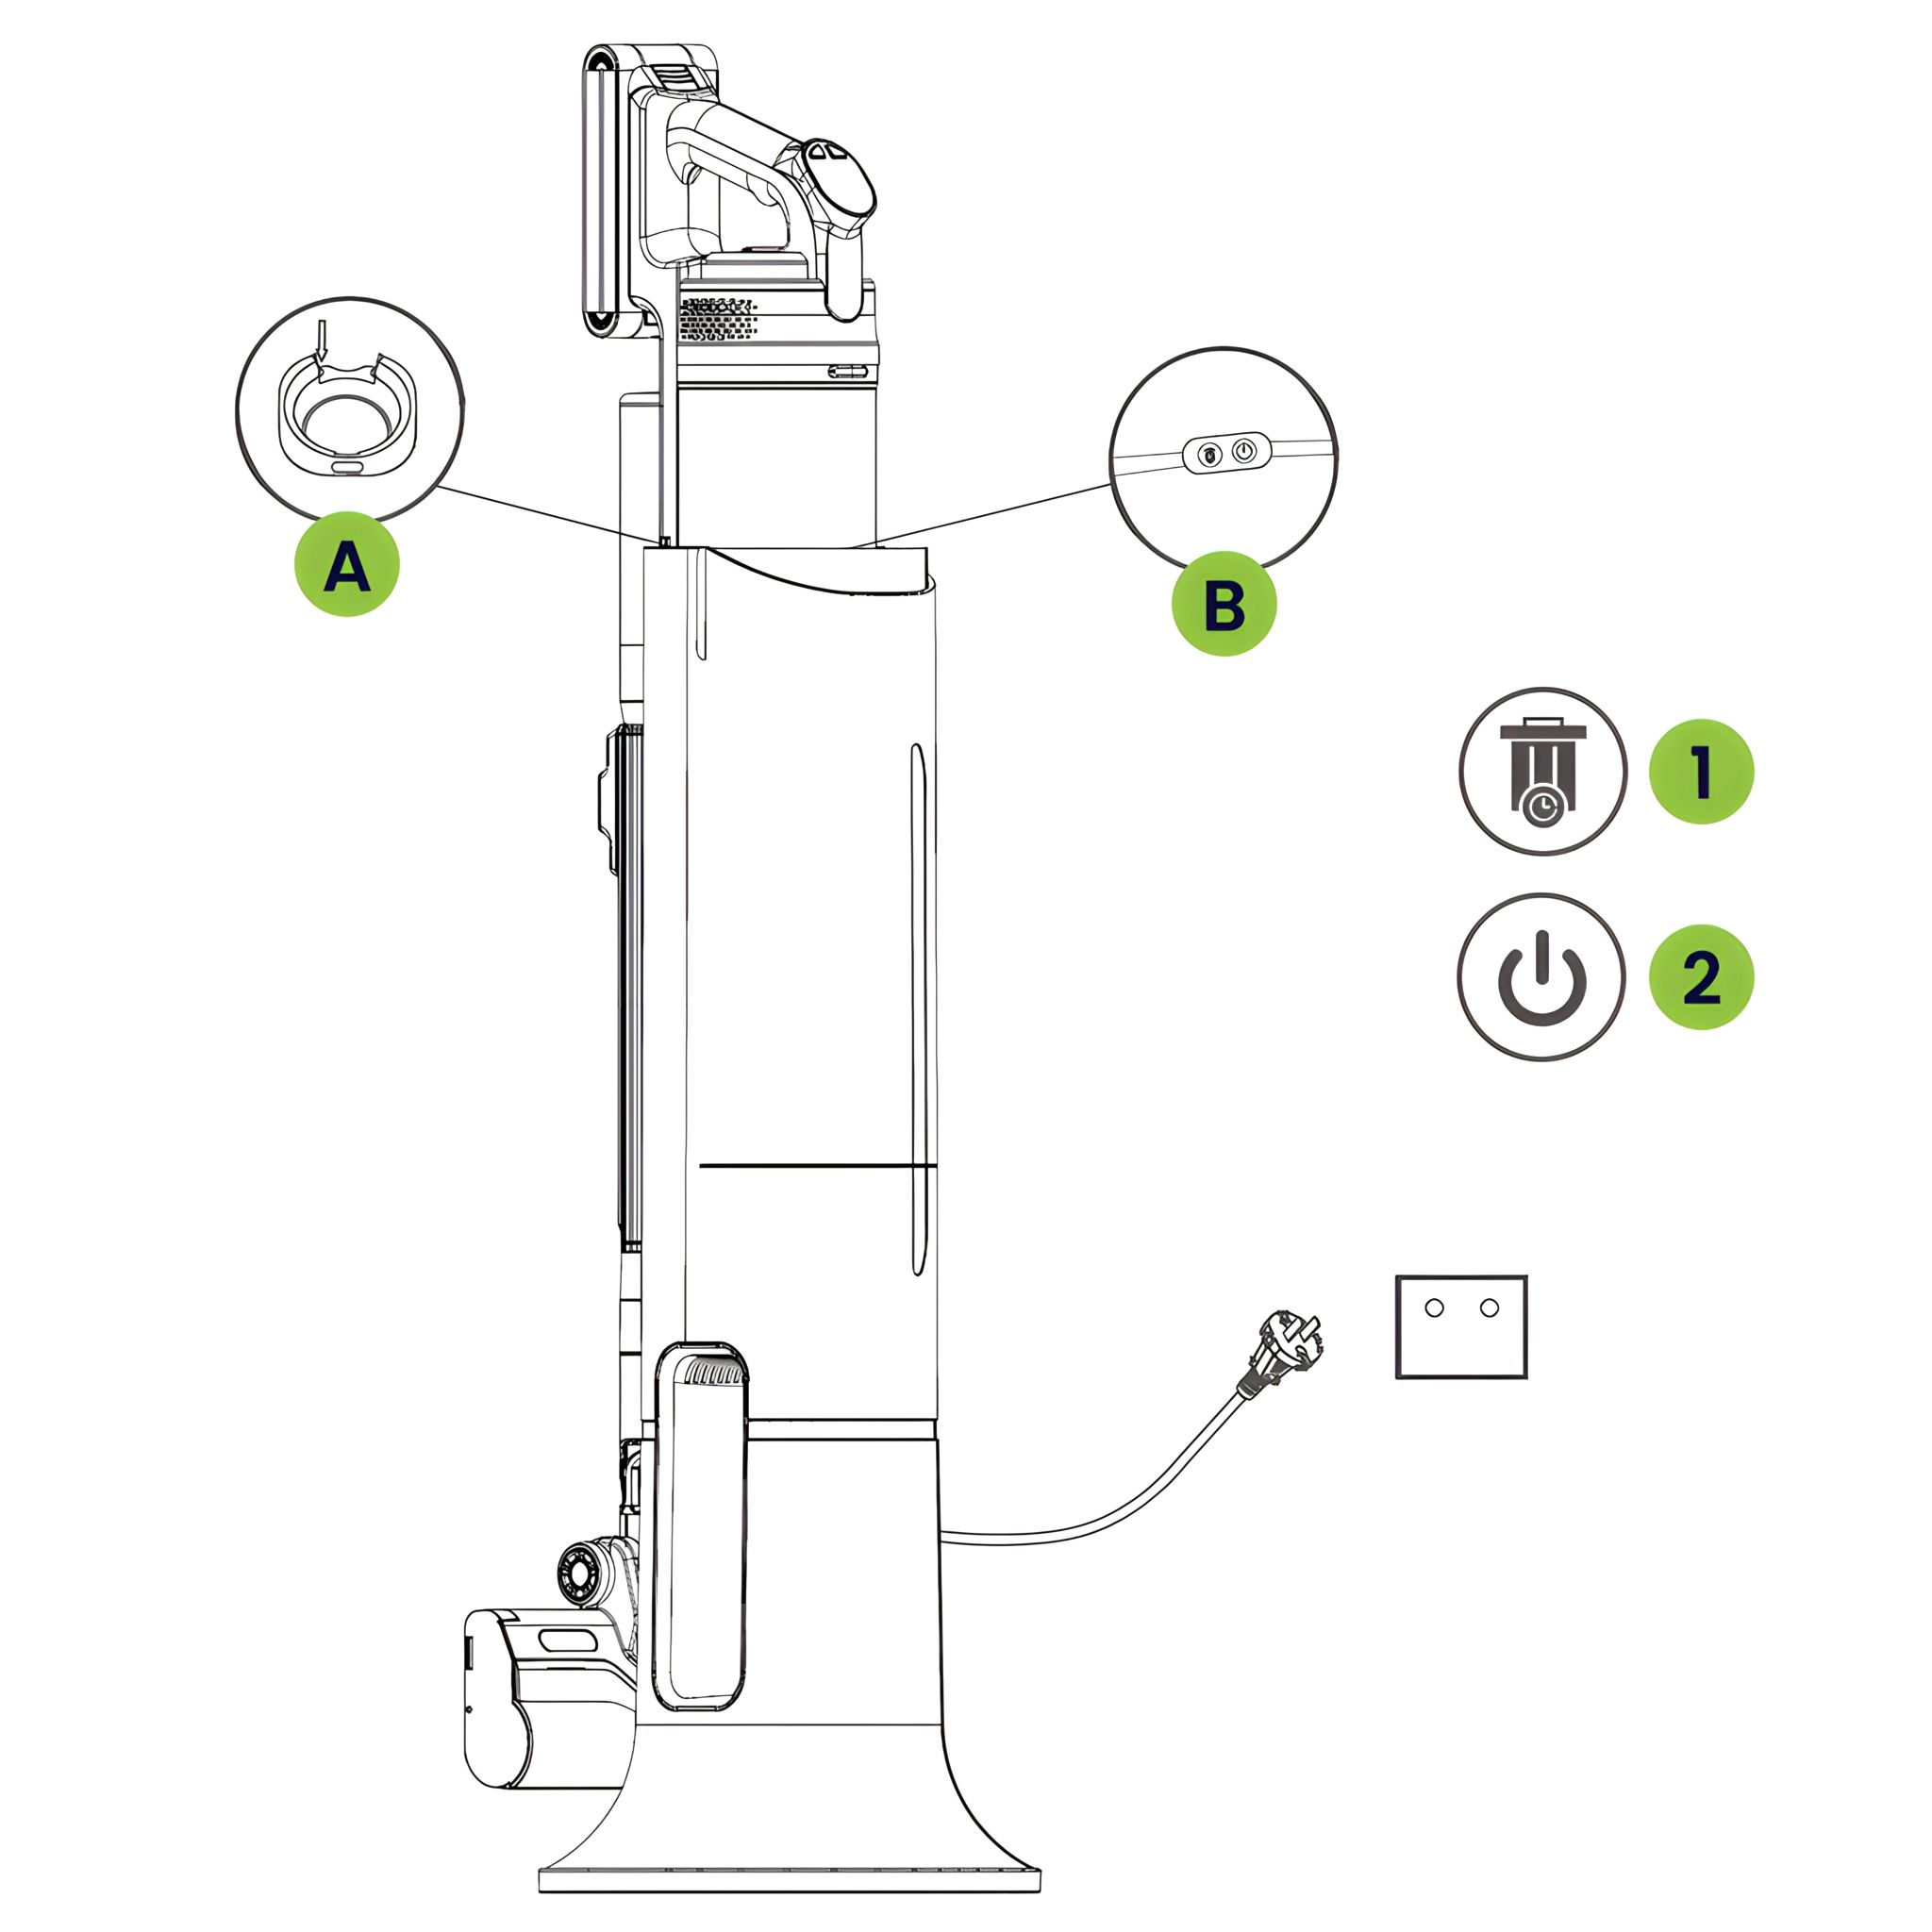
12. How to Use the Station
- Connect station to power, touch On/Off (2), it will start to work.
(Indicator at On/Off (2) is steady on).
After three cycles (30 seconds)
the station will automatically shut down and light will go out.
The thimble will close the dust cup lid.
- Hold down On/Off (2) for 3s, the icons (1) and (2) and will flicker, then the station
will enter the auto mode.
When the vacuum is placed on the station,
it will starts work automatically. (Indicator at On/Off (2) is flicker).
After three cycles (30 seconds), the station will automatically shut down
and light will go out. The thimble will close the dust cup lid.
- Hold down On/Off (2) for 3s, two modes can be switched between each other.
-
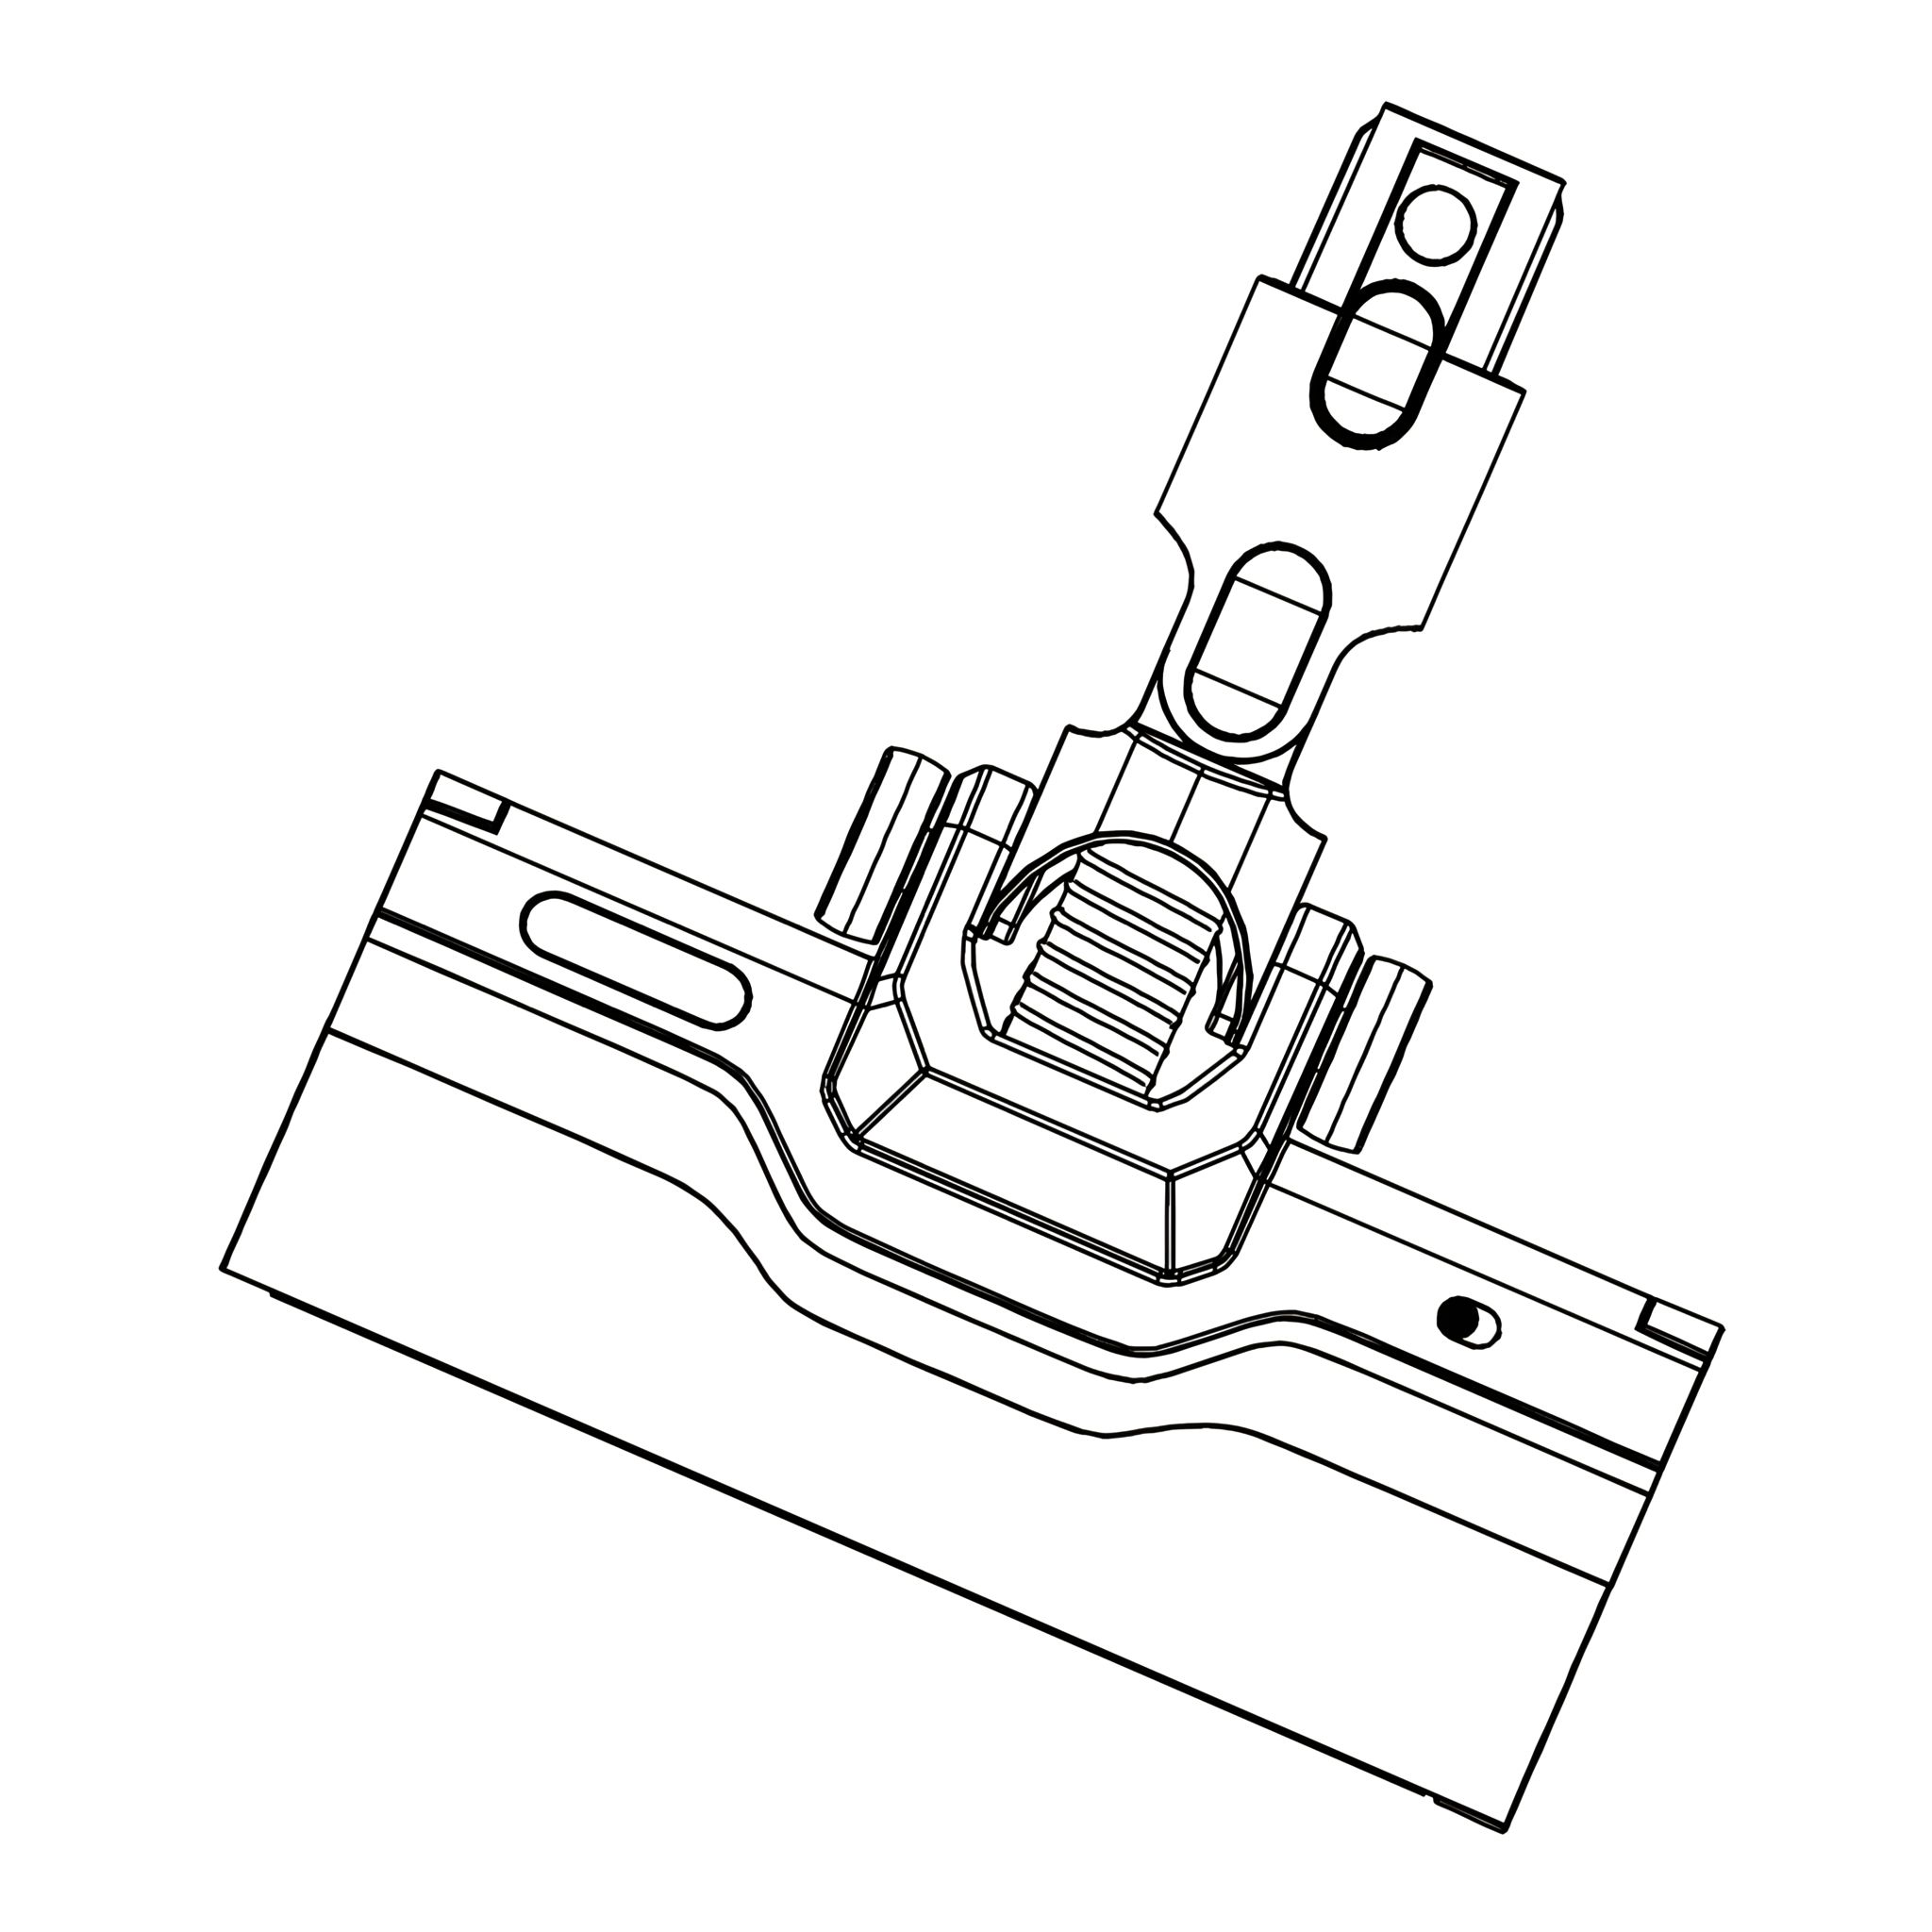
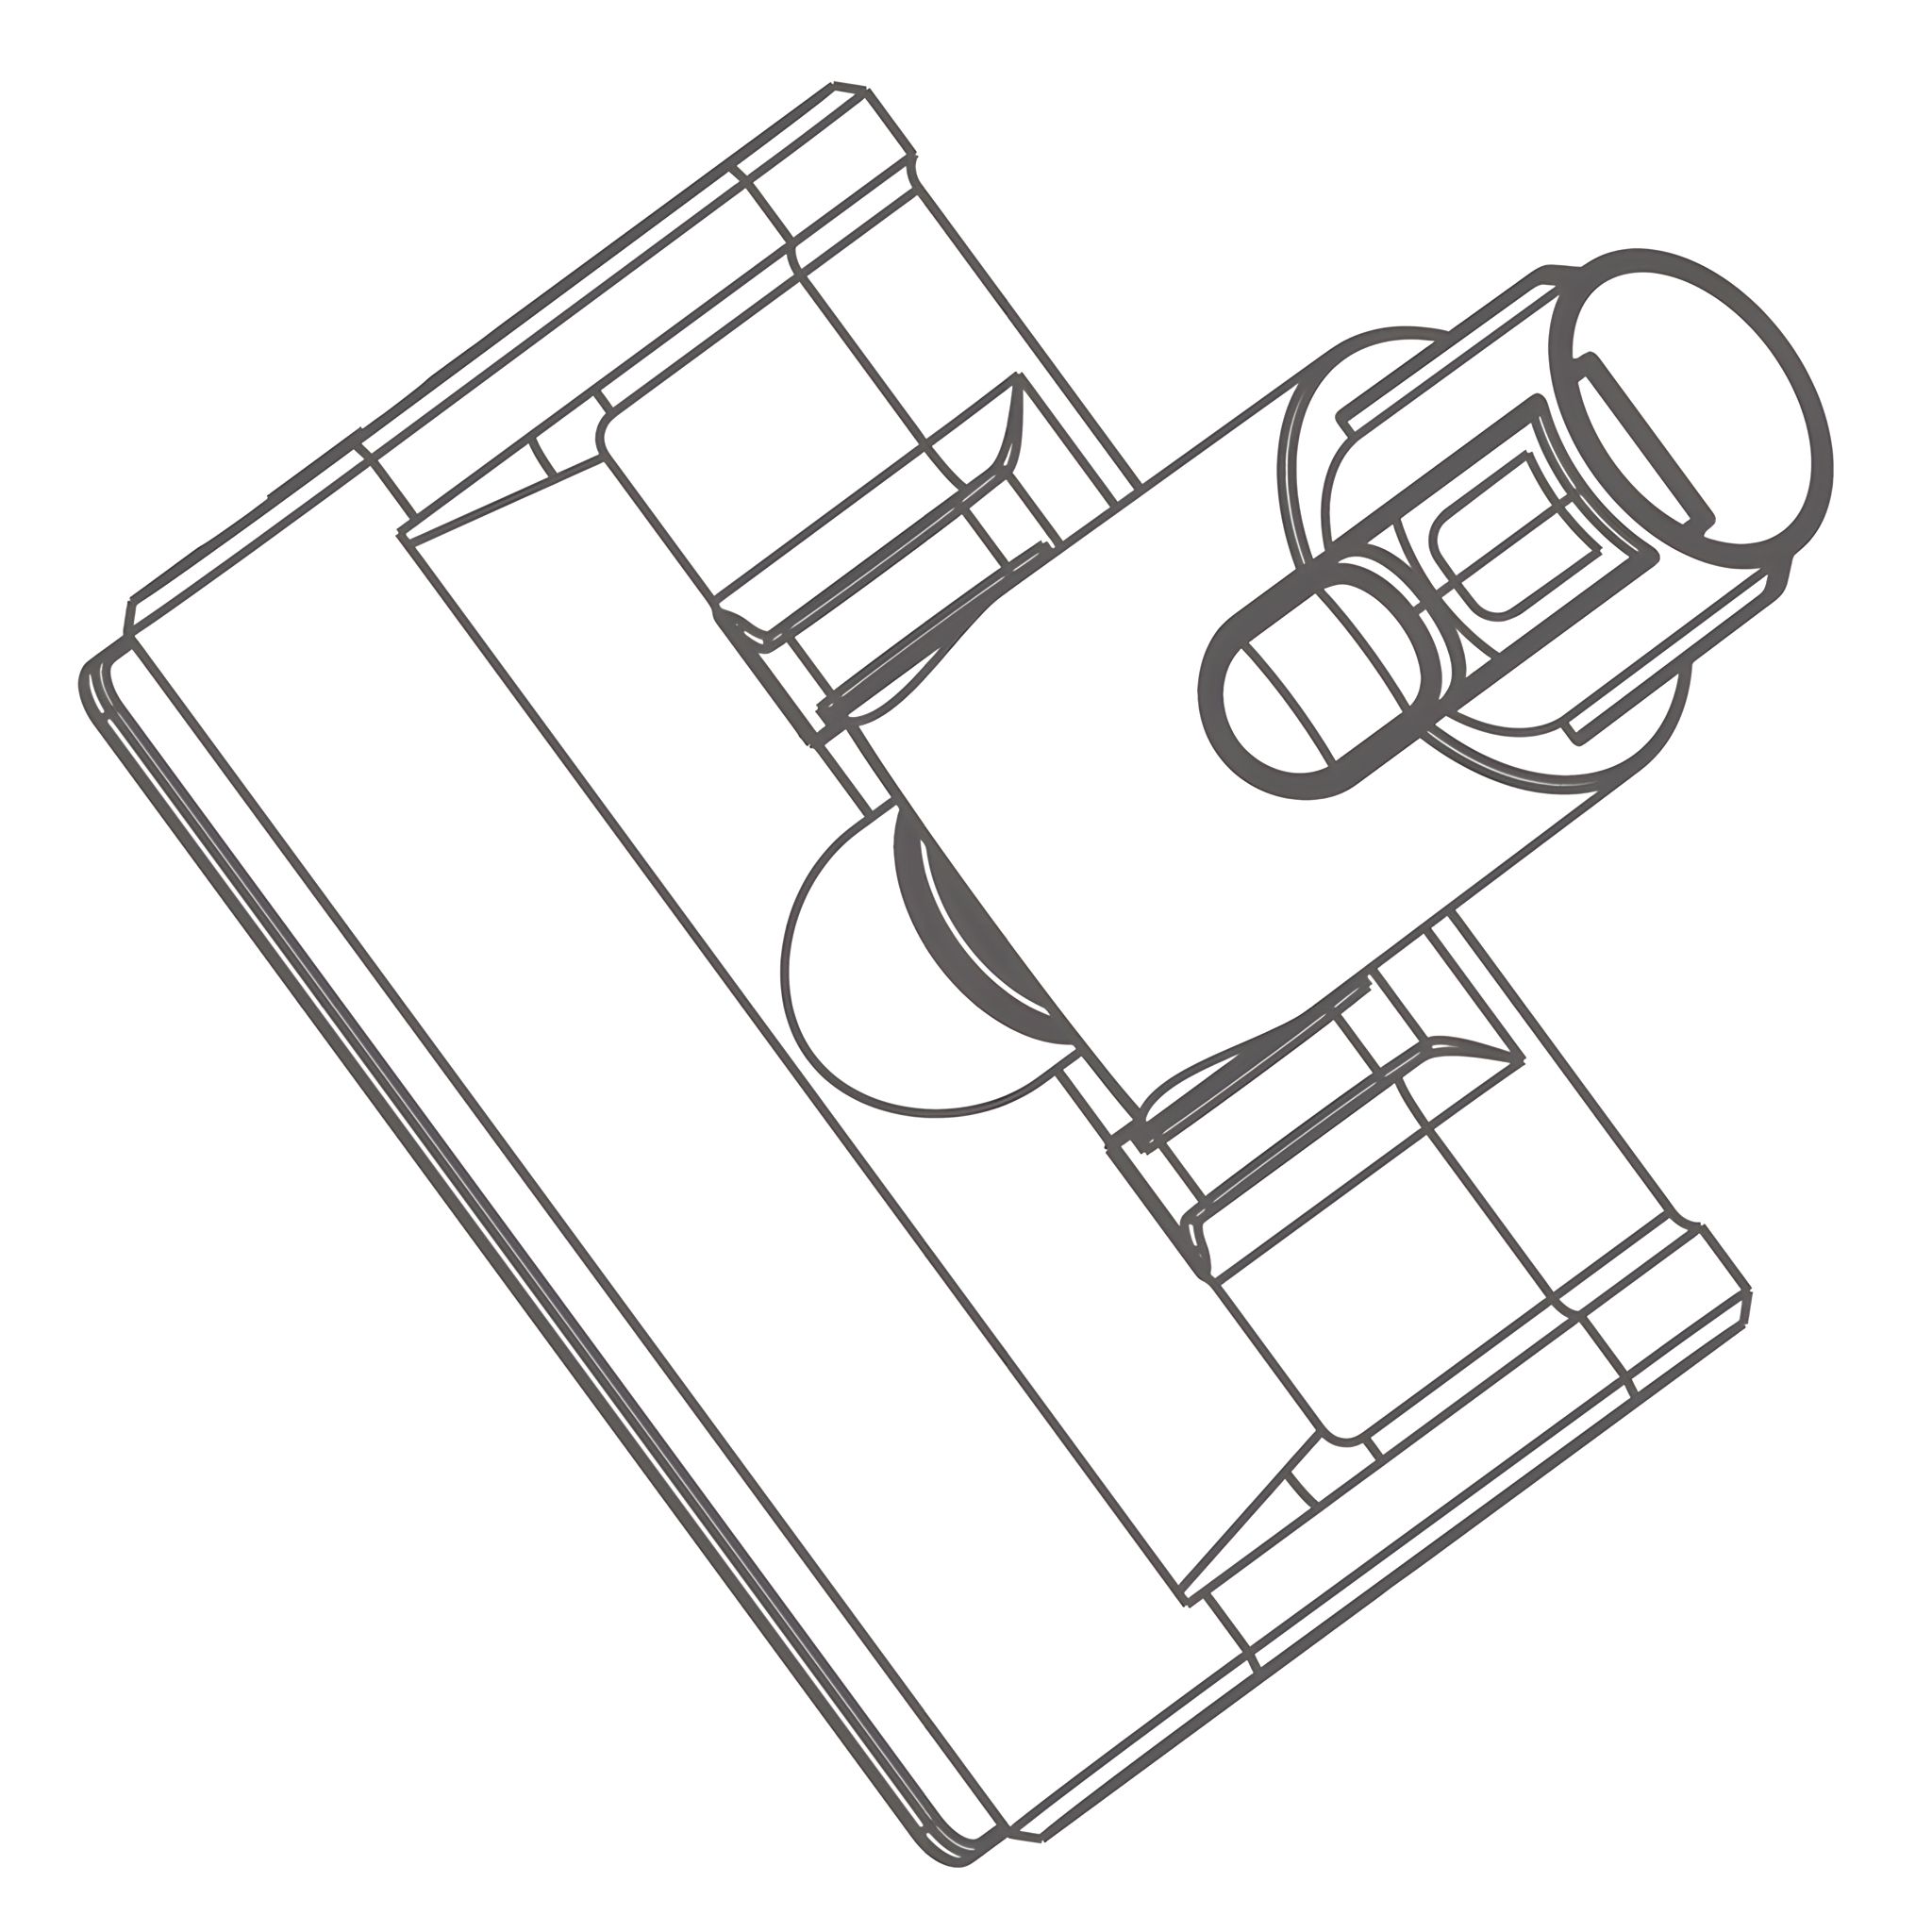
Use of Accessories 13. Floor Brush Suitable for cleaning the hard surface such as floor and ceramic tiles and the undercoat carpet
-
Quick cleaning due to built-in independent motor and large fluffy roller brush.
-
Flexible cleaning due to horizontal rotation (270°) and vertical rotation (90°).
-
Cleaning of dark and hard-to-reach areas enabled by the front LED light.
-
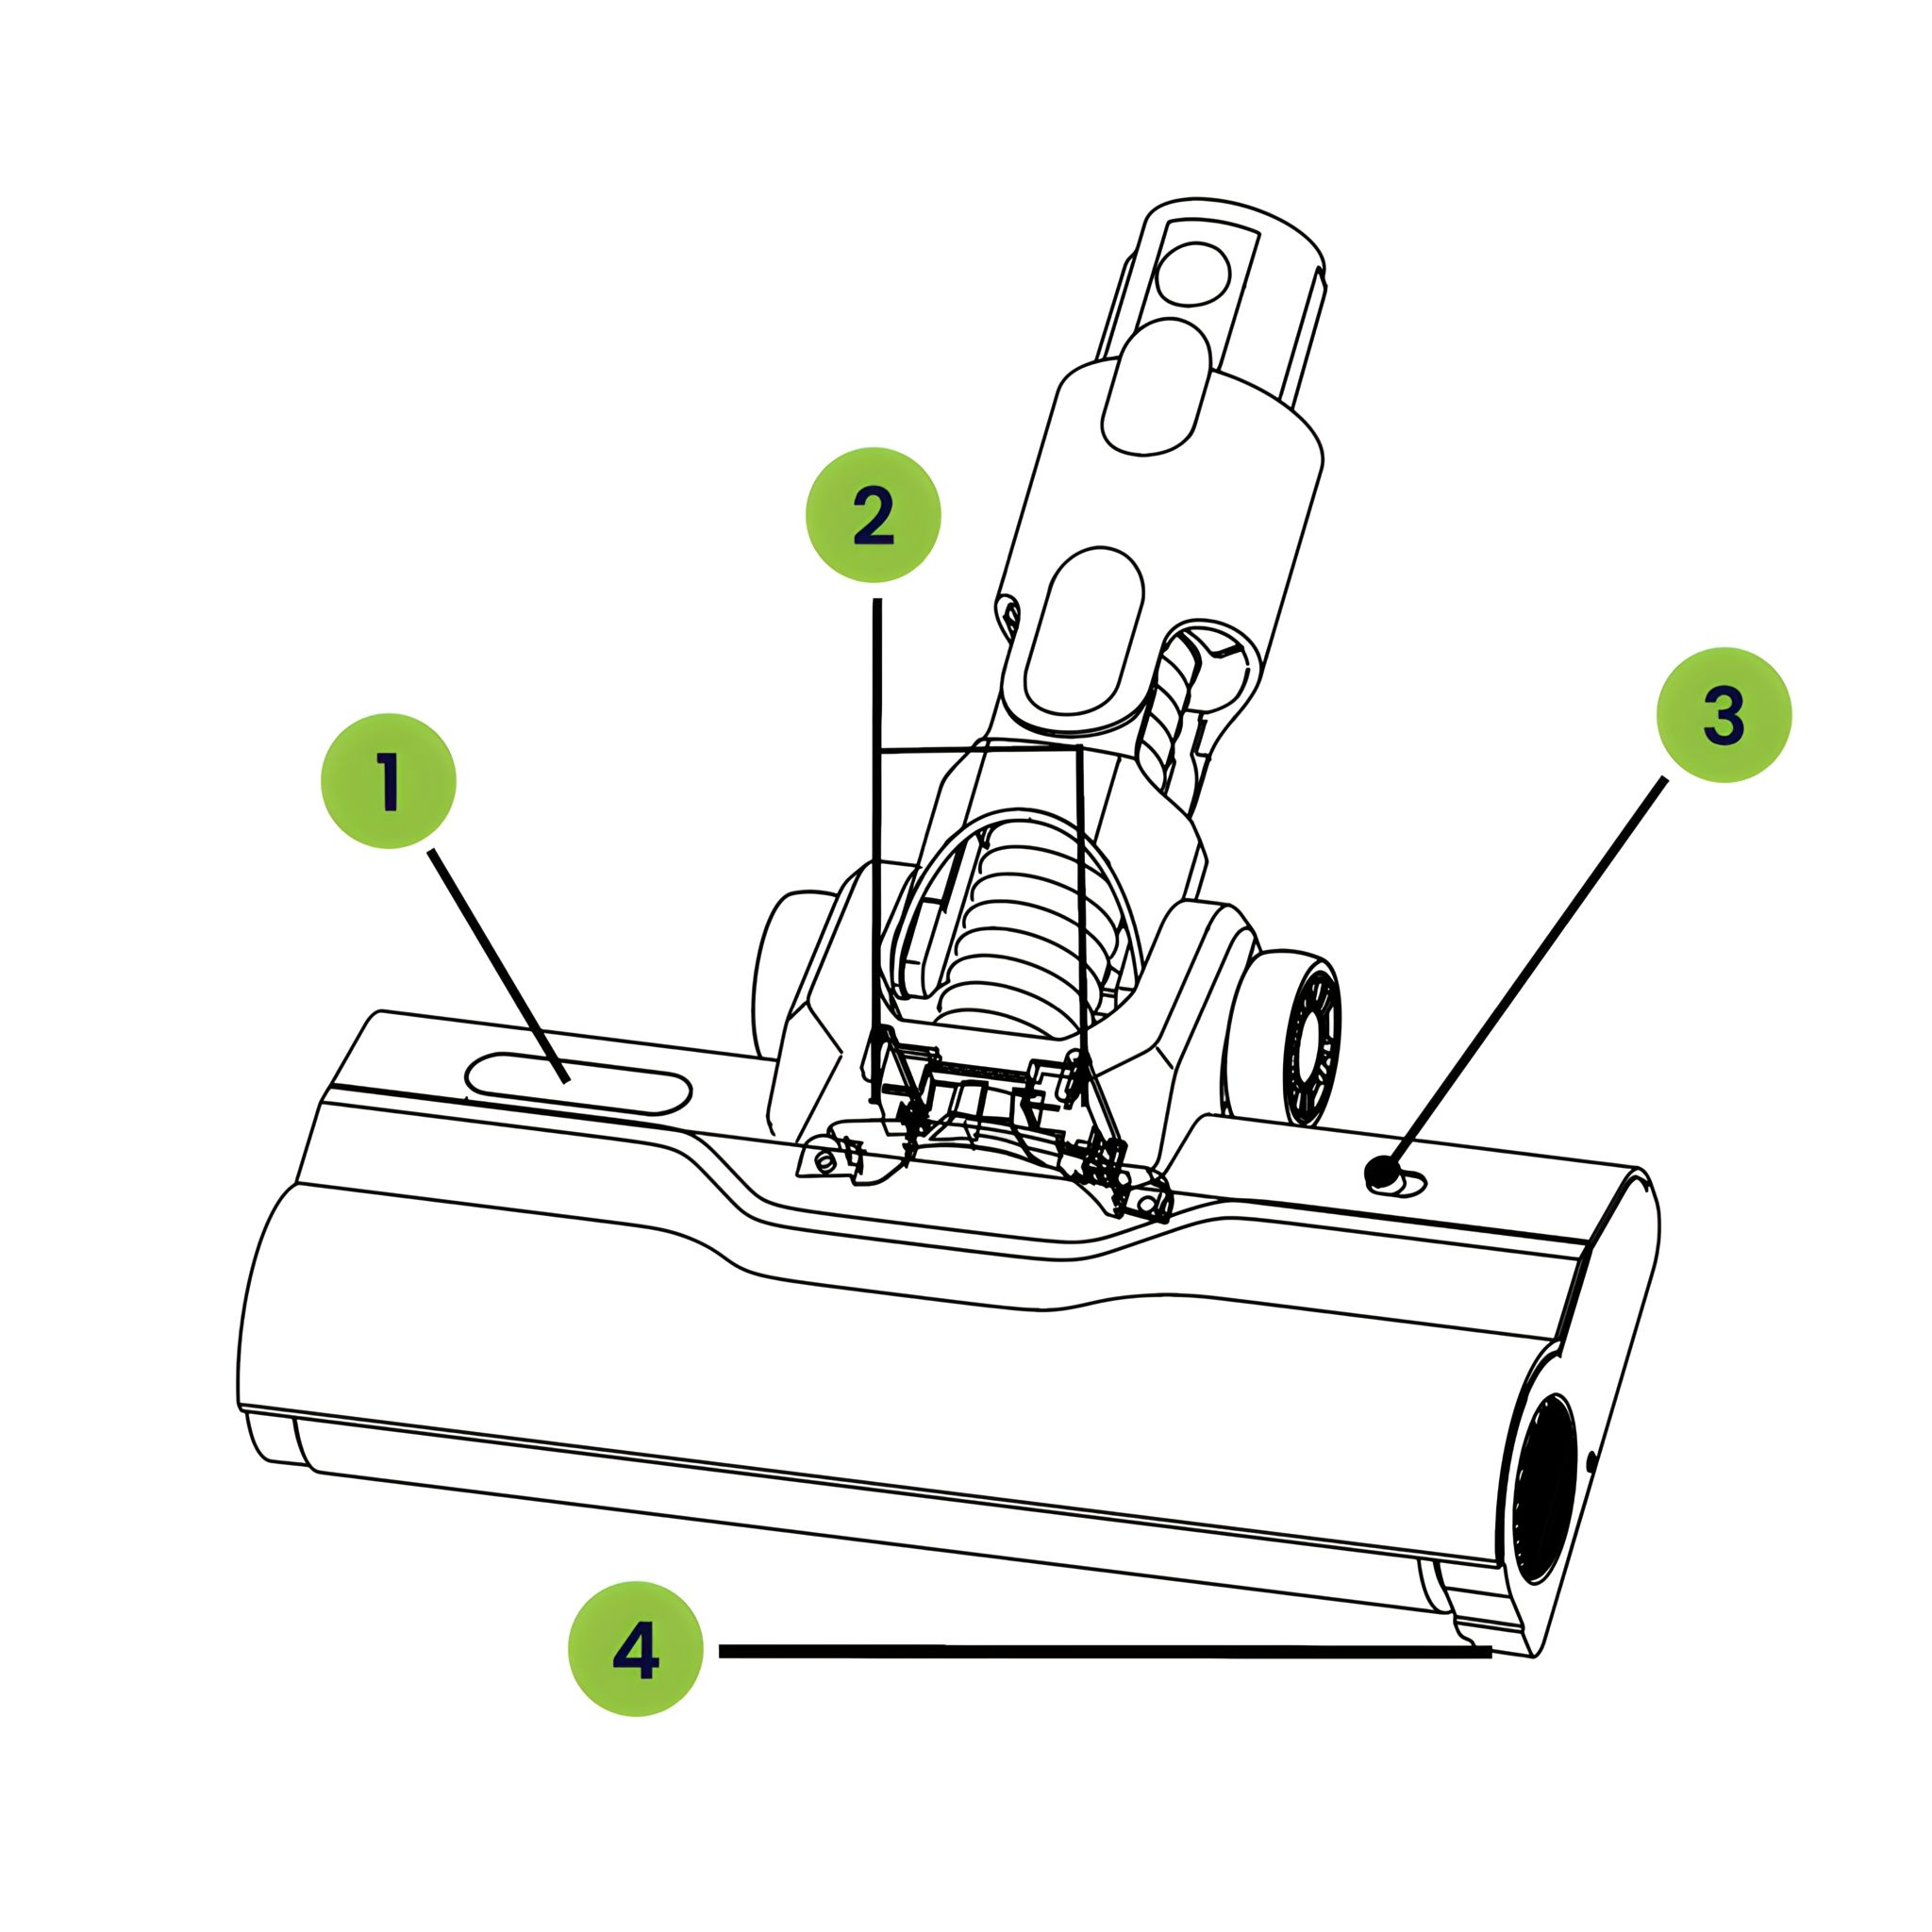
14. Function of LED Light and Safety
-
When using the motorized brush in the floor, it will shine a green light diagonally forward.
-
The green light brings out the dust on the ground.
-
Press the On/Off button (3) to turn off the green LED.
Note: Do not look directly at the LED light (4).
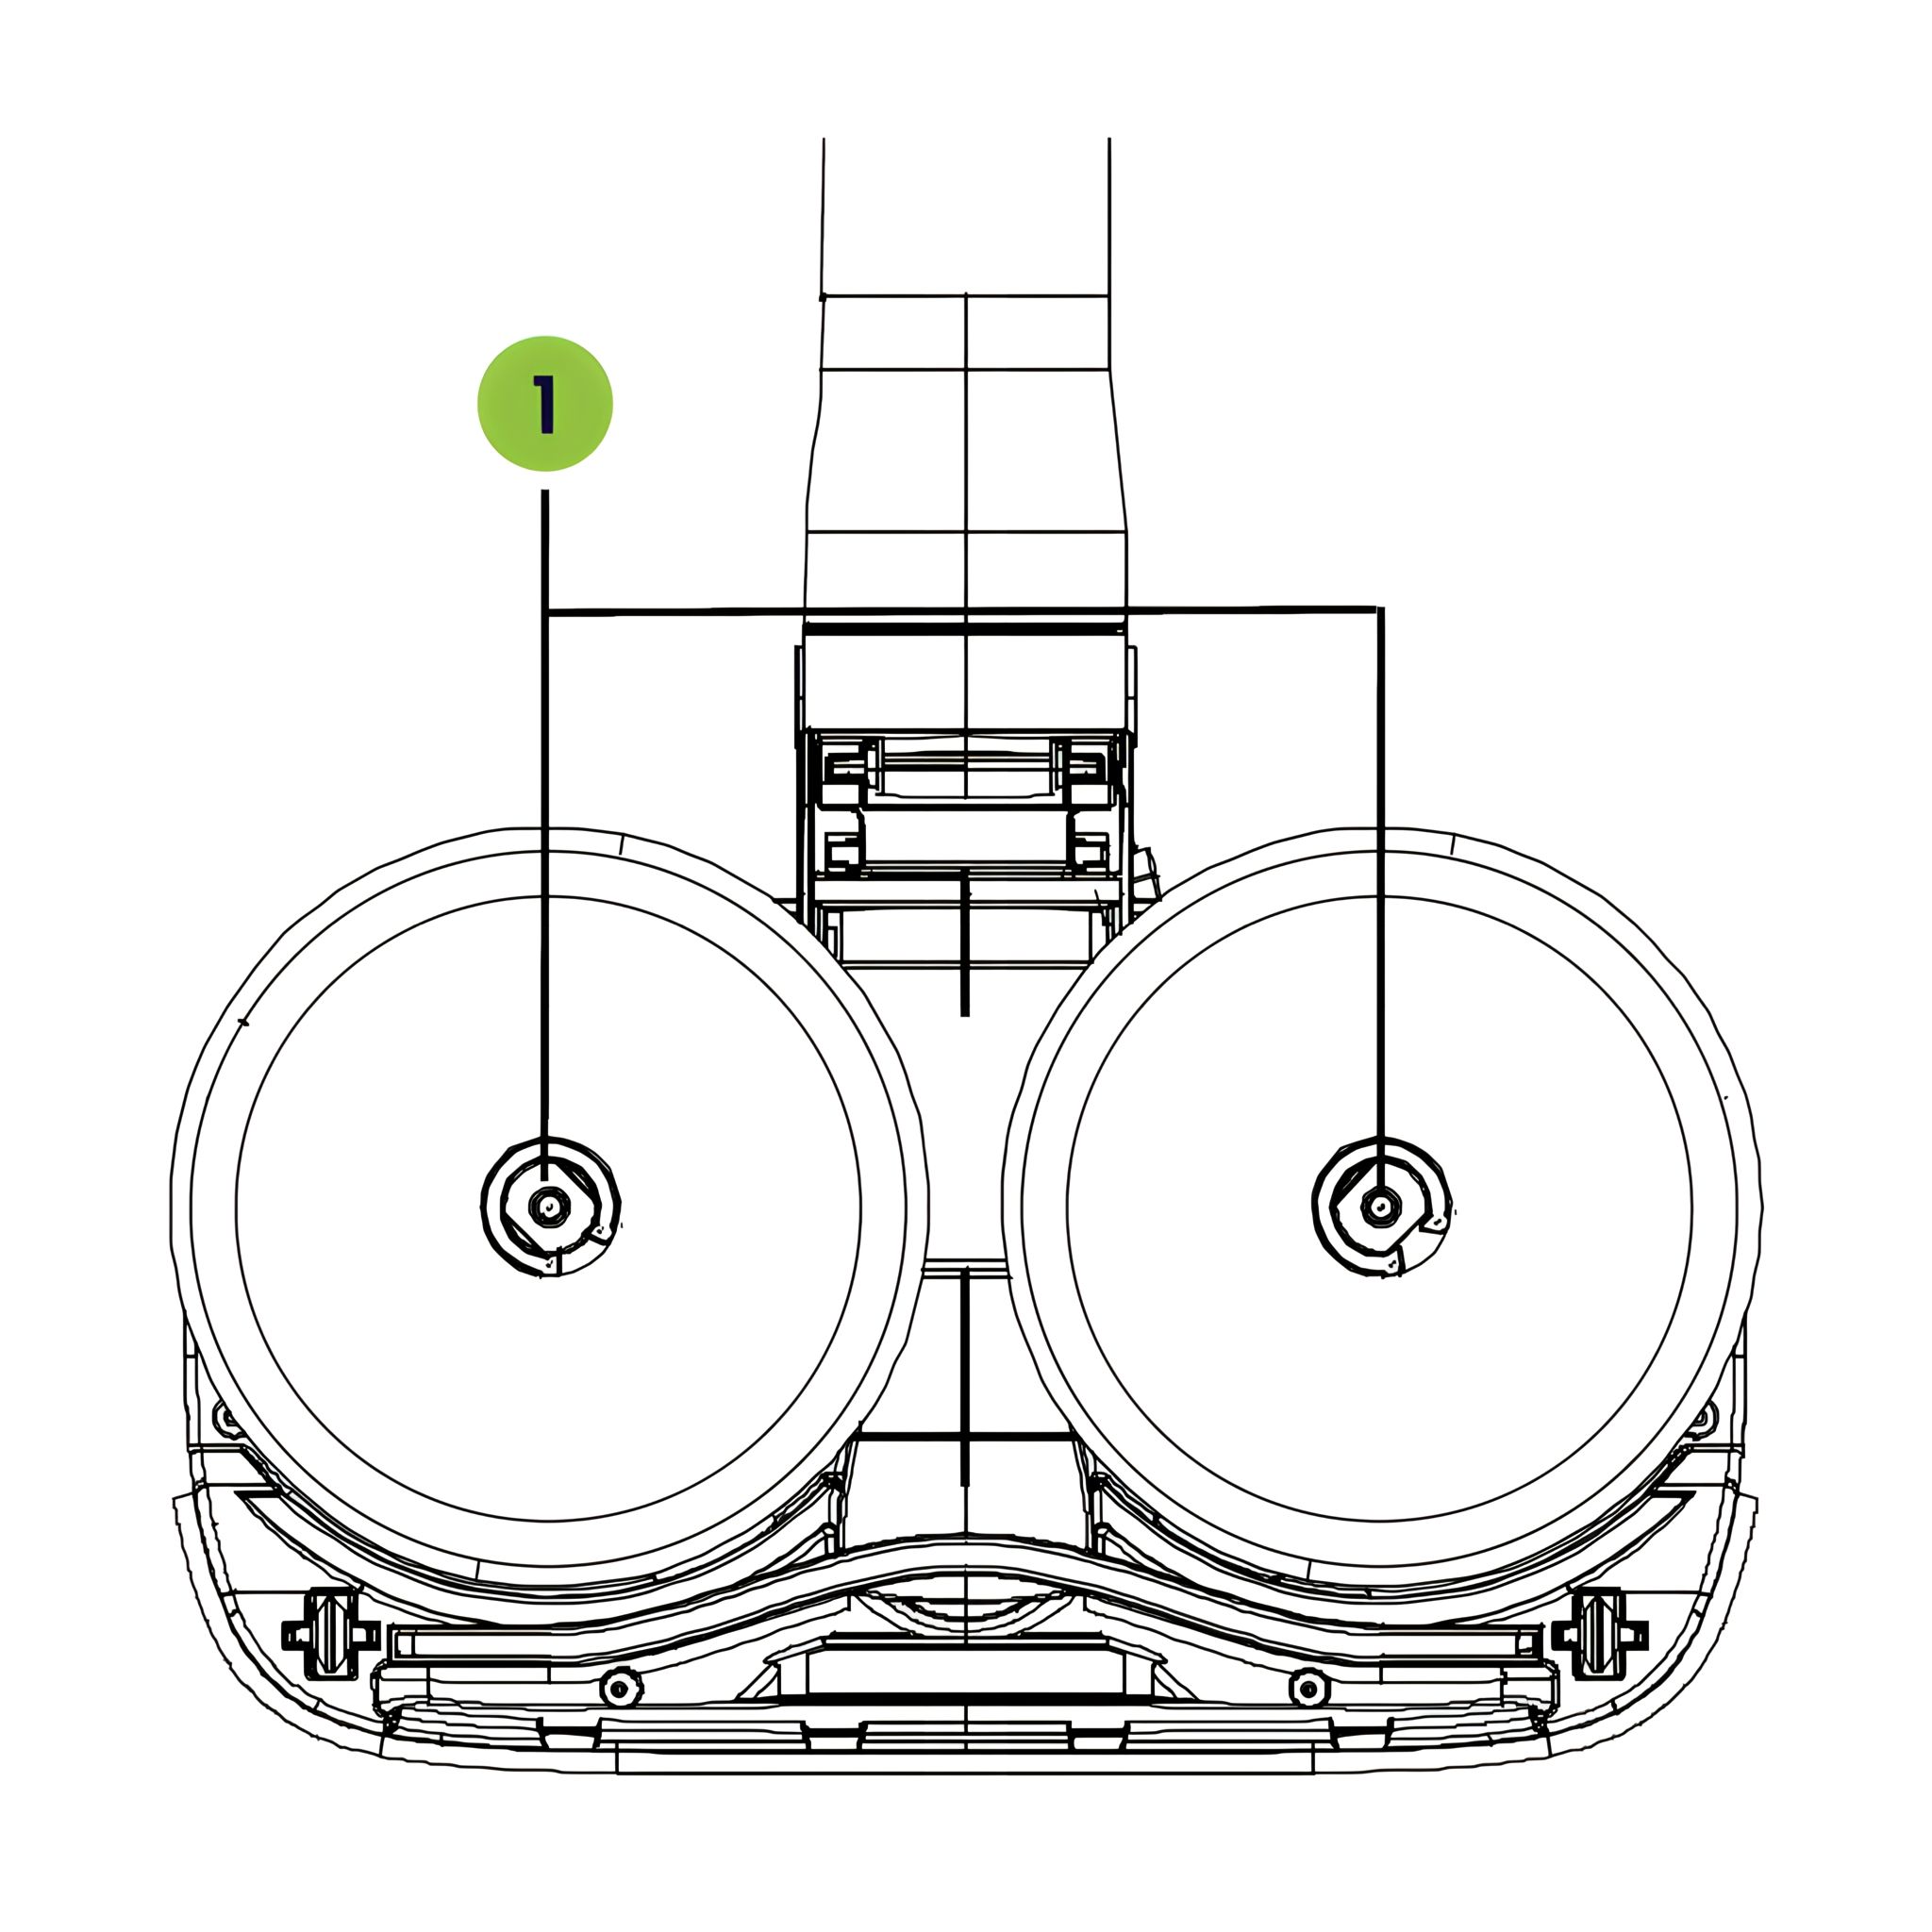
Function of Dust Sensor and Signal Light
-
When using the motorized brush in the floor, it has a dust sensor (2) and will transmit a signal to the vacuum cleaner according to the garbage or dust on the floor, then the vacuum cleaner will automatically adjust the suction power. The dust sensing function is only turned on when vacuum cleaner is AUTO mode. At the same time, the signal light (1) will change depending on dust sensor (2) sensing garbage or dust. When there is no garbage or dust, the light will show all green, there is garbage or dust into motorized brush, it will show some red. Signal light (1) will be all red when there is a lot of garbage, at this point, the motorized brush will not stop working, and when the garbage or dust leaves the sensor (2), it will turn full green again.
-
When the vacuum cleaner is ECO/POWER mode, the dust sensor (2) function will be turned off. The signal light (1) will be adjusted according to the resistance sensed by motorized brush, when the motorized brush is running without load, it will be full green. The red and green gradually show, the greater resistance, the longer red area. After the motorized brush is completely stuck, the light will be showed full red. The motorized brush will stop working.
-
15. Steam Mop Kit Suitable for cleaning the hard surface such as floor and ceramic tiles
-
Quick dust removal due to independent dual motors and two high-power rotating mops,
vacuuming and mopping simultaneously.
-
Flexible cleaning due to horizontal rotation (270°) and vertical rotation (90°).
-
Cleaning of dark and dead angles due to the front LED light.
-
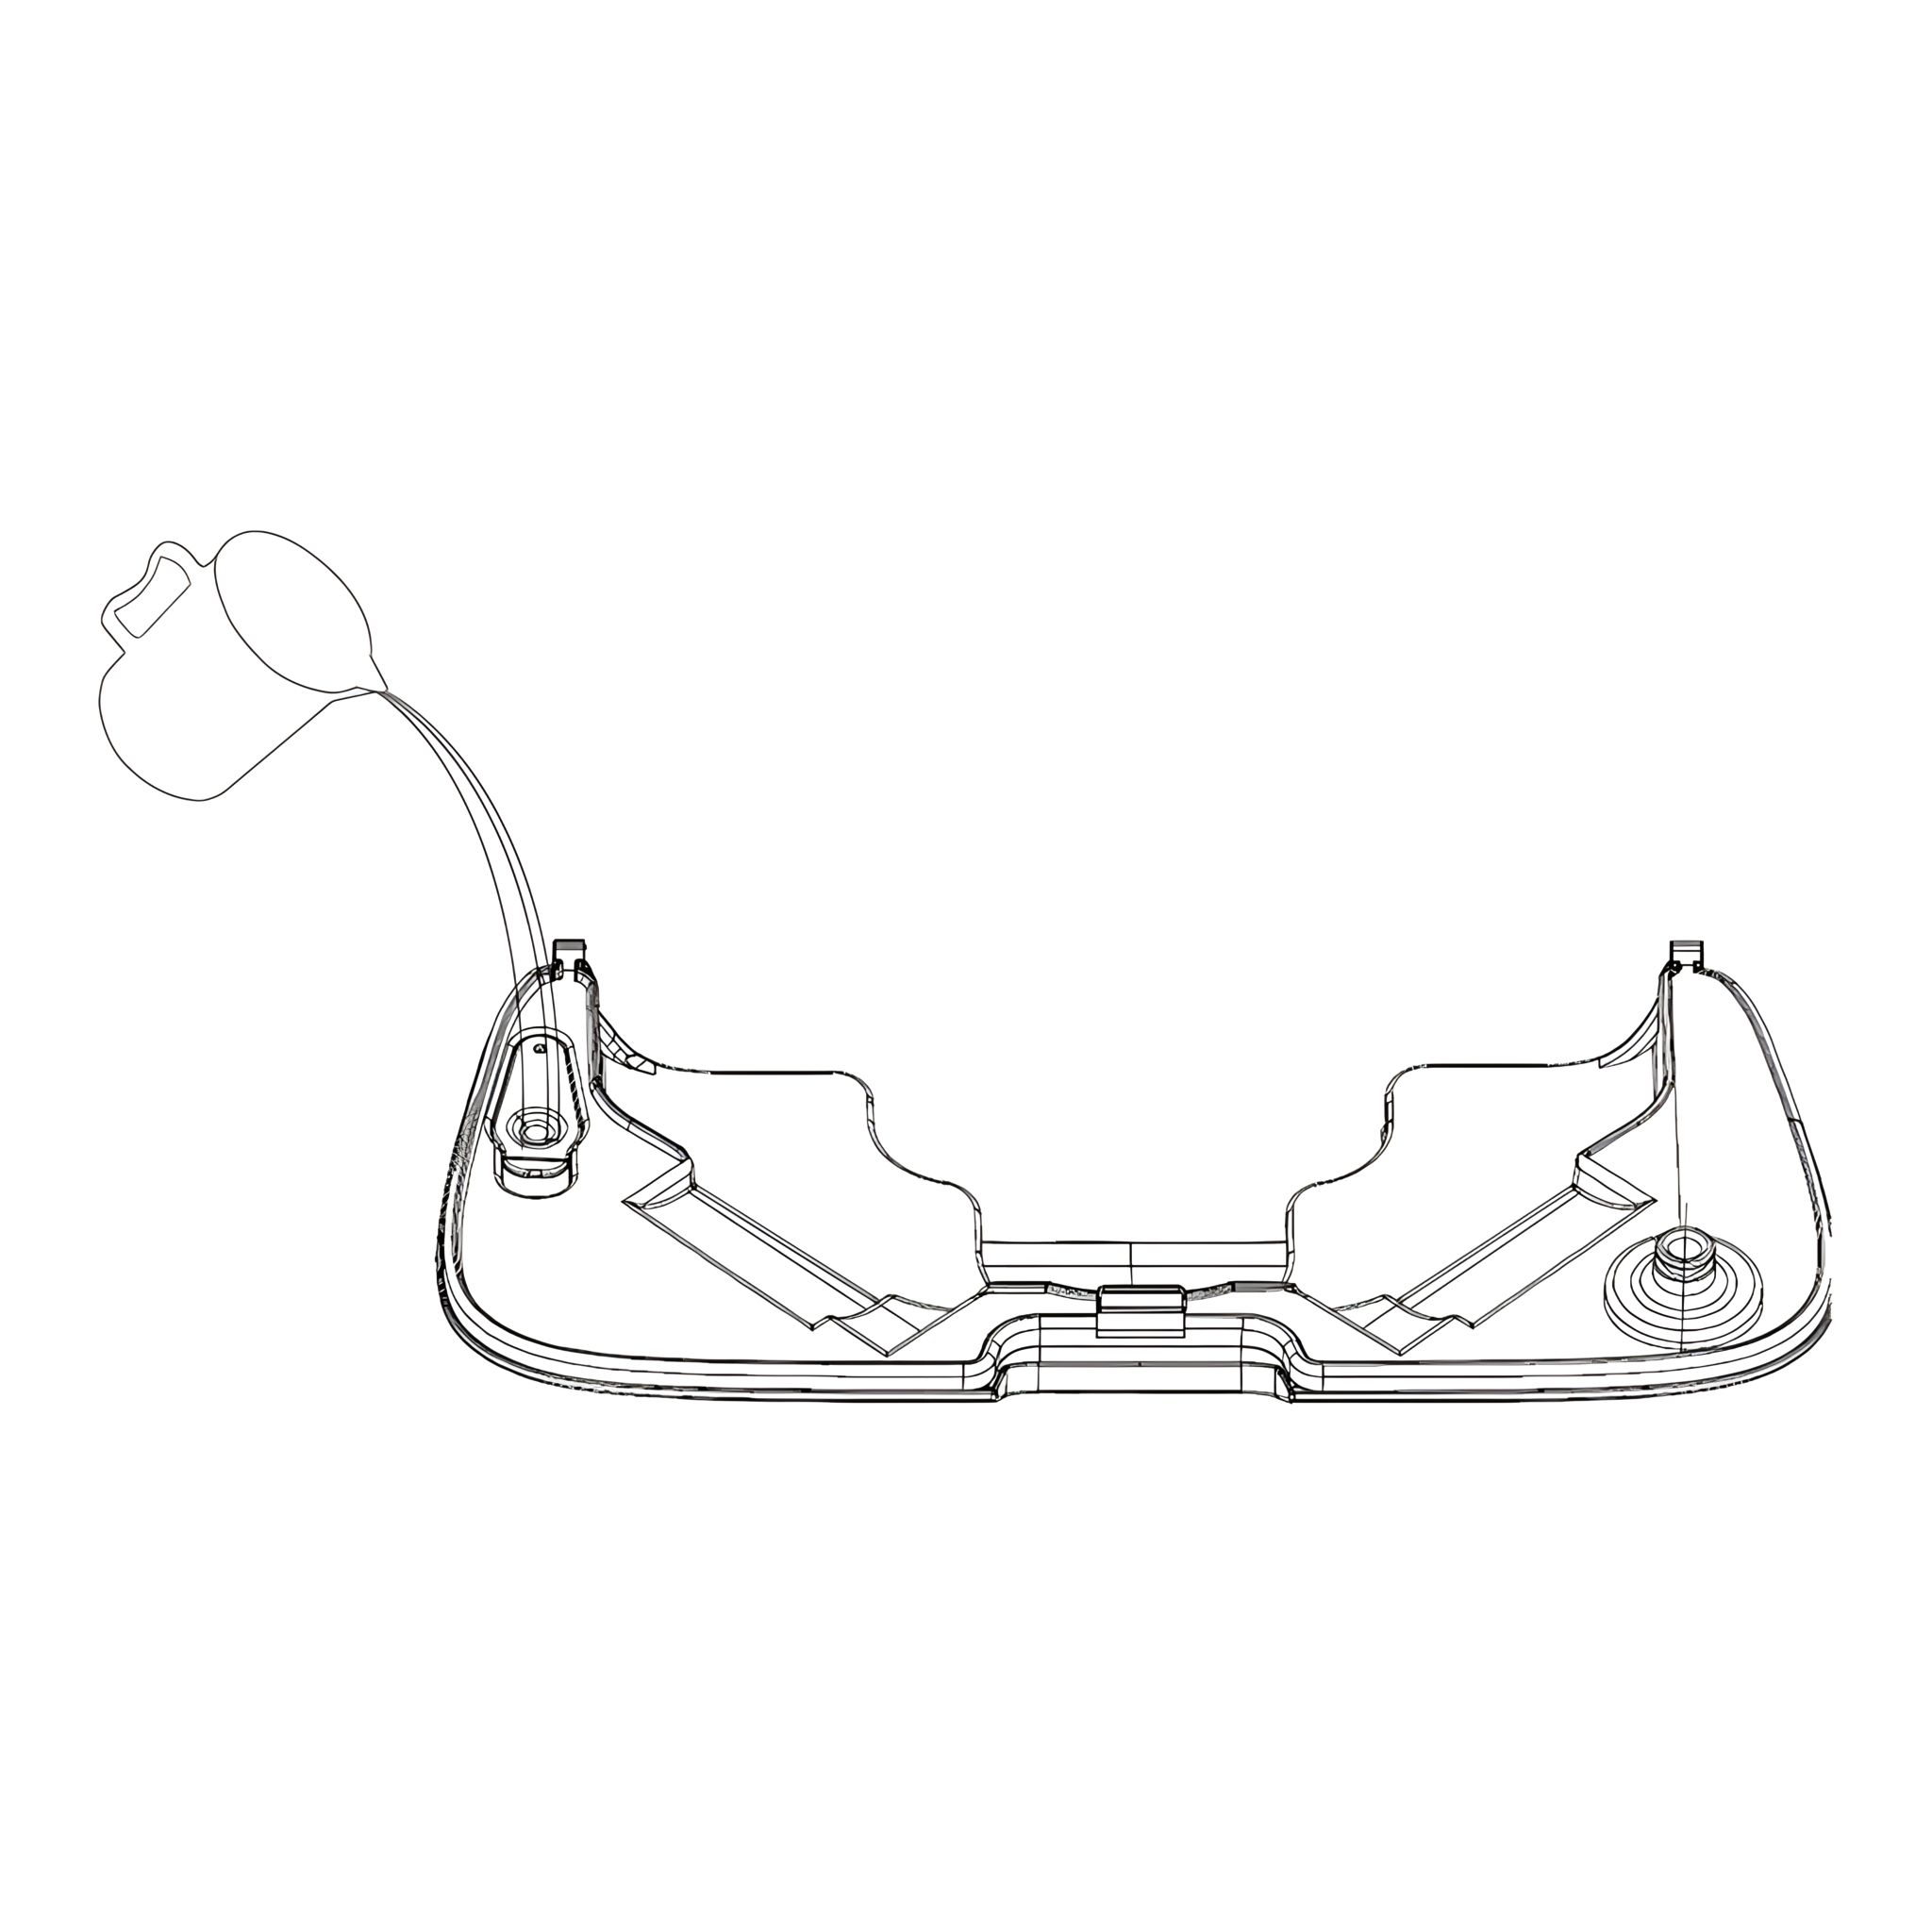
16. Add Water to Steam Mop Kit
- Please push the button then take out the water tank (170ml). Fill the water tank using a cup.
Note: Fill with clean water, do not add dirty water, otherwise it will clog the pipe!
-
17. How to Make Steam
-
Please connect steam mop kit to the vacuum cleaner, then press the On/Off button, the
vacuum cleaner will be the cold water+vacuum (ECO mode).
-
Press the +/- button, it will
be the steam mode, and show the “steam” icon in the display screen. Wait about 30 s for steam to appear. It will appear at the bottom of steam mop kit through the steam hole (1).
-
Press the +/- button,
it will be the steam and vacuum (ECO) mode.
Note: Do not touch the steam. Risk of burns!
-
18. Mattress Brush Suitable for cleaning fabrics such as mattresses and sofas
- Driven by built-in independent motor, the roller can pat and rotate at a high speed, clean
particles such as pollen, dust mites and hair on the deep layer of bedding and is good for the
sleeping health of the whole family.
-
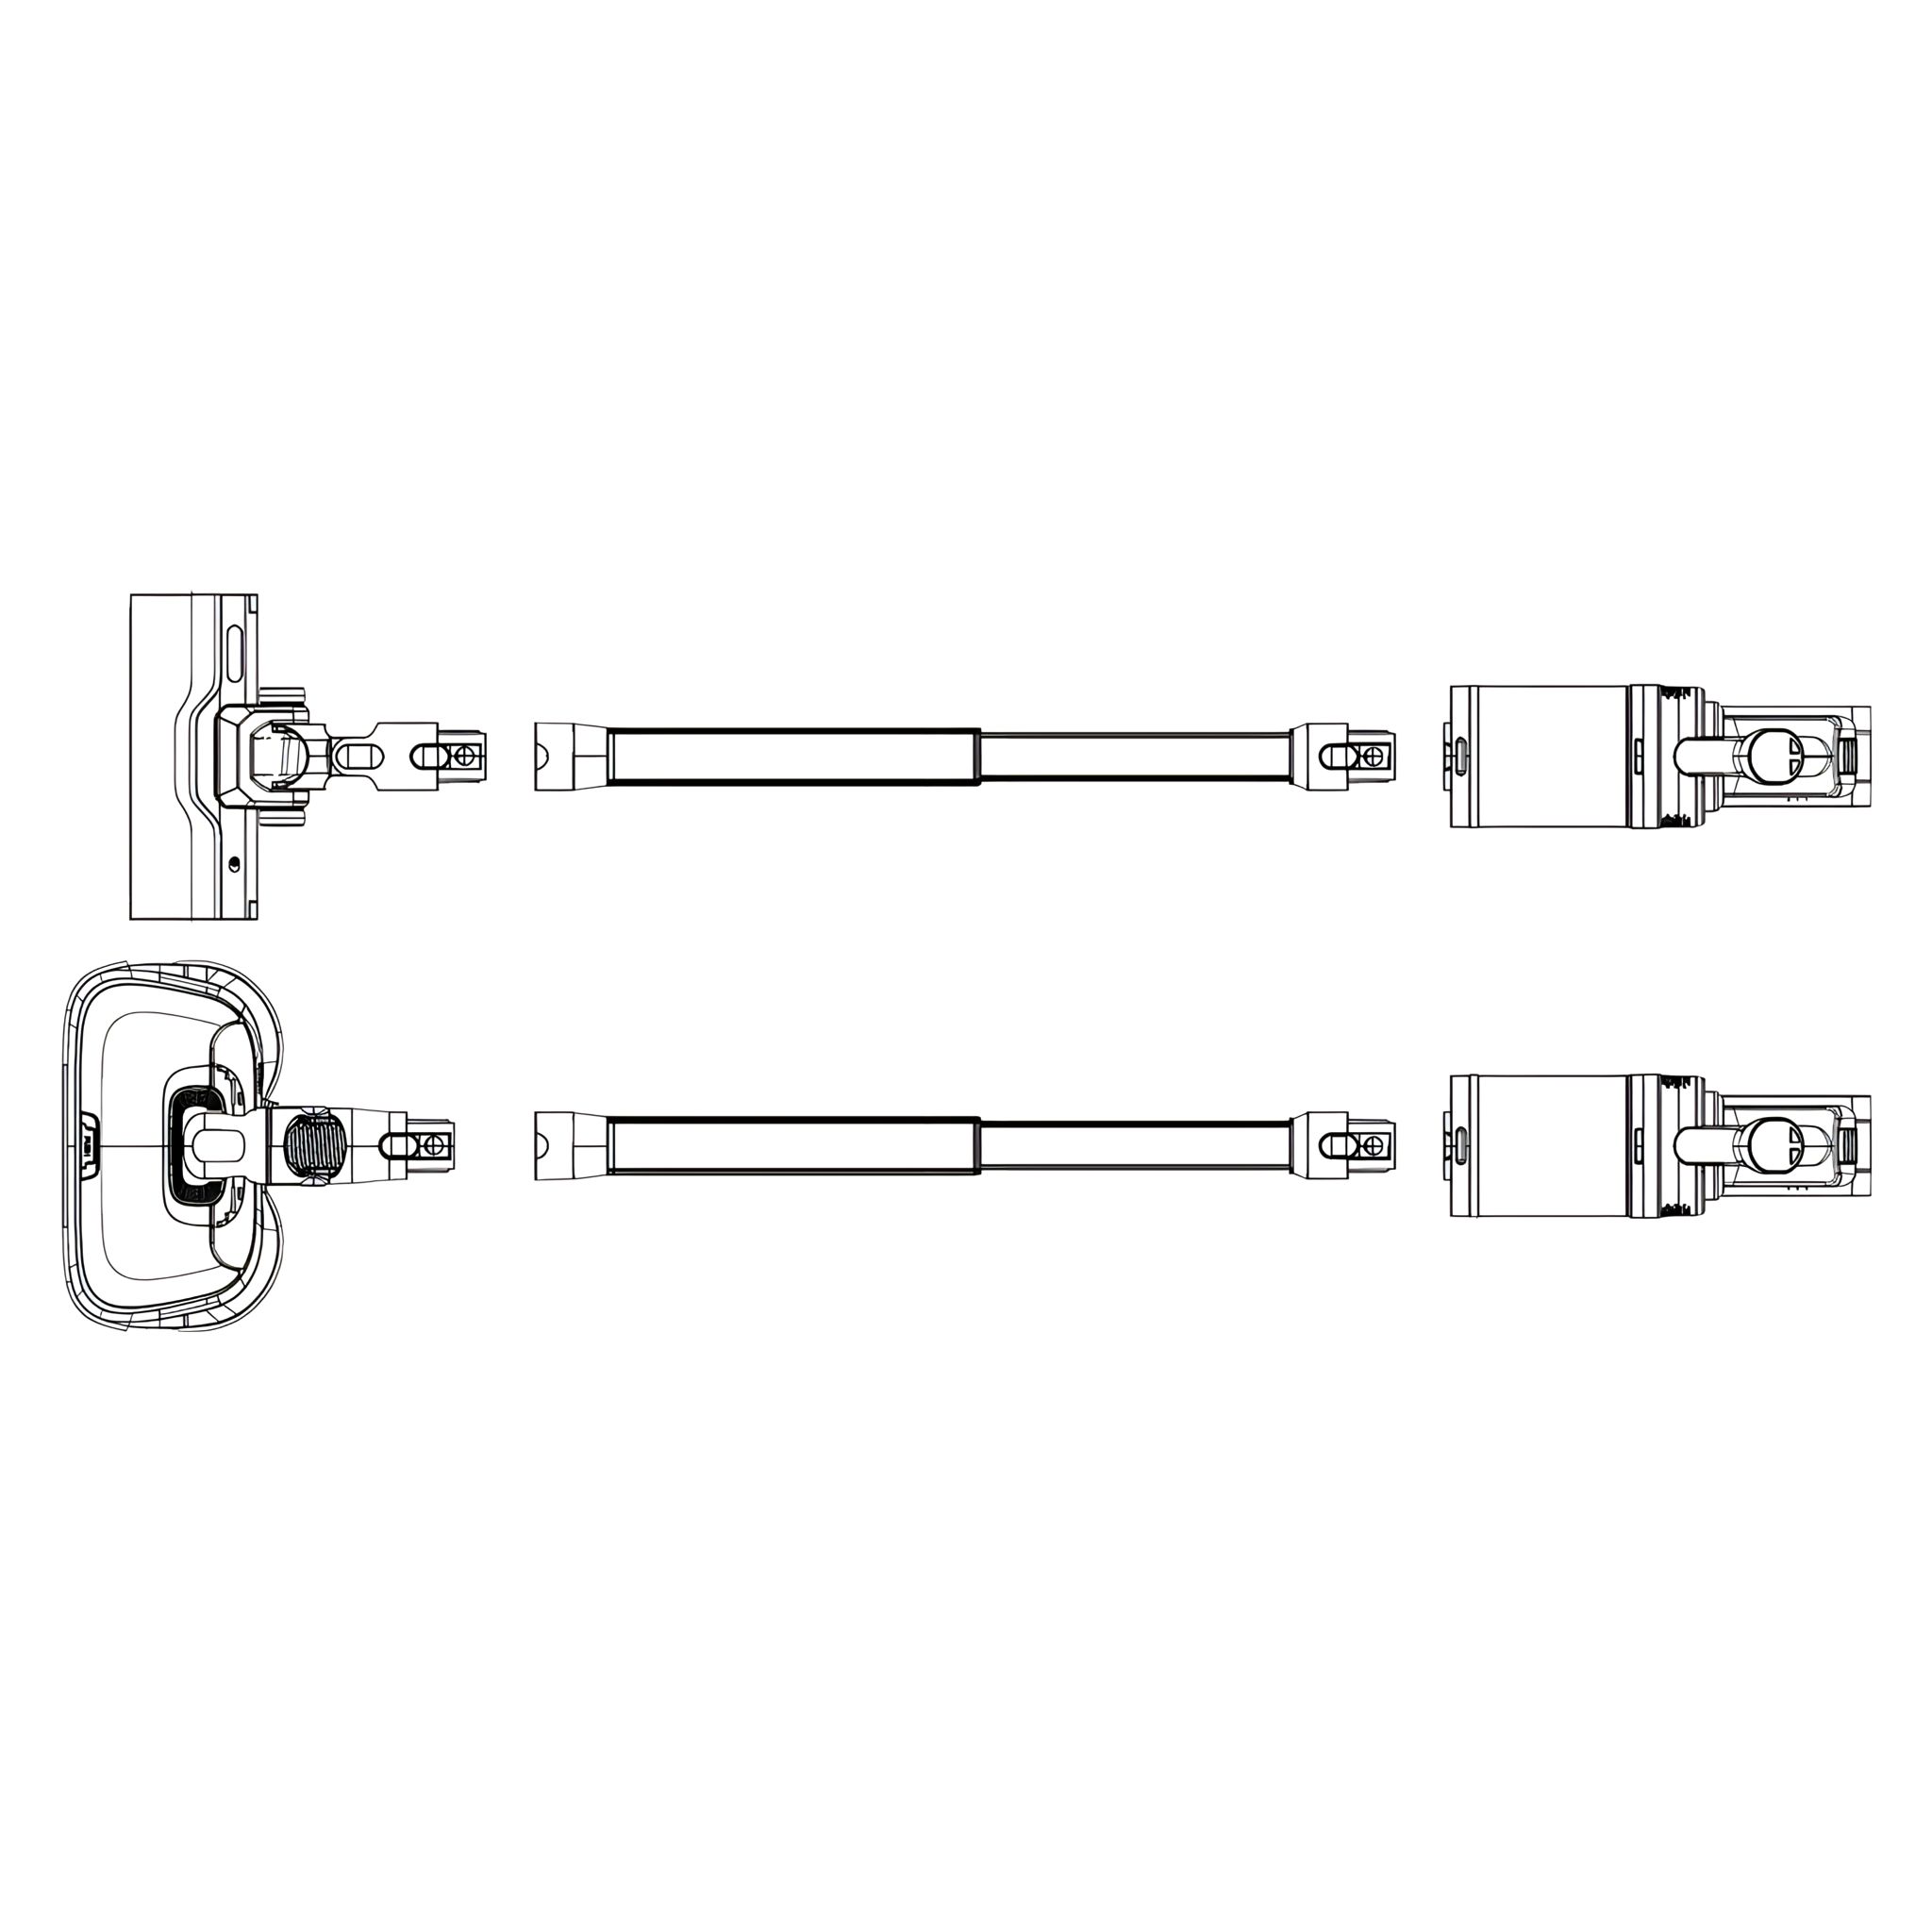
19. Long Crevice Nozzle Suitable for cleaning various household seams and narrow positions in the car.
- Deeply clean the household dead angles such as sofa seams, supporter, window
corners, car interiors and other inaccessible seams.
-
20. 2-in-1 Dusting brush Suitable for cleaning the surfaces that need hair brush such as curtains, car interiors and air-conditioning vents.
-
One-key extensible brush can suck and clean simultaneously and remove dust efficiently.
-
Slim and soft hair brush can clean the fiber and other household soft decorations.
-
The fine hair brush can clean small seams and meet the refined cleaning requirement.
-
21. Telescoping Tube
- The length of the telescoping tube can be adjusted.
- Press the button to adjust the length from 42cm to 66cm.
-
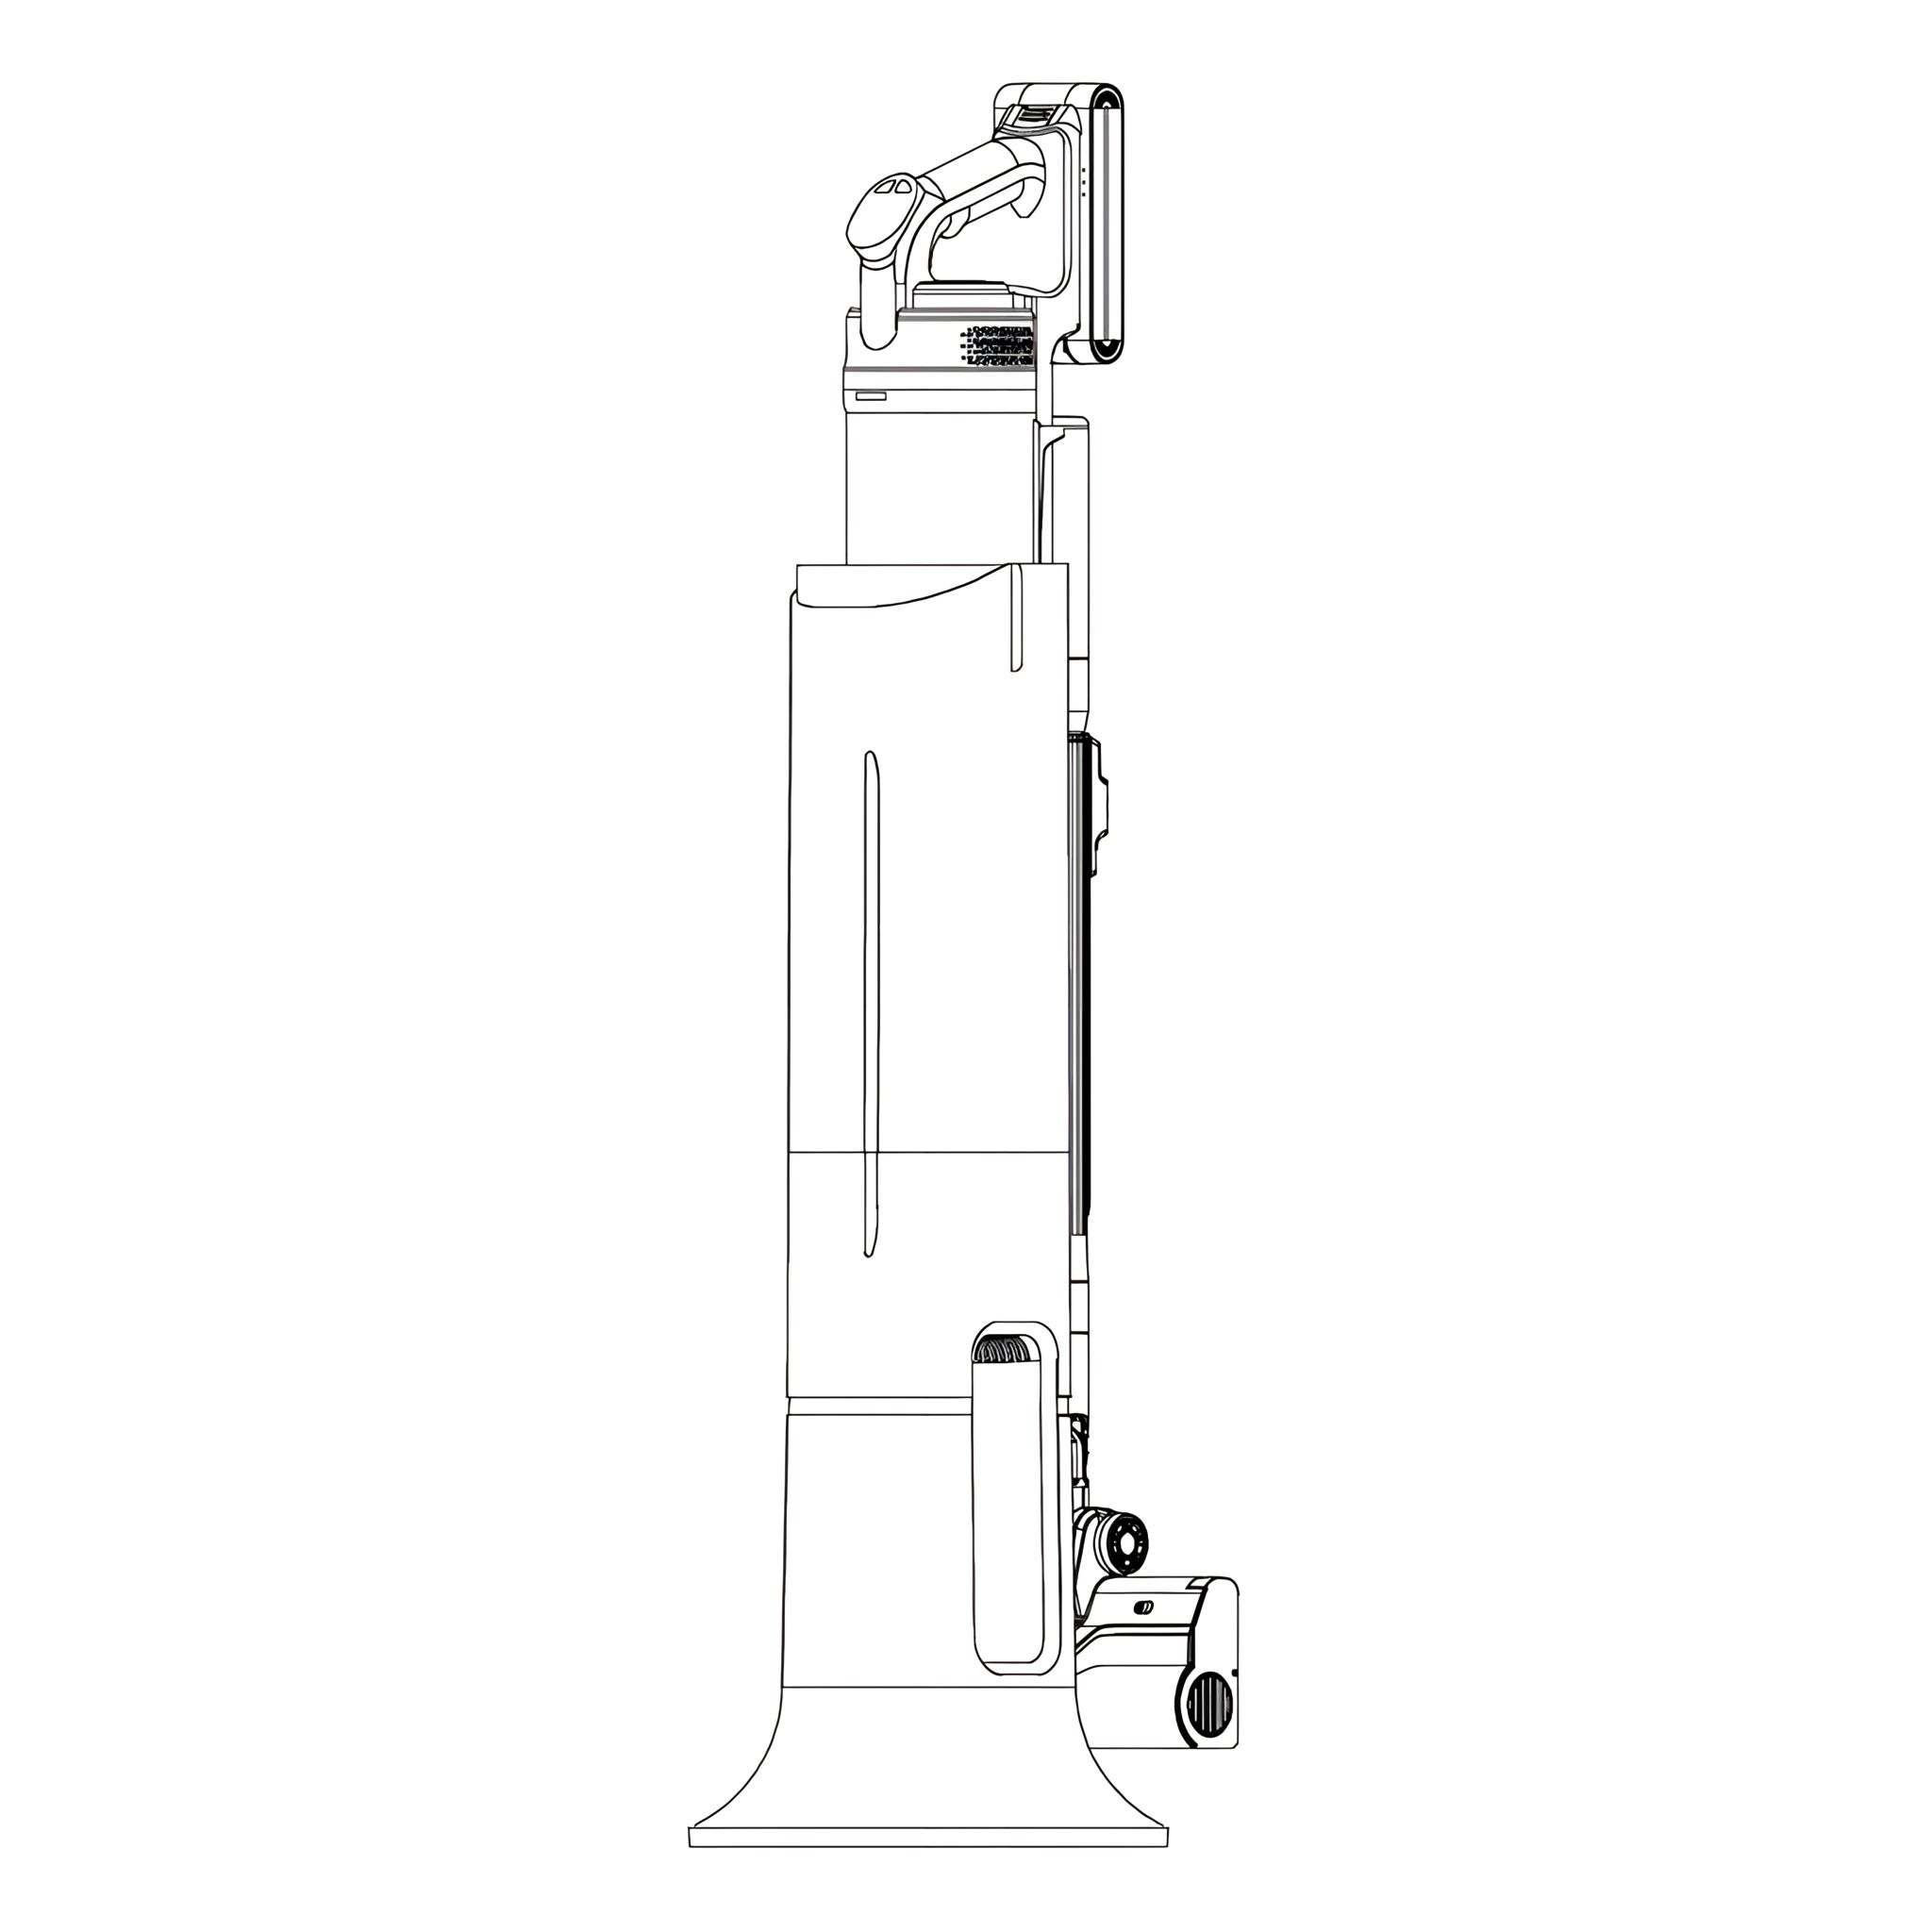
Precautions and Product Maintenance 22. Precautions and Product Maintenance of Vacuum
-
During Use
Do not place near heat sources such as radiators or stoves.
Before Using
To prevent damage caused by collision, please remove large and sharp objects. Do not vacuum flammable materials or liquids such as gasoline, cigarettes, or alcohol.
Daily Storage
For long-time storage, please place the machine in cool and dry place, and avoid direct
sunlight or humidity.
-
Machine Cleaning
How to empty and clean the dust container.
- As shown in the picture, press dust container lock, the bottom will open automatically, the dust
and garbage can be poured out.
- Please put your finger on this button and pull it down in the direction of the arrow to remove
the garbage that is entangled in the filter or stuck in the dust container.
-
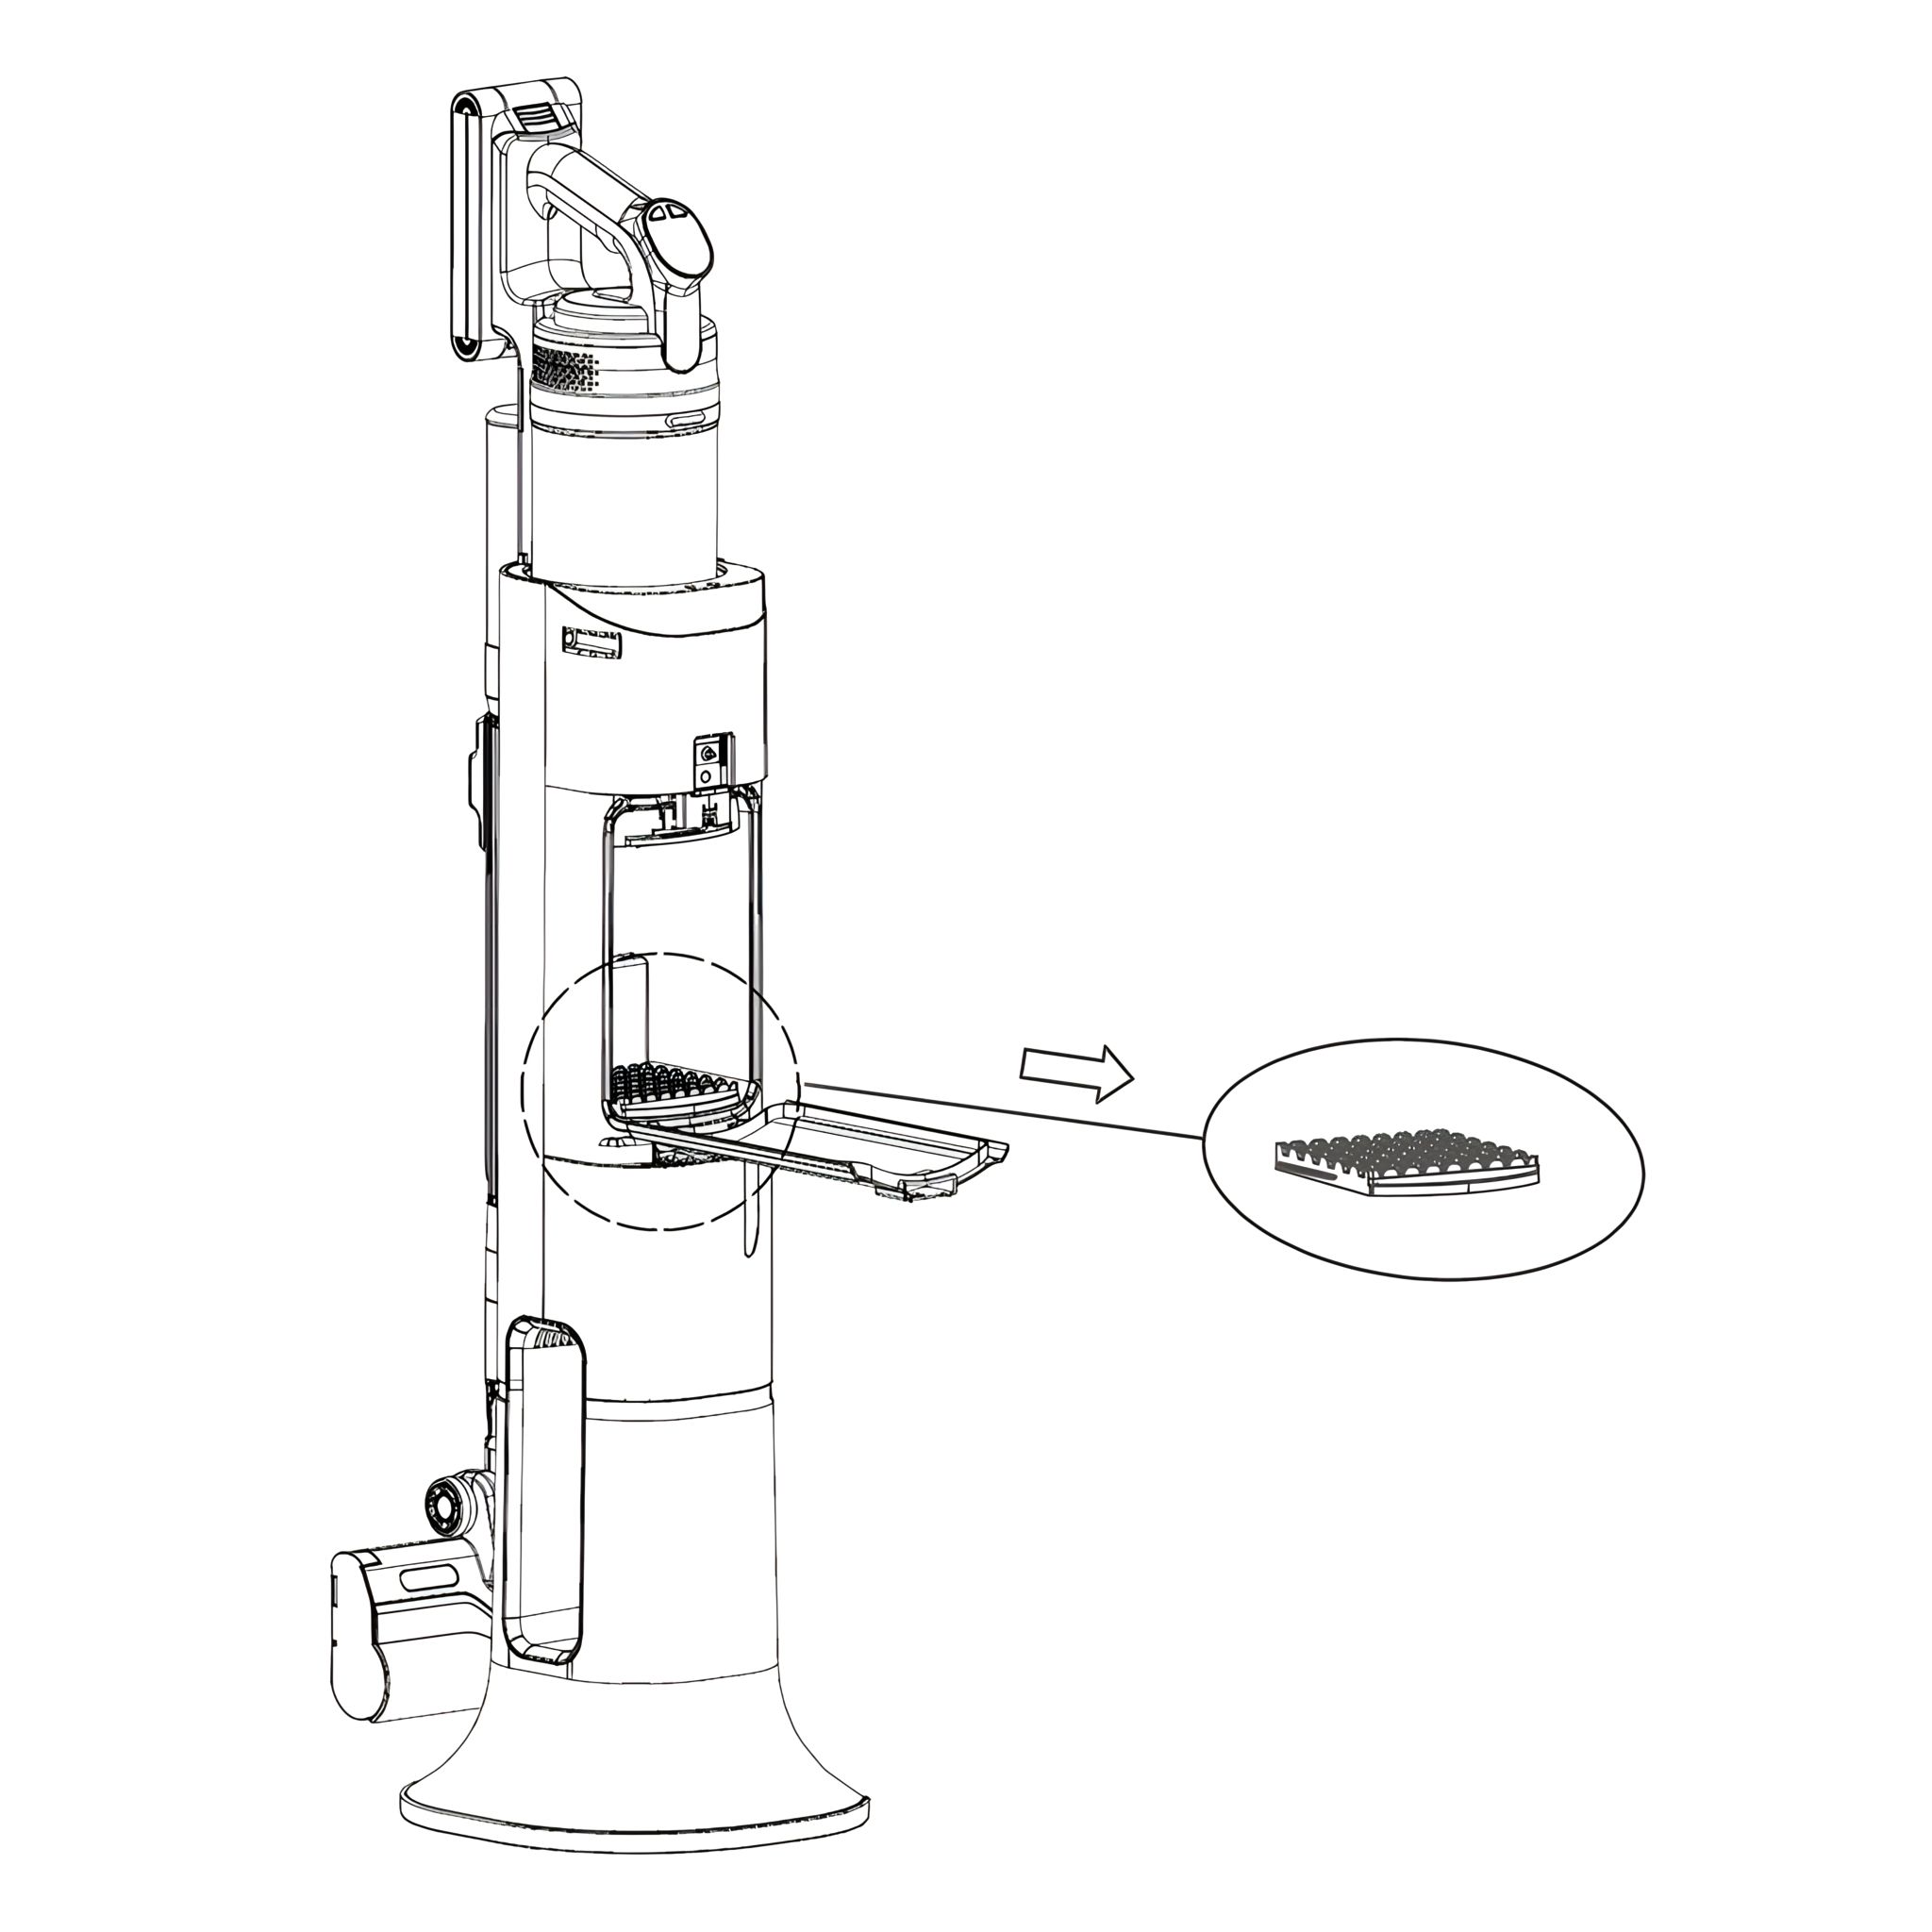
23. Clean the Outlet HEPA
-
Rotate counterclockwise as shown in the picture to remove the Outlet HEPA from the machine
and clean it with a soft brush. (Note: Do not clean with water.)
-
Remove the dust container from the machine body (refer to the previous removal instruction).
-
Clean the filters and HEPA with soft hair brush or put them into water for washing.
-
Reinstall the filters and HEPA only when completely dry. We suggest washing it when the suction gets weak.
Notice: Before using, please ensure all filters are installed in correct position.
-
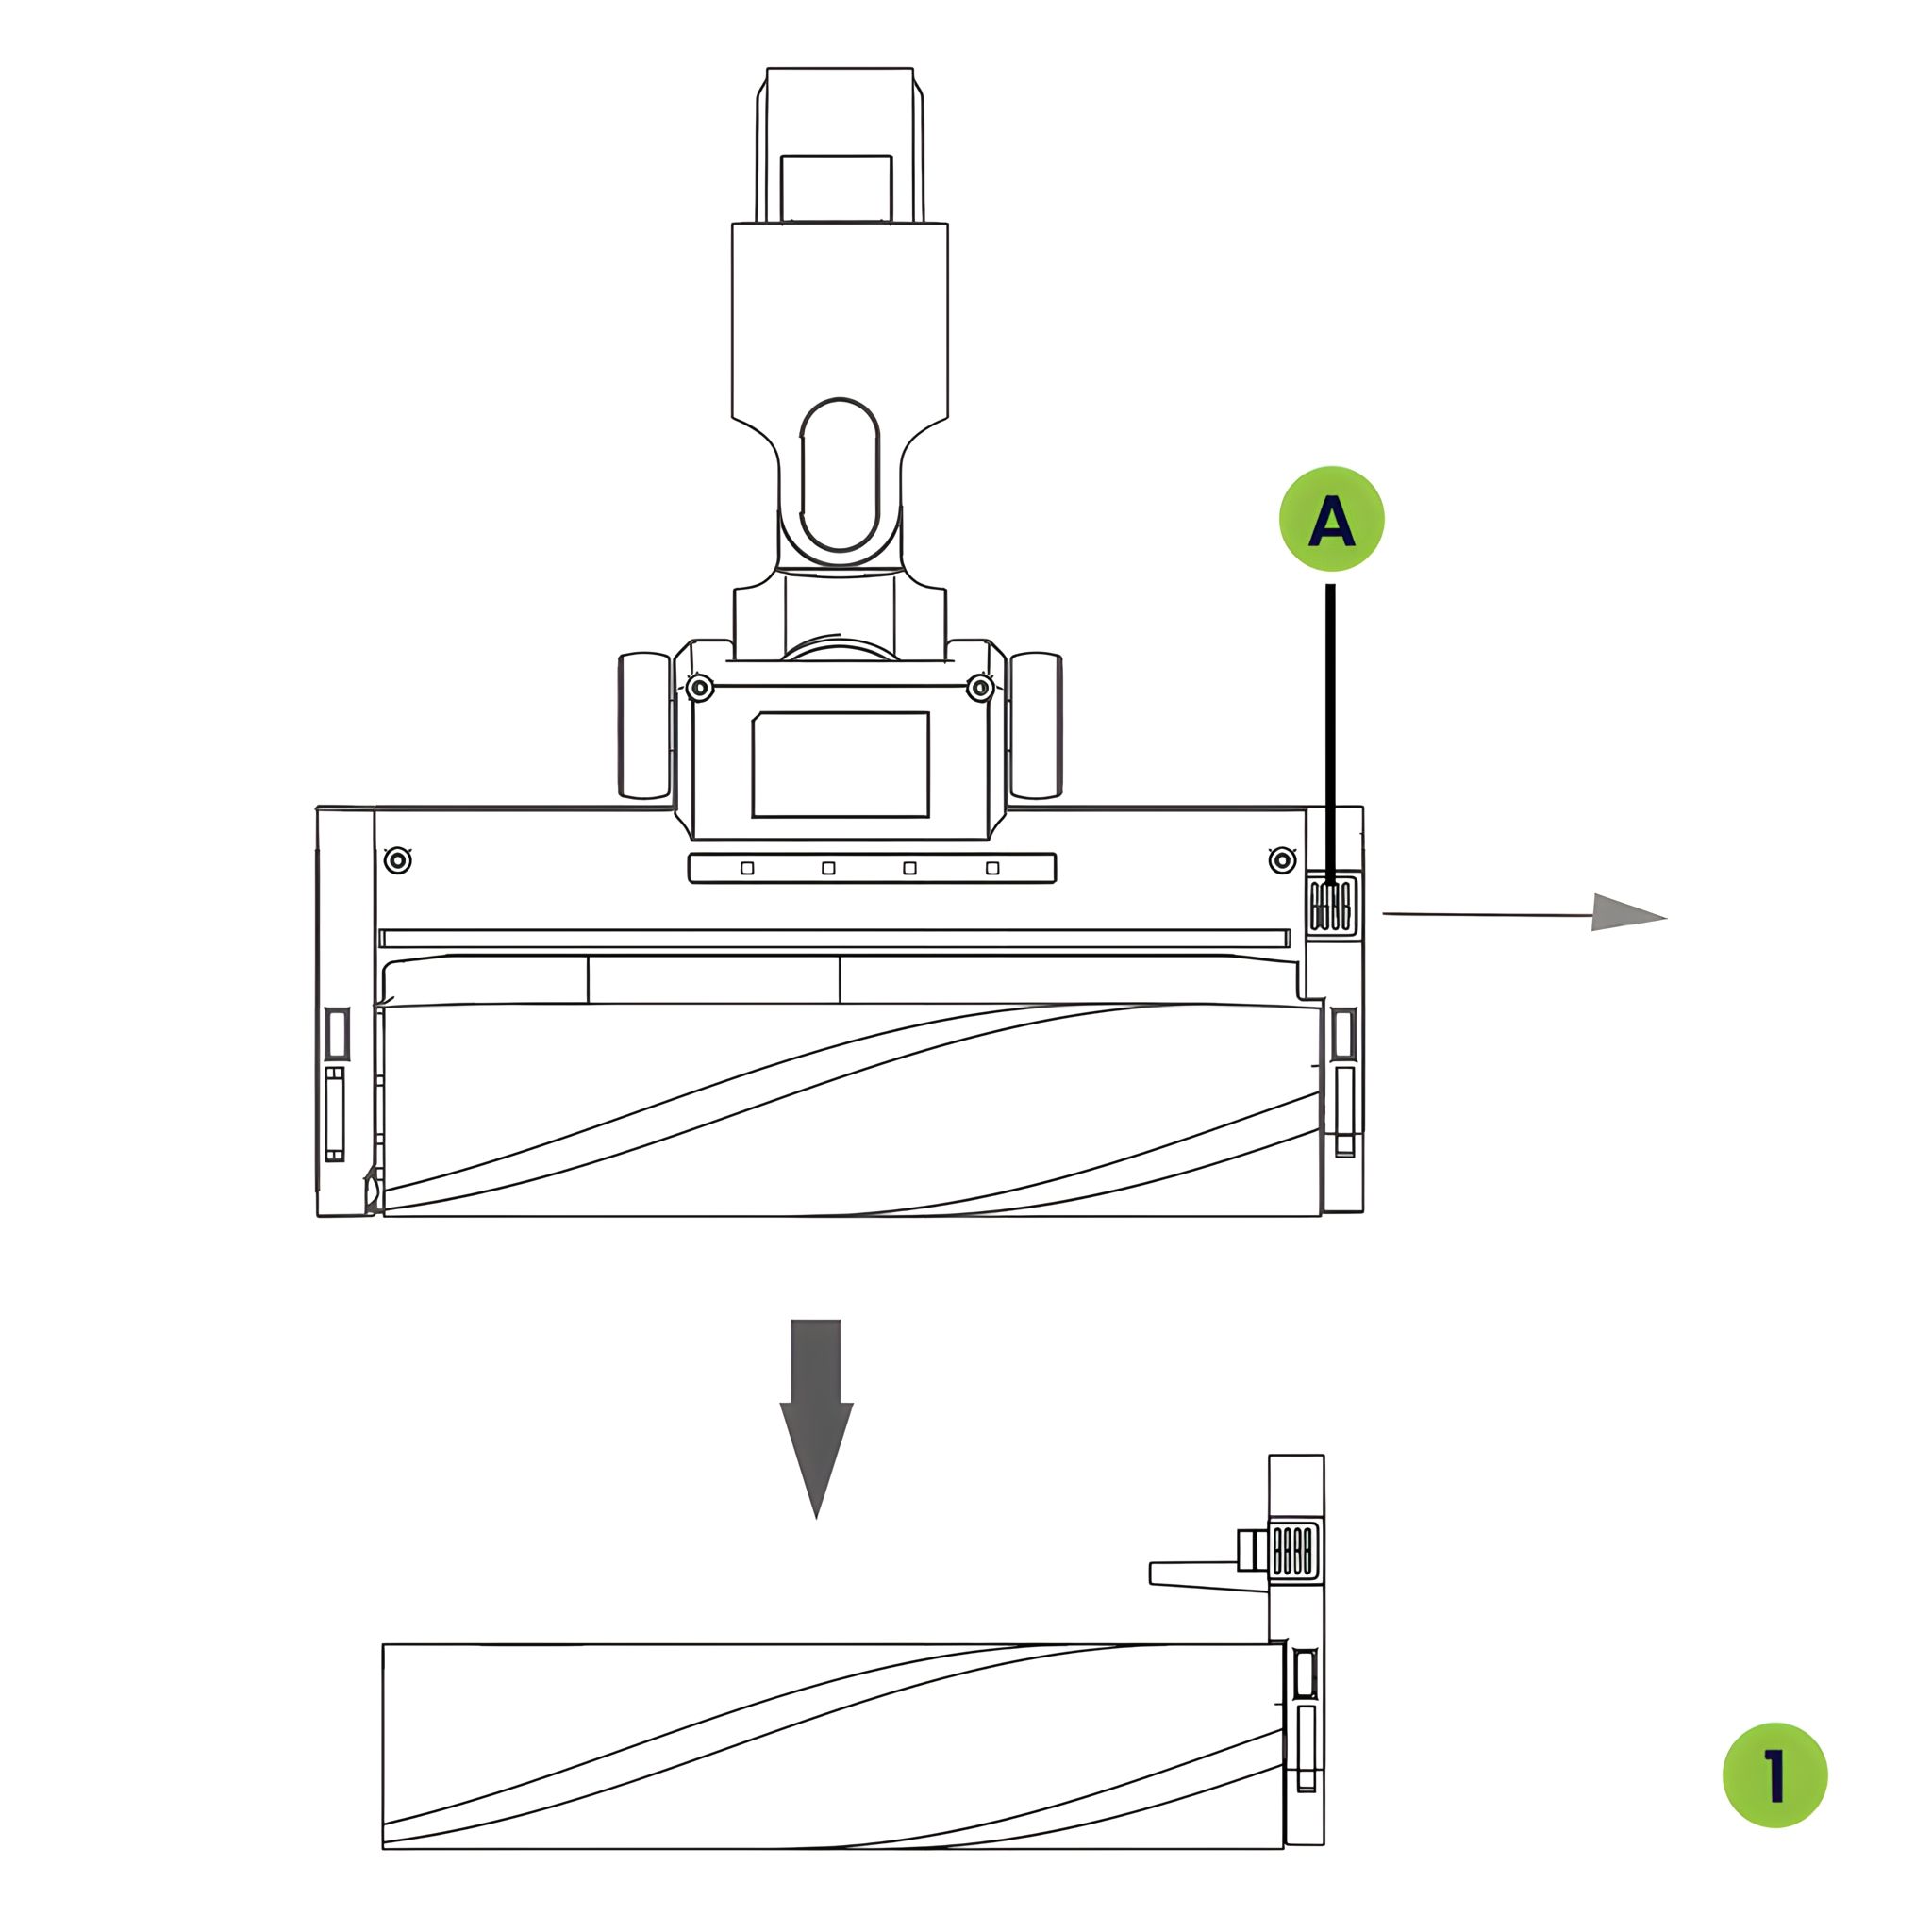
24. Replace or Clean the Motorized Brush and Mattress Brush
- Motorized Brush
- Mattress Brush
- The cleaning head needs to be cleaned after using for a long time.
- Push the button (A) and pull it out as the arrow,then take out the roller brush.
- Spin the button to unlock, take out the roller brush to clean and exchange!
-
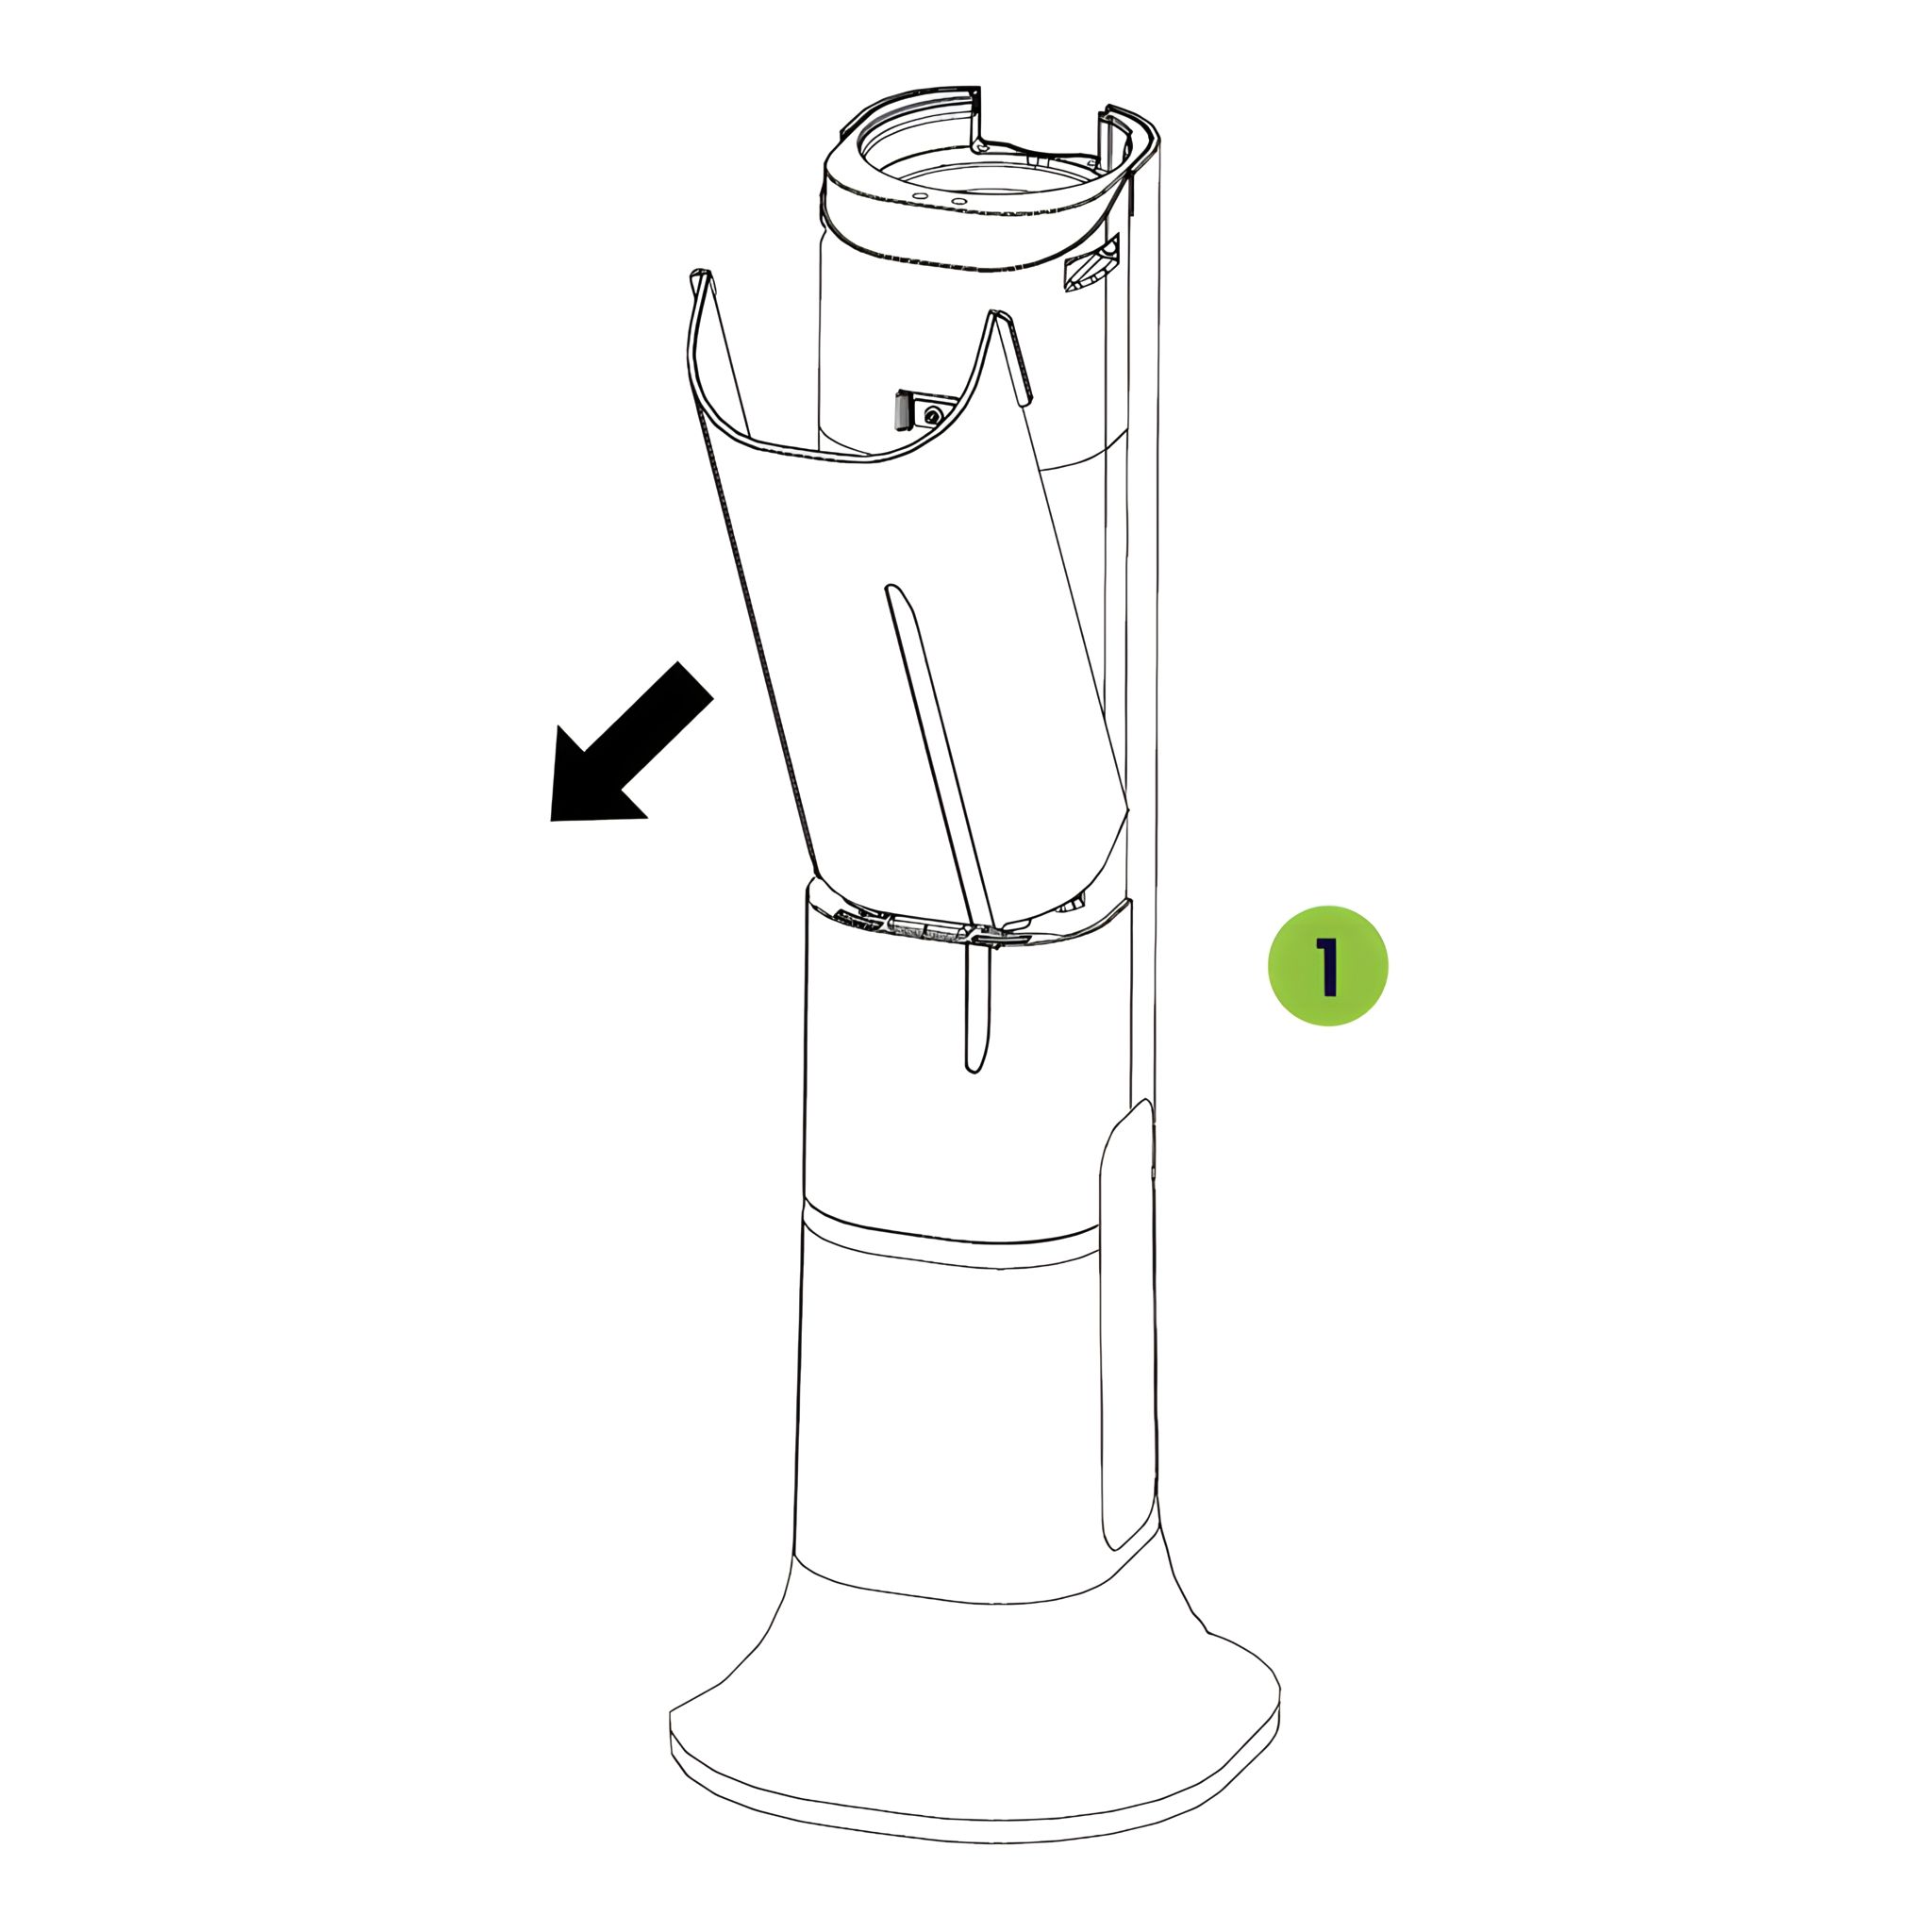
25. Precautions and Product Maintenance of Station How to take out dust bag and clean the filters
-
Clean the dust bag with a soft brush, when it is very dirty, please replace it with a spare dust bag.
-
Clean the filter with soft hair brush or put them into water for washing.
-
Reinstall the filter and dust bag after it is dry. We suggest washing it when the suction gets weak.
Notice: Before using, ensure the dust bag and filter in the correct position.
-
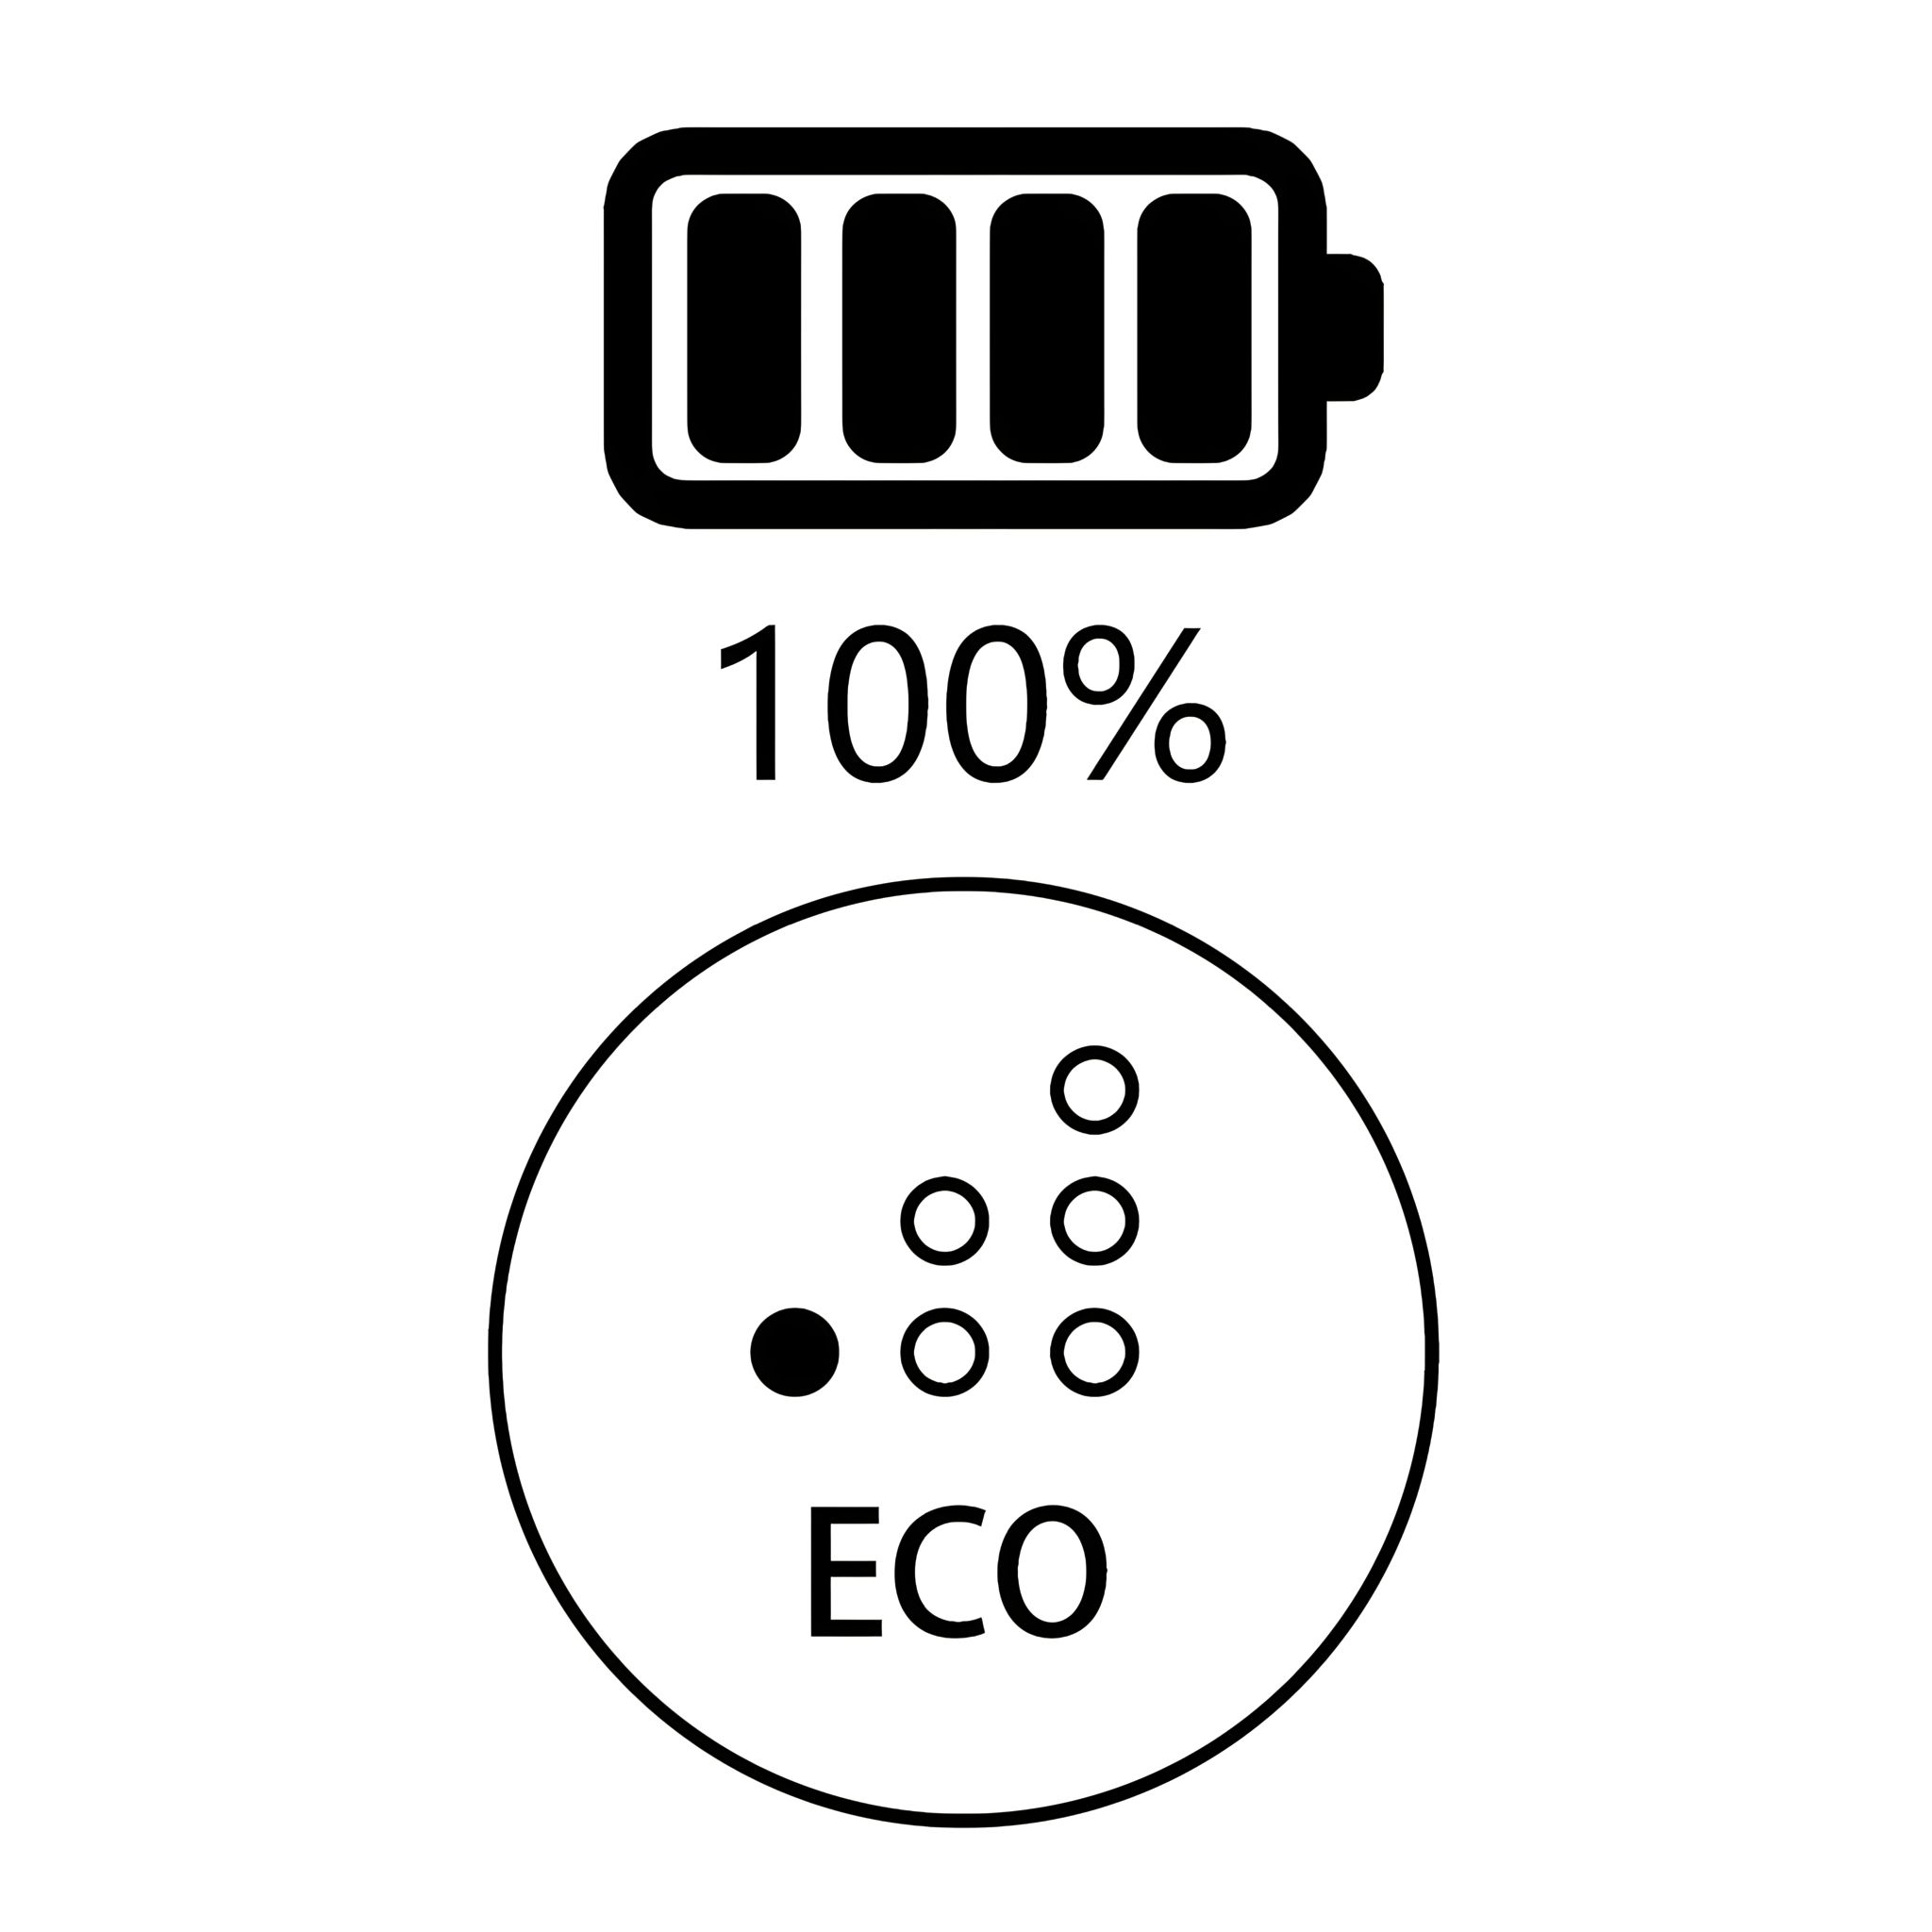
Product Icons 26. Modes
- Mode Eco
- Mode Auto
- Mode Power
-
27. Low Battery When the battery power is low, three red lights flash on the battery pack.
-
28. Sensor -
29. Blocked Inlet Means that the inlet HEPA or
suction inlet of dust container is blocked.
In this case, these components
need to be checked and cleaned.
-
30. Blocked Soft Roller Brush Means the soft roller brush is
blocked by hair or garbage,
which needs to be checked
and cleaned.
-
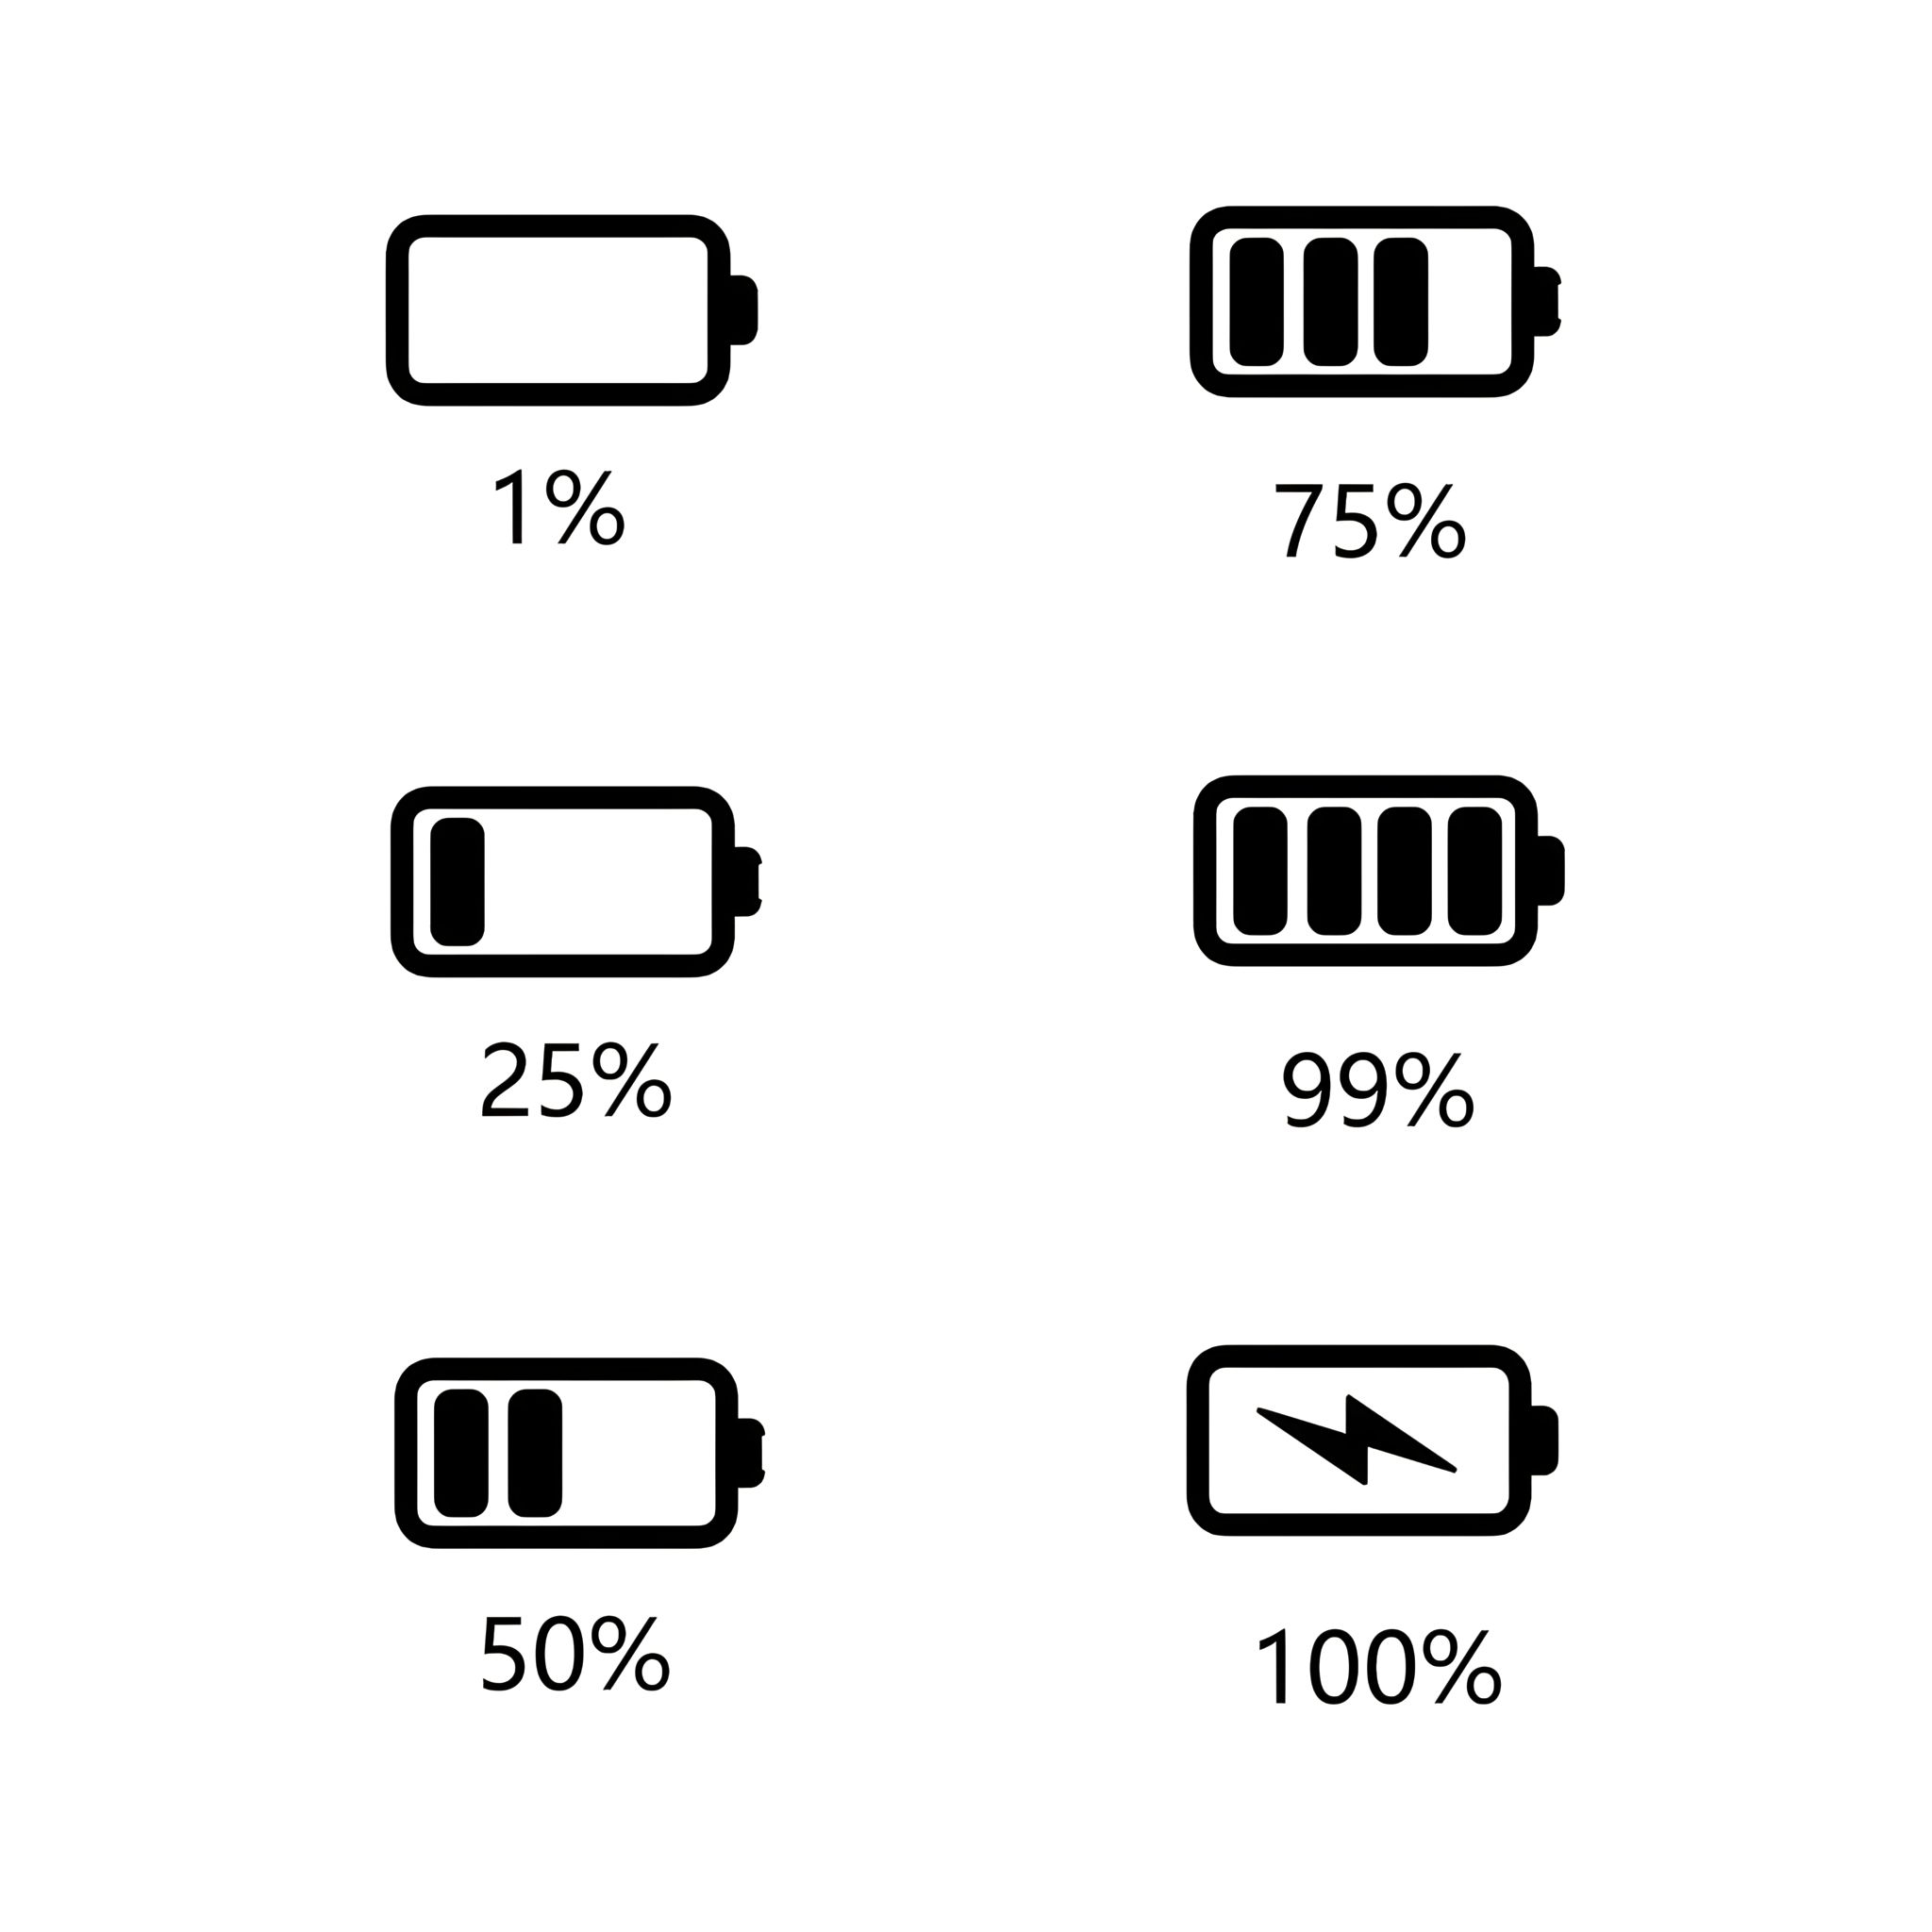
31. Battery Levels
- Battery 1%
- Battery 1% - 25%
- Battery 26% - 50%
- Battery 51% - 75%
- Battery 76% - 99%
- Full Battery - 100%
-
Troubleshooting 32. Motorized Brush Doesn't Work Causes
- Too many hairs or long fibers are wrapped around the brush roll
Solutions
- Remove tangled hair or fibers
-
33. Vacuum Doesn't Work -
34. Vacuum Suction Is Weak Causes
-
The filter of the dust container is full of dust
-
Power brush pipe is blocked
-
Paper or plush fiber is stuck in tube
-
Channel between dust container and machine is blocked
Solutions
-
Clean or replace the dust container filter
-
Clean up garbage from power brush
-
Check and clear the tube
-
Check and clear the channel
-
35. Brush Wheels Do Not Turn Causes
- Hair wrapped around wheel
Solution
-
36. Station Suction Is Weak Cause
Solution
- Clean or replace the dust bag
-
37. Station Doesn't Work -
38. Three Red Flashing LED Lights If the three LED-lights on the battery pack turn red and flash, it may have the following faults
-
If the internal temperature of machine is too high, the machine will start the overheat
protection function and be shut down automatically and the three LED-lights turn red
and flash. Restart the machine after its body is cool and it will recover to normal.
-
The machine will be short-circuited and shut down automatically after sucking
liquid, and the three LED-lights will turn red and flash quickly. Please don't start/shut down the machine repeatedly. Remove the battery for recharging and restart
the machine after troubleshooting.
-
When the host motor is blocked by foreign matters, the machine will be shut down automatically.
Please restart after removing the foreign matters.
-
If the floor brush is blocked by foreign matters, the machine will not be shut down automaticaIly, but the three LED-lights will turn red and flash; shut down the machine, remove the foreign
matters in the floor brush, and press the switch button again to start the machine.
-
When the battery power is low or out of power, the three LED-lights will turn red and flash,
please charge immediately.
|